
Back
Managing Users: An Overview
The Users menu is where you can manage all the different users on your platform. These include Students, Developers, Teachers, Revenue Partners, and Site Admins. In this article, you’ll learn how you can manage users.

Students
You can add a new student manually from here. And see all the details including the number of students verified, unverified, and enrolled.

You can search students with their name/email, filter students based on courses, enrollment status, and see the number of students enrolled between a specific time using start and end date.
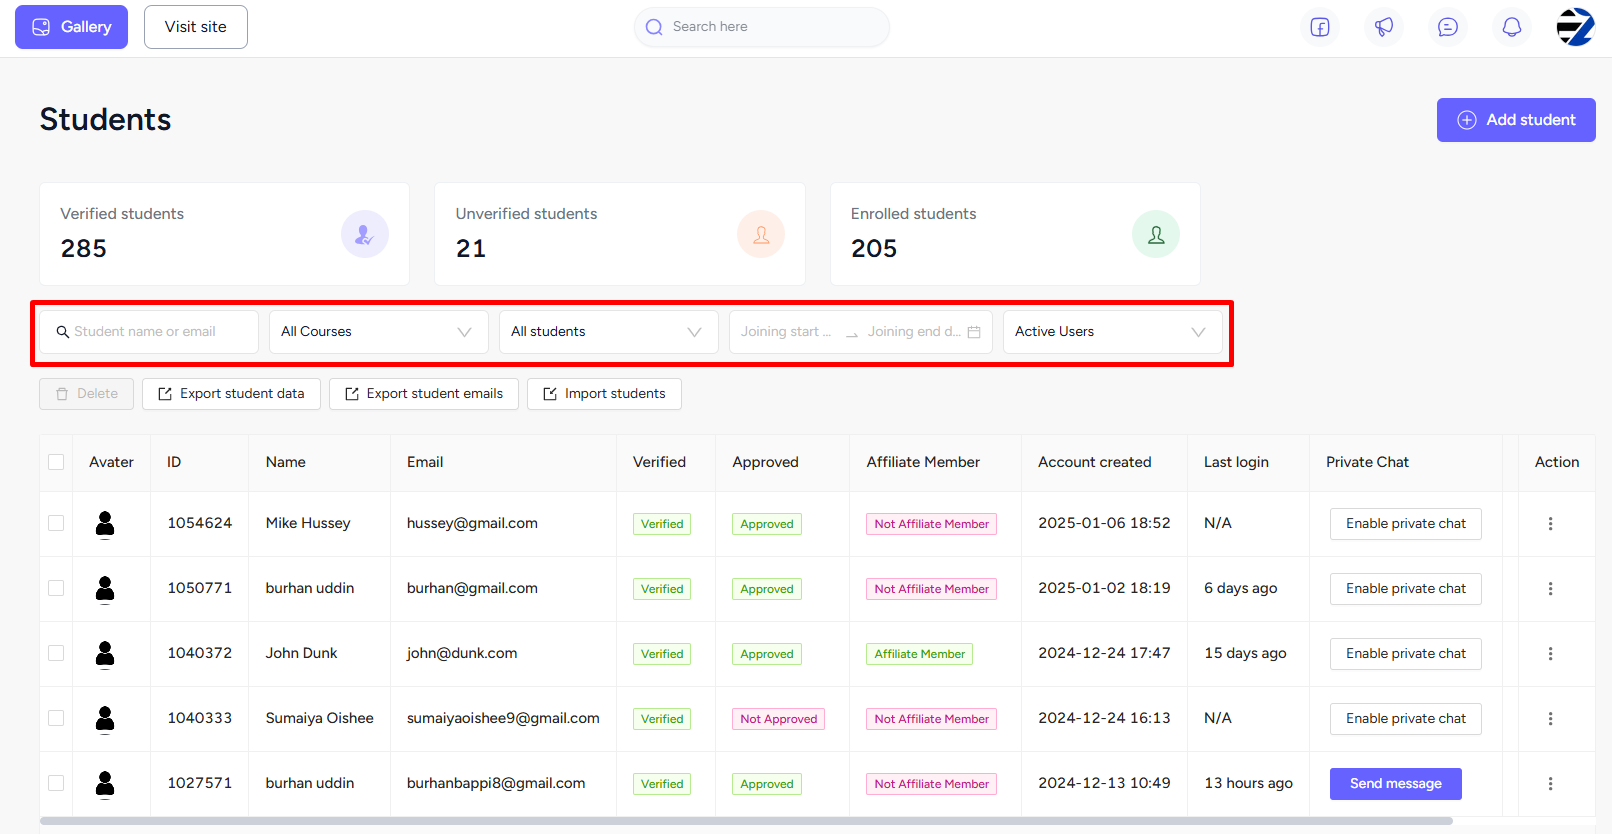
You can export student data or import existing students to your school.

For each individual student, you can edit their info, control their login and logout sessions, see product enrollment, manually enroll into products, manage email tags, and add them as an affiliate on your platform.

You can also enable the private chat option for a student from here.

Developers
You can add a new developer by giving info such as their name, email, etc. You can see the total developers on your platform, search by name or email, and sort them by approval status and chronological order.

Other activity you can do is update the info and delete a developer.

Teachers
Like students, you can add a new teacher, search them by name or email, filter them by status or chronological order, and see the total number of teachers on your platform.
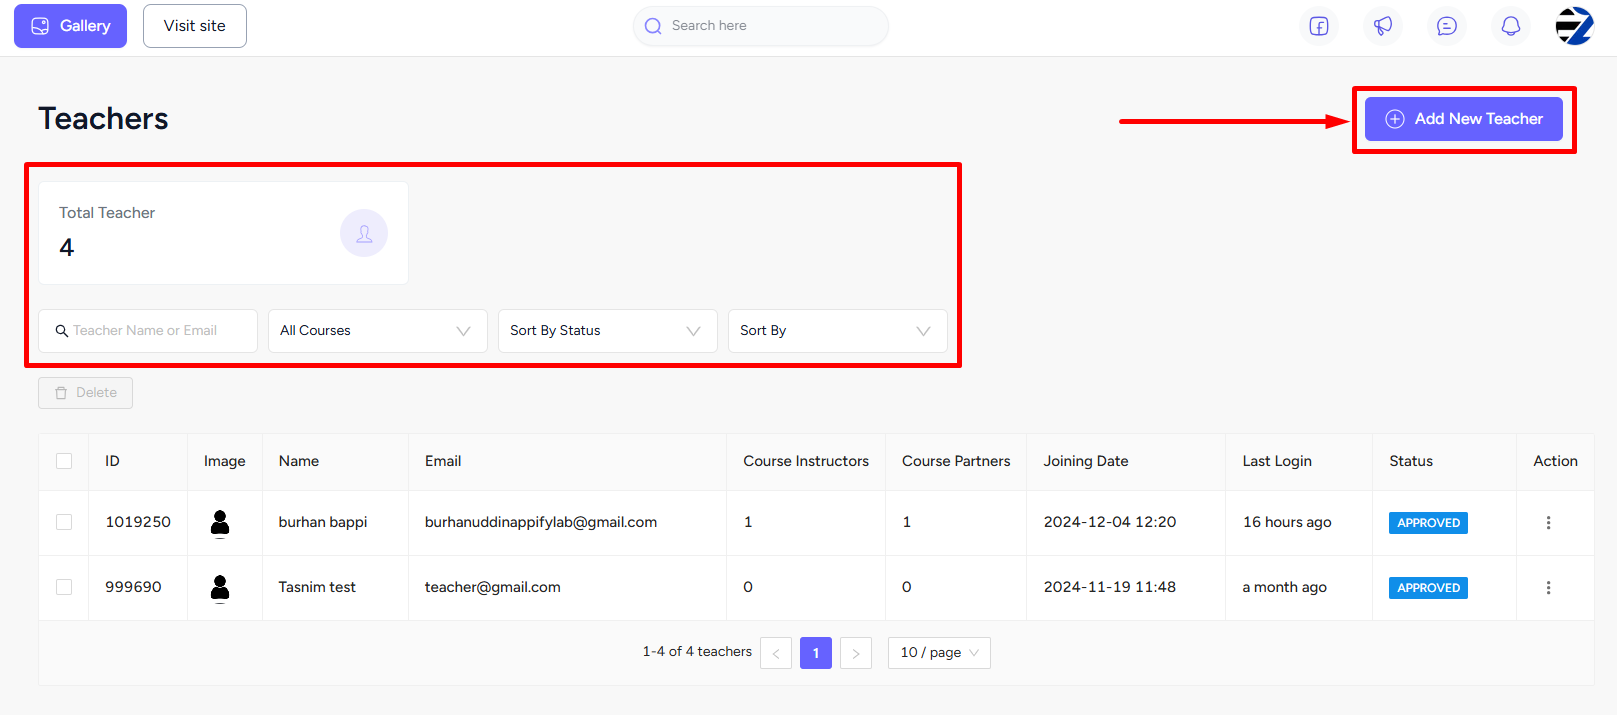
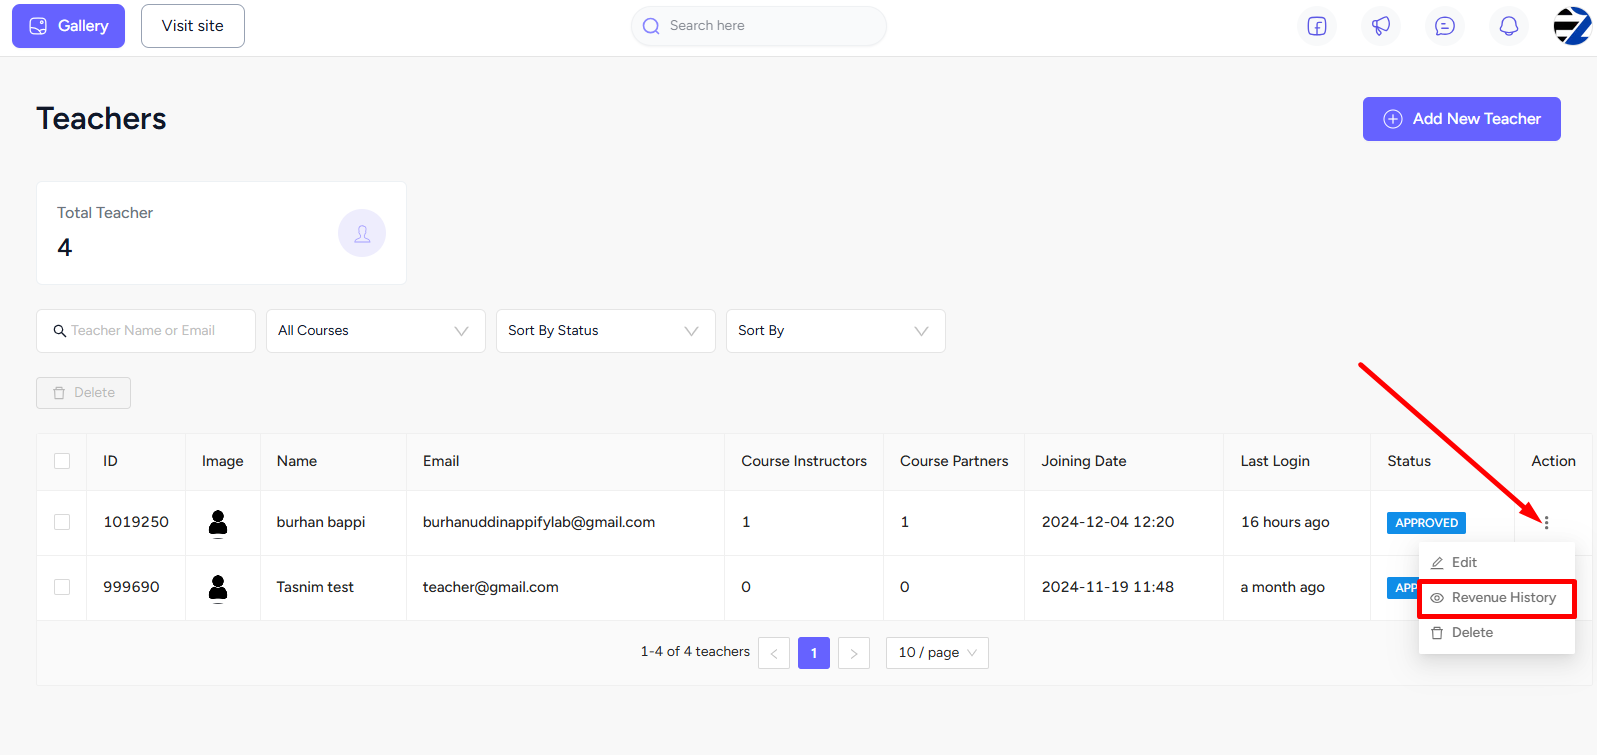
Apart from editing a teacher’s info, you can also view the revenue history of the teacher from here. That is, of course, if that teacher is a revenue partner on your platform.
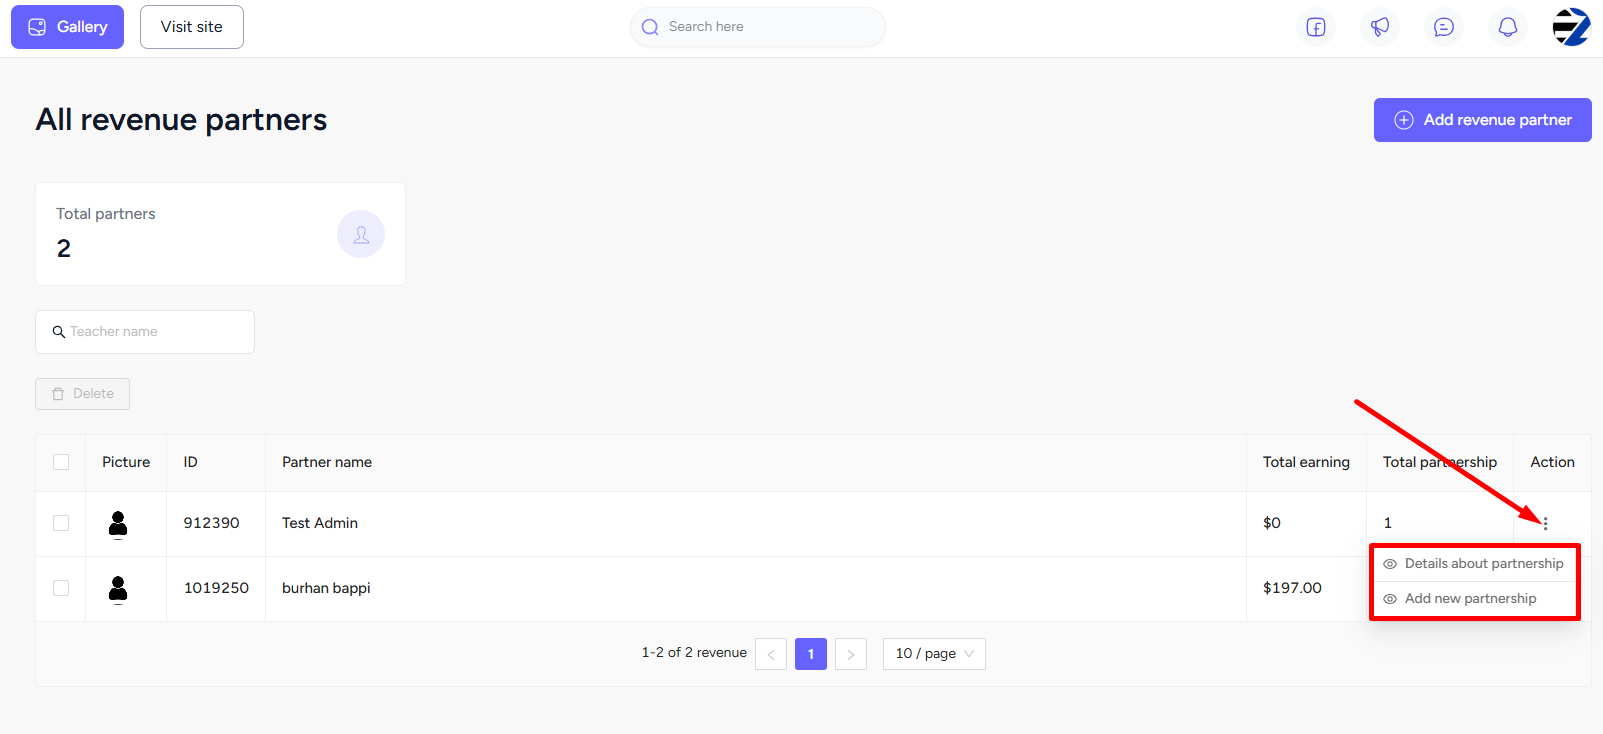
Revenue Partners
You can add a teacher on your platform as a revenue partner also. This page lets you see the total partners and search them by name or course.
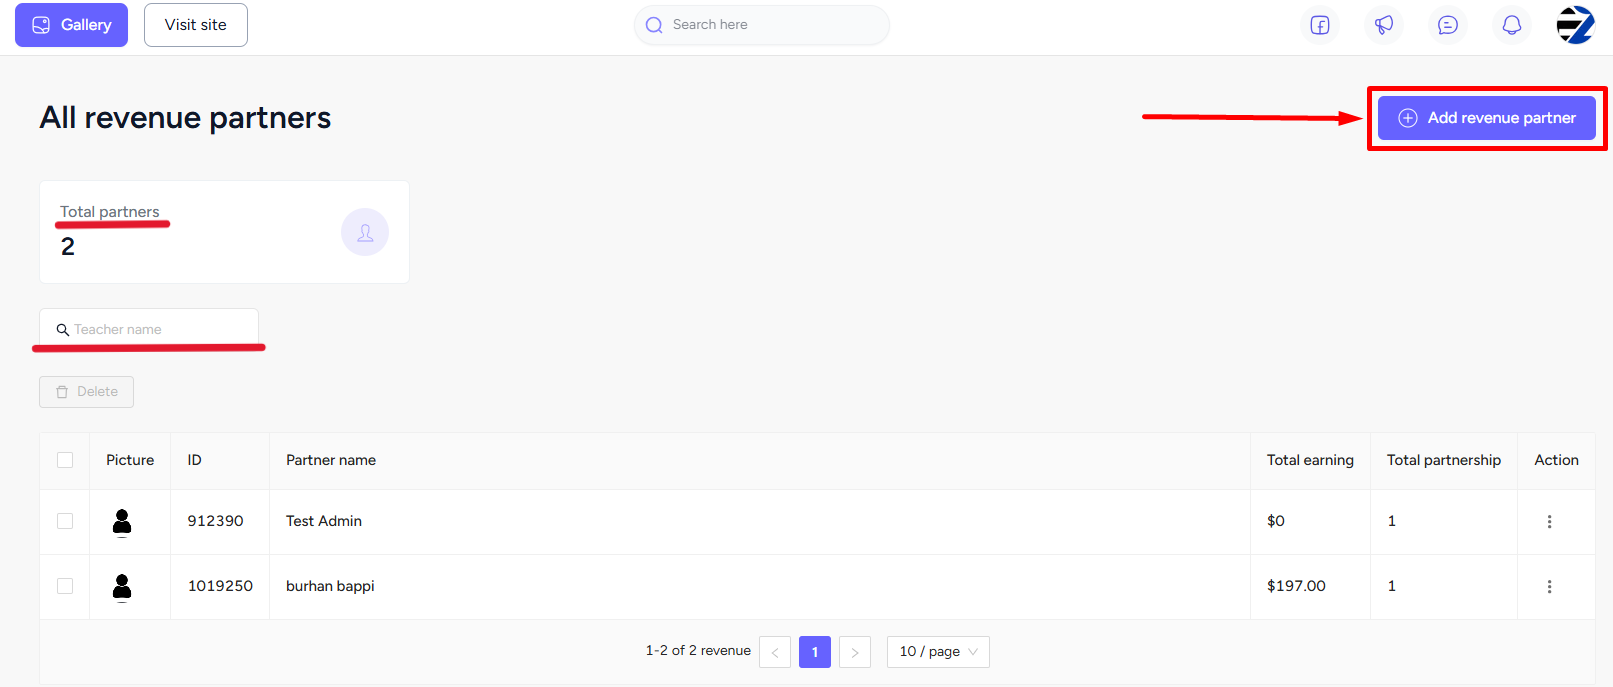
From here, you can add new partnership and view the details about the partnership including the products they get a commission for, edit the commission percentage, and manage the partnership details.
Site Admins
You can easily add a new Site Admin from your dashboard, search them, and sort based on different parameters.

You can edit the info or delete a Site Admin any time you wish.

Role Manager
You can create custom user roles with the dynamic role manager and set your own bunch of permissions that users can access.
At first, you need to enable the role manager. Note that you cannot disable it again, so use it wisely.

Enabling the role manager will affect the Users menu on your dashboard. With role manager enabled, you will only find Students, Revenue Partners, Admin Users, and B2B Users under the Users menu.
Also, notice that three default roles will appear. You cannot edit these roles or delete them, but you can view the permissions set, clone the roles, and manage members under them.

Additionally, you can create a custom role from here. Simply, click the Create Role button.

Once you’ve created a custom role, you can now add any site admin, teacher, developer, or admin user to this role by going to the Manage Members tab -> Add Members button.

Now, you can go on to set permission for this role, which will be applied to the members under it. Simply, go to the Permissions tab -> click the Add Permission button, and then select any permission from the available categories.

In addition, you can view all the enabled permissions for this role and remove any permissions. To save time, you can use the search feature to quickly find and see any particular enabled permission.

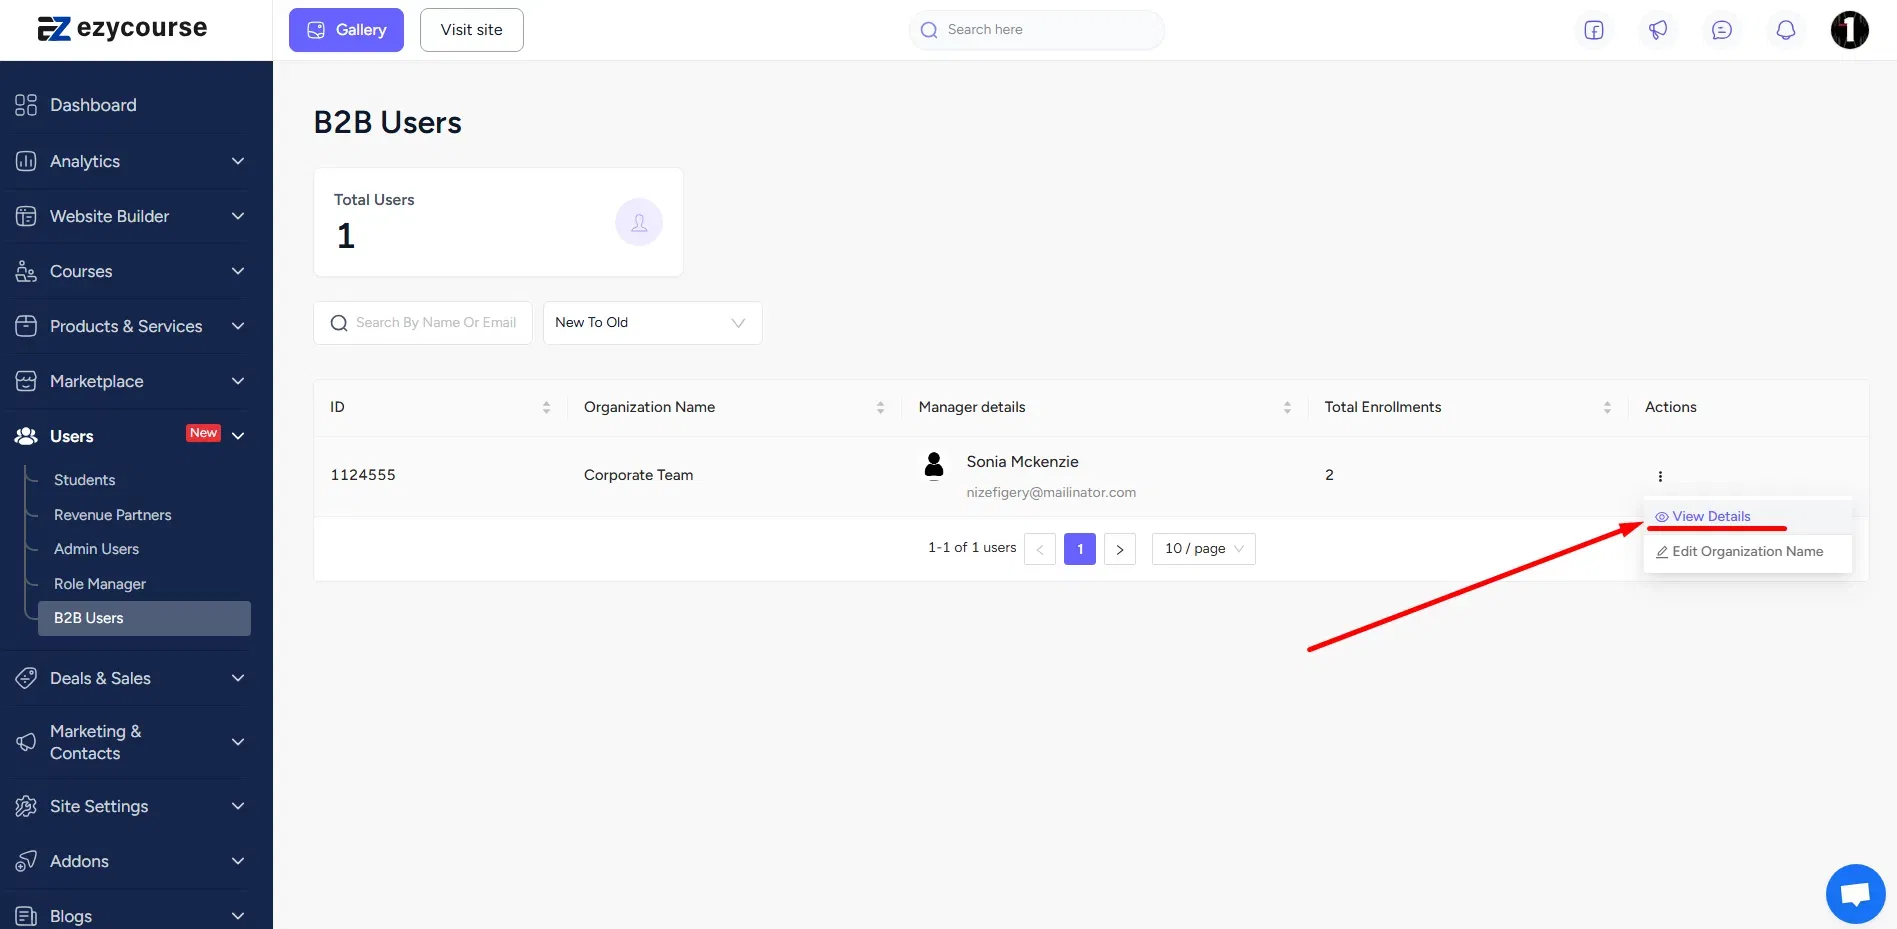
B2B Users
You can find all the B2B users or managers under the Users menu. You can view/edit the organization name, manager details, and the total number of enrollments as well.

Moreover, you can view additional details about the B2B manager by simply clicking three dots and then selecting the View Details option.
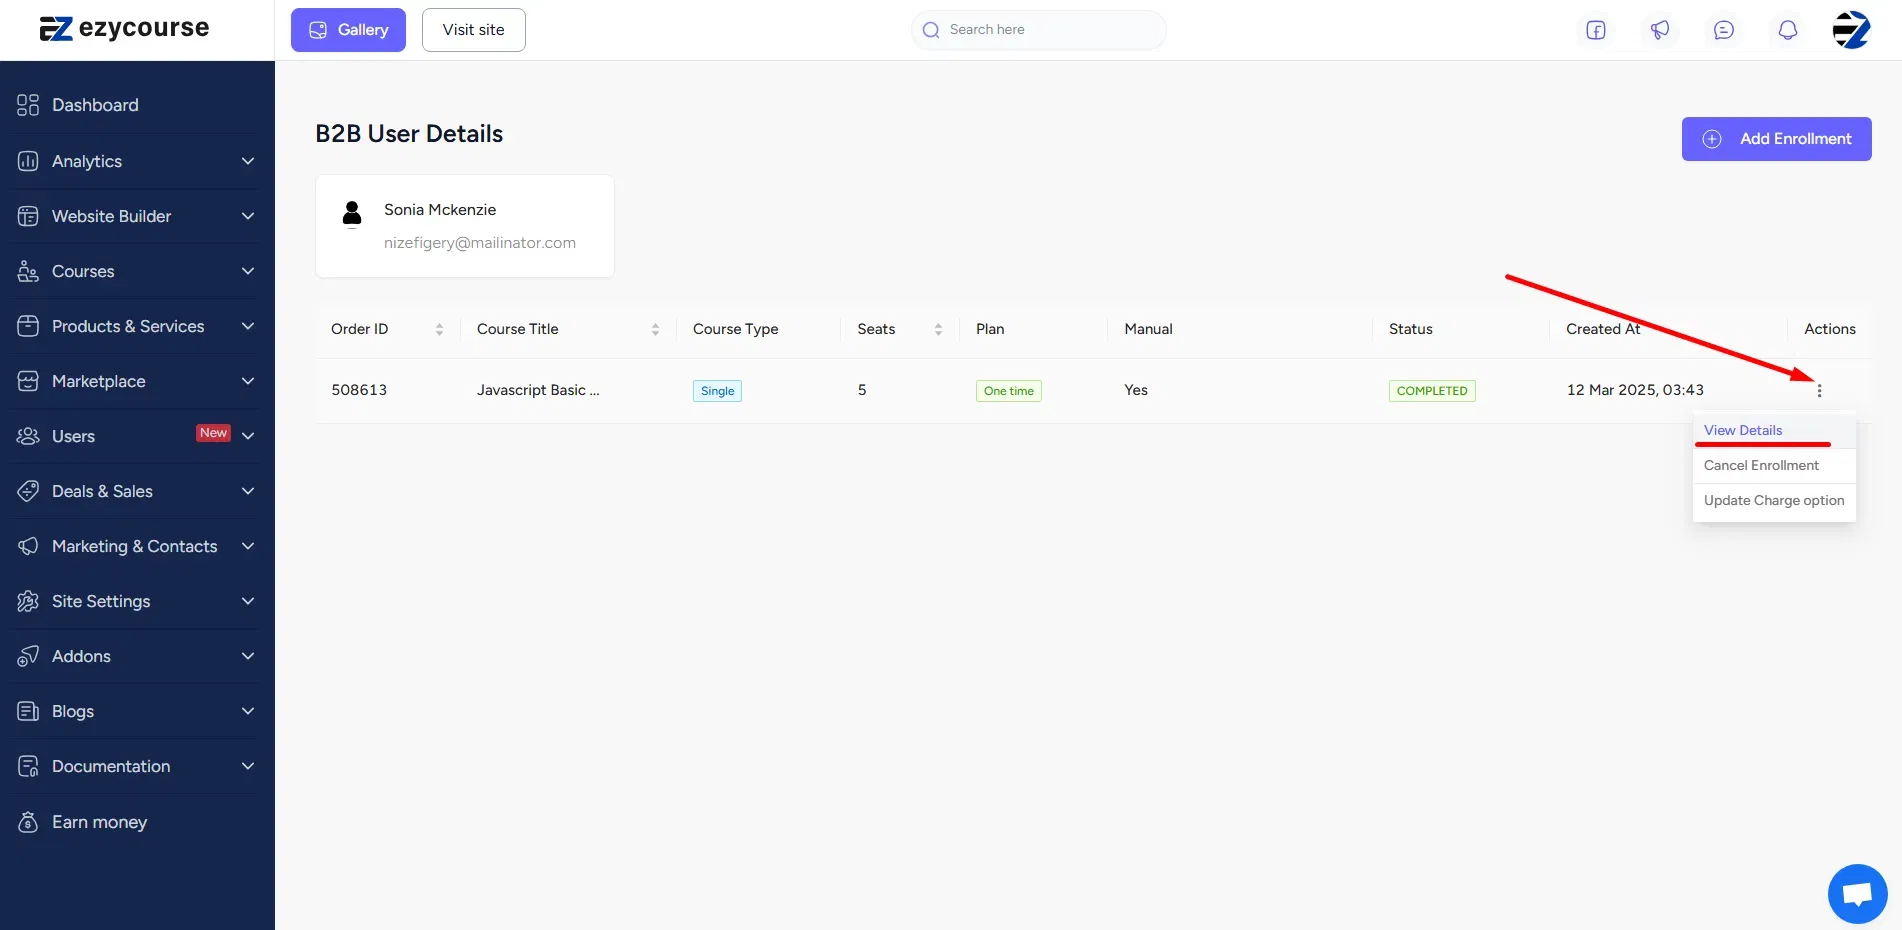
To see more details about any order, including the members enrolled in the course and their course progress, click the three dots and select the View Details option.
If you want, you can cancel enrollment and update the charge option too.
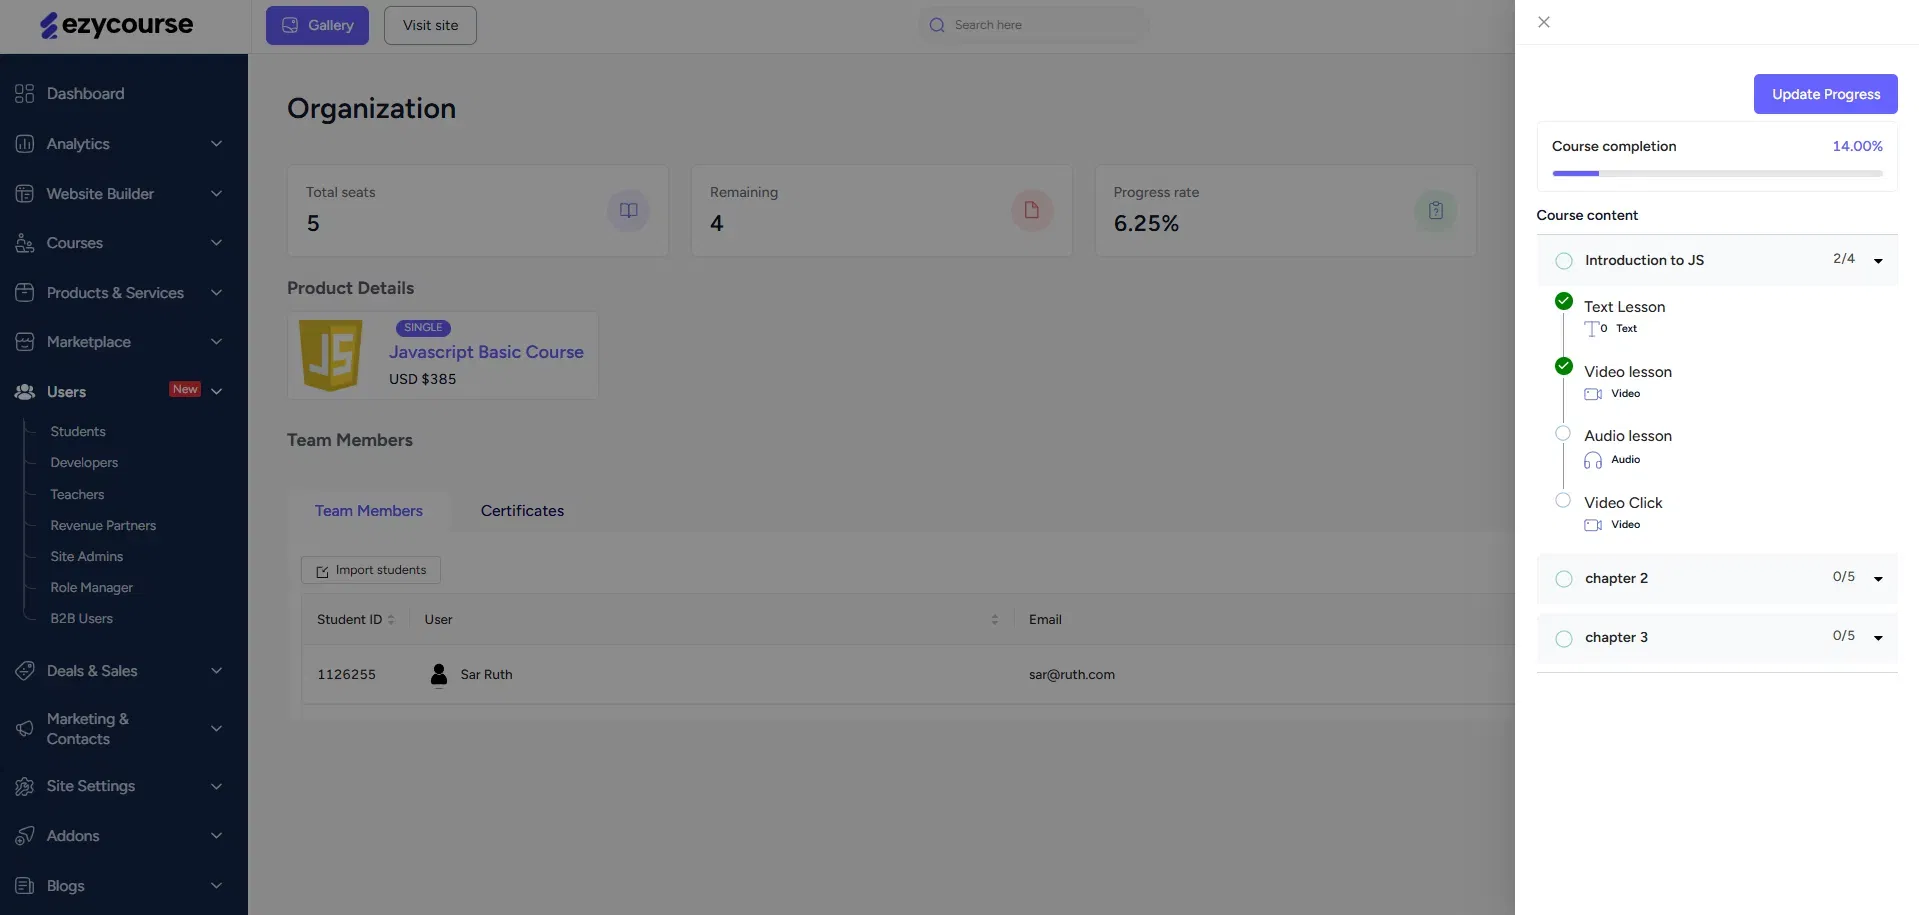
From the order details page, you can view the total number of seats and the remaining seats. Also, adding new seats and members can be done from here using the Add Seats and Add Members option.
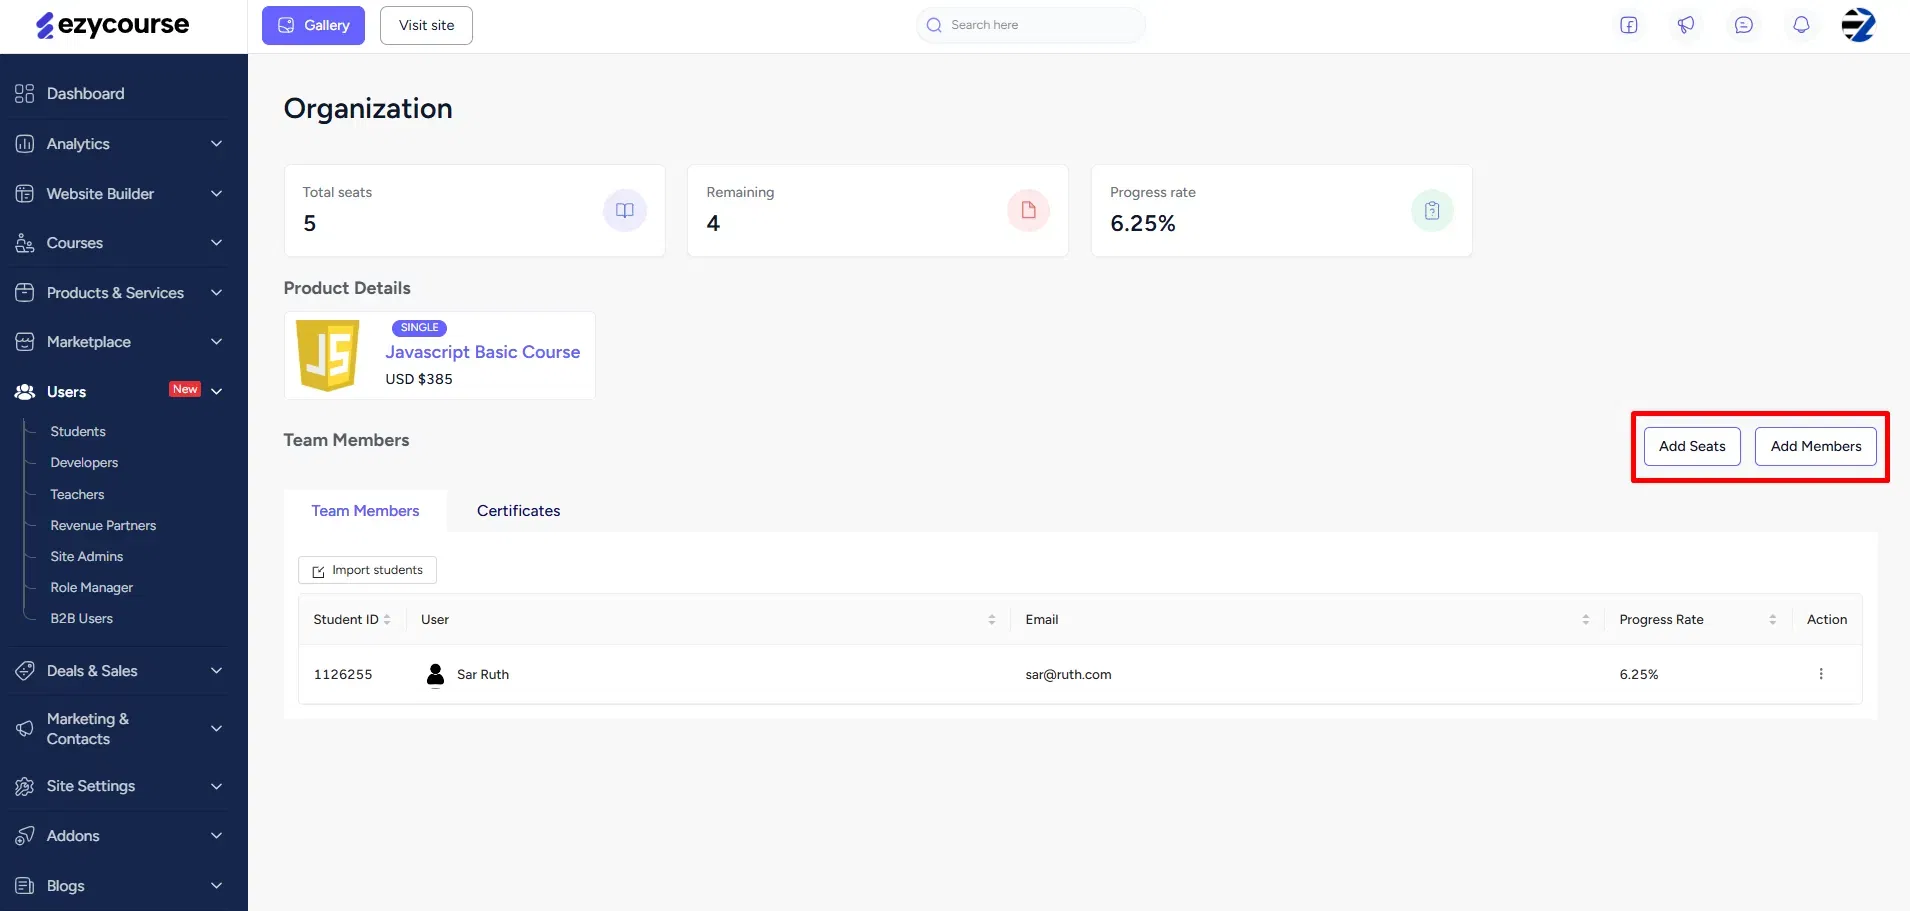
In addition, you can see the progress of any member and even update their progress.
View the certificates achieved by the members or issue/download the certificate of any member.
