Back
Student Email Tags
How to Assign/Remove Student Tags
You can create tags, assign them to students, and then launch campaigns that are specifically relevant to the tagged students.
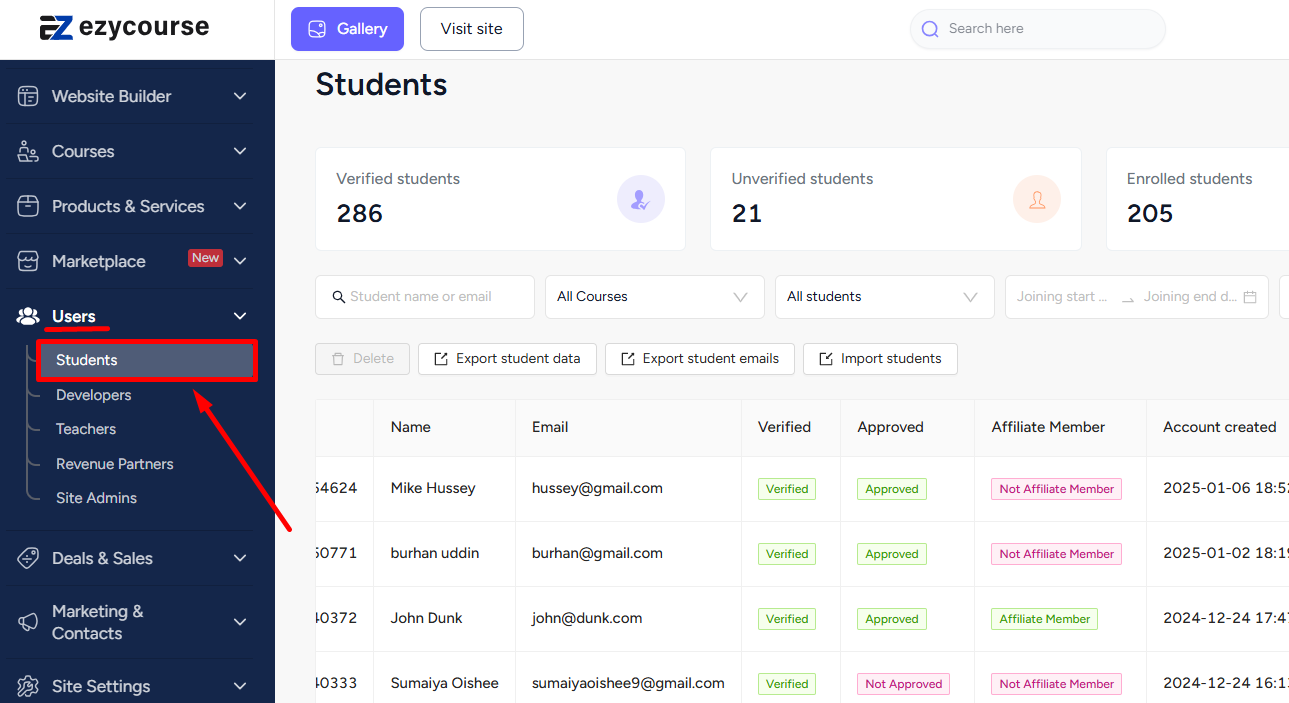
After creating a tag, you can assign the tags to specific students based on behavior, activity, performance, and whatnot. To do that, go to Users -> Students.
[Note: You can create a tag from Marketing & Contacts -> Tags.]
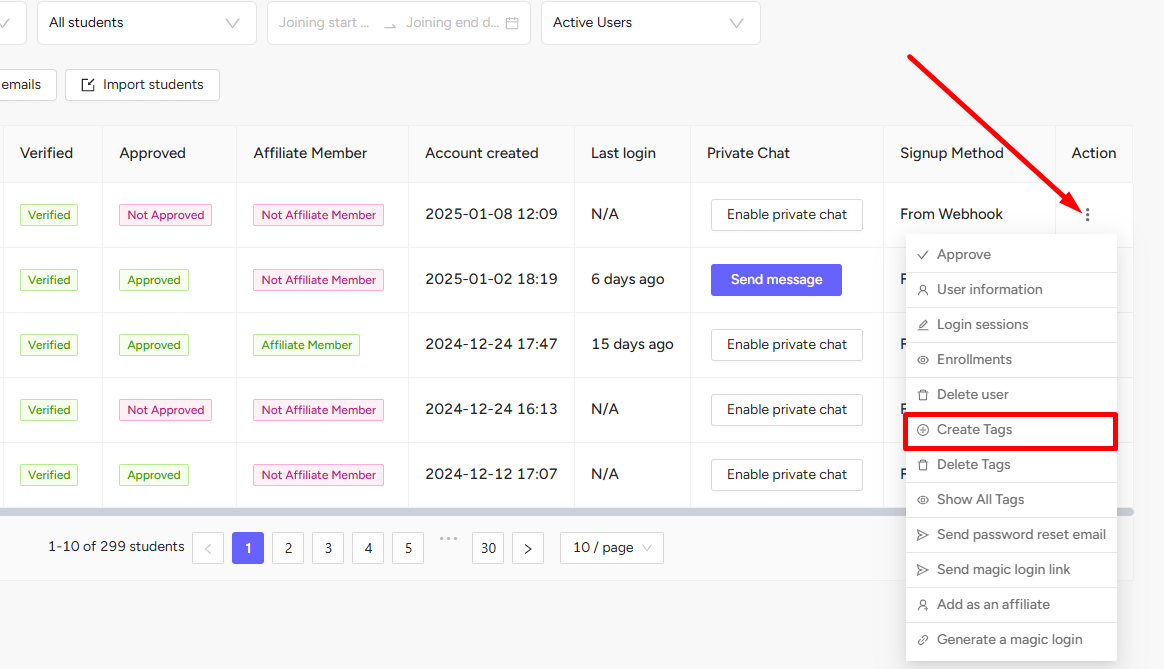
Locate the student you want to assign a tag to, click the three dots, and select the Create Tags option.
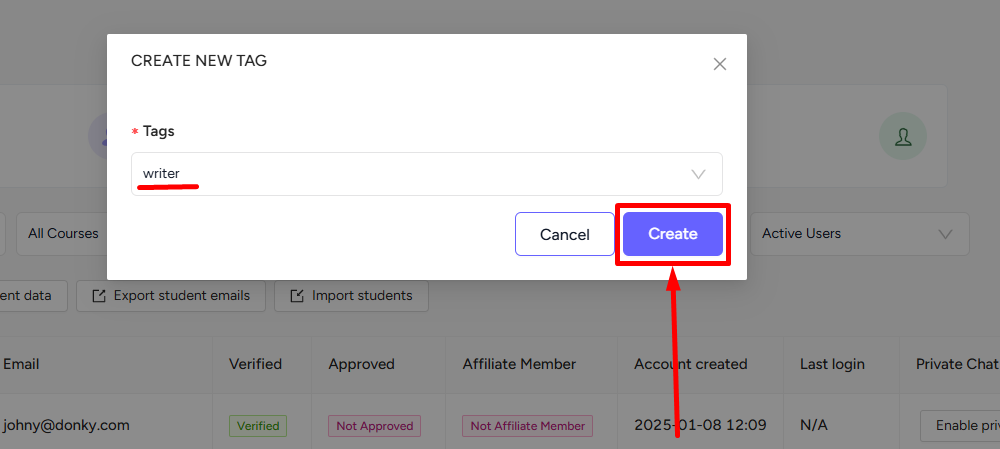
On the popup, you can select any tag from the created tags using the dropdown option. Click the Create button to complete assigning the tag to this student.
[Note: You can assign multiple tags to a single student.]
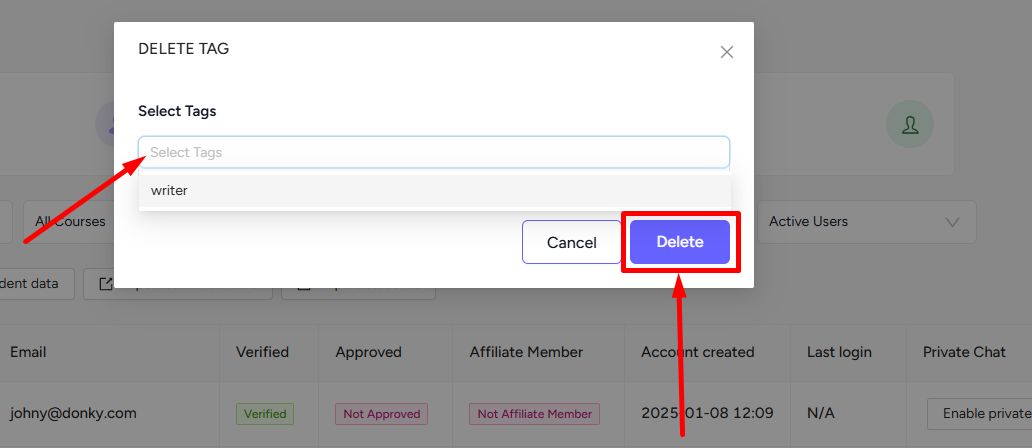
To remove an assigned tag, click the three dots on the student and select the Delete Tags option.
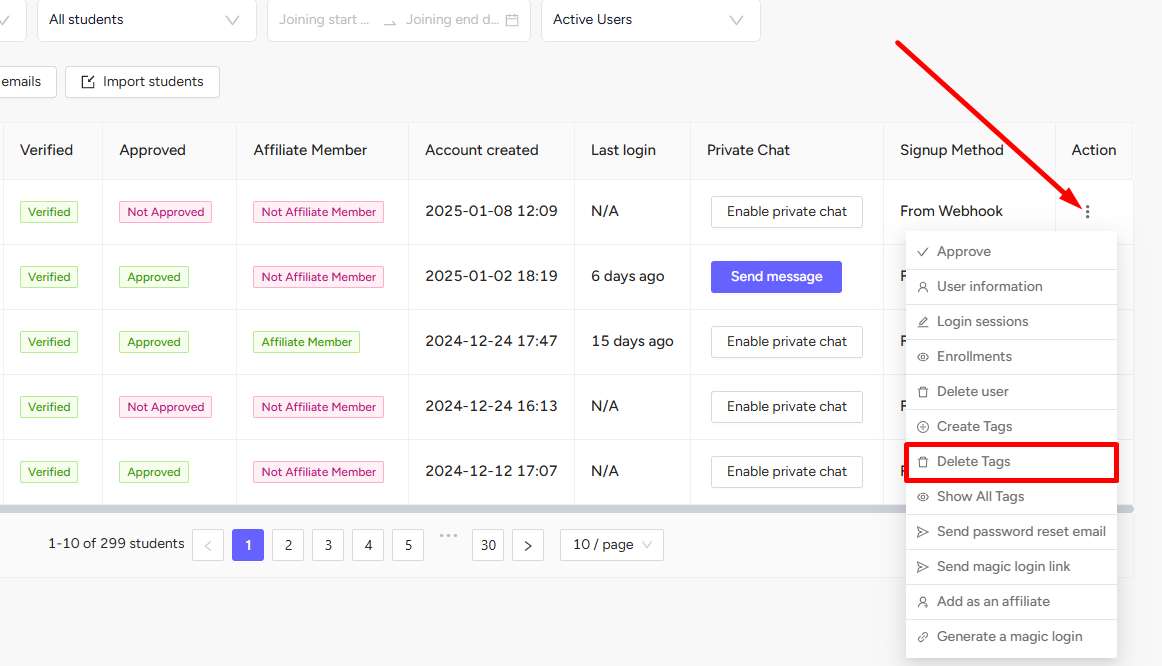
On the popup, you can select the assigned tags from the dropdown option and click the Delete button to remove all the selected tags.
