
Back
EzyCourse Dynamic User Role Manager
What is it & why you need it
EzyCourse allows you to manage different user roles such as site admins, teachers, and developers, each having their own levels of functionalities and accessibility.
Now, you can create custom user roles and set your own set of permissions that users can access. This will give you greater control over which user can access what features on your dashboard. The role manager feature will not simply allow you to control generic permissions, but will help you to define and maintain control over specific permissions related to the entirety of your dashboard.
You can use the feature to delegate specific tasks to users without worrying about them accessing anything other than the task they are assigned to.
How it works
As an admin, you can access all the role manager features from your EzyCourse dashboard. Once you enable the role manager, you cannot disable it again. Enabling the role manager will affect the Users menu on your dashboard. With role manager enabled you will only see Students, Revenue Partners, and Admin Users under the Users menu.
The Admin Users menu will give a merged view and show all your existing teachers, developers, and site admins. From this menu, you can also create a new user, add to any role, and manage them.
[Note: If you keep the role manager disabled, everything will work as usual in terms of which user has what permissions.]
On the Role Manager menu, you’ll find three default roles already created for you: Administrator, Developer, and Teacher. You cannot edit or change the permissions of these default roles. But, you can add any user to these roles i.e. any site admin, teacher, developer, or admin user (users created from the ‘Admin Users’ menu).
Note that existing developers will be logged out when you enable the role manager feature. If you do not add them to any role then they cannot log in to their dashboard. On the other hand, existing site admins and teachers will automatically be assigned to the default Administrator and Teacher roles respectively. You can remove any user from the default roles and add them to any custom role if you like.
A single user can be added to multiple roles at the same time, but it depends on the plan you are on. Adding any user to a role will give that user access to all the permissions as set for the role.
Apart from the default roles, you can create your own custom roles and then set up personalized permissions related to the created role.
[Note: As a site owner and site admin, you can add seller account if the role manager is turned off. Else, when the role manager is turned on, then the roles with the addons permission enabled can only add a seller account directly.]
So, in short, here’s how role manager feature would work:
You enable the role manager feature. This will create a separate Admin Users menu which will contain all the existing site admins, teachers, and developers. You can also create new users from here and assign them directly to a role.
The Role Manager menu is where you create new roles, manage the permissions, and also add any user to a role.
Once added to a role, the user will have access to the features, as per the set permissions for the role, on their dashboard.
How to get started using it
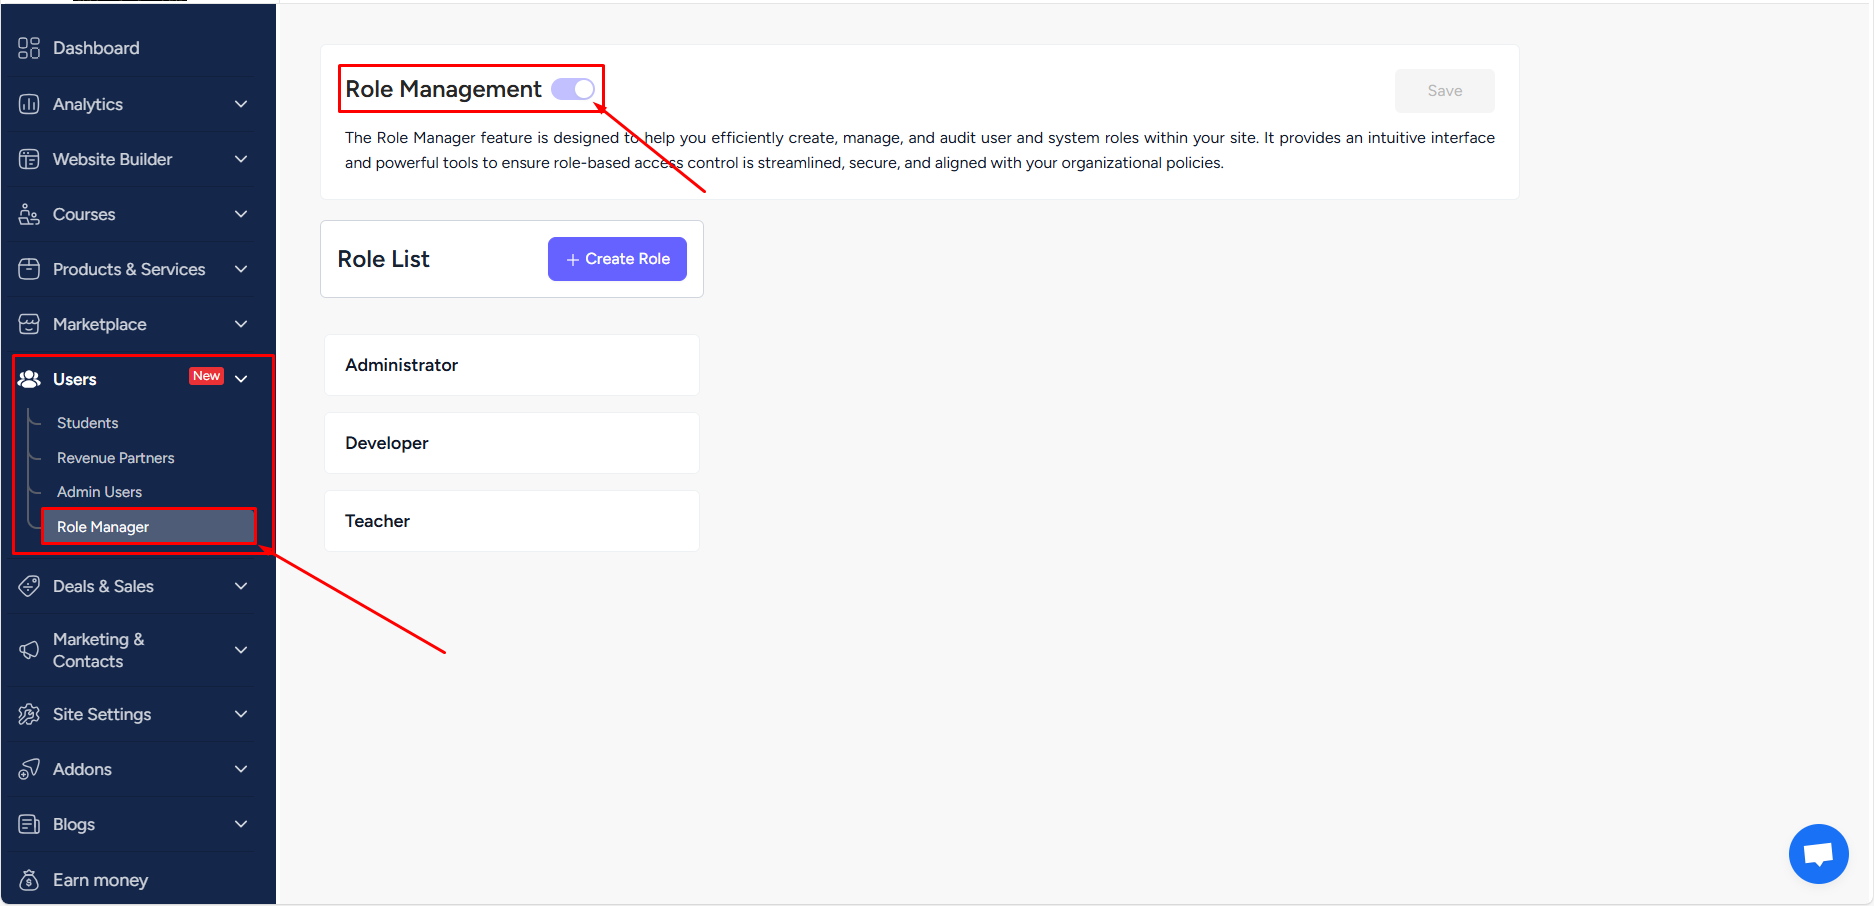
To enable role manager, log in to your EzyCourse dashboard and go to the Role Manager menu. From here, enable the toggle button and click the Save button.
[Note: You cannot disable the role manager feature once you enable it.]
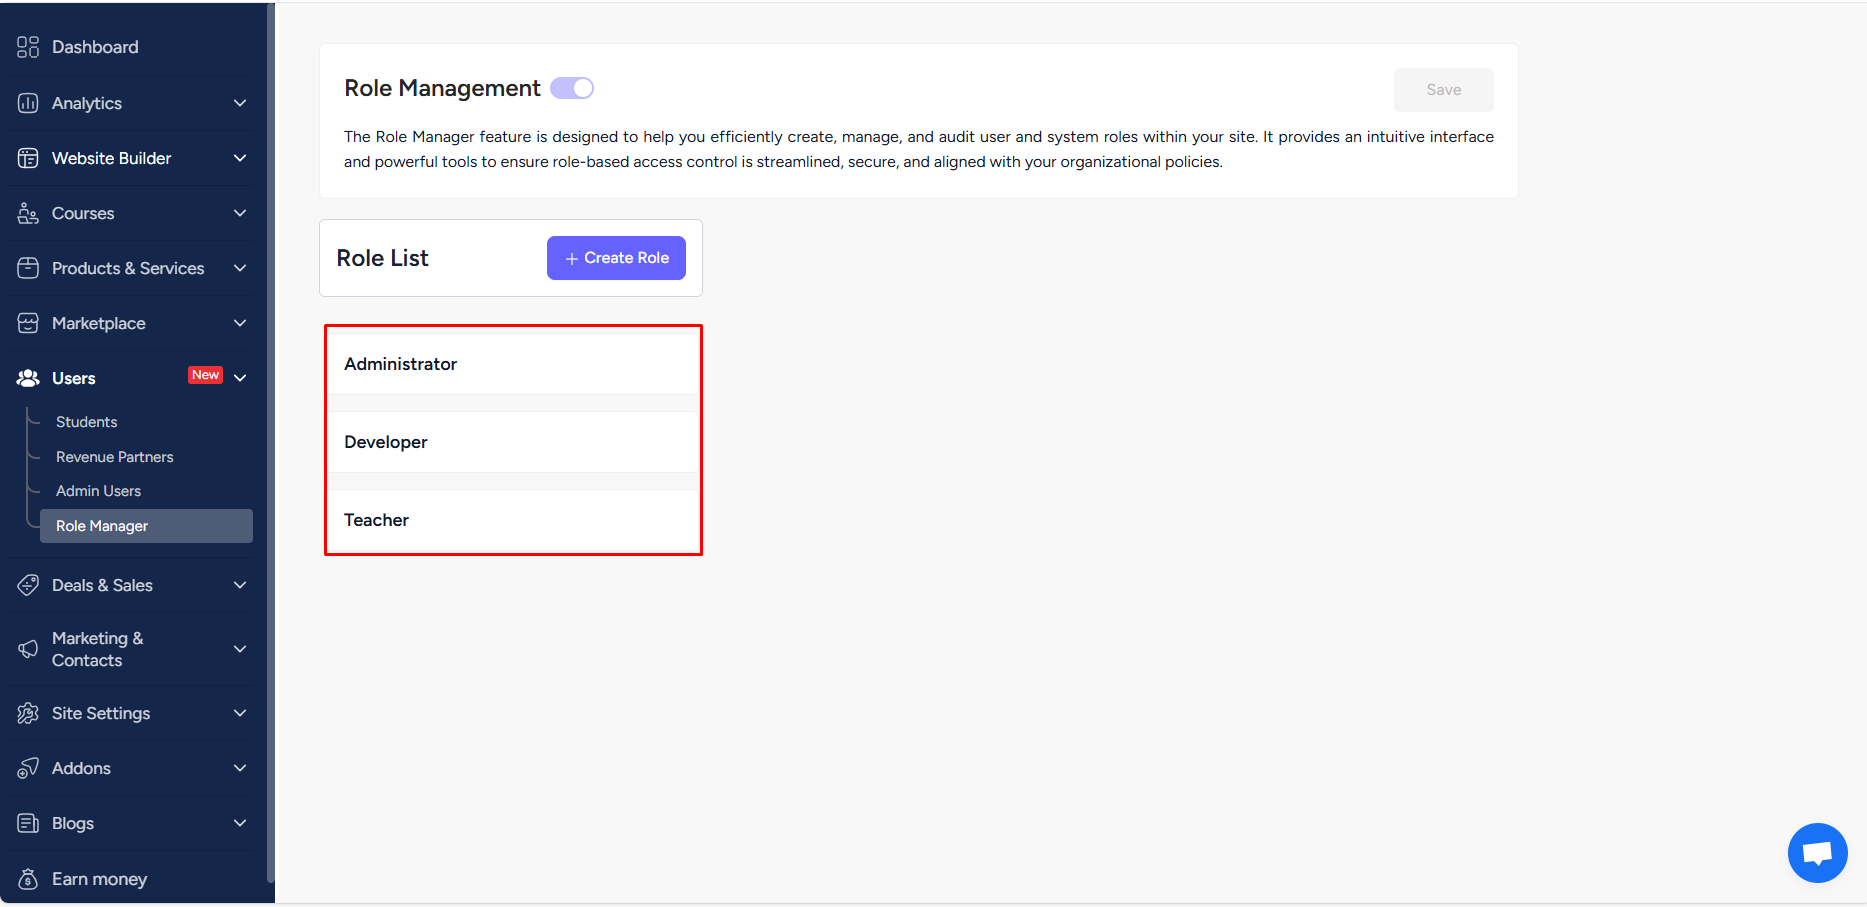
As soon as you create, you’ll see the three default roles appear. You cannot edit these roles or delete them, but you can view the permissions set for these roles. It is important to note that the default roles Administrator, Developer, and Teacher have the exact permissions as EzyCourse site admin, developer, and teacher user roles respectively.
[Note: All the existing site admins and teachers on your platform will automatically be assigned to the default Administrator and Teacher roles respectively.]
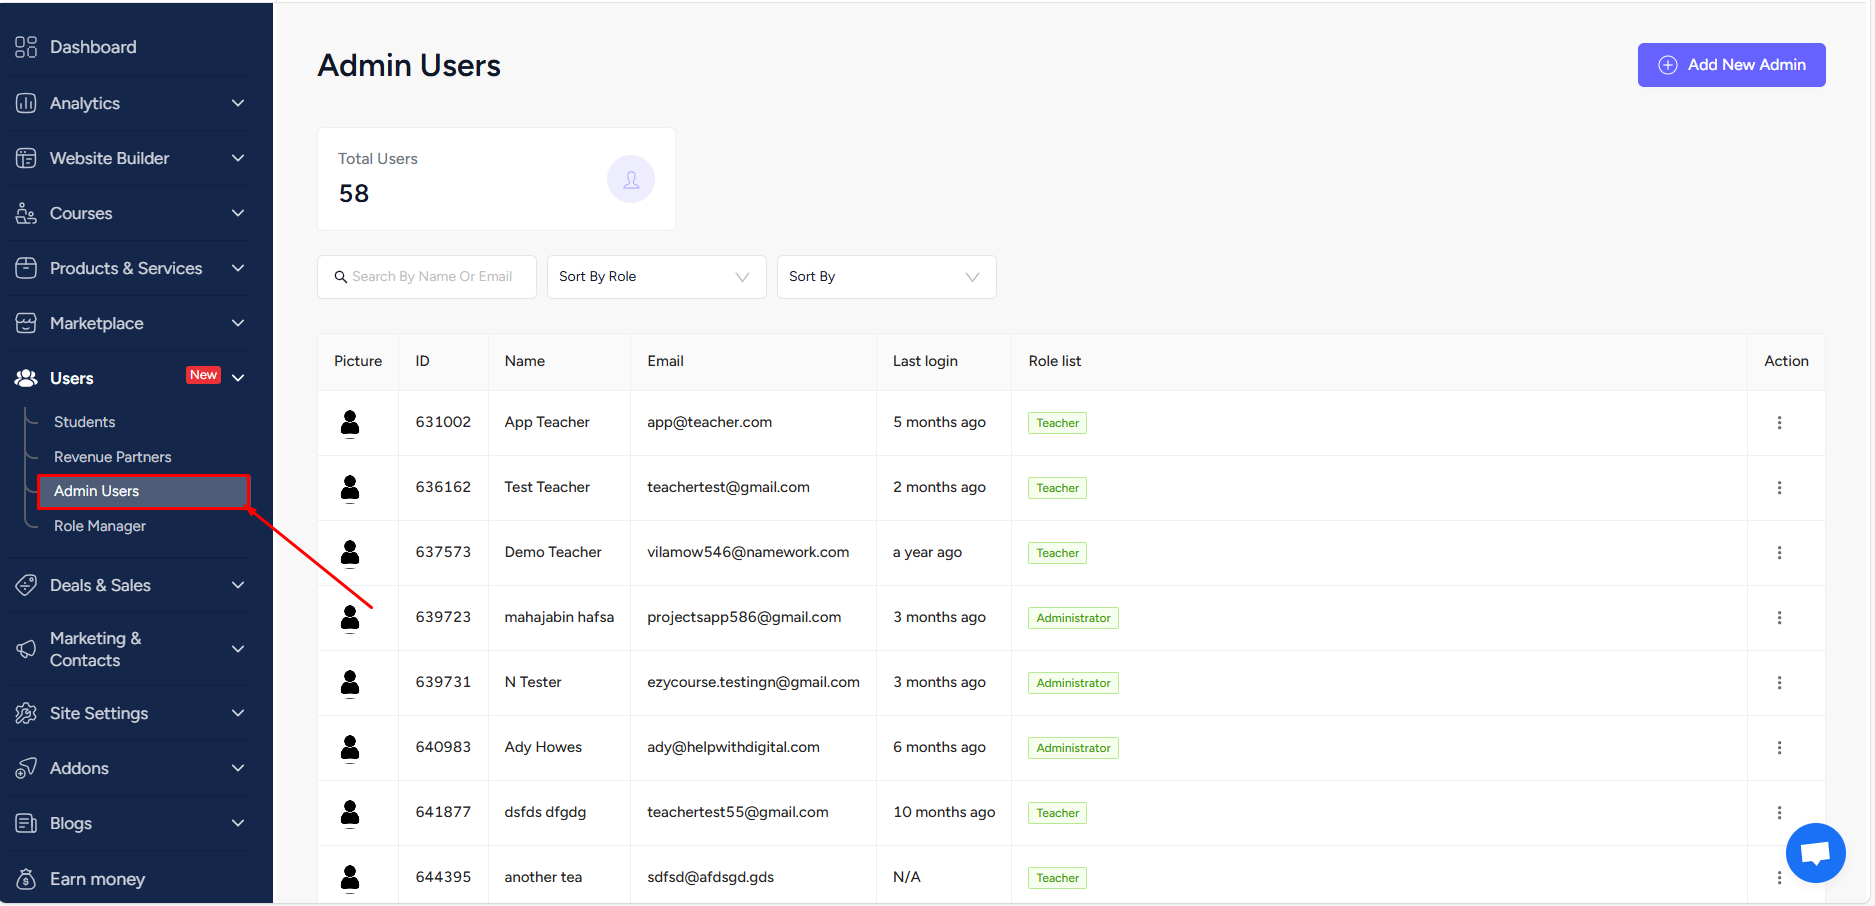
Also, notice that the Users menu on your dashboard will show three users apart from the role manager tabs after enabling the role manager feature. They are Students, Revenue Partners, and Admin Users.
[Note: User’s menu usually has site admins, developers, and teachers also when the role manager feature is disabled.]

The ‘Admin Users’ menu is where you’ll find all your existing site admins, developers, and teachers. You can also create new users and add them to any existing role, both default and custom roles.
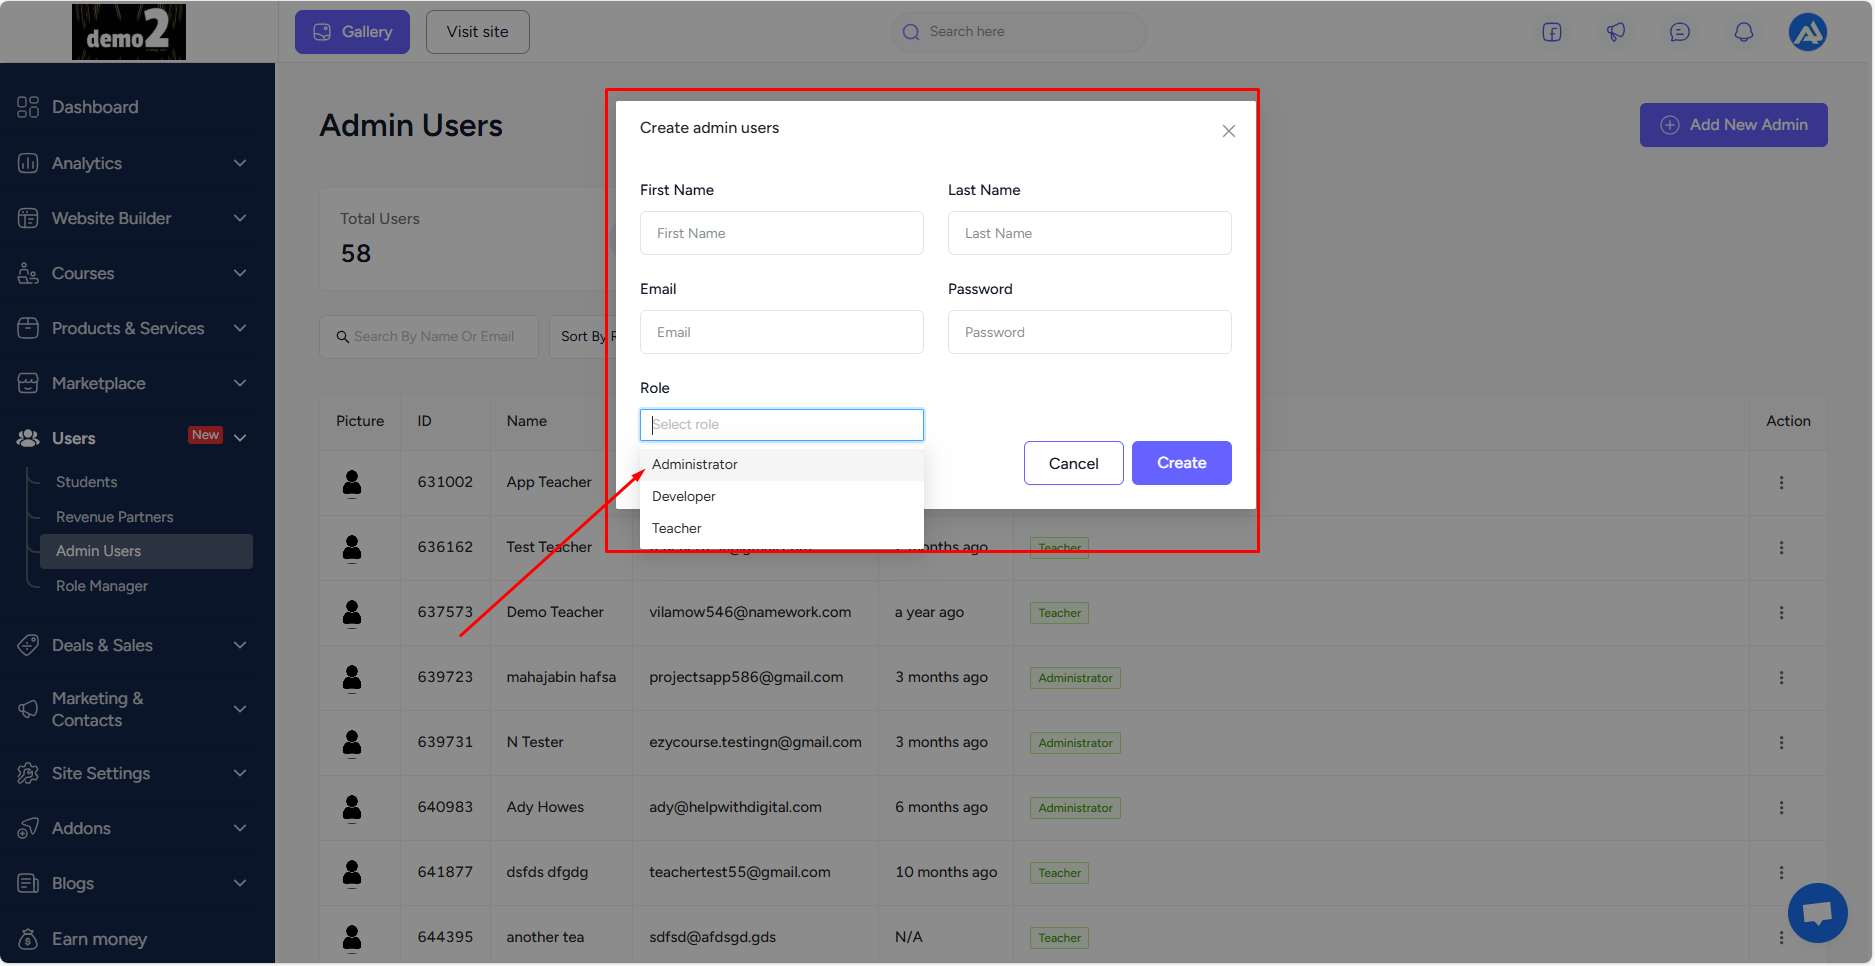
To create a new user, click the Add New Admin button on the top right corner of the screen.
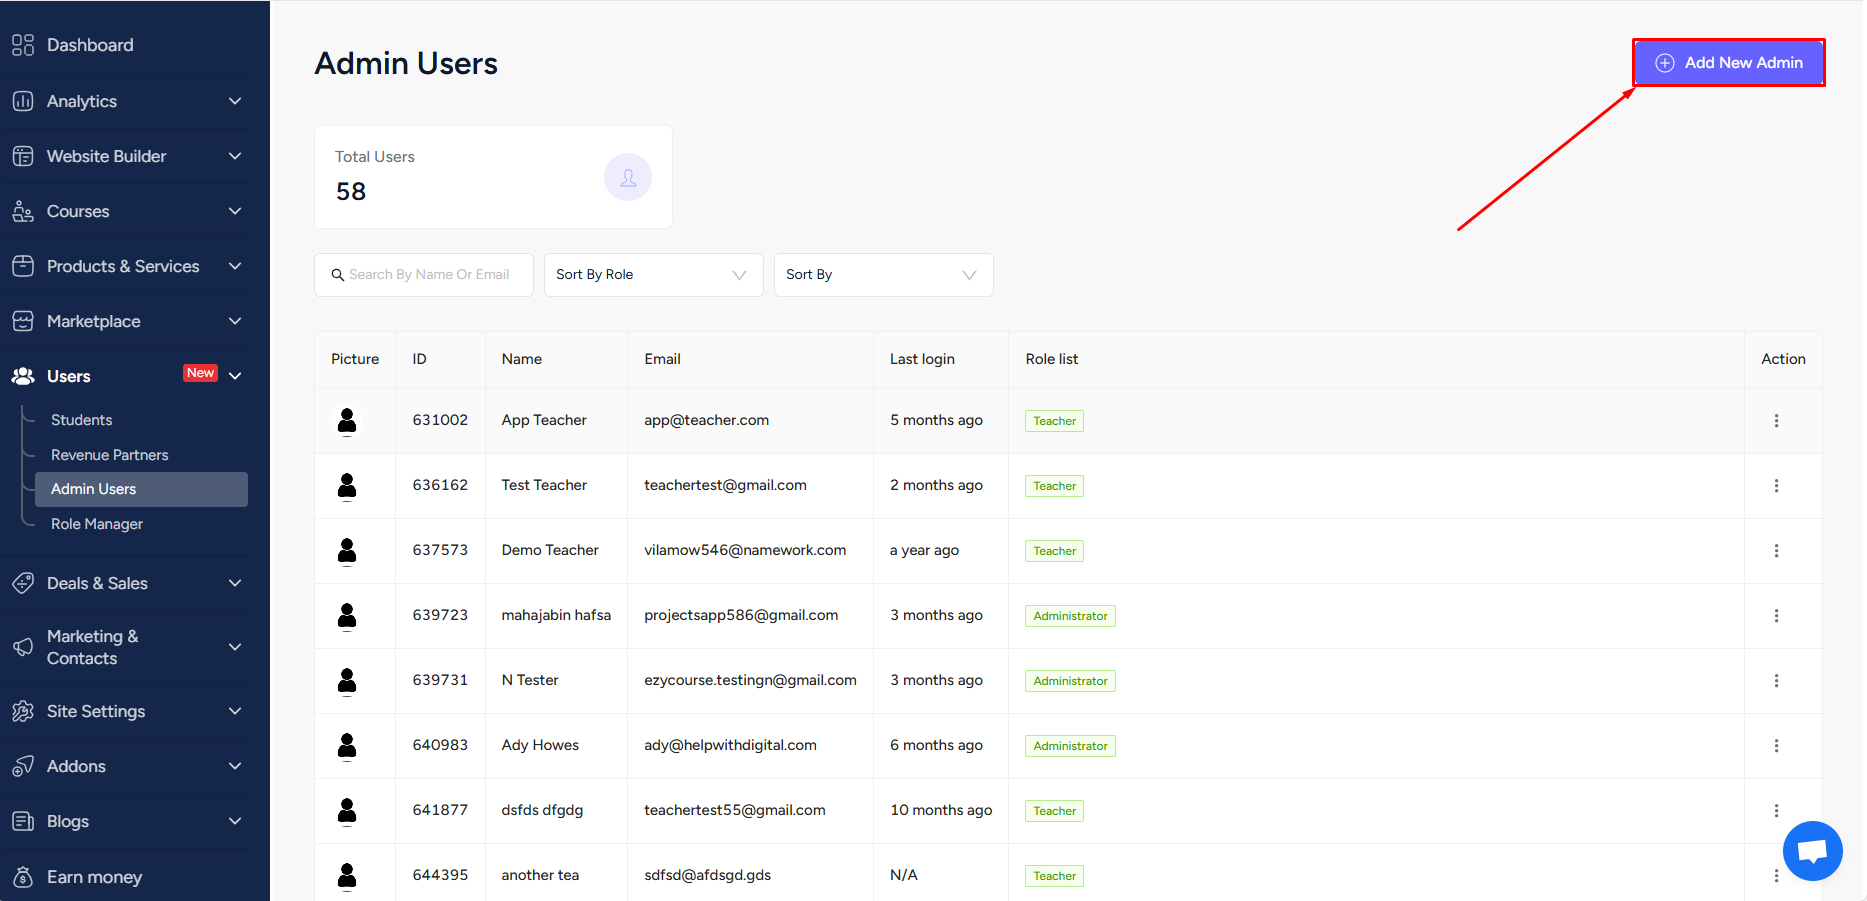
On the popup, provide the name and other user info. Here, you can also assign the user to any existing role.
[Note: You can assign a user to multiple roles at the same time. It depends on your EzyCourse plan.]
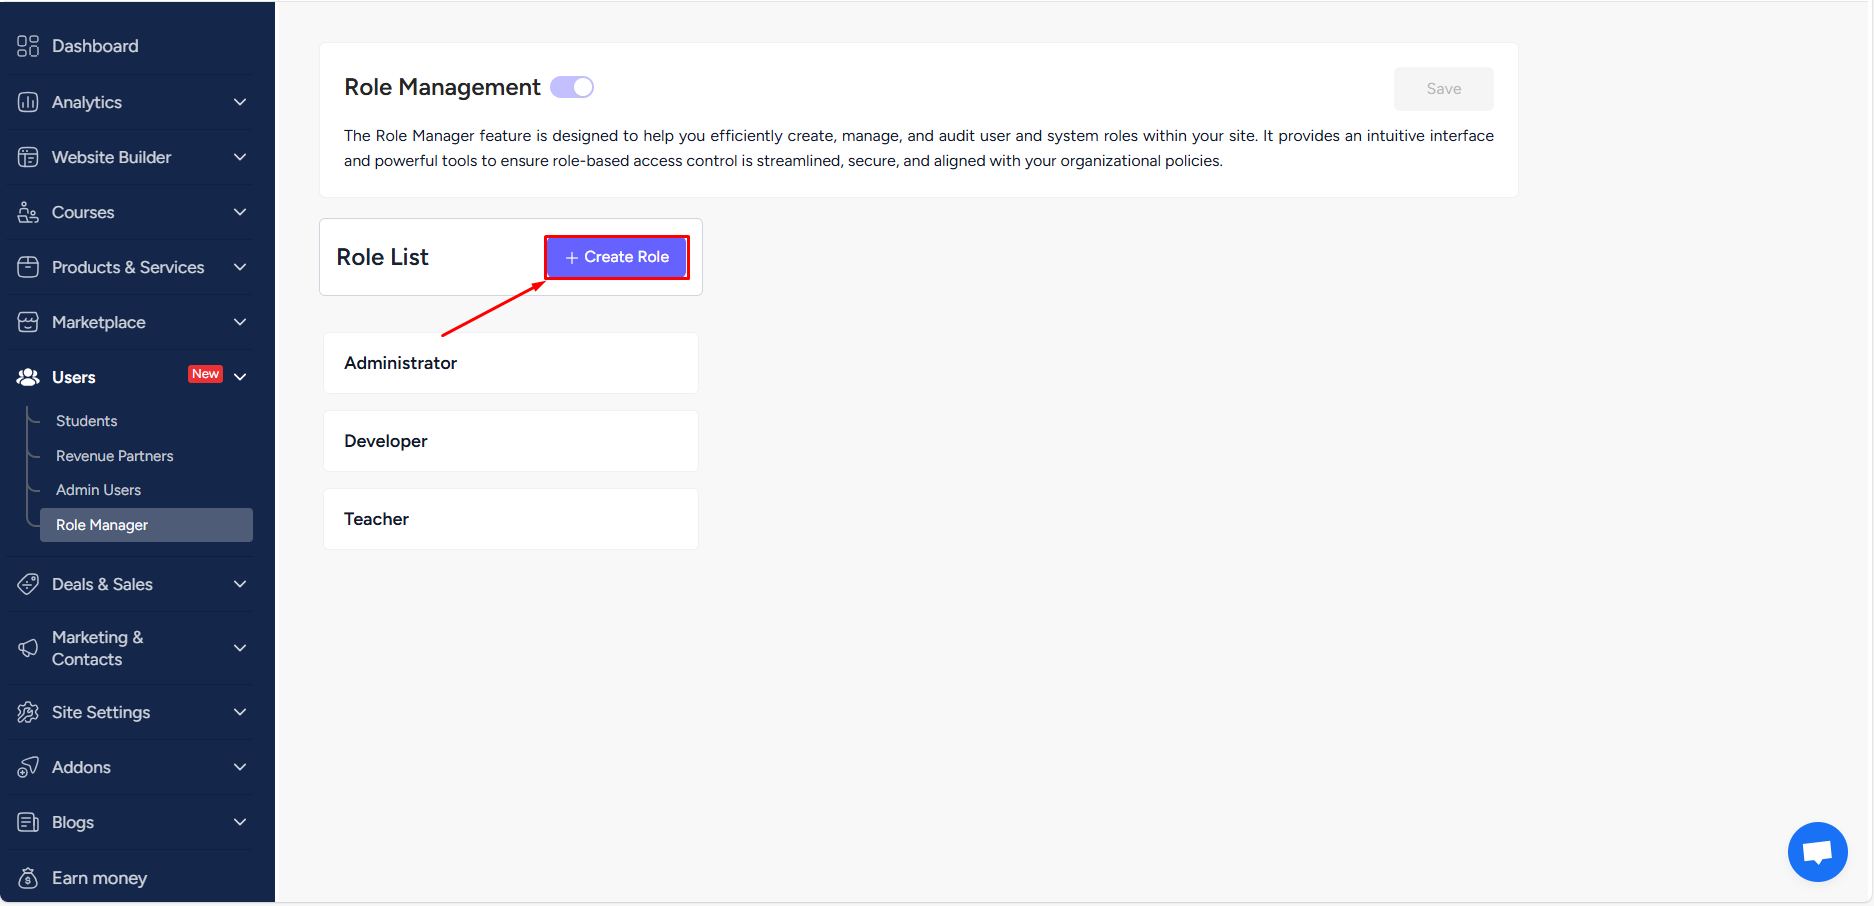
To create a custom role, head over to the Role Manager menu and click the Create Role button.
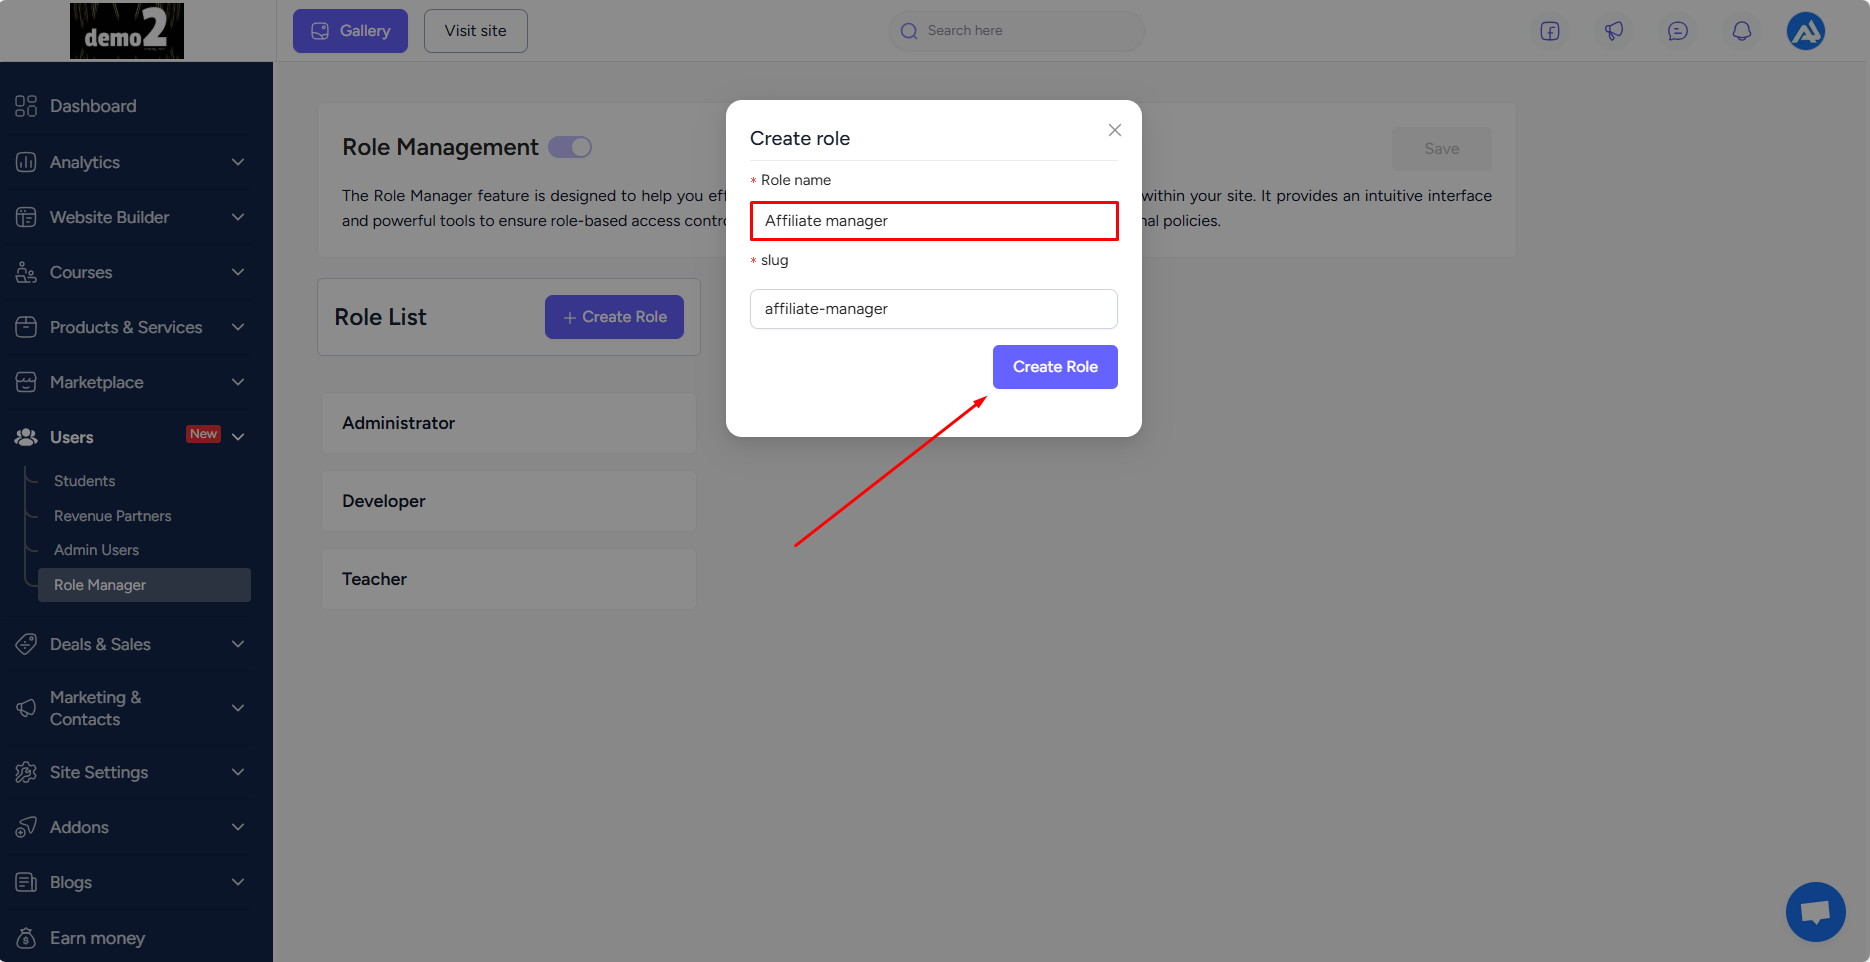
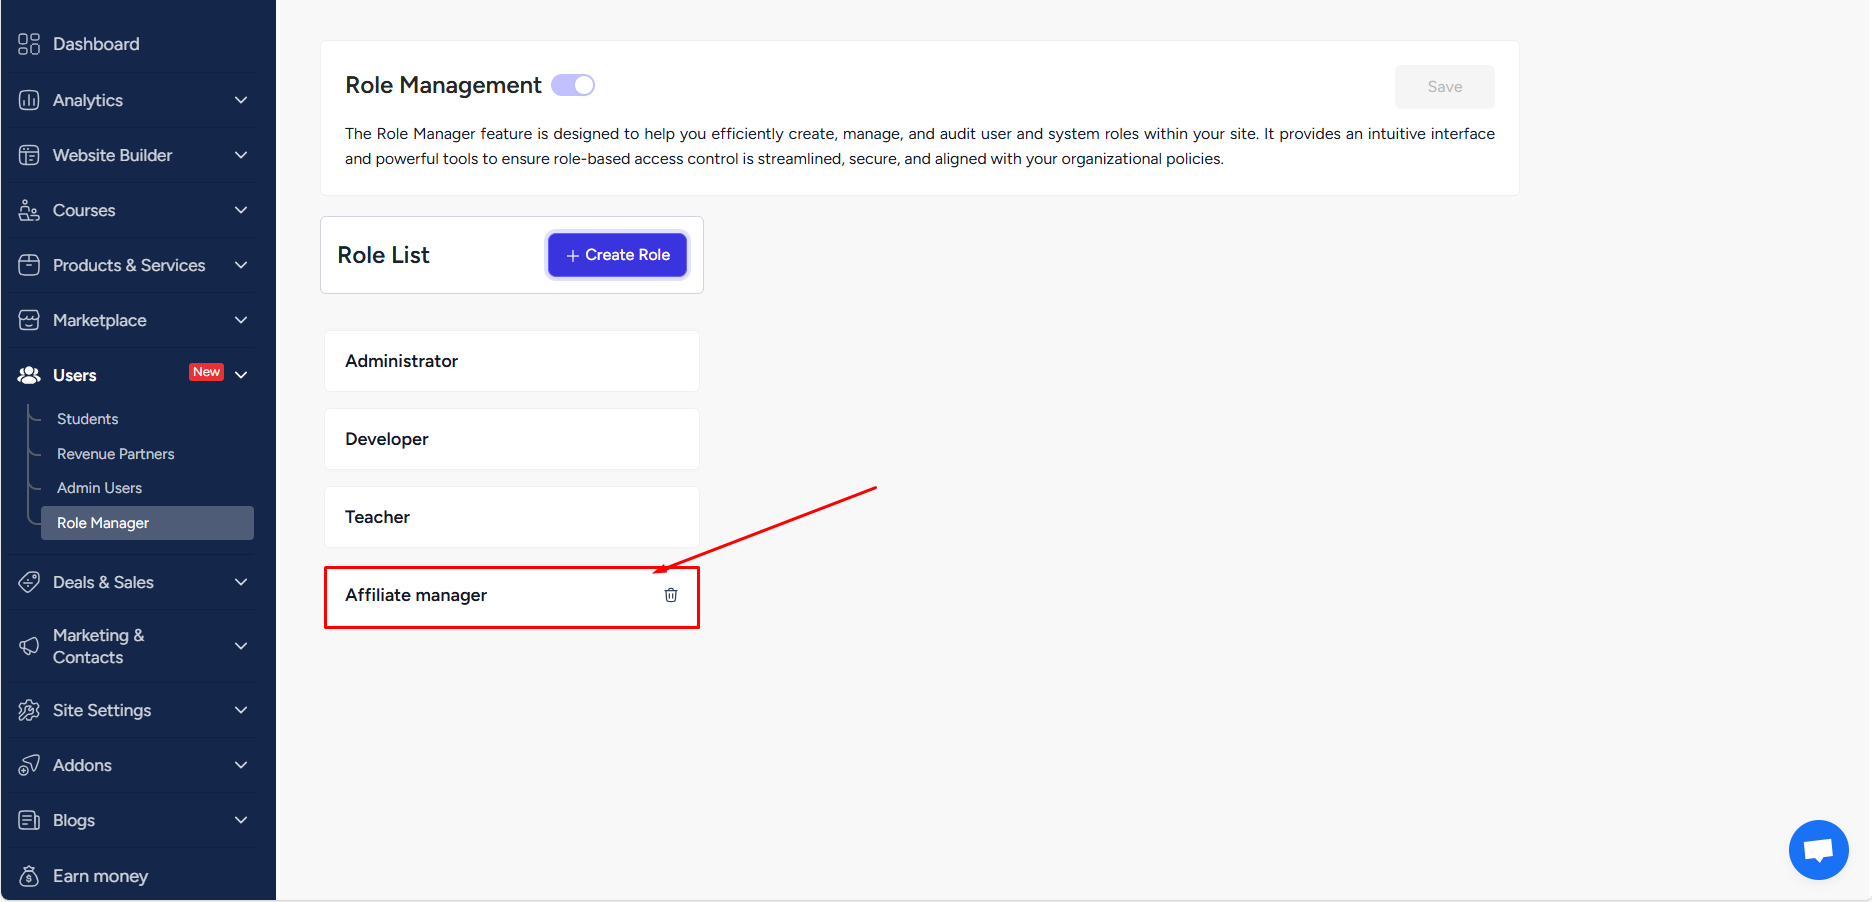
On the popup, give your custom role a name and click the Create Role button. With a custom role created, you can go on to set the permissions and add users to the role.
To set permissions, click on the custom role. Then from the Permissions tab, click the Add Permission button.
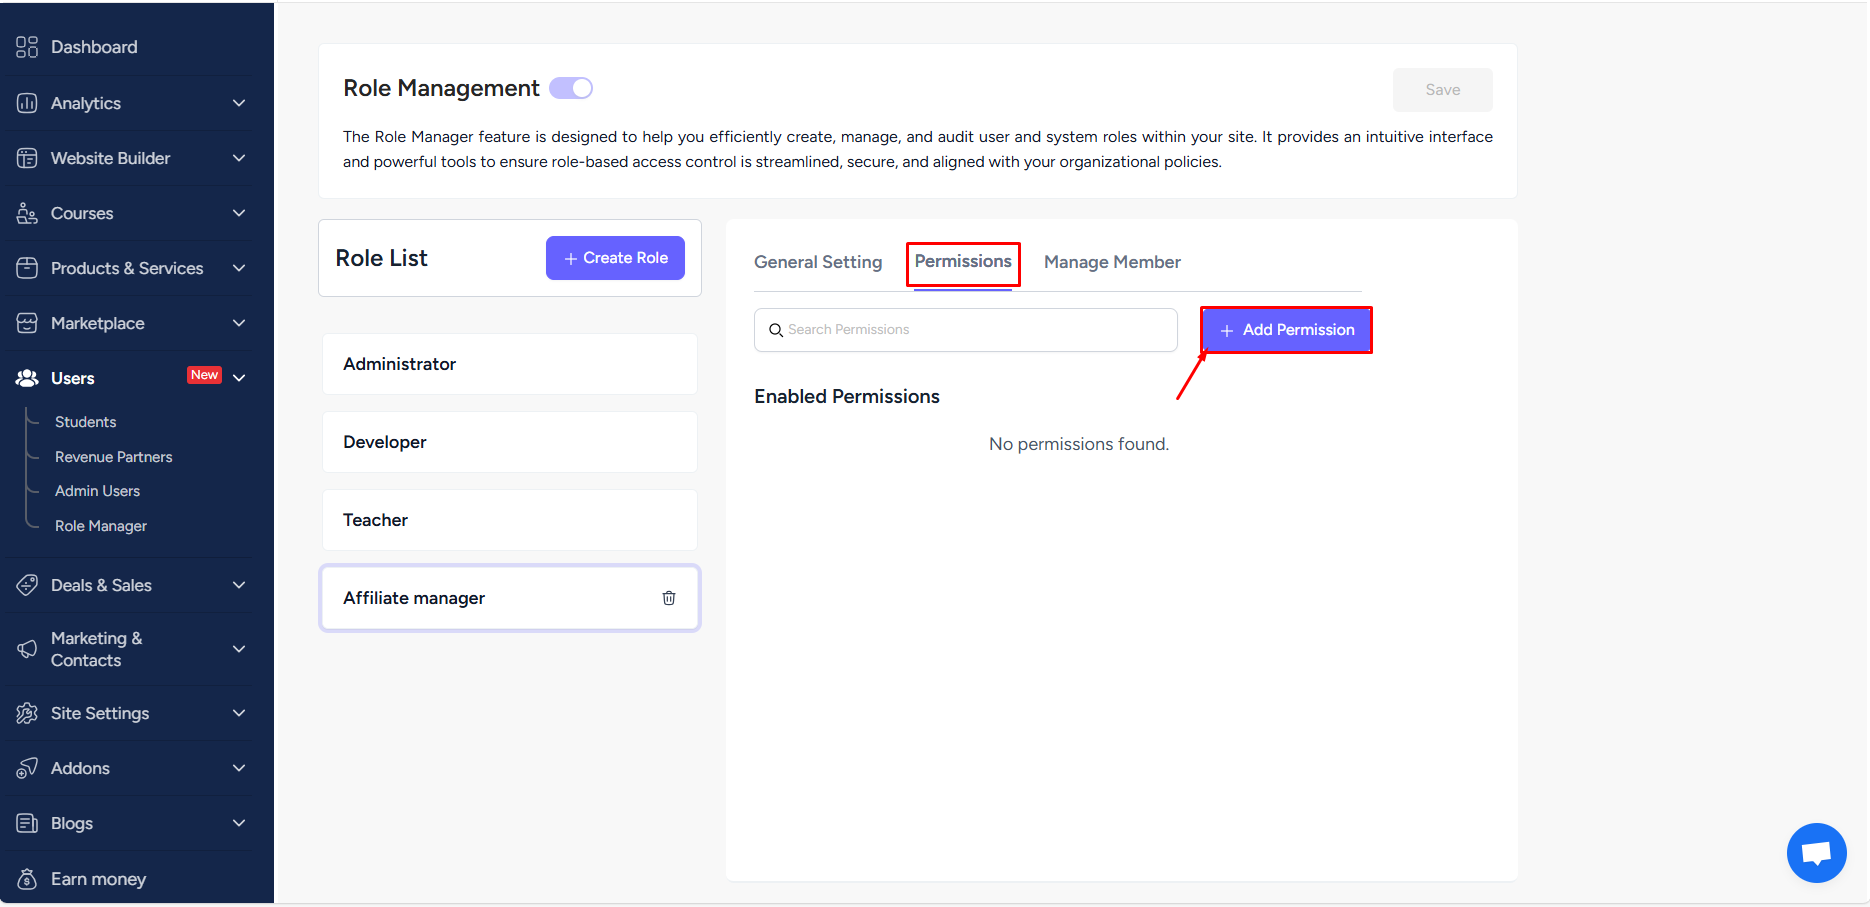
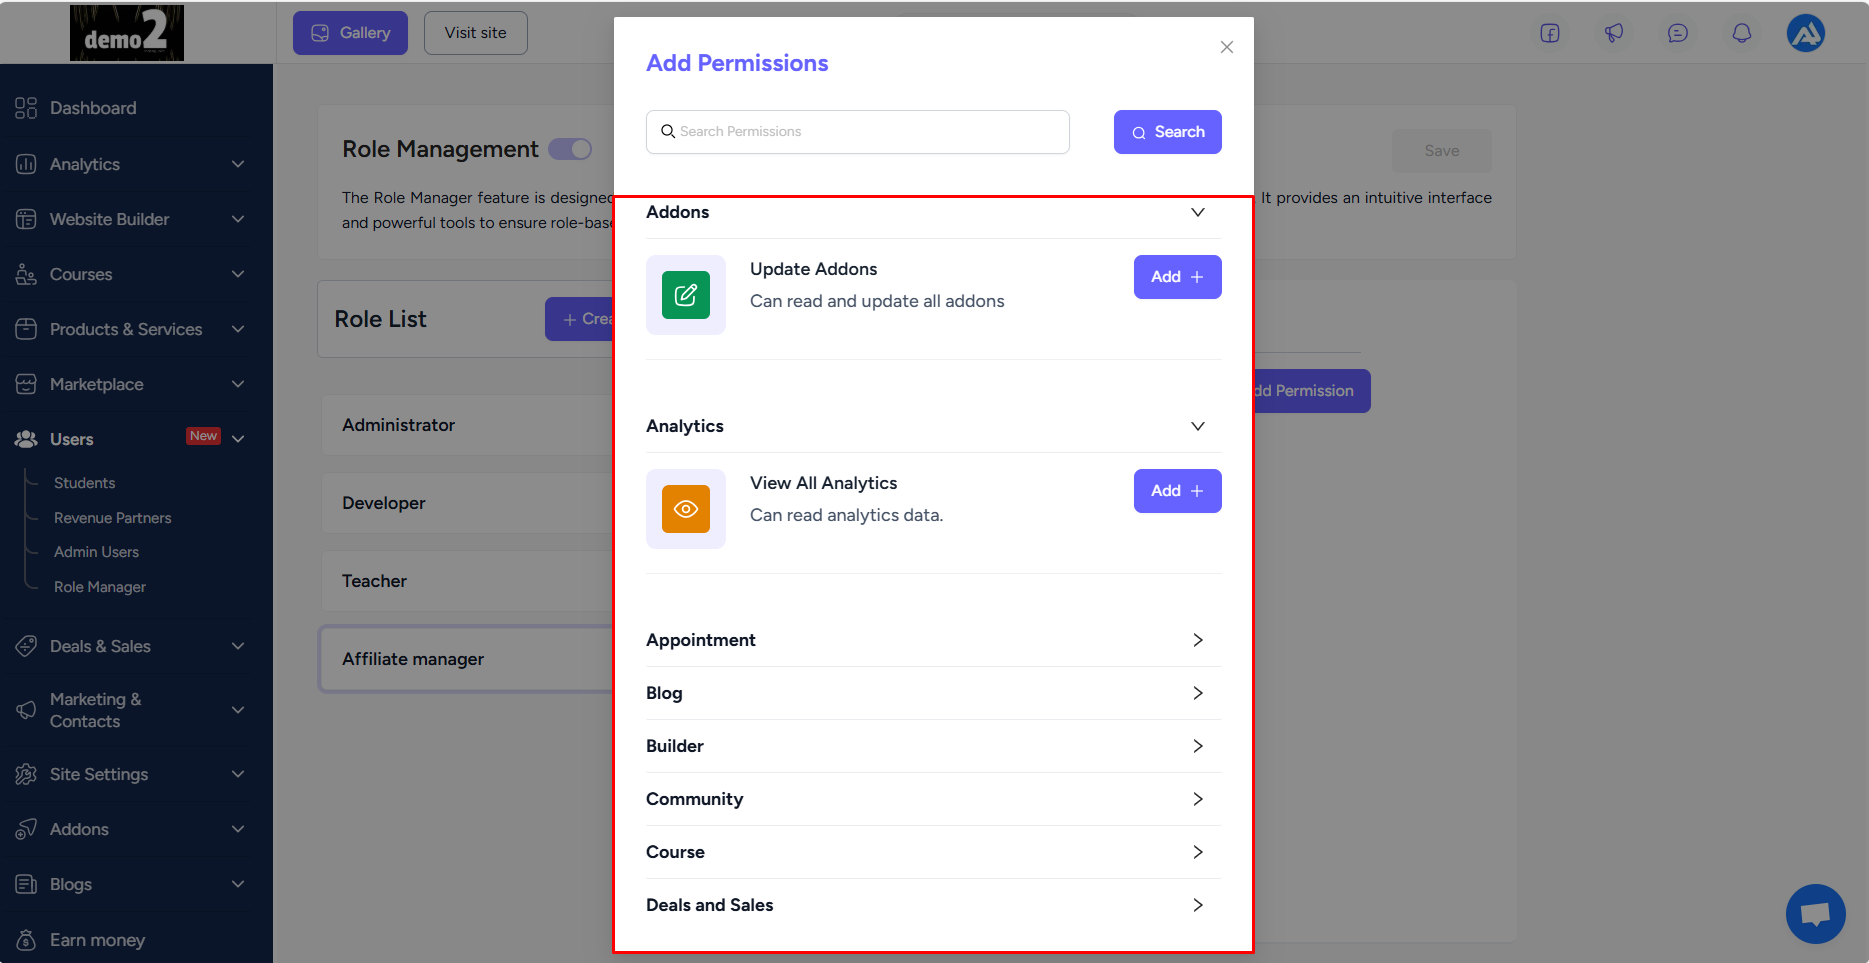
Here, you’ll see all the available permissions that you can set for the role in a categorised way. To quickly find it, simply search with the name. Click the Add button on any permission to add it to the role. Notice that there’s a description for each one so that you know exactly what permissions you are granting.
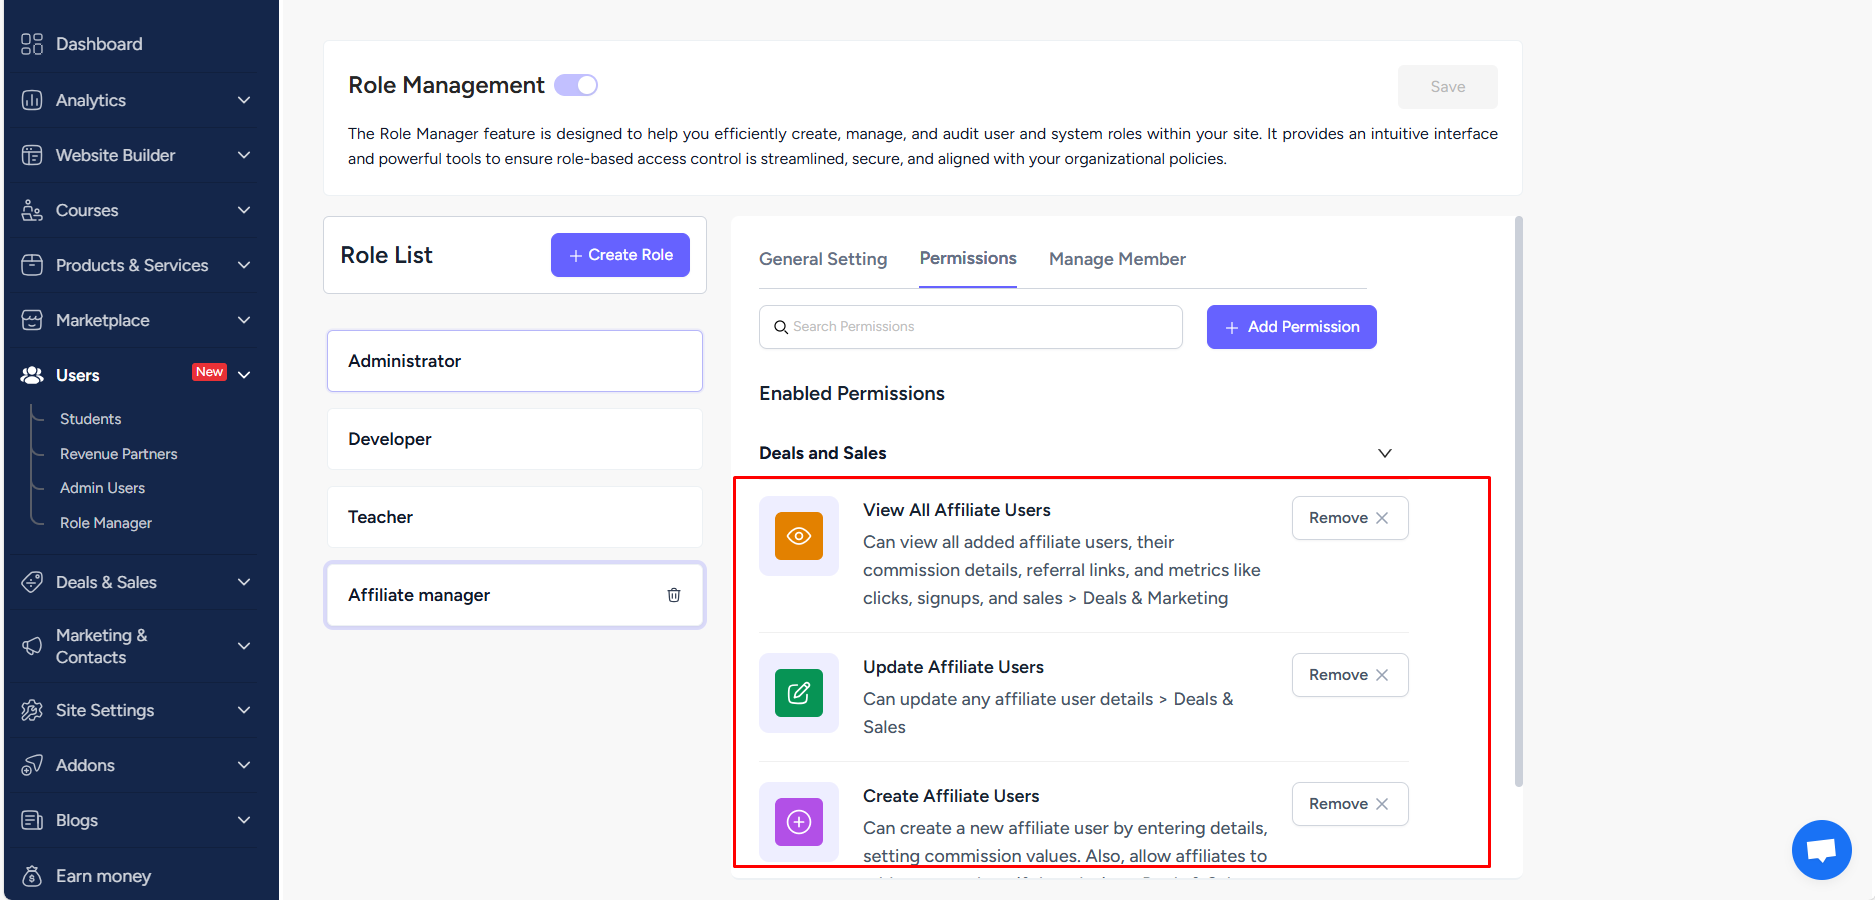
You can view all the enabled permissions for a role and remove any permission, when necessary. Also, use the search feature to quickly find and see any particular enabled permission.
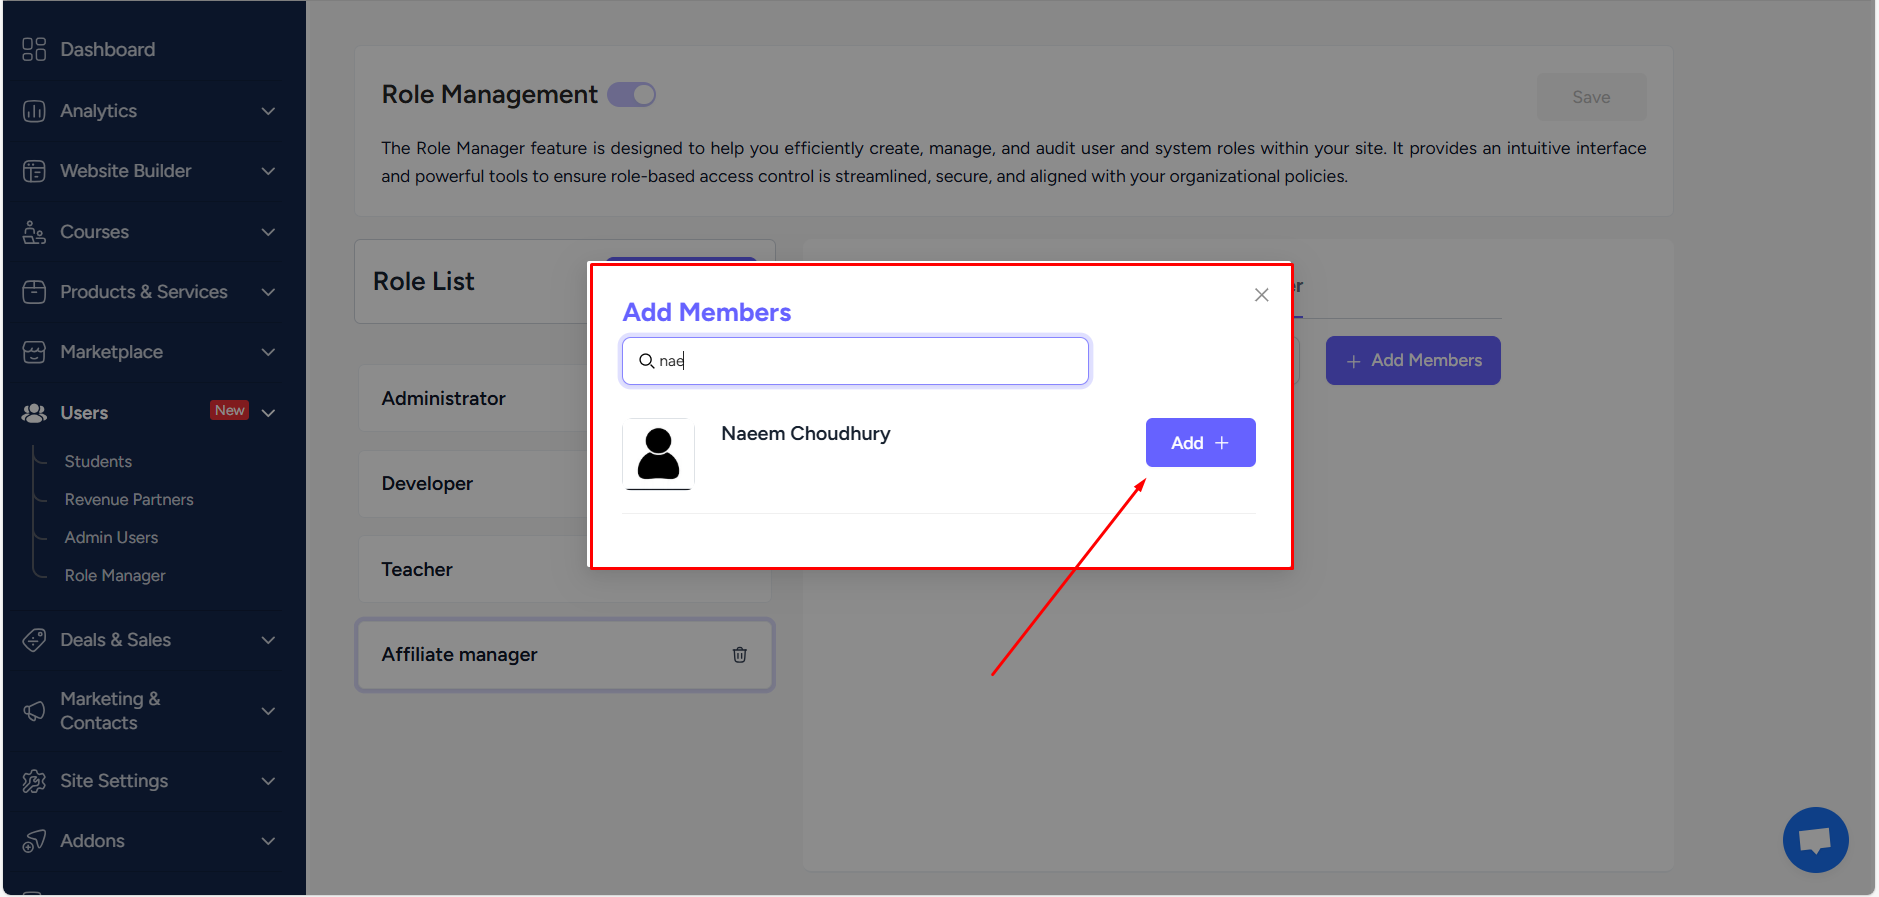
Once you set up permissions, you can go ahead and add the users/members in the role. To do that, go to Manage Member tab and click the Add Members button.
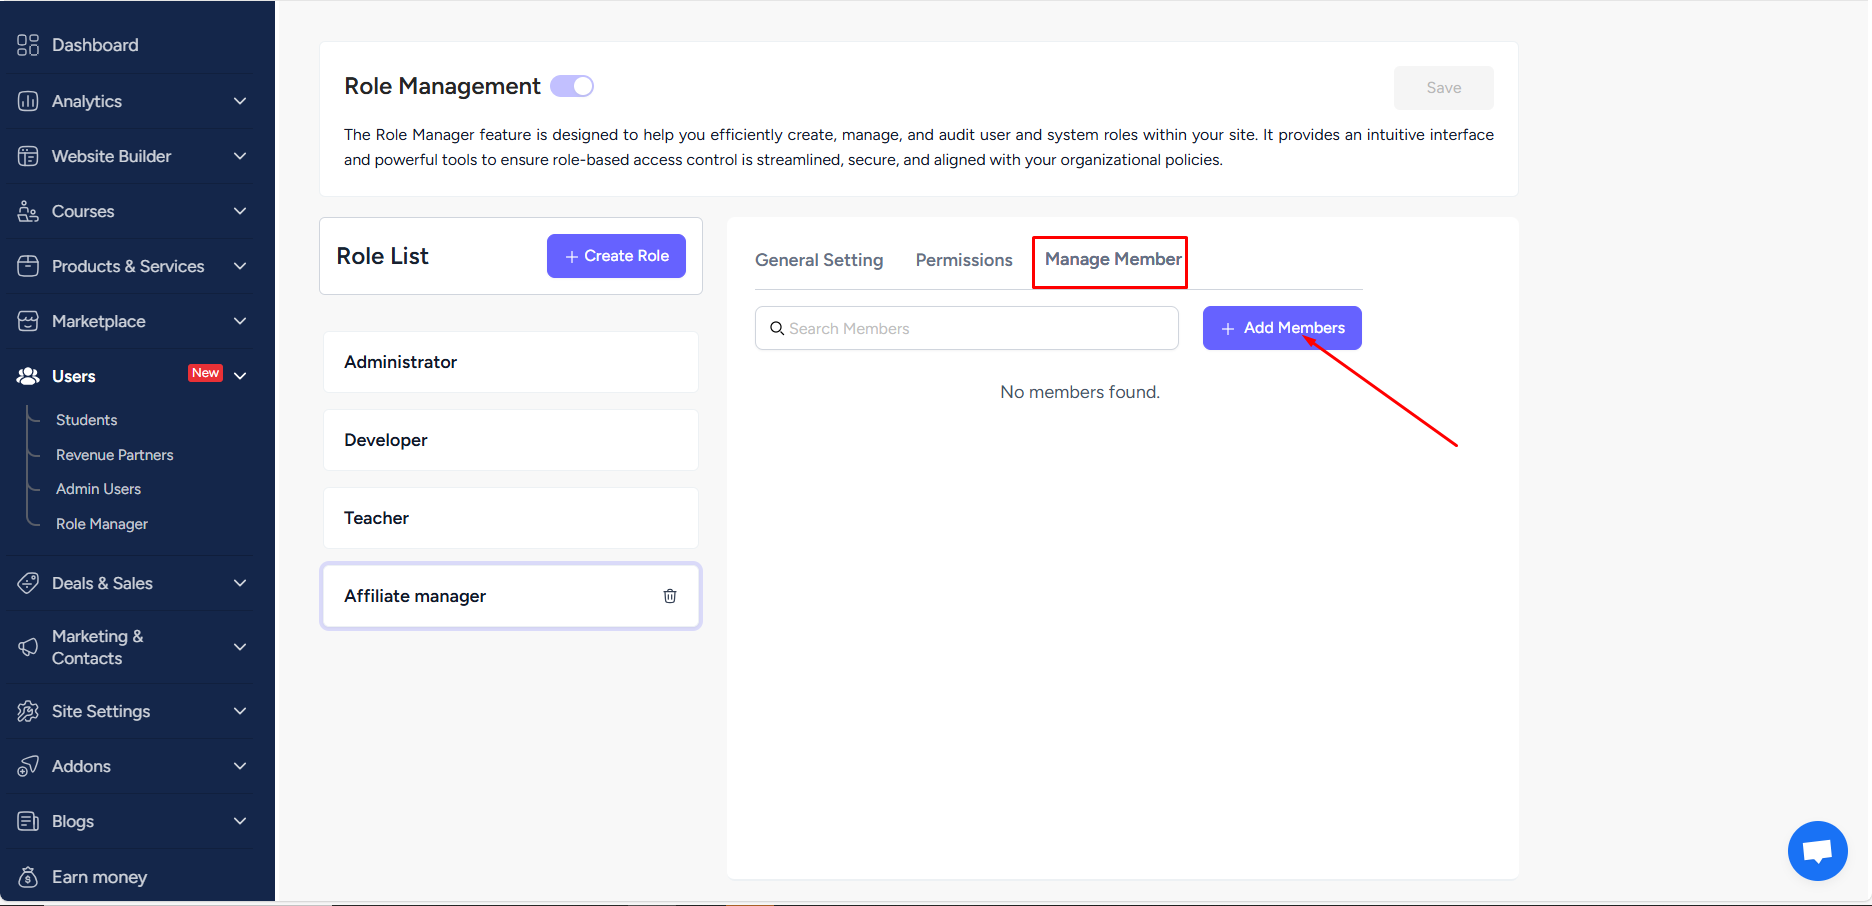
You can search and add any site admin, teacher, developer, or admin user. Adding a user to a role means the user will only access whatever permissions you’ve set for the role.
On the added user’s dashboard, they can only see as much as you’ve given the permissions. The screenshot below illustrates a user having the following permissions: View All Affiliate Users, Create Affiliate Users, and View Affiliate User Details.
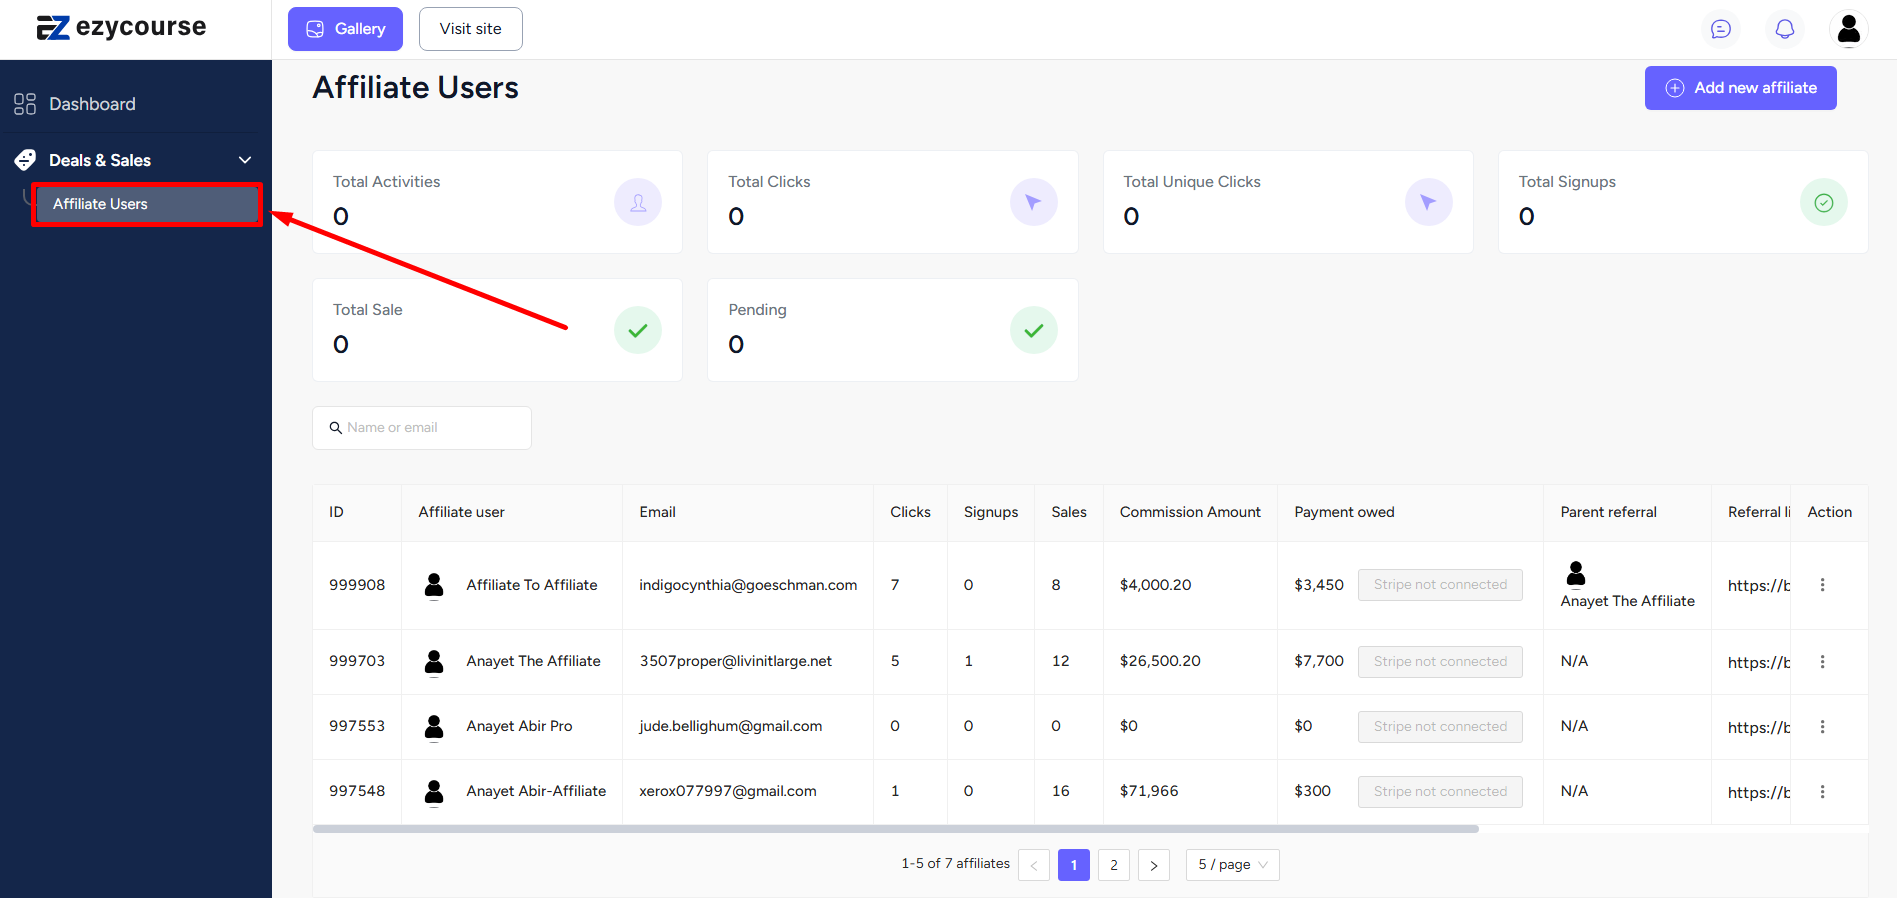
Notice that the user only has access to the Affiliate Users menu. As per the permissions set, the user can create new affiliate users and see details of any affiliate user. But, the user will not be able to edit or delete any user since there are separate permissions for those actions.
This way, you can use the role manager feature to restrict any user and only allow them to have access to specific parts of your EzyCourse dashboard.
The three default roles are available for all. But, it depends on your EzyCourse plan how many custom roles you can create.
Basic Plan: Can create three custom roles. And can only have one user added to only one role i.e. cannot add a user to multiple roles simultaneously.
Pro Plan: Can create five custom roles. Pro users also cannot add one user to multiple roles simultaneously.
Unlimited Plan: Can create up to seven custom roles. And can add a single user to a maximum of three roles at the same time.
Elite: Users on the Elite plan can create an unlimited number of custom roles and can add a single user to unlimited roles.