
Back
Track Server-Side Facebook Ad Conversions
What is it & why you need it
You can now track exact conversions from your Facebook ad campaigns with our Facebook Server-Side Conversion.
With this feature, you’ll be able to track every purchase made through facebook ads. This will not only make Facebook show your ads to more people, but also to people more likely to convert.
So, if you're running Facebook Ads to sell courses, coaching, or digital products — this feature will significantly boost your ability to scale profitably and track real business results.
How it works
All you have to do is provide the Pixel ID and the Access Token of the pixel. And then you can track purchases made through your facebook ads.
With every purchase, EzyCourse will automatically send a purchase event to Facebook using your Pixel ID and Access Token. The information sent will typically be product ID, name, price, payment gateway used, etc.
You can view the tracking and get all the analytics from your Facebook business account.
How to get started using it
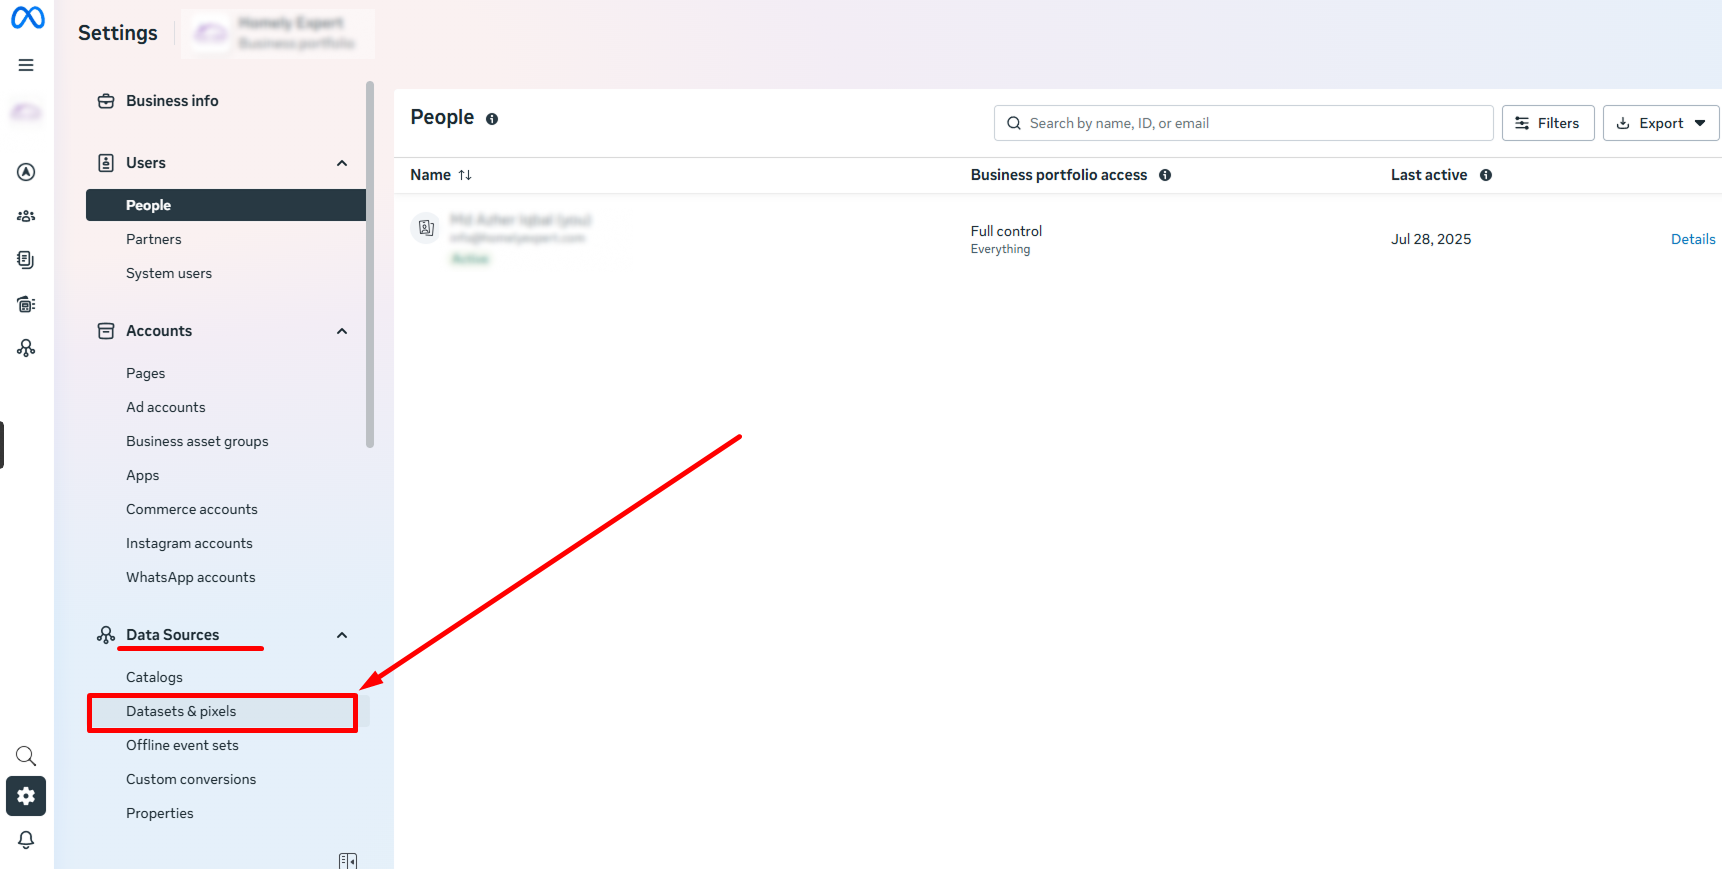
First, log in to your Meta Business Account or create one if you do not have any. From there, go to the Settings menu from the left sidebar.

Expand the Data Sources menu and go to the Datasets & Pixels option.
Here, you can add a new Pixel. If you wish to use an existing Pixel, then simply select the pixel and copy the Pixel ID.

Before we see where you have to paste the Pixel ID on your EzyCourse dashboard, let’s first see where to get the Access Token from.
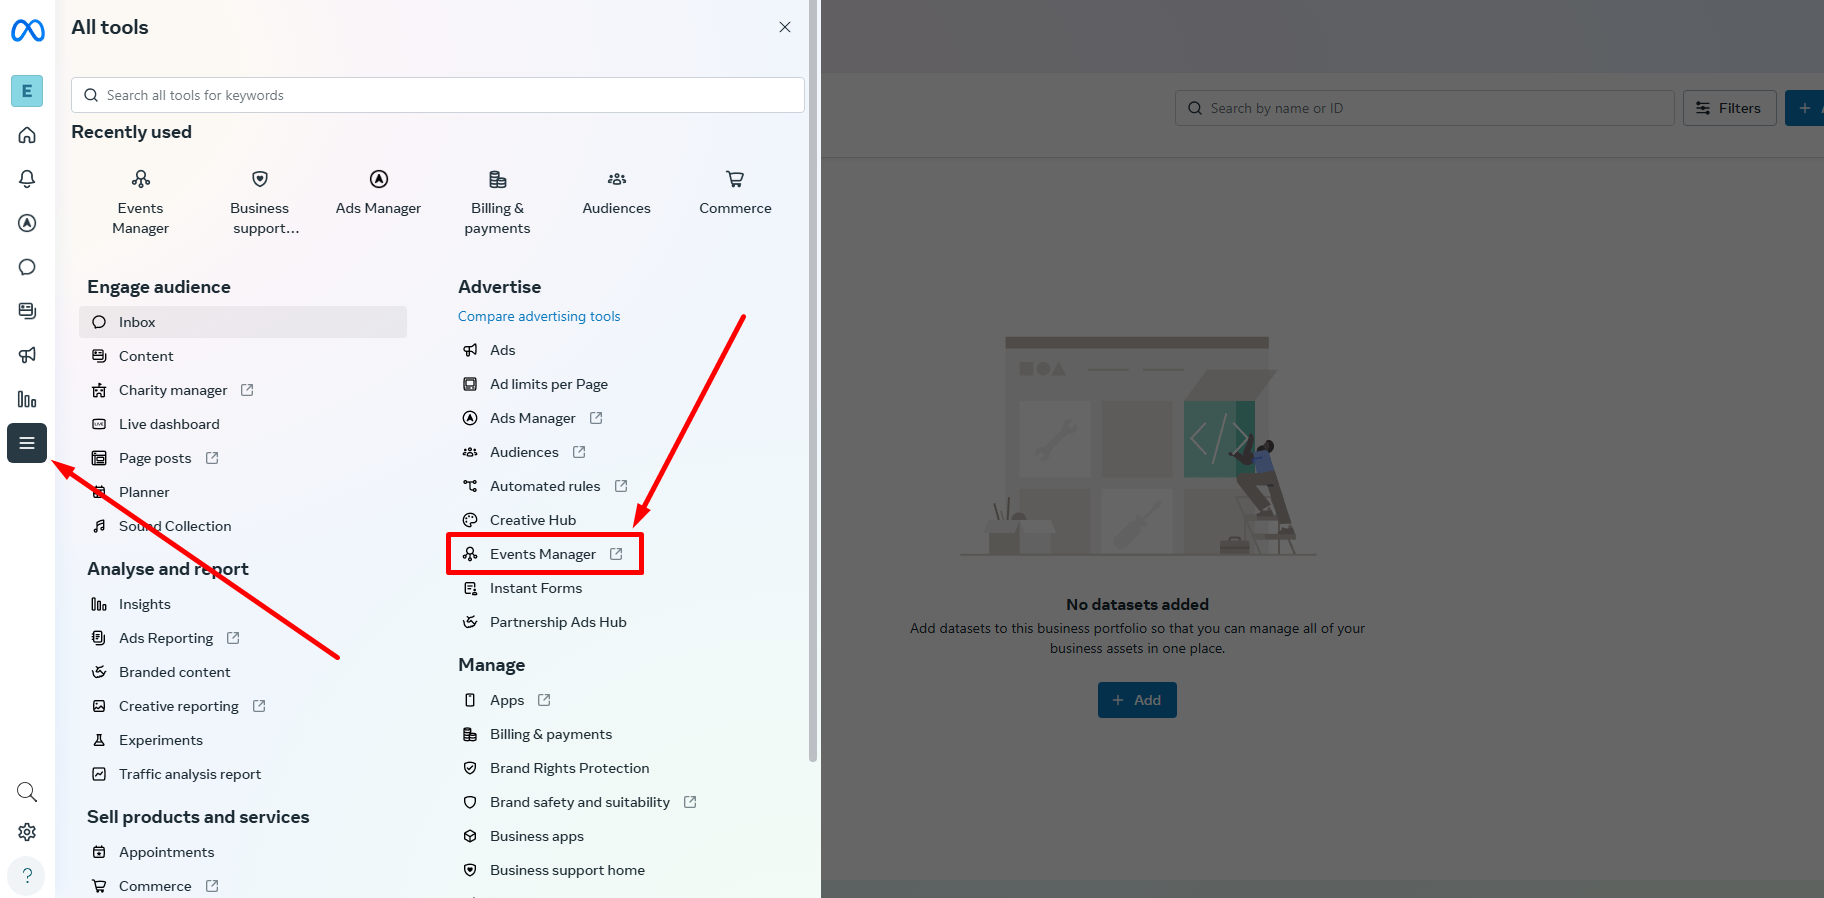
Go to the events manager page. You can go from right where you copied the Pixel ID.

Or, from the left sidebar. Select the All Tools icon and then click Events Manager.
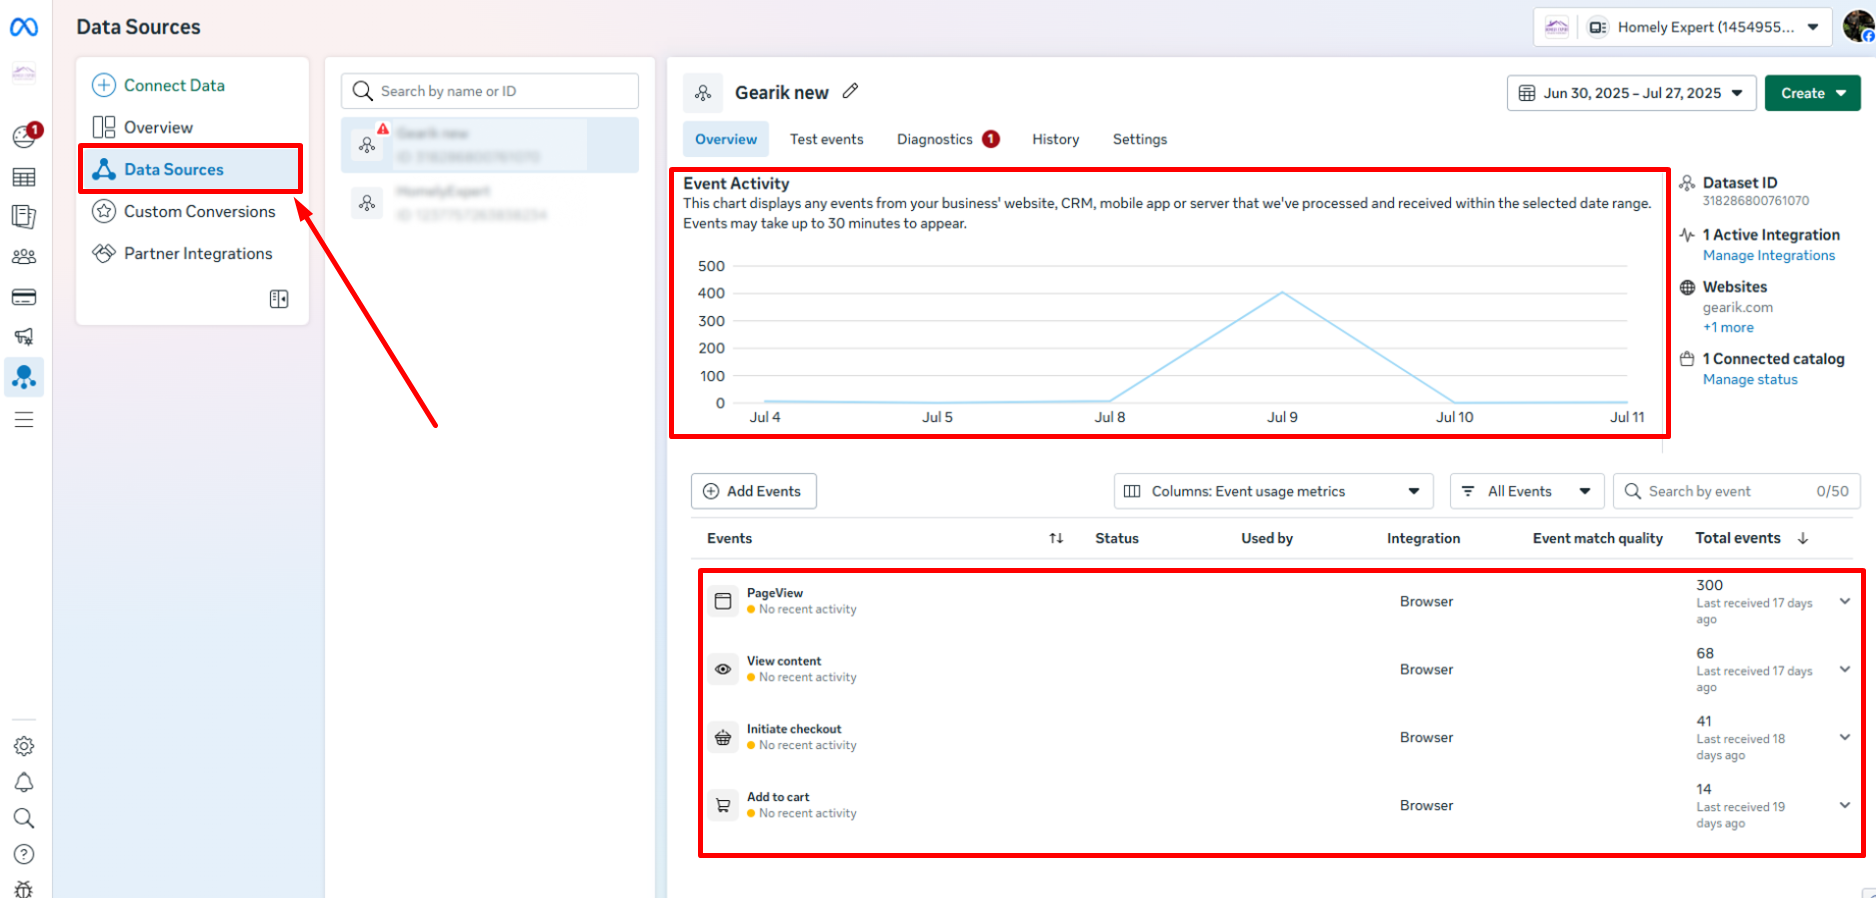
Once you set up the purchase event, you’ll be able to see all the analytics and event triggers from the Data Sources menu.
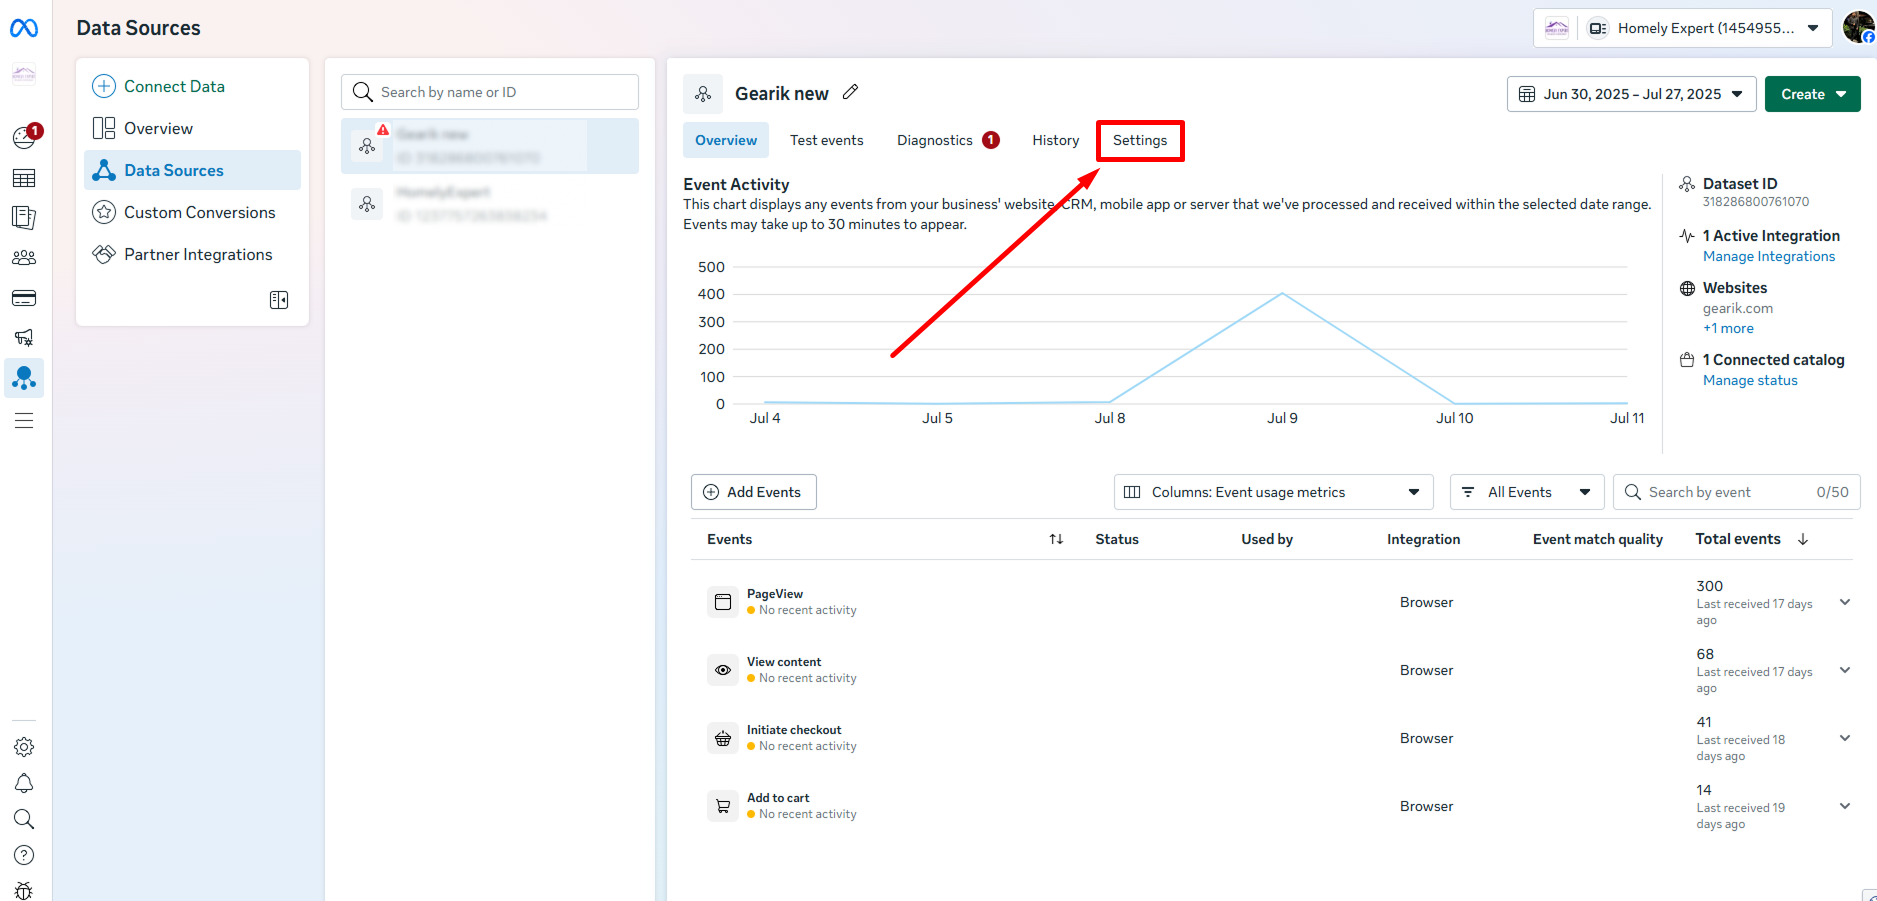
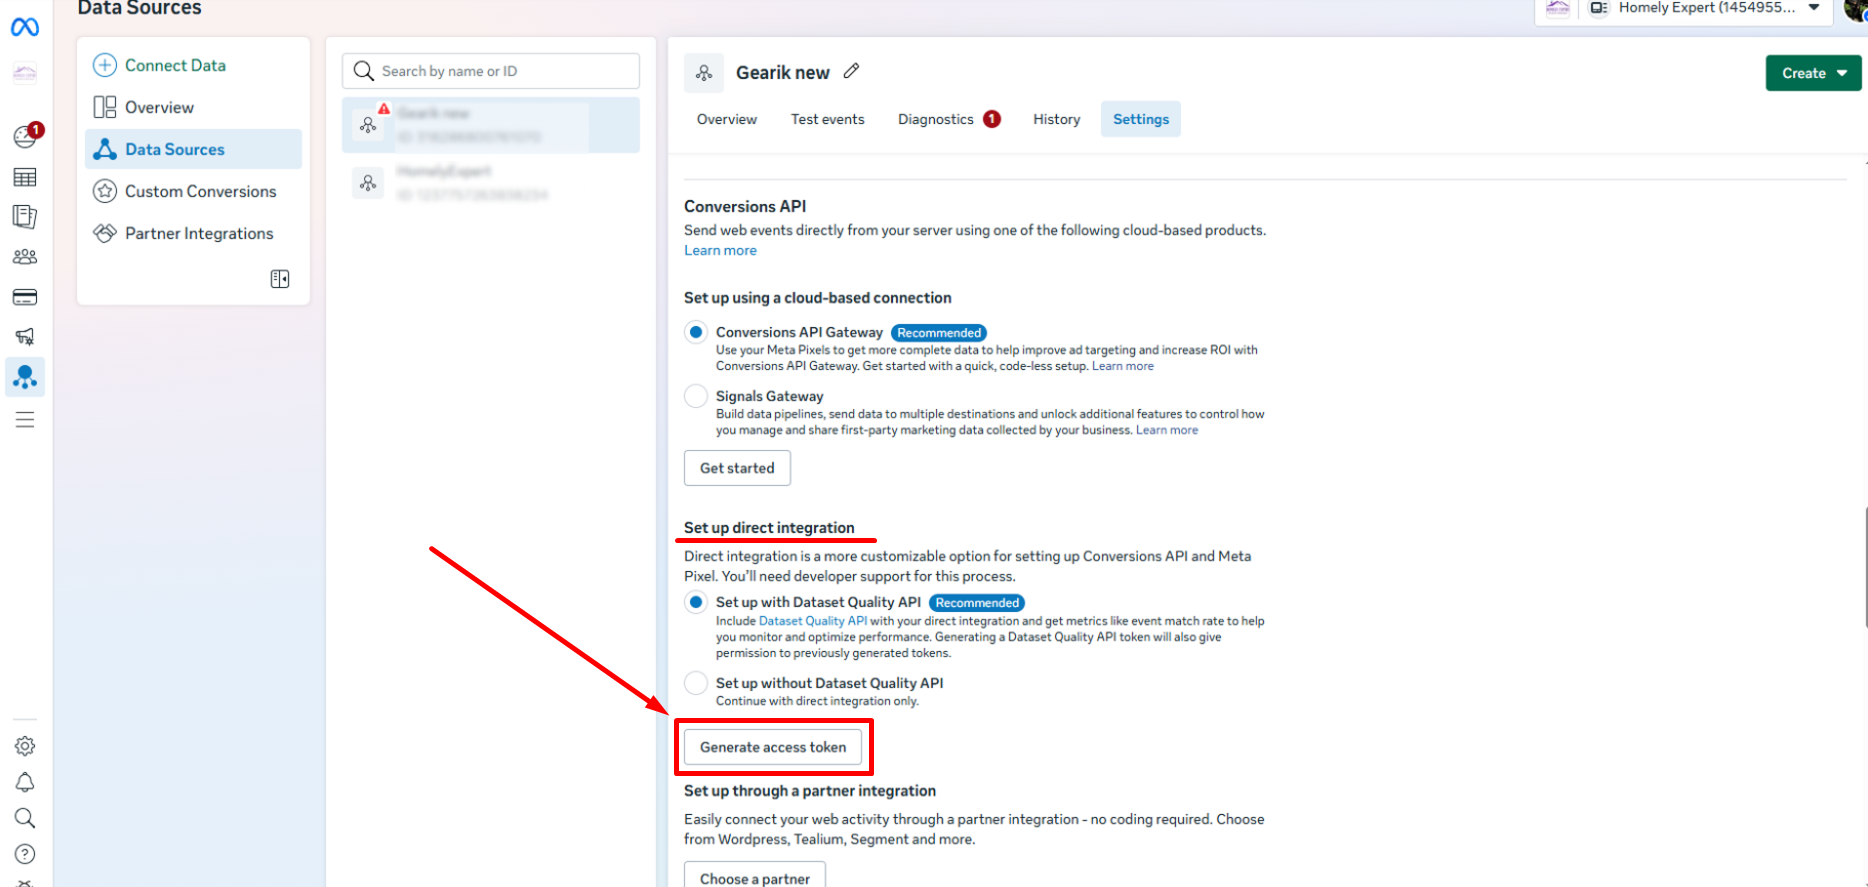
Go to the Settings tab to find the Access Token.
Scroll down to the “Set up direct integration” section and click the Generate access token button.
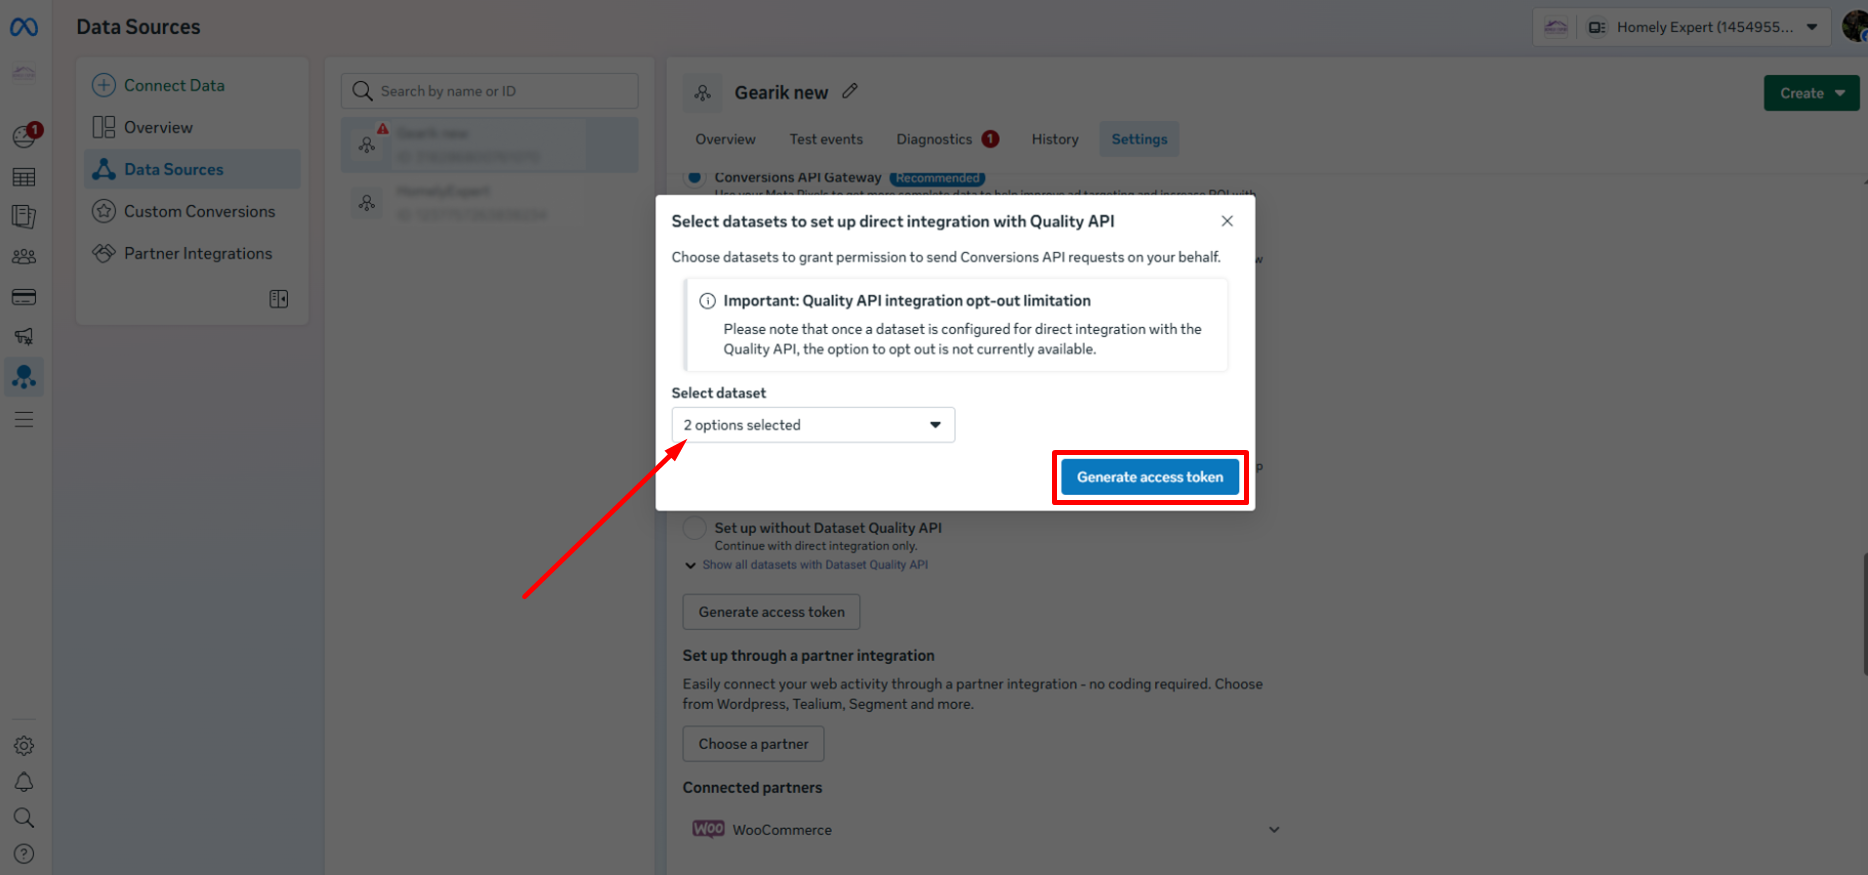
On the popup, select your Pixel from the dropdown and click the Generate access token button.
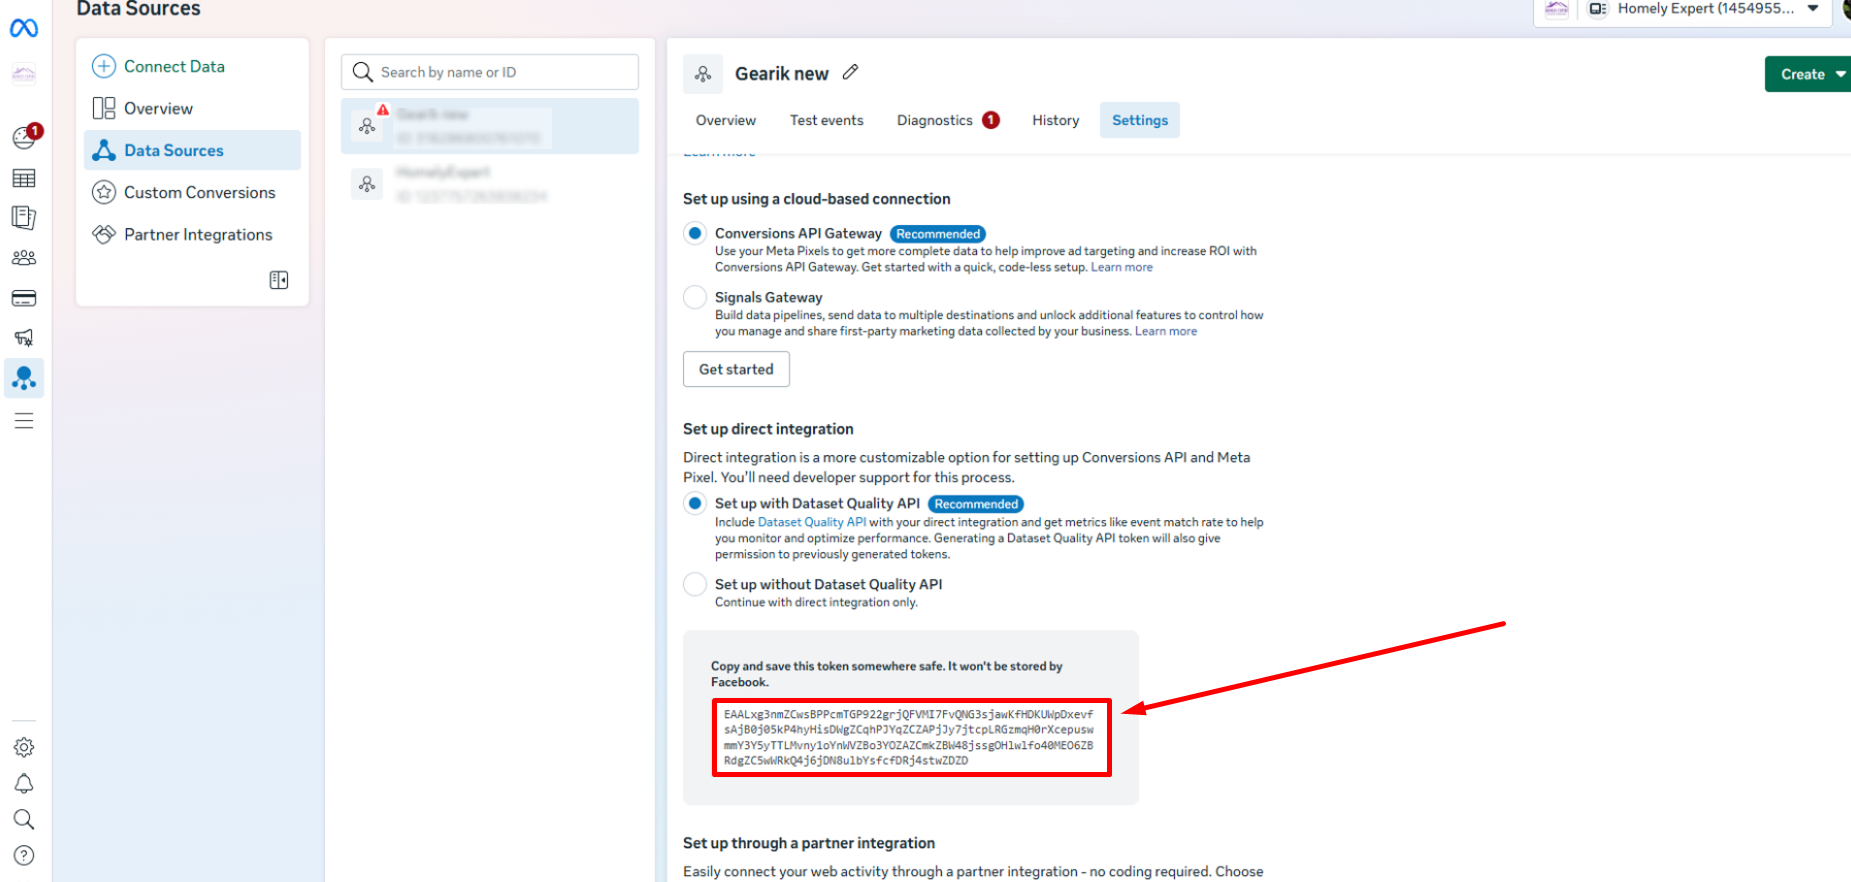
Click on the generated token to copy it.
[Note: You should ideally save the access token somewhere.]
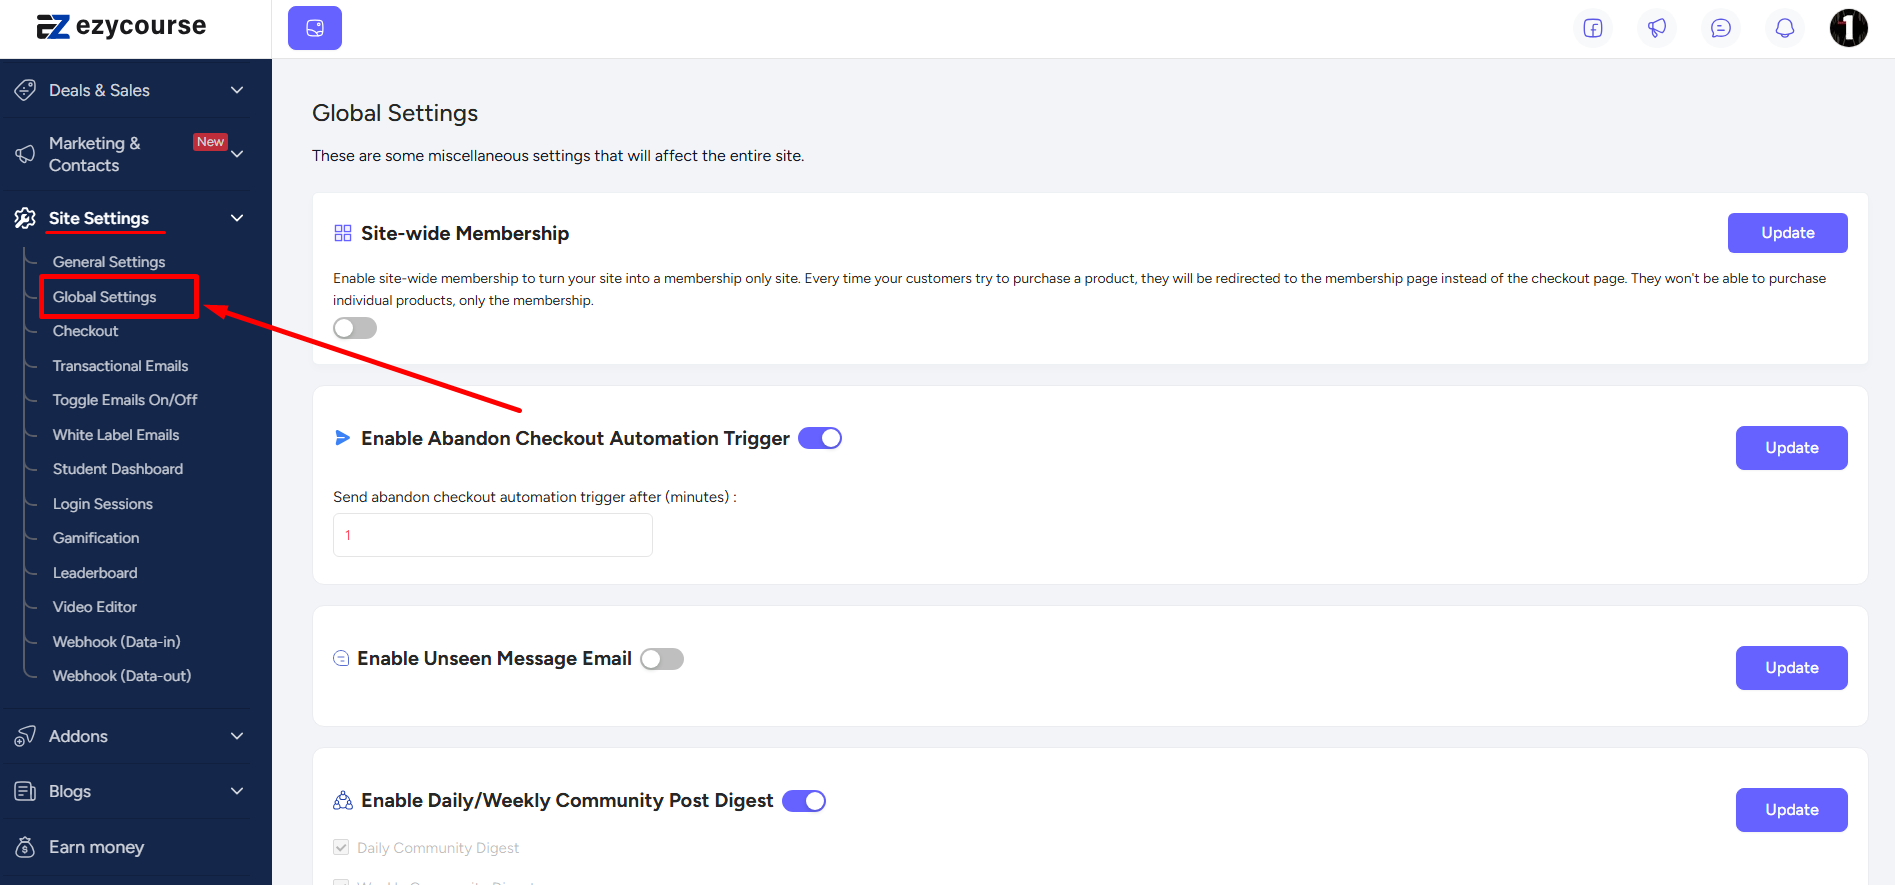
Now that you have both the Pixel ID and the Access Token, let’s see how to add them to your platform. First, log in to your EzyCourse dashboard and navigate to Site Settings -> Global Settings.
Scroll down to the bottom of the page to find the “Facebook Server Side Conversion” setting. Paste the Pixel ID and Access Token here in the respective fields. And then click the Update button. And that’s it. You’ll be able to track every purchase made on your website through Facebook ads.

You can also click the Validate button to check whether the access token is valid and linked to the Pixel ID. This will even show all the other Pixel IDs linked to the access token.


⚠️ [Note: If you ever change or update the existing Pixel ID in the global settings, you must update or re-enter the Access Token also at the same time. Updating only the Pixel ID will result in an unauthorized Access Token.]