Back
Zoom is Live Now in EzyCourse
You can now connect your Zoom account inside EzyCourse and host live meetings, community interactions, and course live lessons.
Let’s see how to create a live meeting using your Zoom account. But, first you have to connect your Zoom account, free or paid. To do that, go to Site Settings → General Settings → and then click the Connections tab. Click connect and simply sign in to your Zoom account.

Create a Zoom Meeting
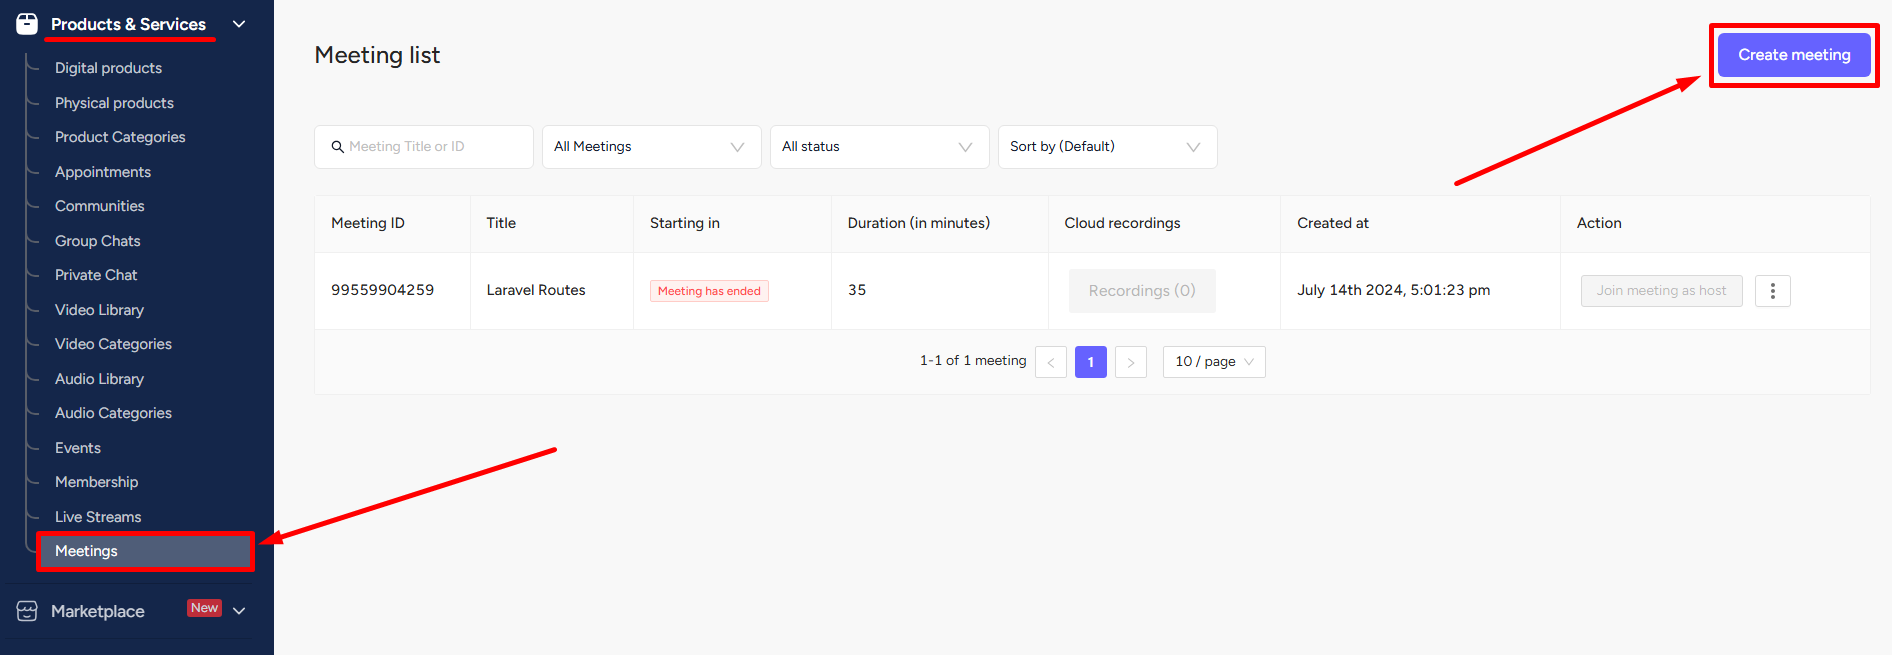
Navigate to Meetings under Products & Services. Here, click on the Create meeting button on the top right corner of your screen.
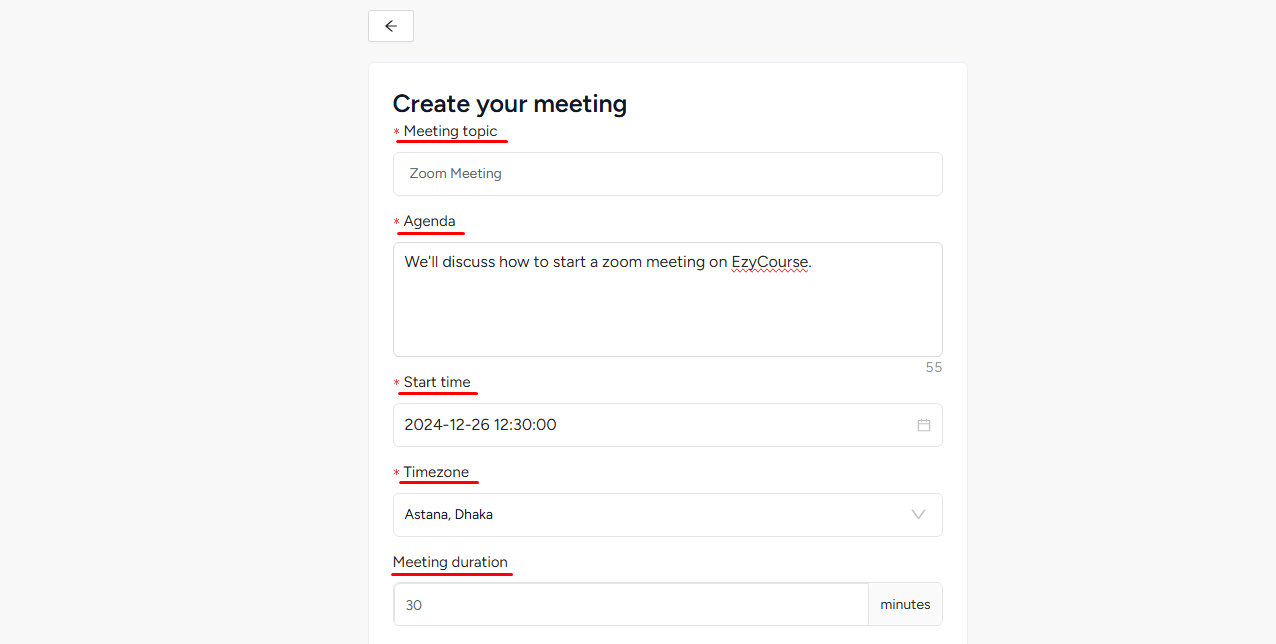
After clicking the Create meeting button, you need to fill up some details like meeting topic, agenda, set the date-time, select time zone, and the meeting duration accordingly.
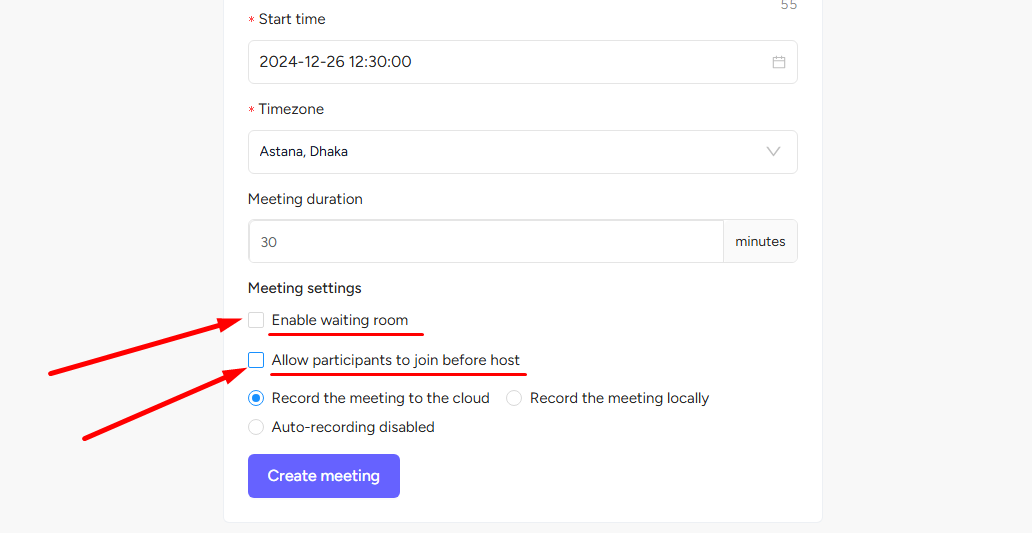
From here, you can also set some interesting meeting settings. You can either enable the waiting room or allow participants to join before the host.
More importantly, you can choose to download and save the meeting recordings automatically. You can save the meeting to the cloud or locally. Or, disable the auto-recording option if not necessary.
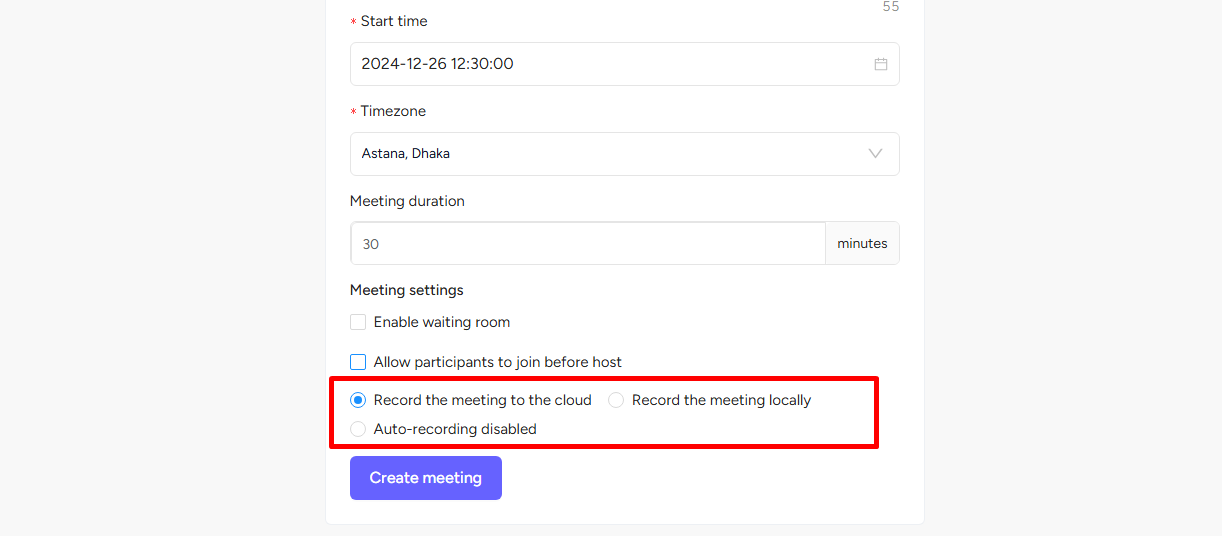
Note: You can get your Zoom meetings automatically recorded and uploaded to your gallery. Also, these recordings will be downloadable directly from your dashboard.
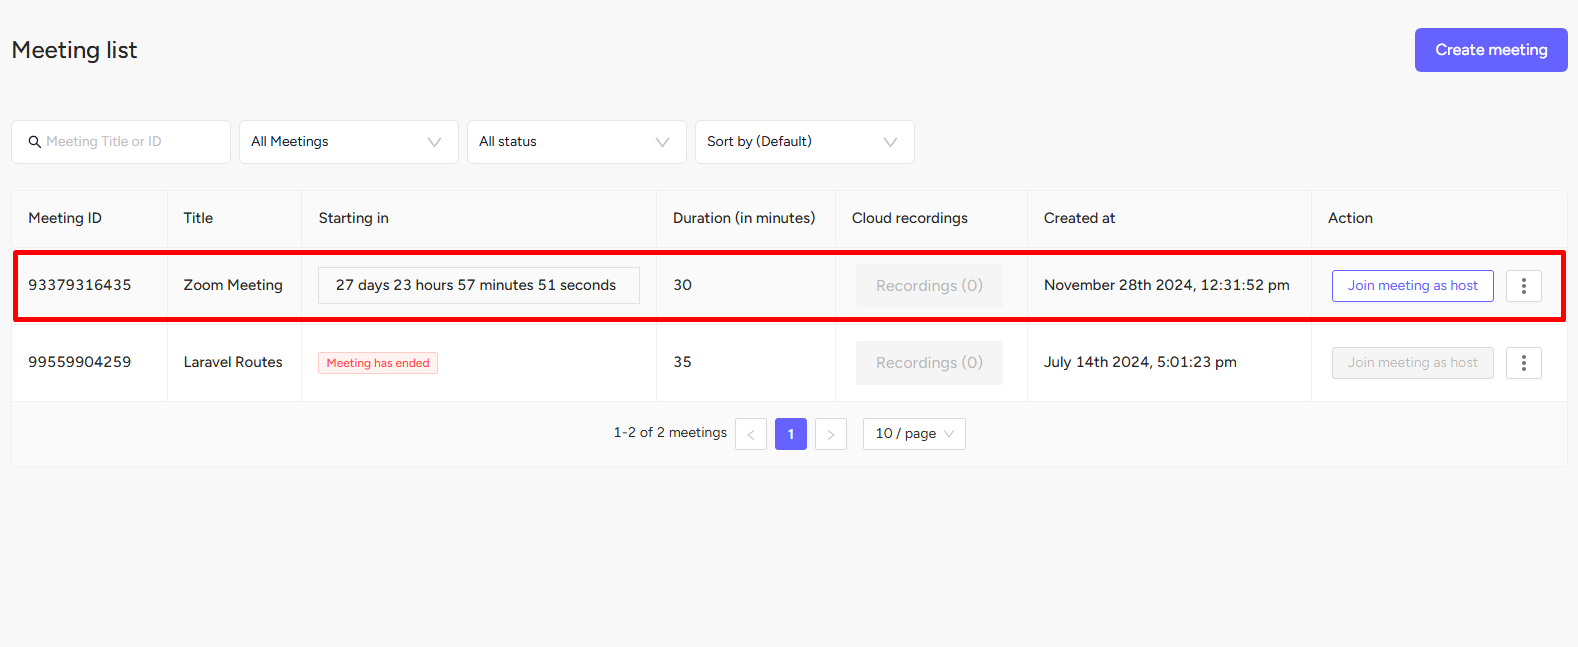
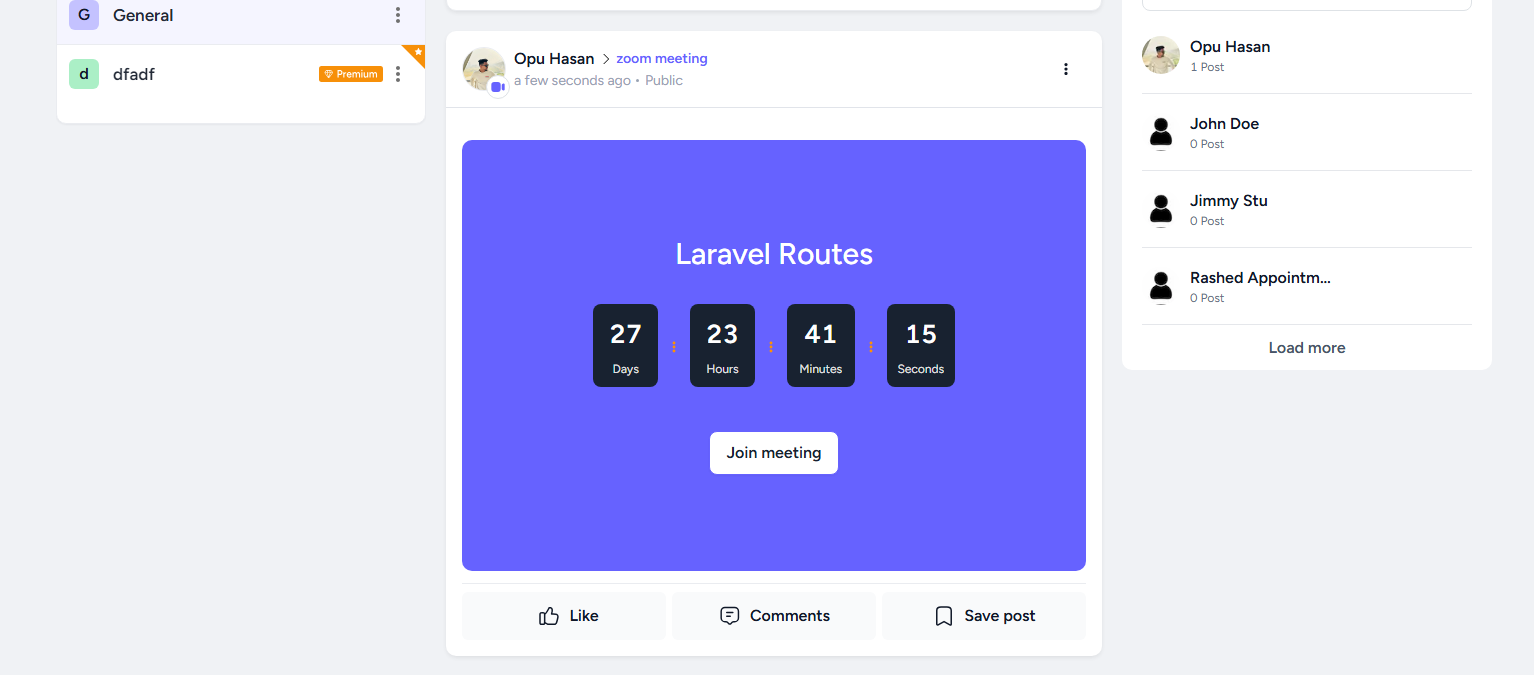
Once a meeting is created, you will be able to see all the details including the countdown timer. You can even join the meeting directly from your dashboard.
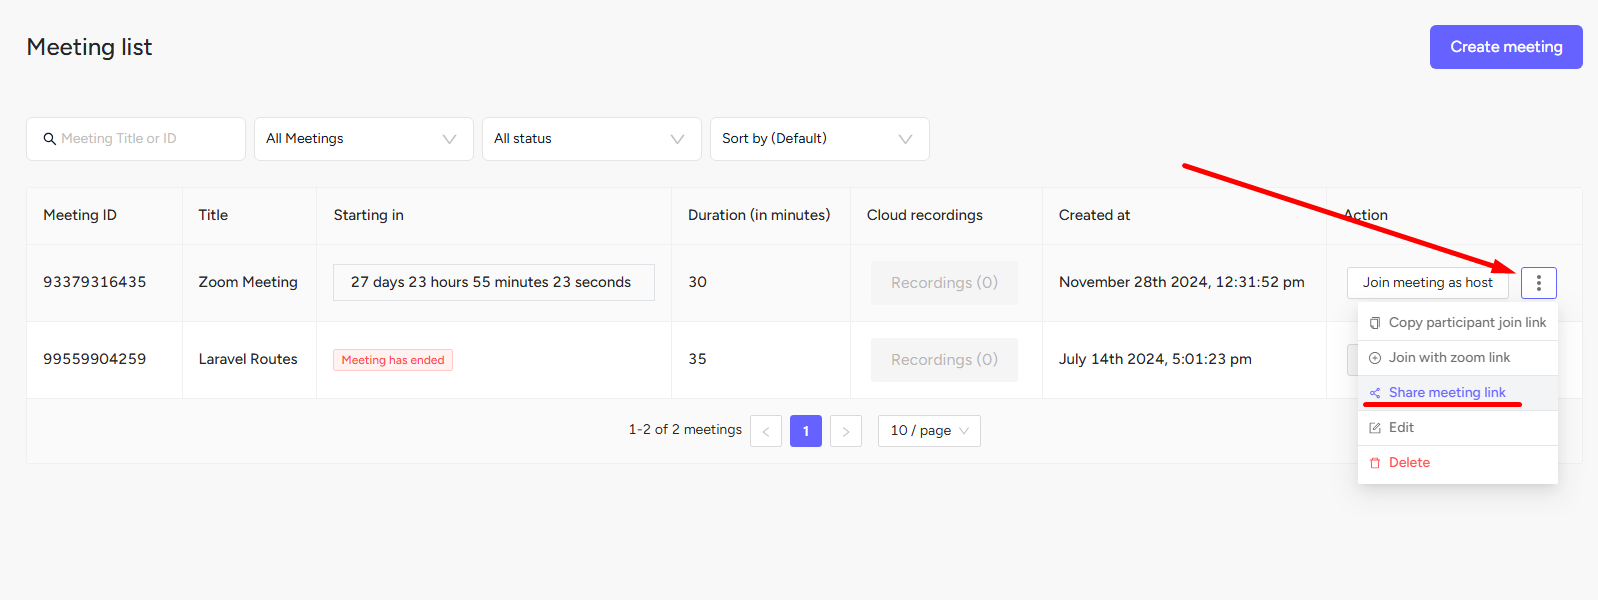
To share the meeting link, simply click the three dots and select the Share meeting link option.
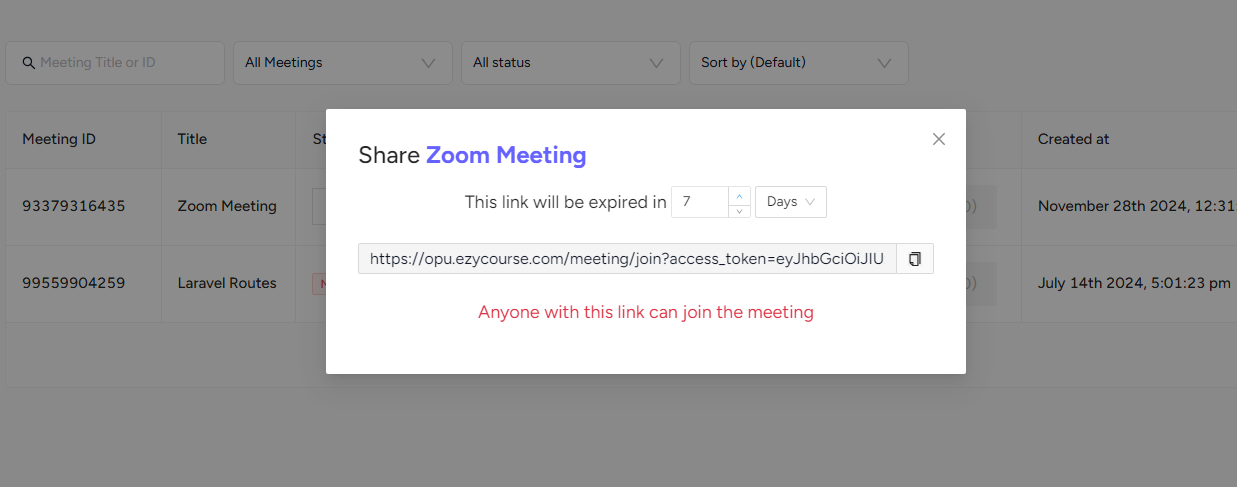
Copy the link from the popup to share it. You can choose to set the expiry time for the link.
You can change your host name i.e. how your name appears on meetings. Find the zoom profile settings from Site Settings → Global Settings.
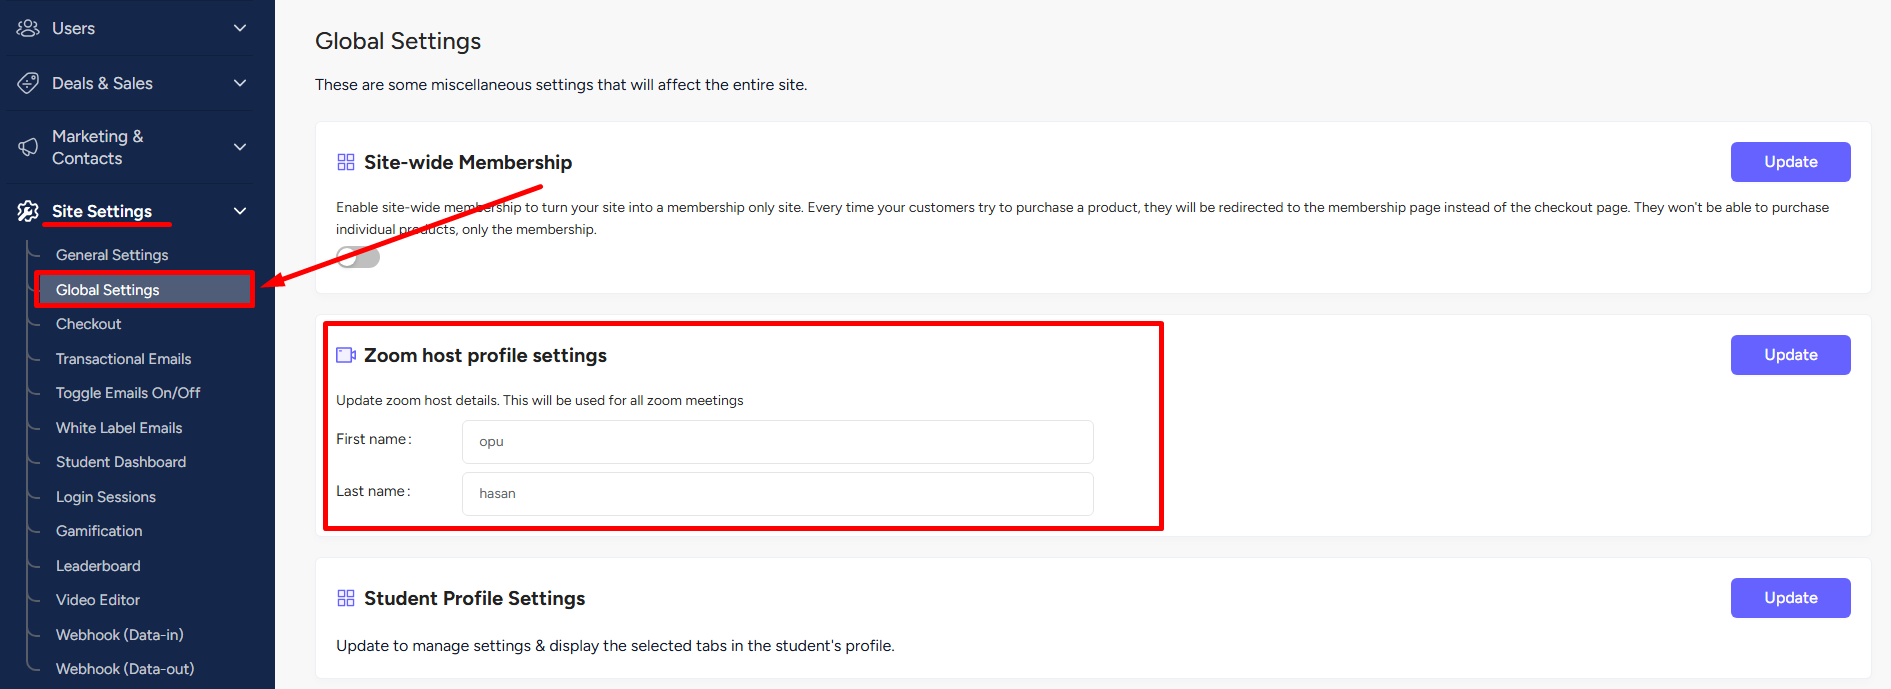
[Note: You can still change your name for any particular meeting once you are inside that meeting. But, it will only stay for that particular meeting. Entering new meetings will show the name which you set on the zoom host profile settings.]
Add Meeting To Communities
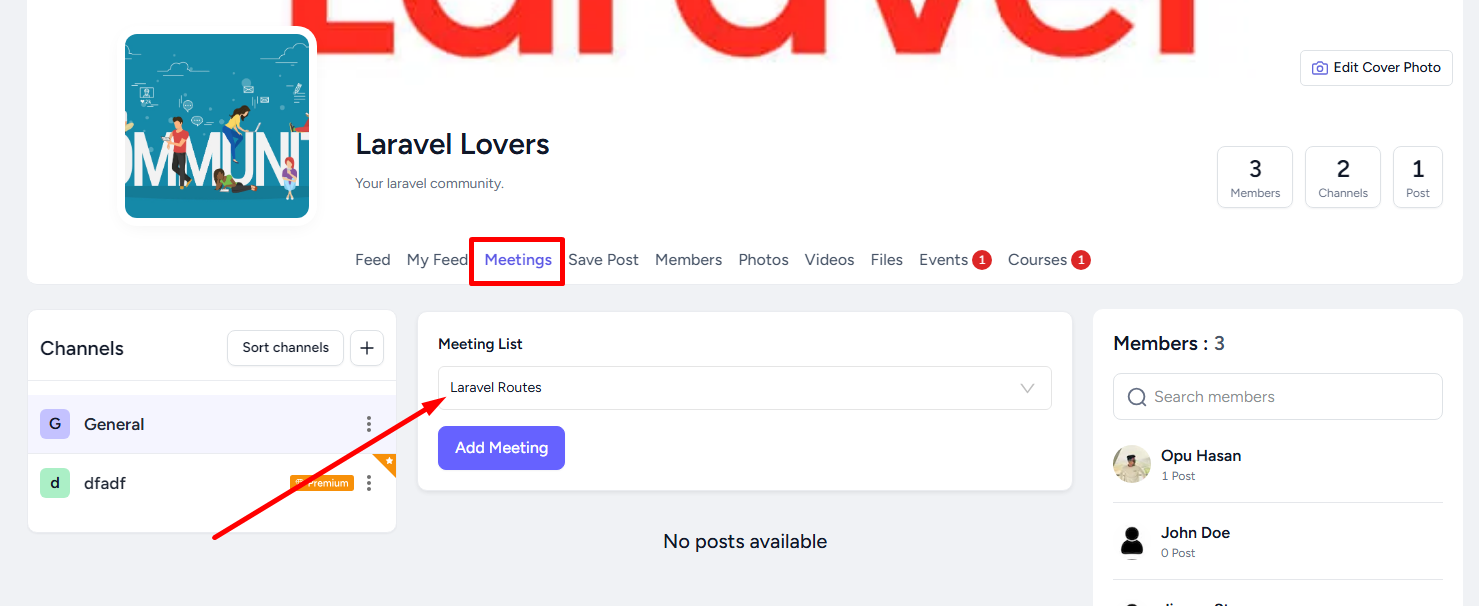
On your communities, you’ll find a tab called Meetings. This will show all the meetings you add to your community. To add a meeting, go to the Meetings tab. Select one from all the existing meetings on your platform and click the Add Meeting button.
This is how your Zoom meeting will be shown on the EzyCourse community.
You can also use zoom with other EzyCourse products including live lessons, appointments, and events.