Back
Create a Community Channel
How to Create a Community Channel
Create your own topic-based channels on the EzyCourse communities. In this article, we show how you can create, edit, and use channels in communities.
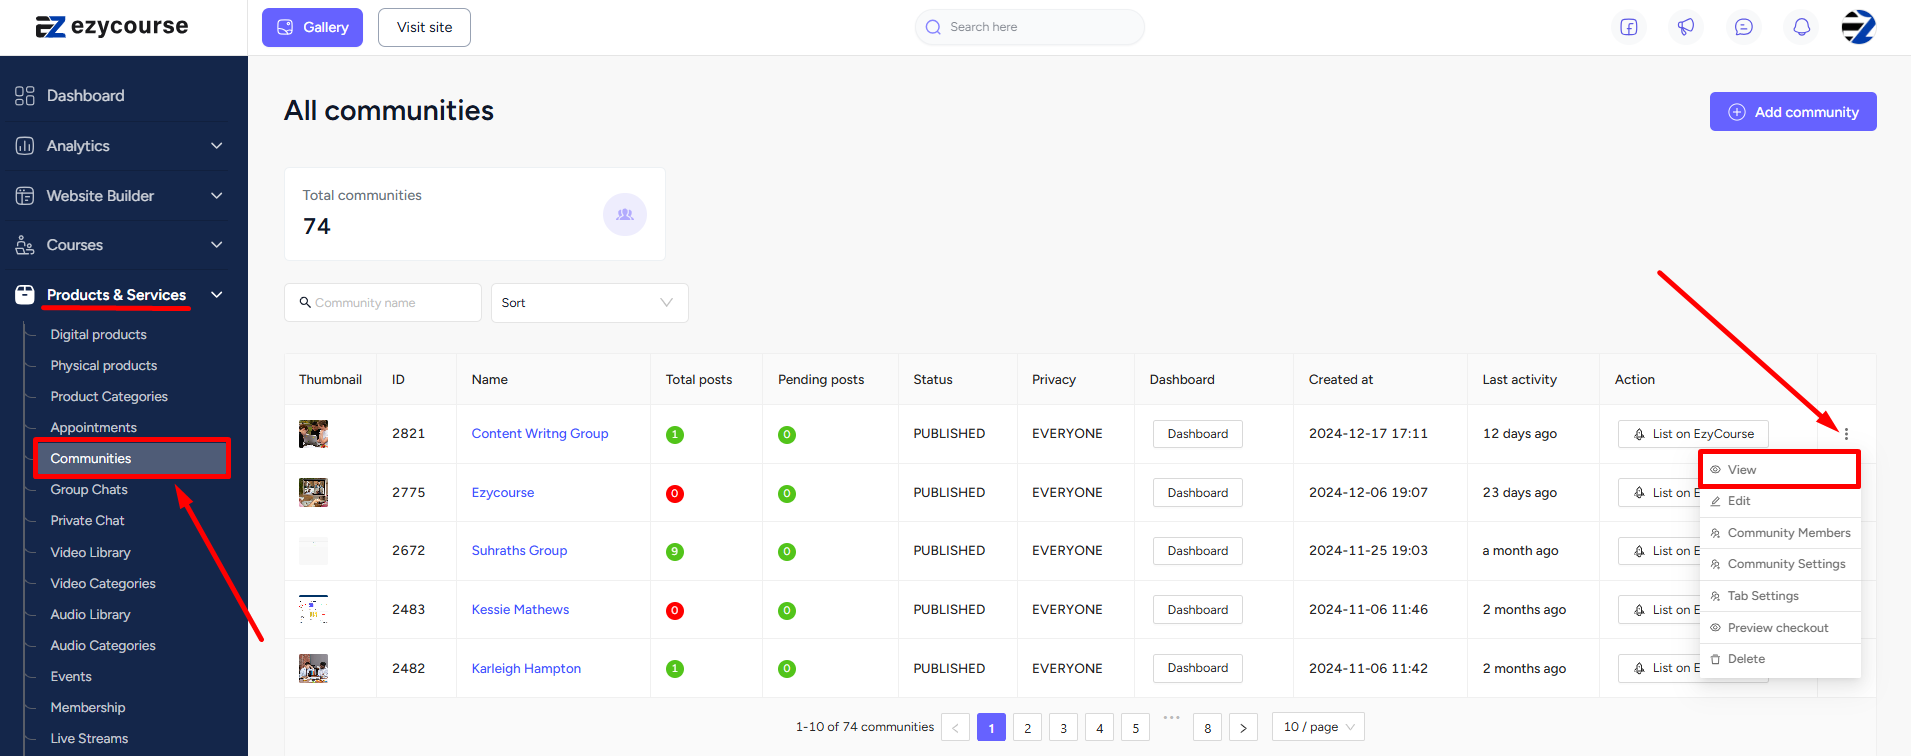
→ To begin, go to Products & Services -> Communities -> click the three dots and select View.
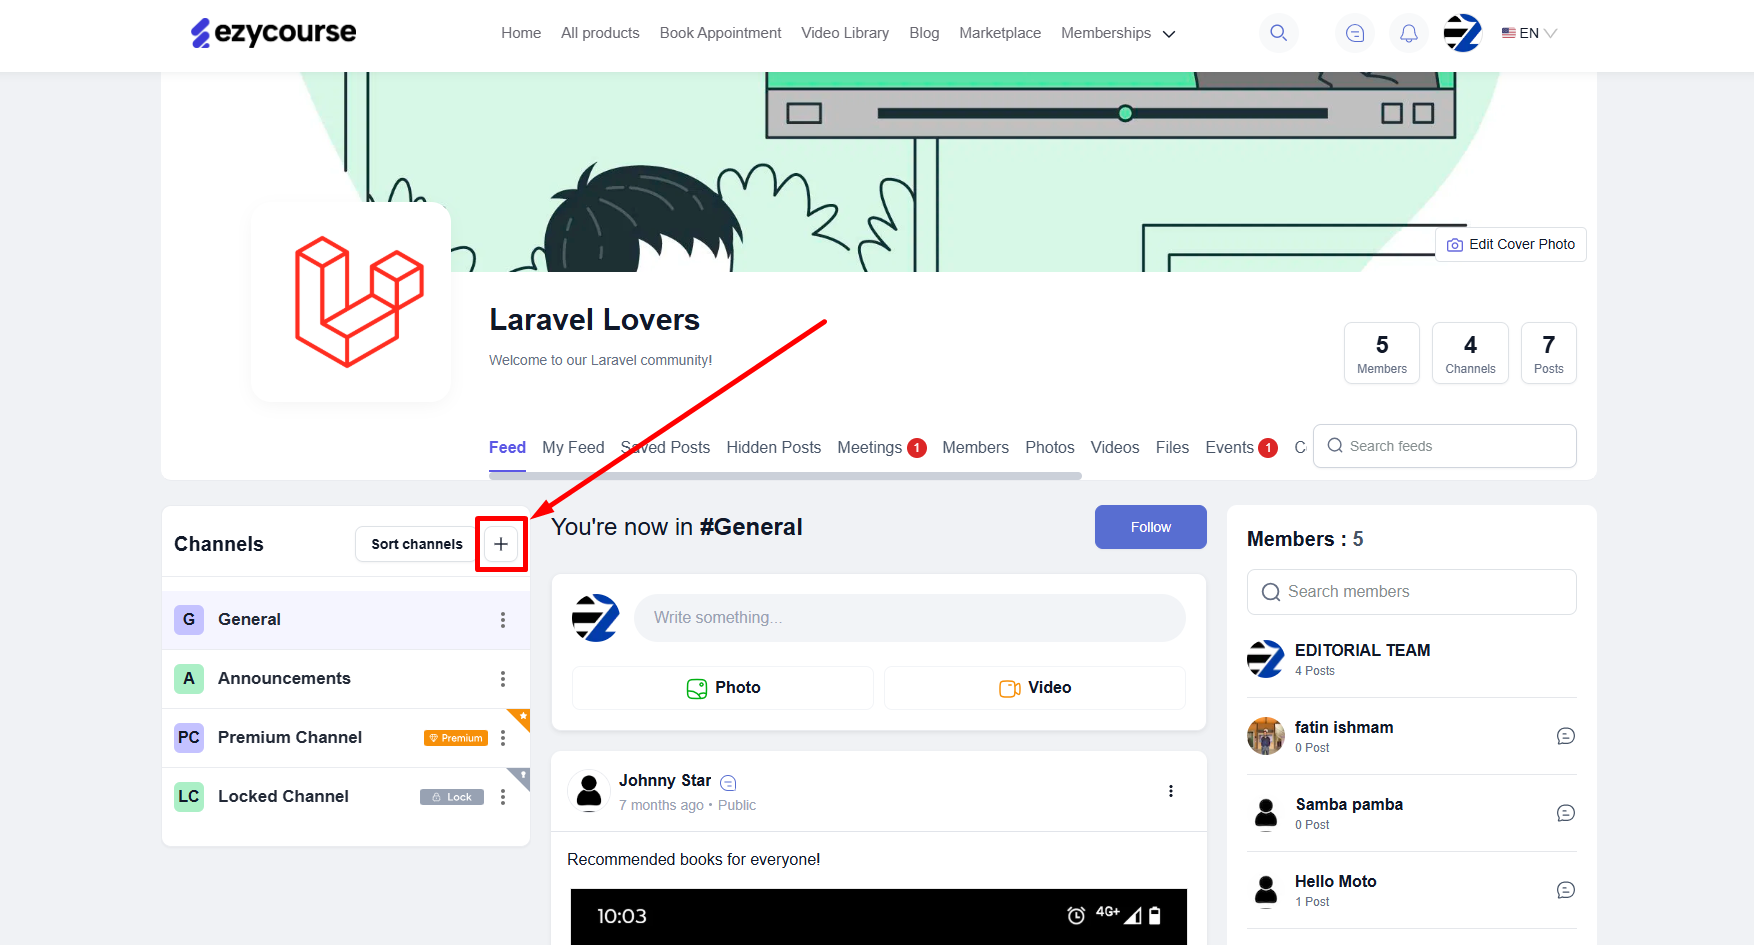
→ Now, to create a channel, first click the “add/plus” icon on the left side of your screen, on the Channels section.
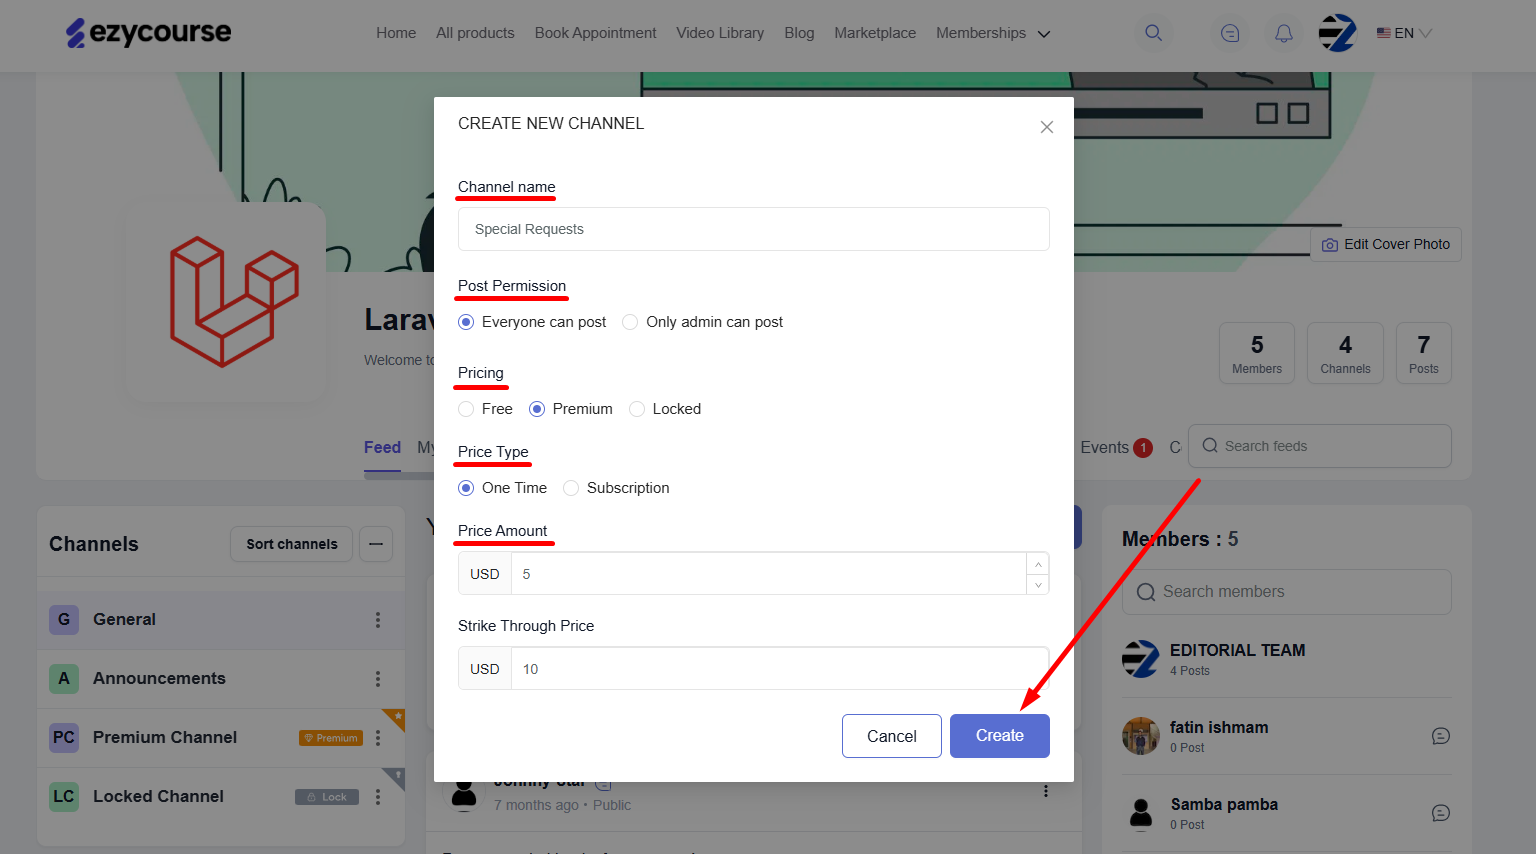
→ Give the channel a name, set the permission settings, and select whether to create a free, premium, or a locked channel. Click the Create button to create the new channel.
Also read : Premium and Locked Channels
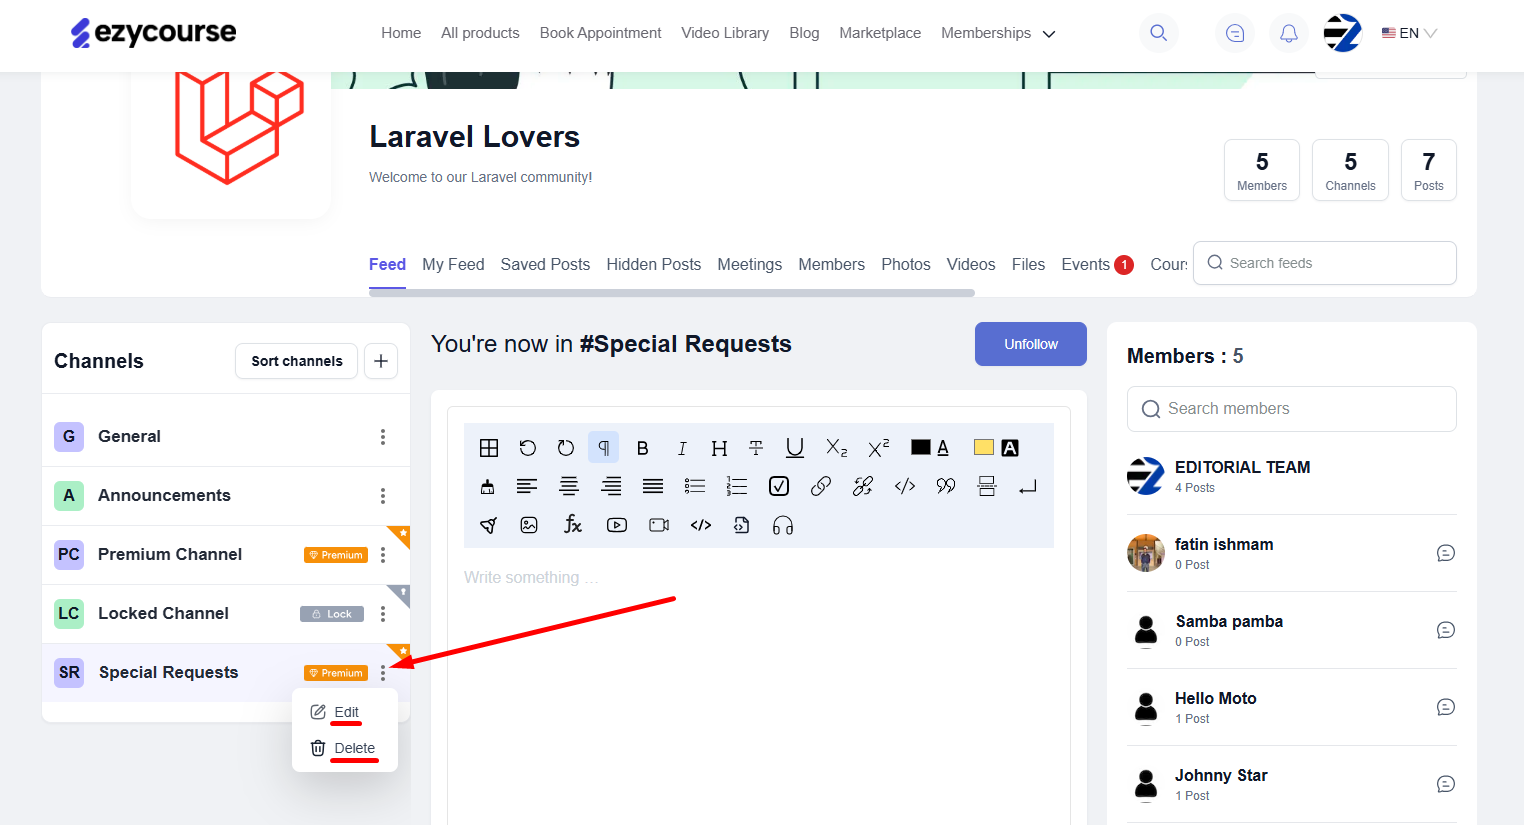
→ You can edit and delete a channel later. Simply click the three dots and select Edit to edit or Delete to remove the channel.
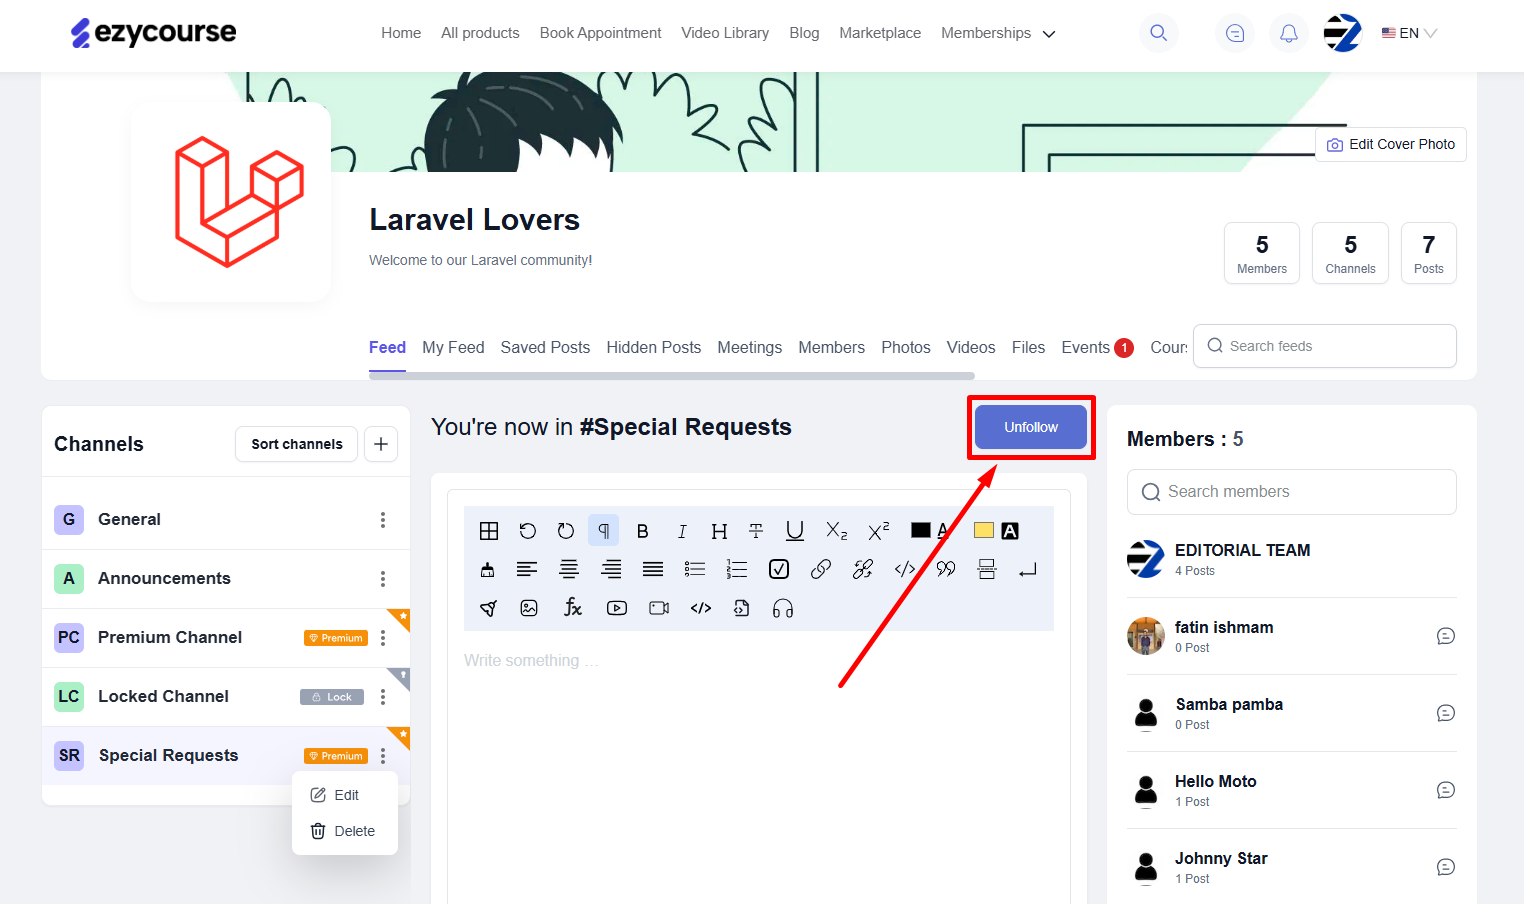
Students will only have the option to follow/unfollow a channel.
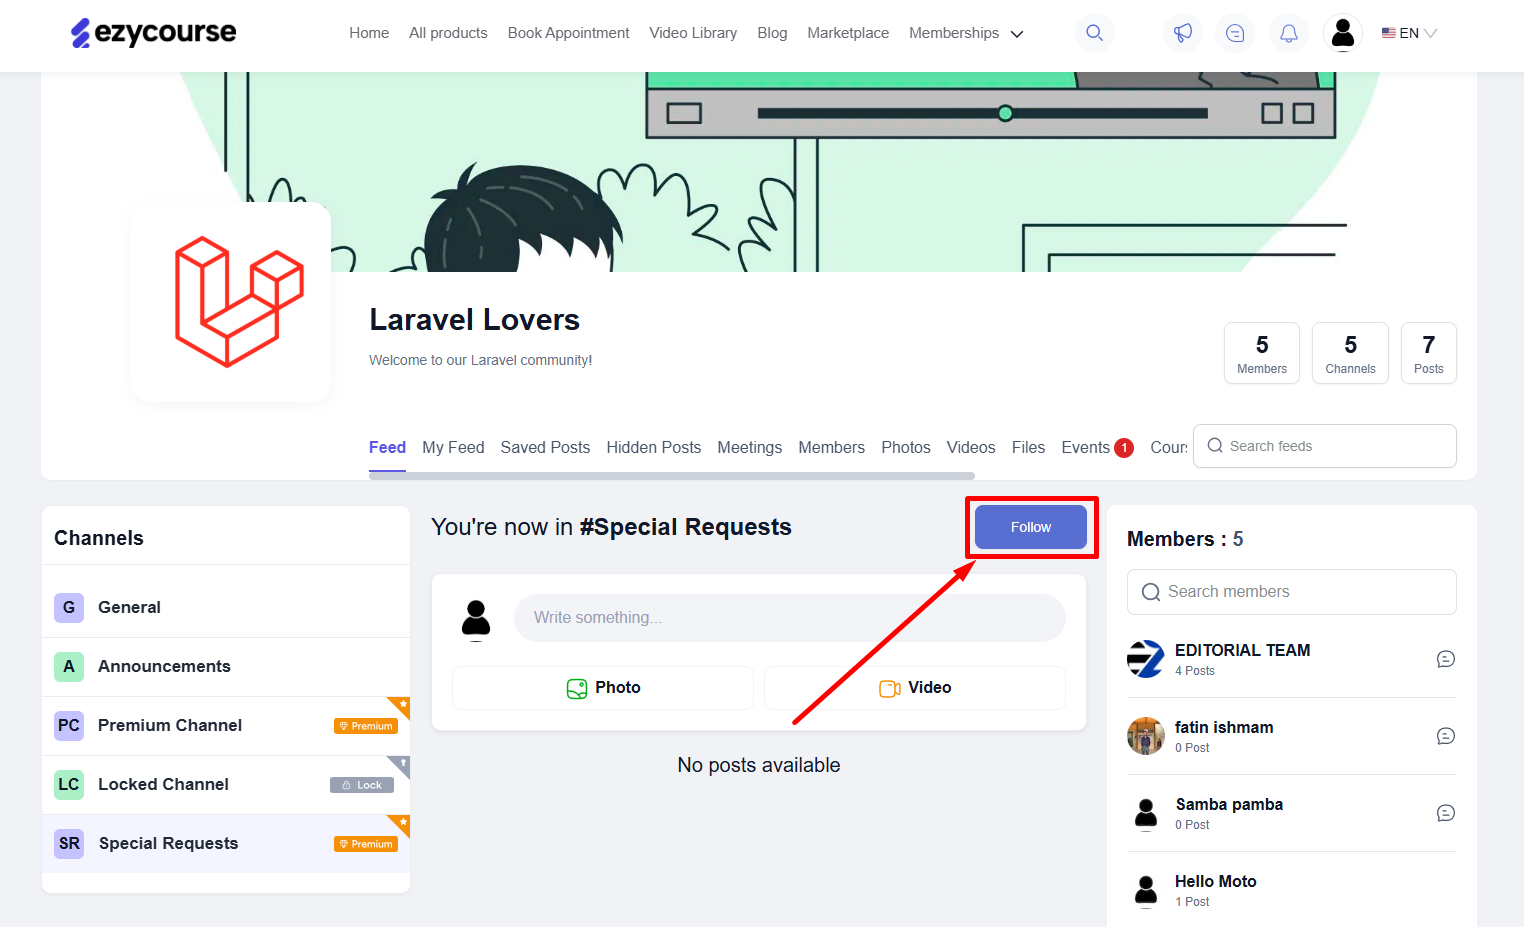
You can do it too to stay updated on every activity that takes place inside the channel.