Back
Add Membership on Your Site
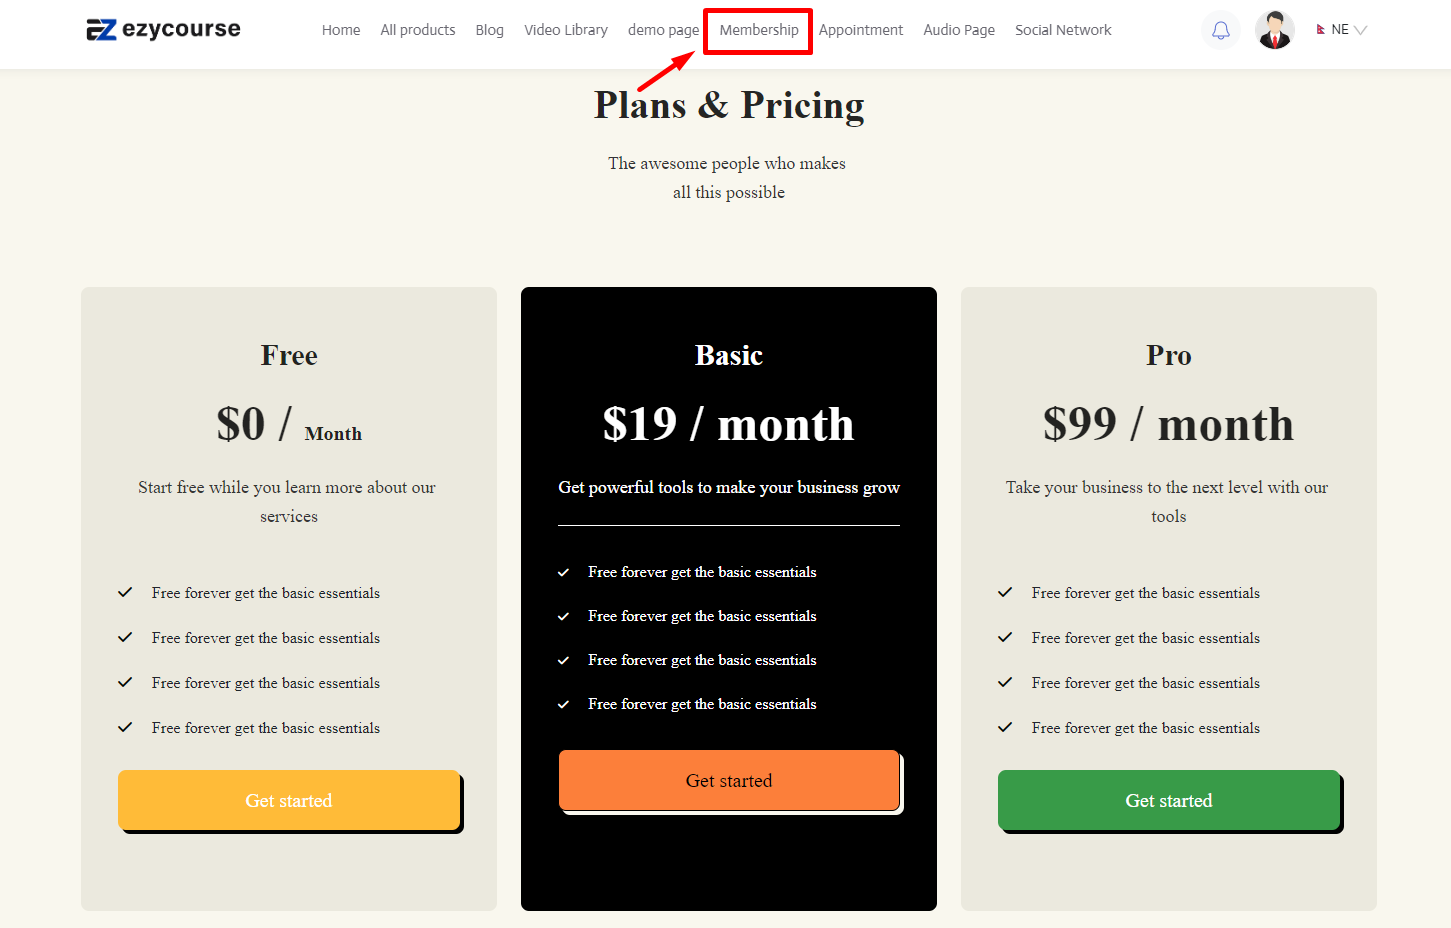
How to Show a Membership Plan on Your Site
On EzyCourse, you can create a completely new page to show your membership plan or add it to an existing page. For this, you have to use the EzyCourse Builder.
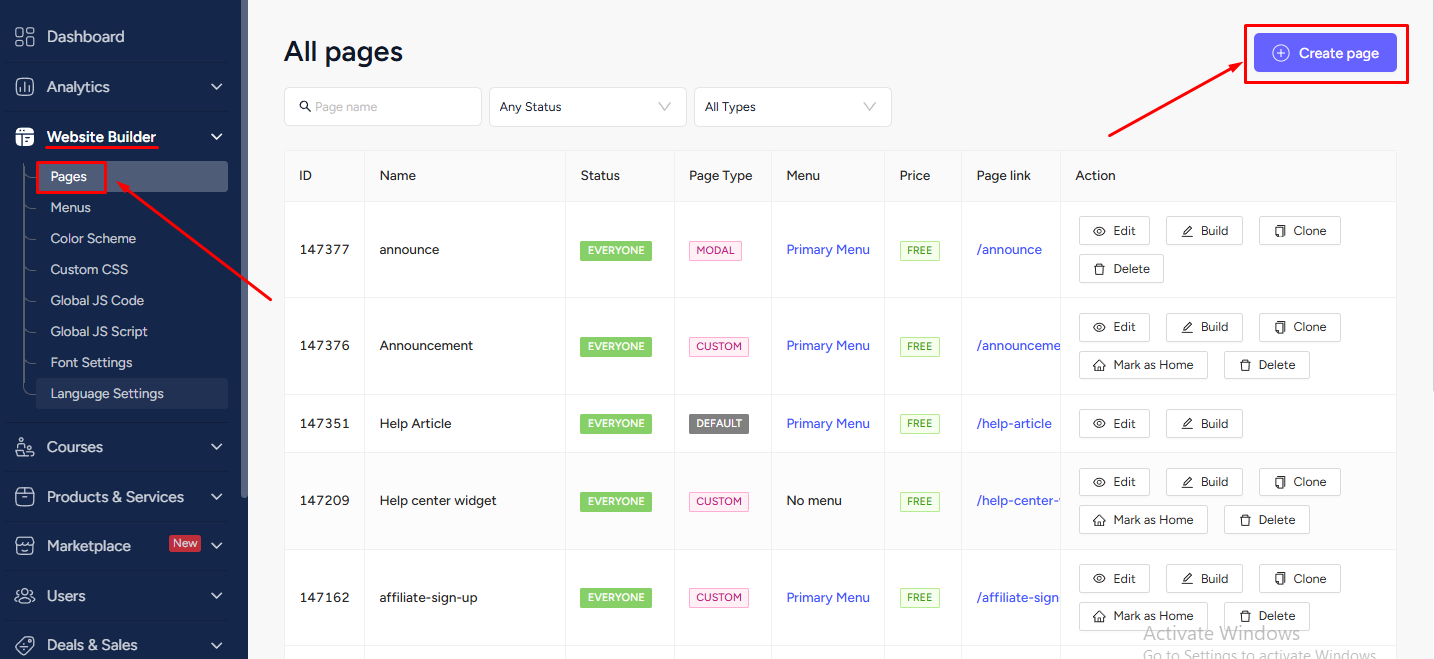
To begin, you have to go to the builder of an existing page. Or, create a new page from Website Builder -> Pages -> Create page button on the top right corner.
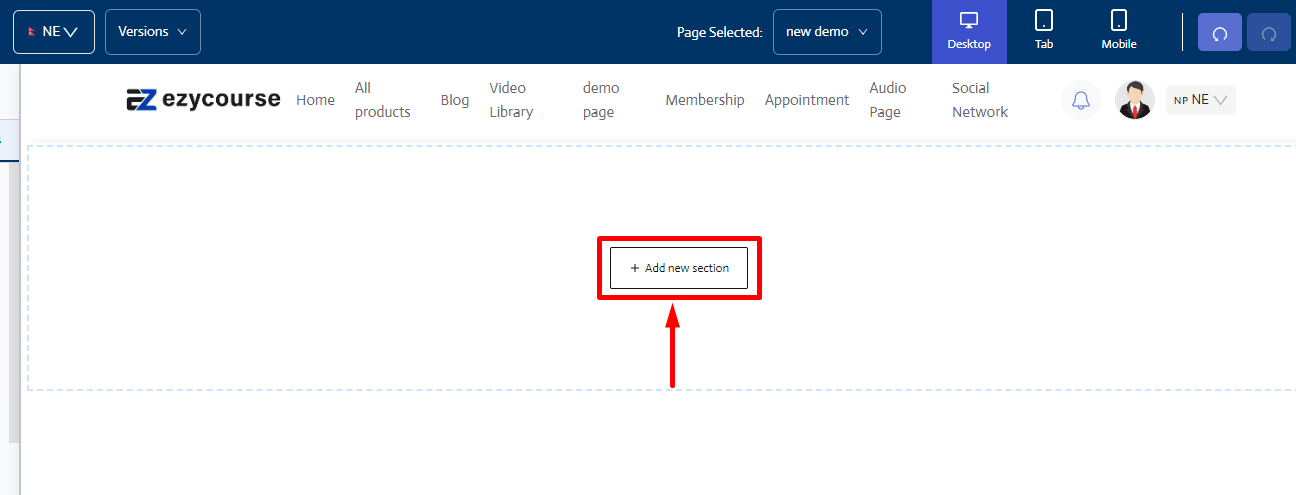
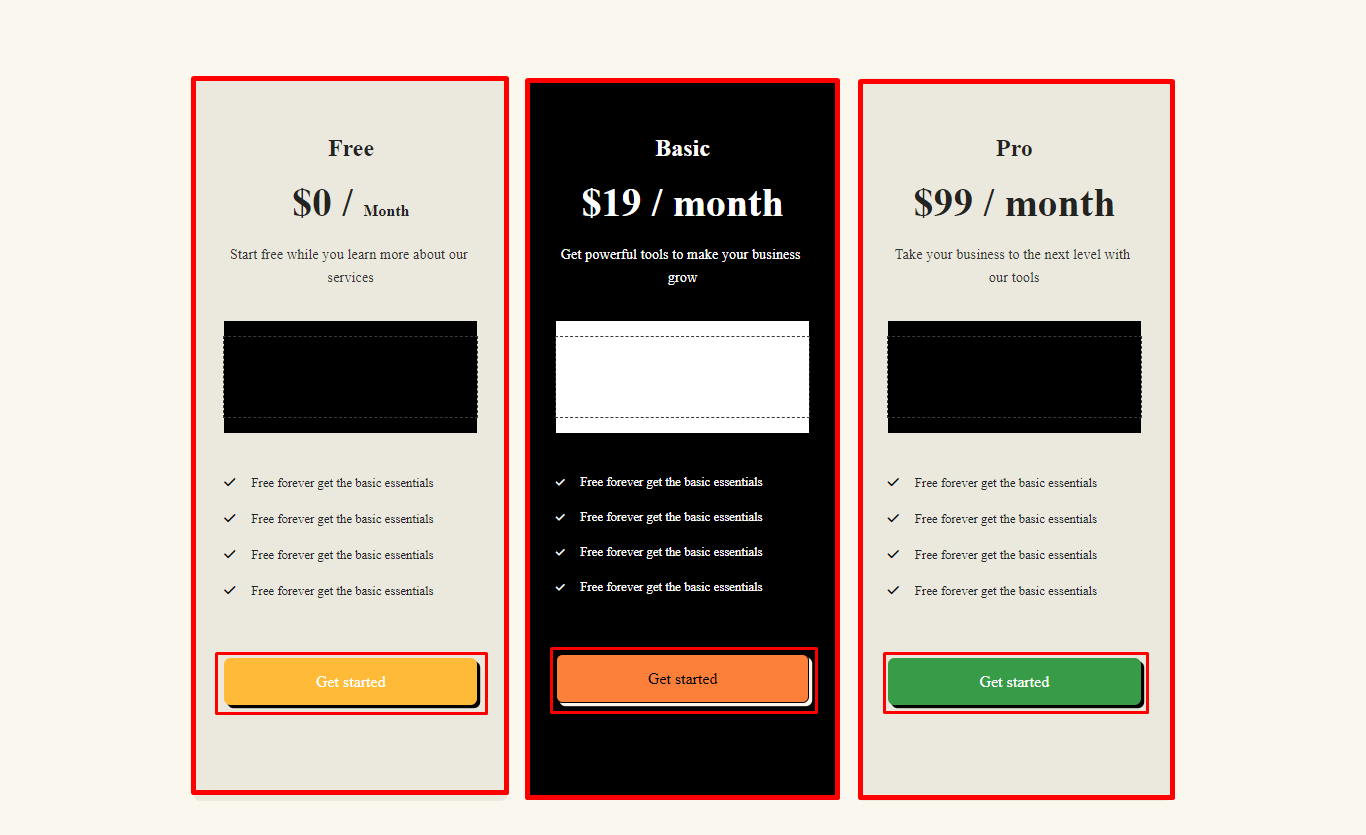
You can link the Membership plan with any type of button. Here, we’ll use a pricing block to add our membership plan. To add the block, first click Add new section.
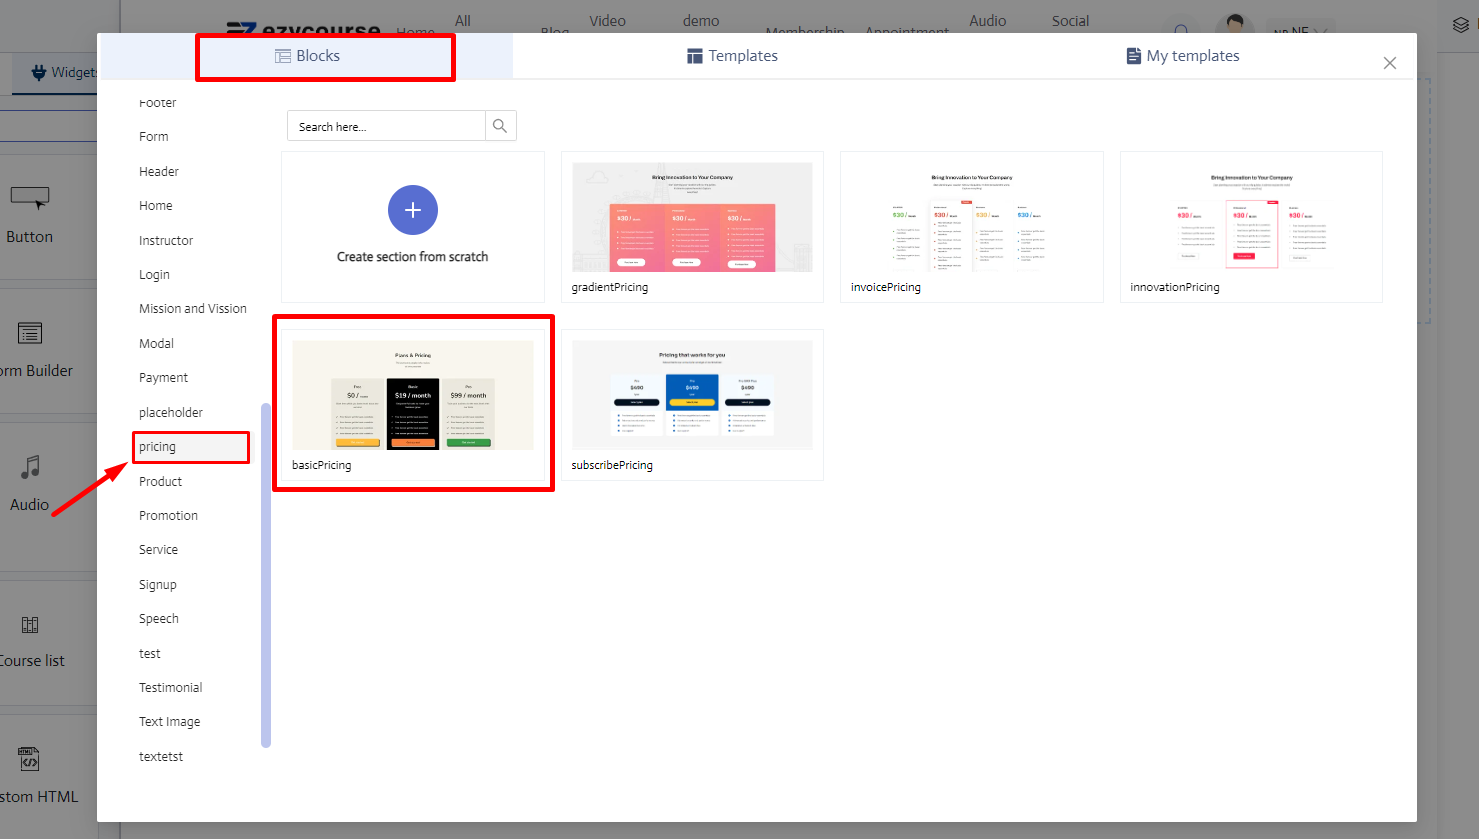
Now, on the Blocks tab, scroll down to find the pricing menu and click on it. Then choose one from the pricing blocks and insert it on the page.
You have the luxury of adding the membership plan link on the whole card or only on the button. The process is similar. Click on any one of the buttons or cards.
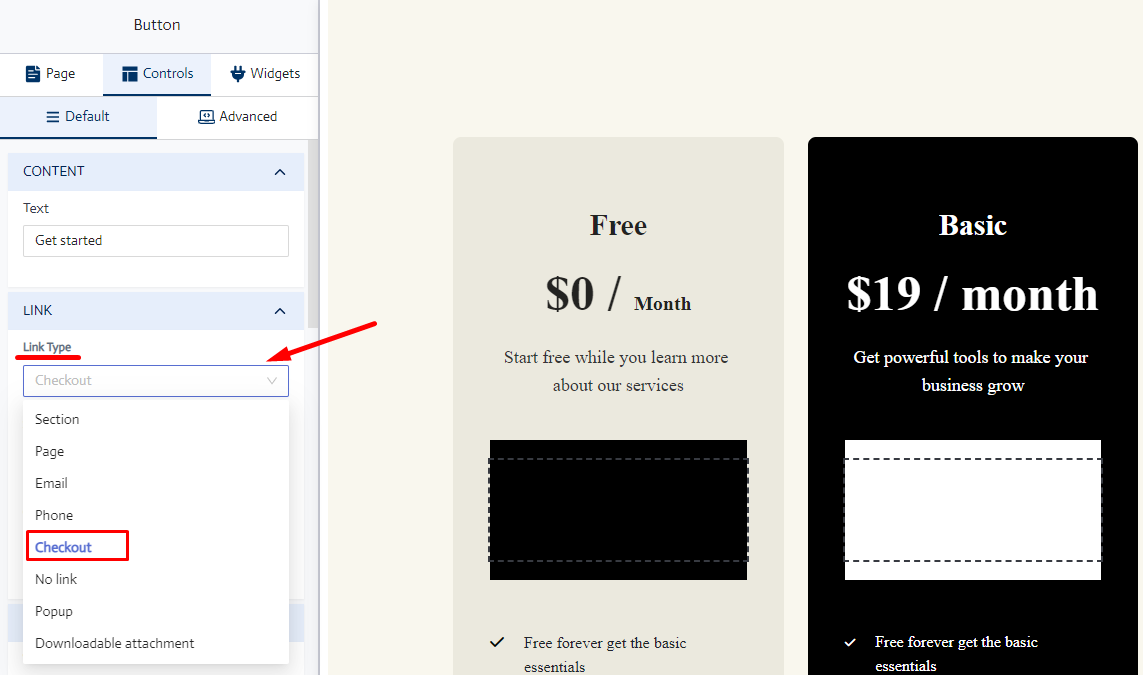
From the left sidebar, select the link type to be Checkout.
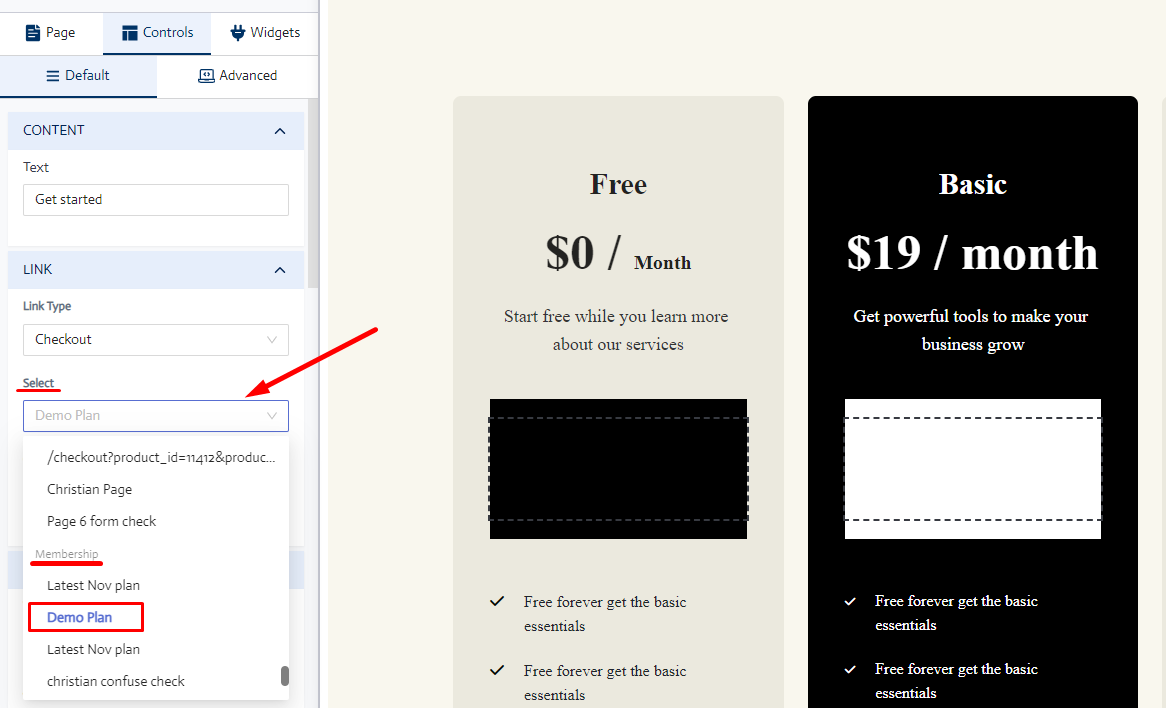
And then choose a Membership Plan from the “select” dropdown option.
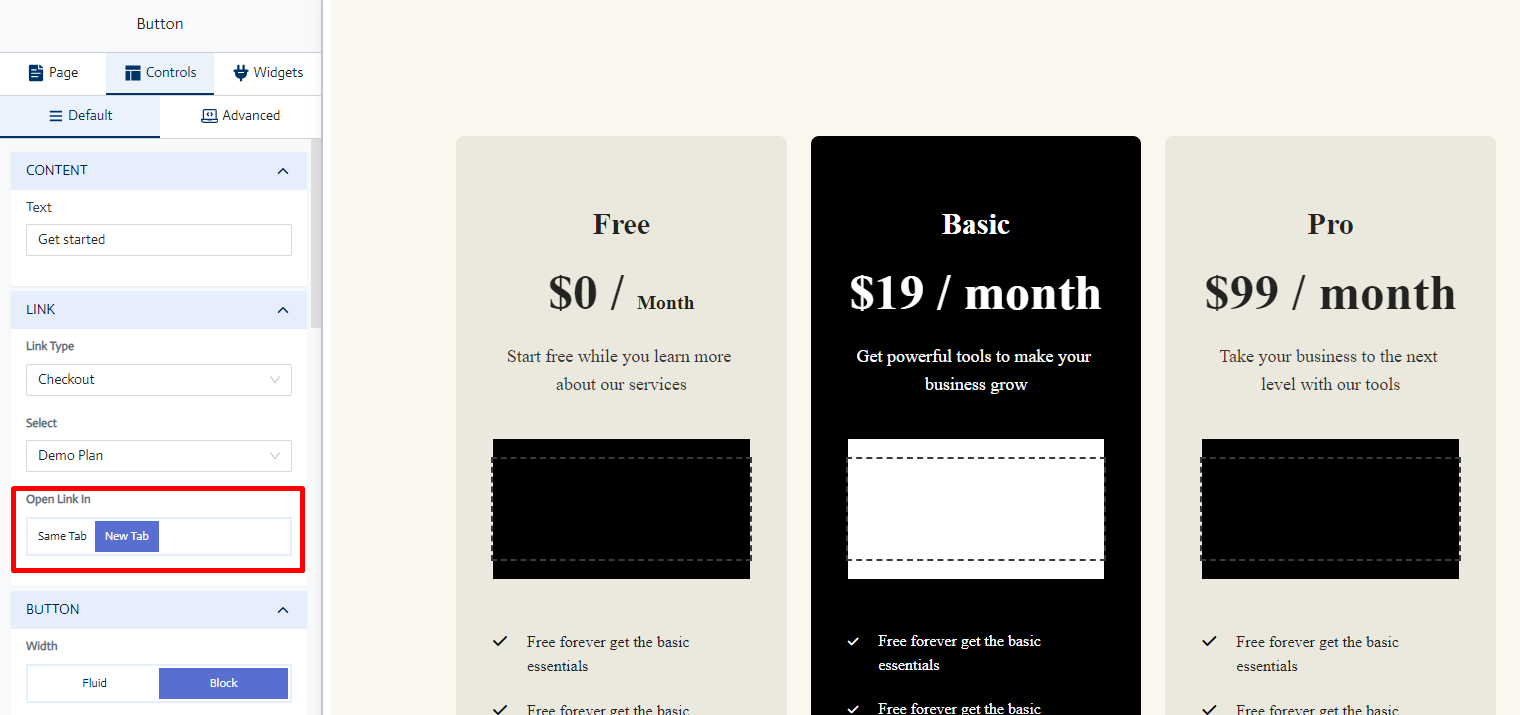
You can also select whether to open the Membership Plan checkout page on a new tab.
[Note: If you’ve created a new page then you have to add the page to your primary navbar for users to access.]
Add Membership Page to Header Menu
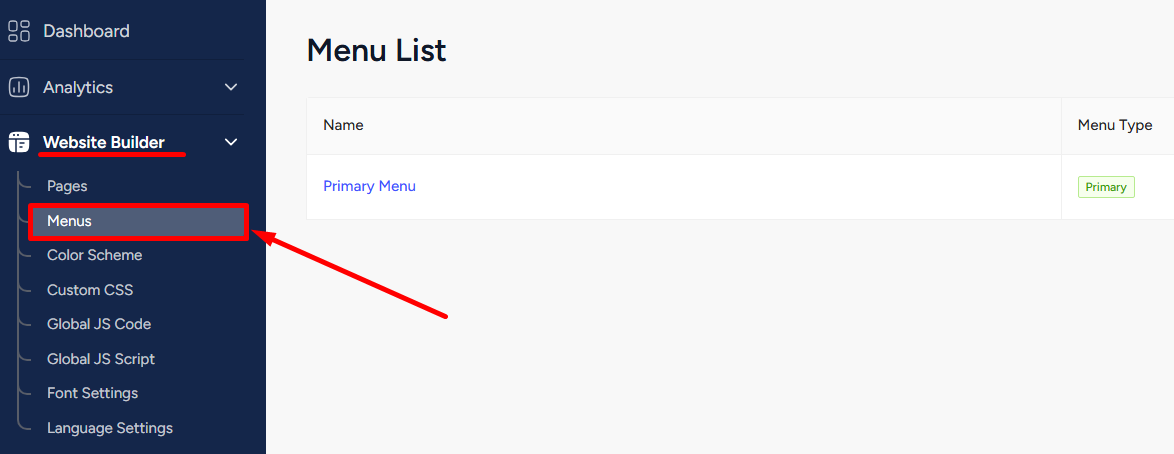
To add your newly created Membership page to the primary navbar, go to Website Builder -> Menus.
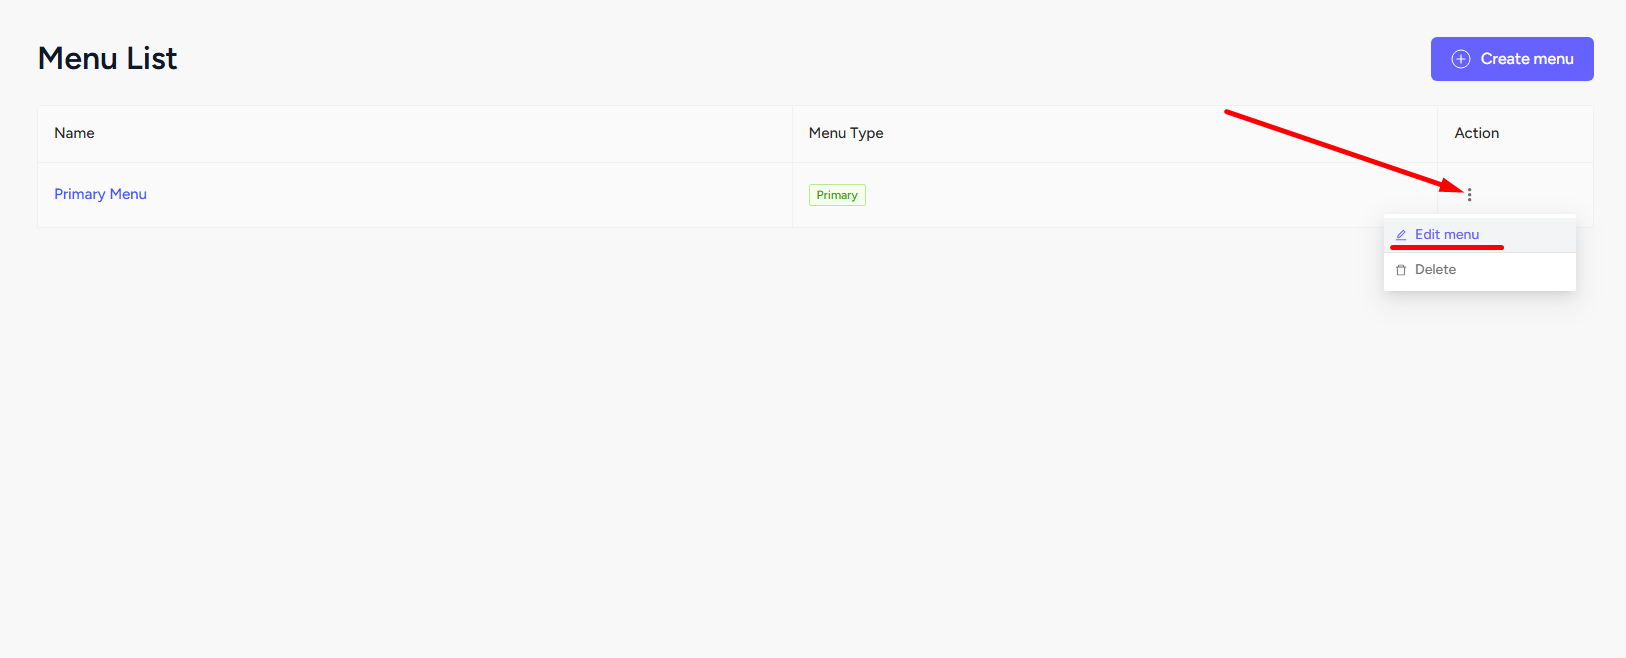
Click the three dots on the Primary Menu and select the Edit menu option.
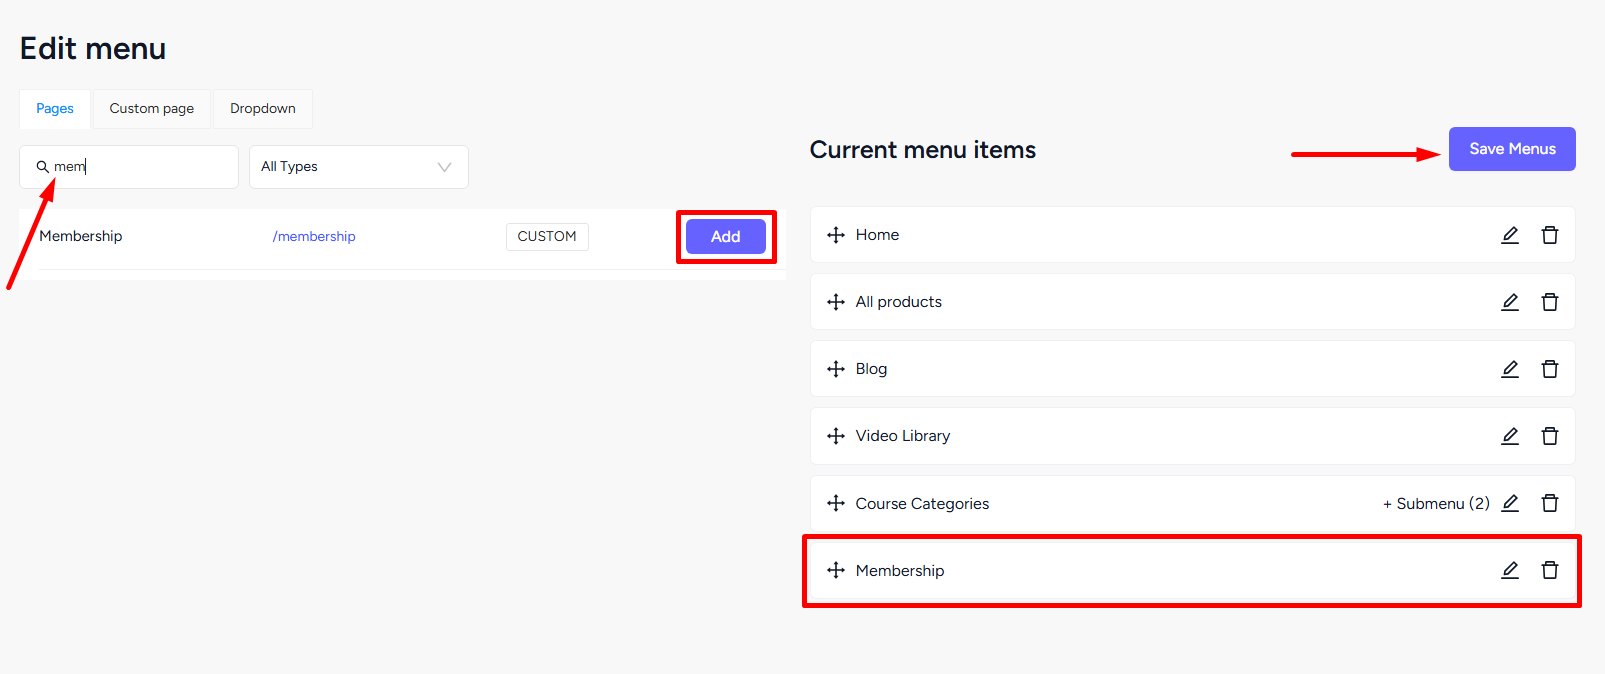
Search for the page where you added the membership plan, click the Add button, and you’ll see the page added on the right side. Click the Save Menus button to save the work.
And that’s it. Your users can now easily access the Membership page from the top navbar of your site.