
Back
Set up Stripe Payment Gateway
How to set up Stripe Payment System
On EzyCourse, you can smoothly manage all online transactions with the secured and convenient Stripe. But, you have to set it up first on your platform.
To set up Stripe, you have to first create a Stripe account and login to the dashboard. From there, click Developers menu on the bottom of the left sidebar.
[!Go to Developers menu]

Now, go to the API keys tab where you’ll find the publishable (public) key and secret key. Or, you can also use the search bar to search for “API“ and go to Developers > API Keys. Copy the keys.
[!Go to the API Keys section]
[Note: You might have to enable 2-Factor Authentication from Profile Settings in order to view the secret key. Also, ensure you are using live data for processing real payments.]

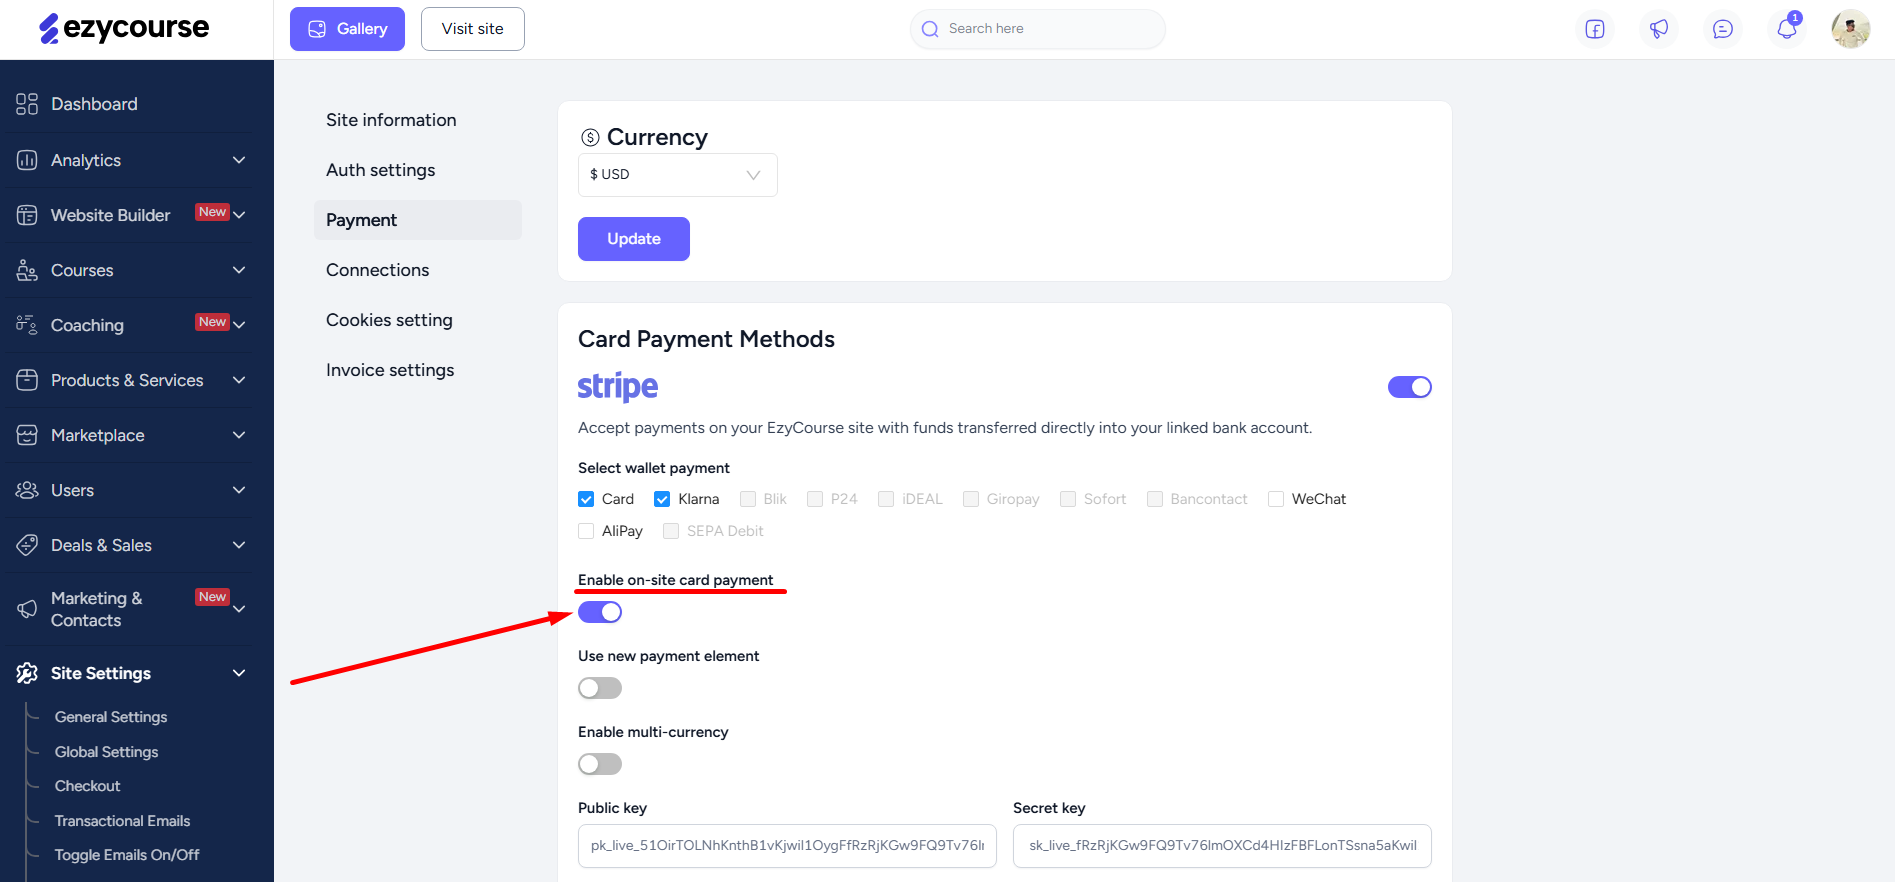
On your EzyCourse dashboard, go to Site Settings -> General Settings -> Payment tab.
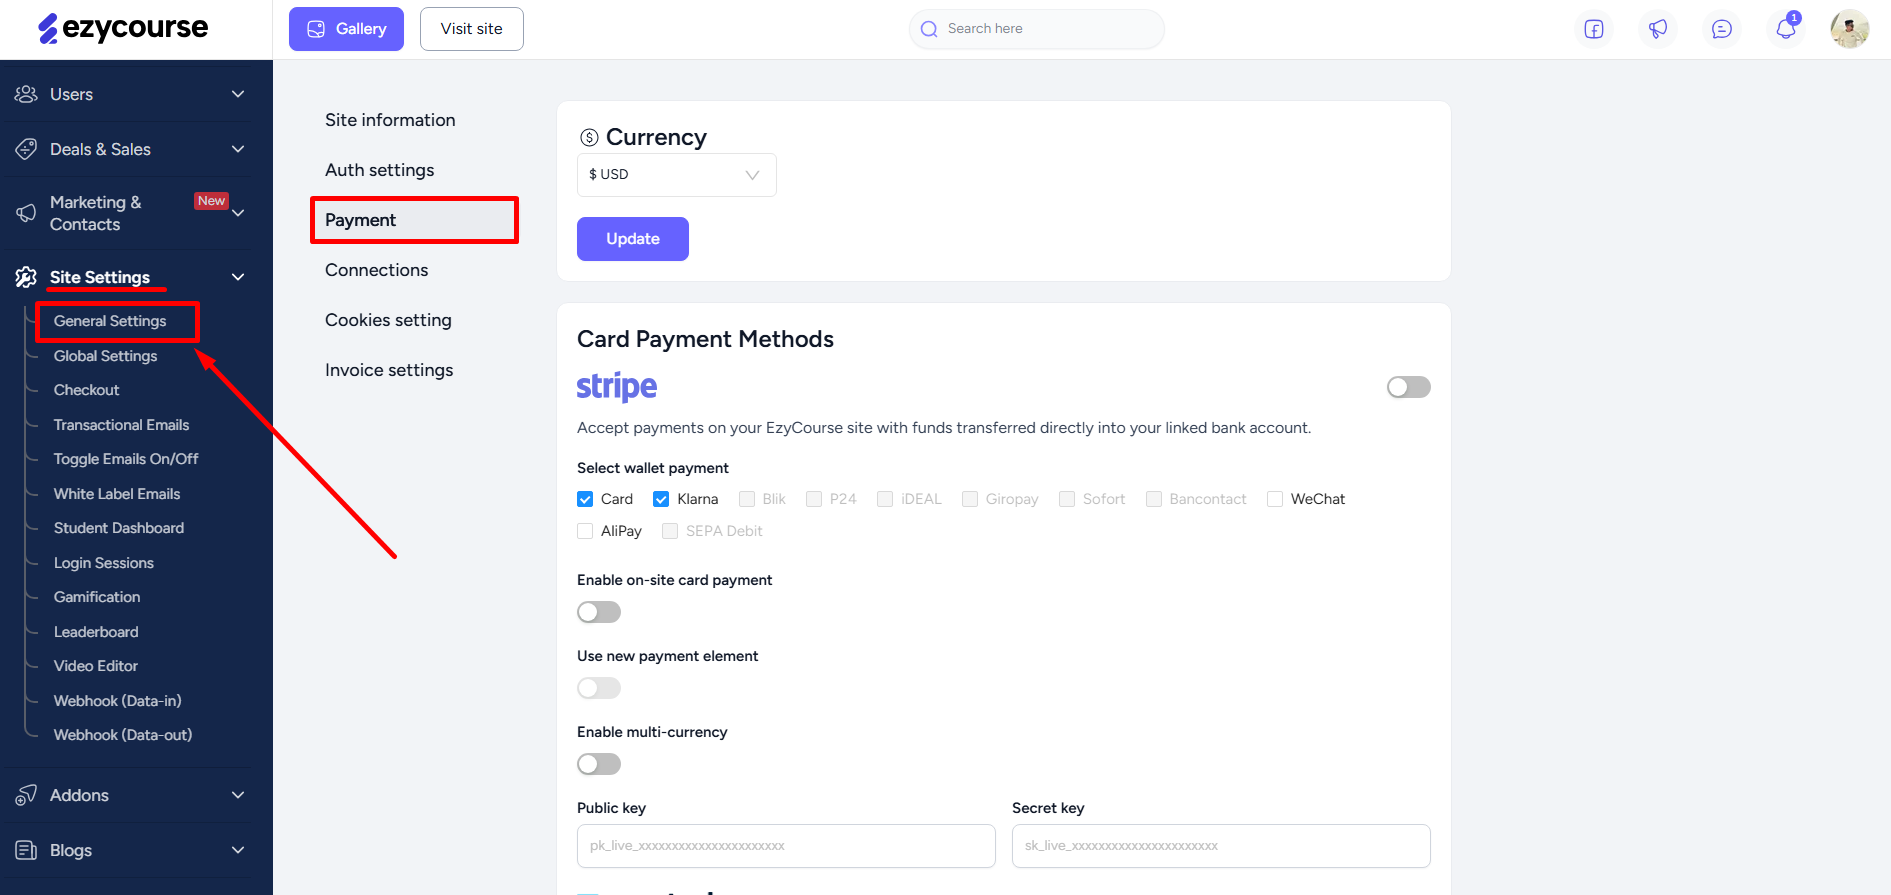
Here, paste the publishable key on the Public key field and the secret key on the Secret key field. Then turn the toggle on and click the Update button.
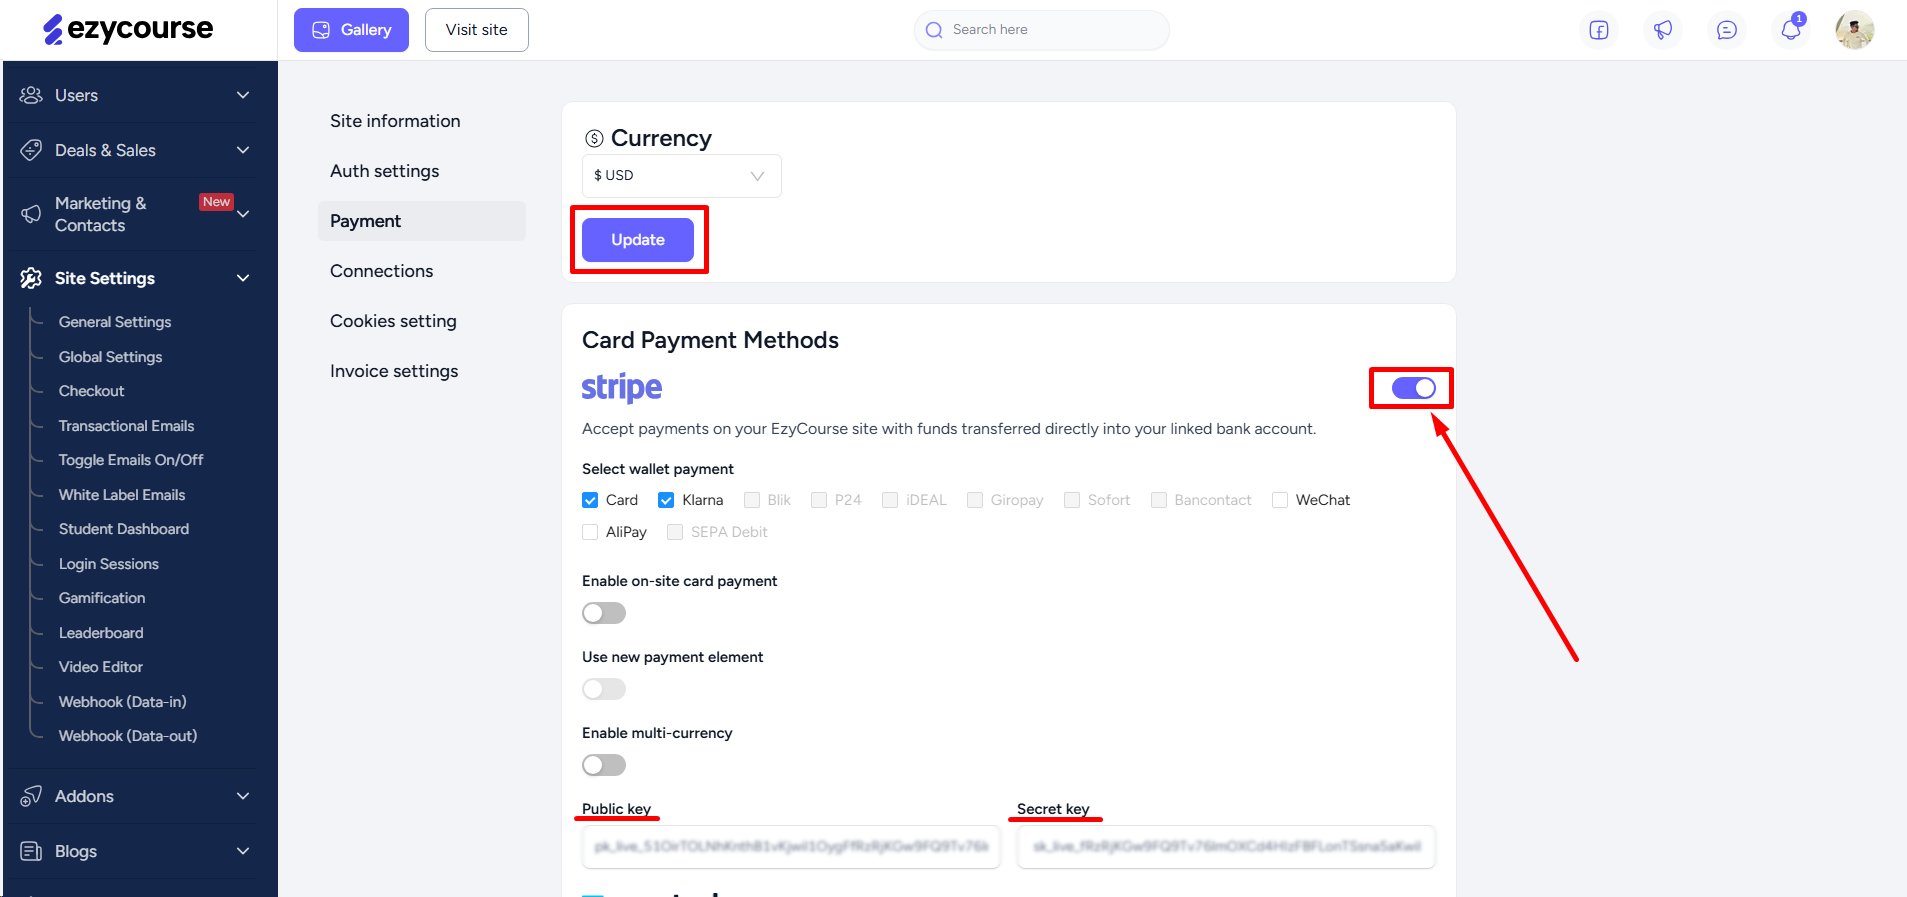
Furthermore, you can also enable your choice of wallet payment option to ease the process of online payment for your customers.
[Note: You can enable multiple wallet payment options at the same time.]
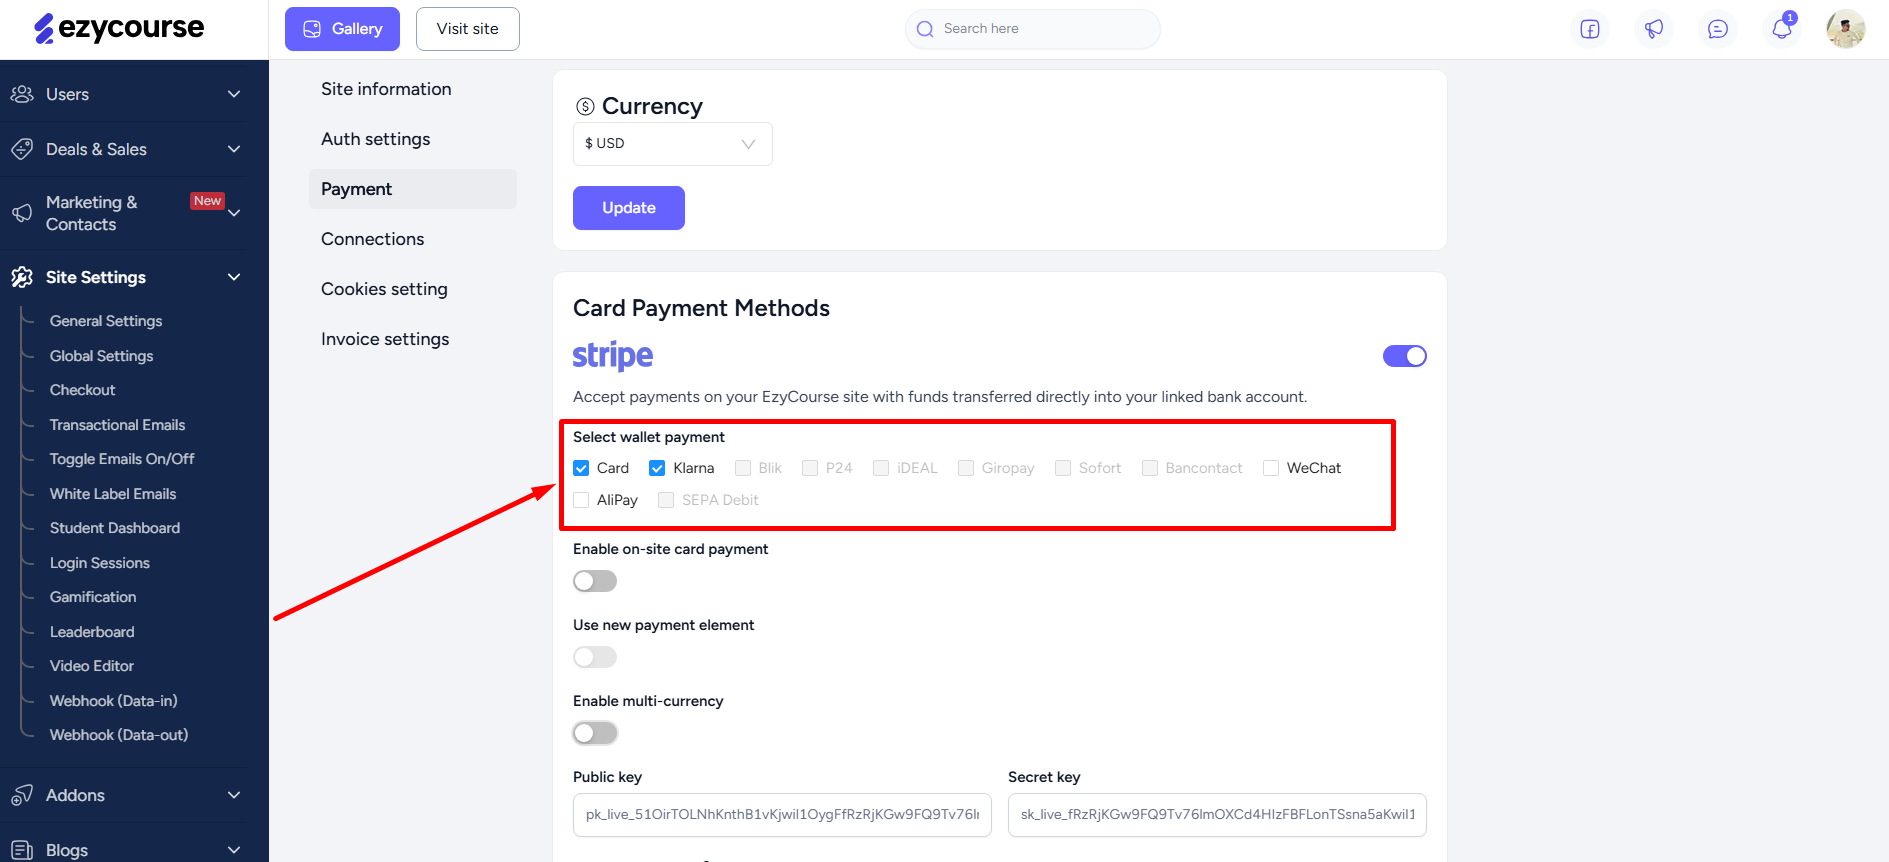
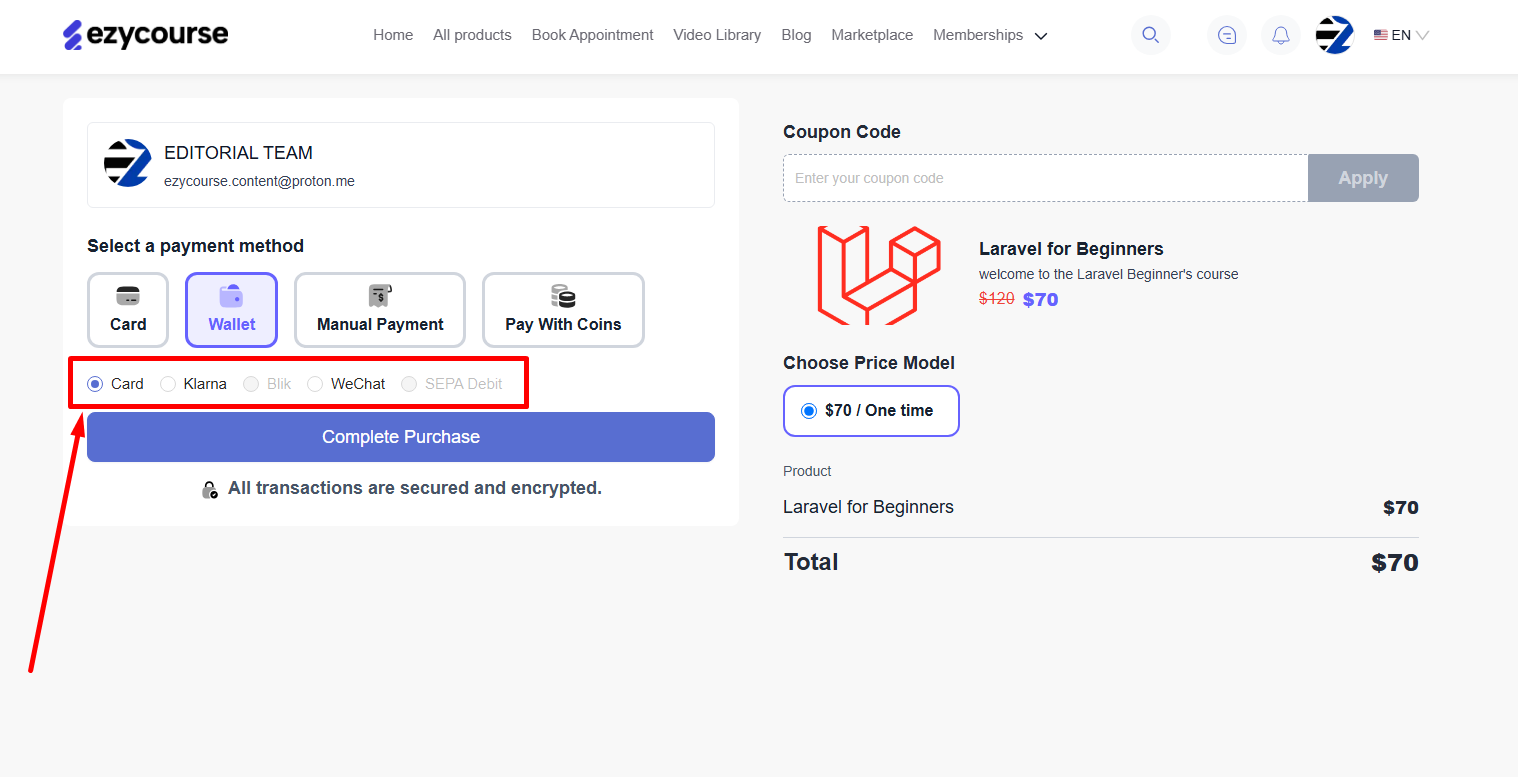
You can enable the “on-site card payment” option which will help to accept customer payments without leaving your site.
And that’s all the settings related to the Stripe payment gateway. Easy and effortless setup, but extremely useful and effective system to manage all your online transactions faster and more securely.