Back
Paddle Payment Gateway
What is it & why you need it
With EzyCourse, you can sell anything online using various pricing systems such as one-time and subscription pricing. Paddle is one of the most complete-solution payment gateways that manages payments, subscriptions, and even taxes for your online business.
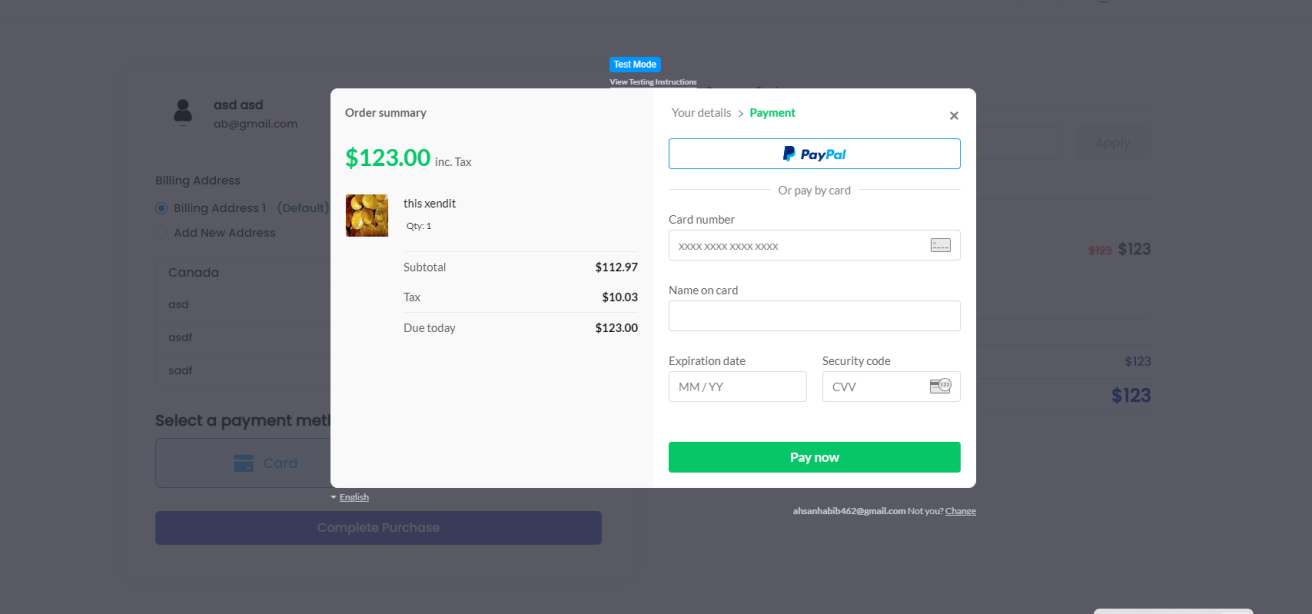
Paddle simplifies the complexities of online transactions and is supported in almost every part of the world. With Paddle integrated, your customers will also experience ease in purchasing from your platform because it supports various payment methods such as Paypal, Google Pay, Apple Pay, credit and debit cards, and more.
How it works
Paddle takes the responsibility of taking care of your online transactions including the ensuring of tax compliance. All you have to do is set your Paddle account and then integrate it on your EzyCourse dashboard.
Once enabled, it will be available to use on the checkout page where your customers can quickly and securely complete transactions. They can complete the transactions on the checkout page, without being redirected elsewhere. As a result, your users will have a more smooth payment experience on your platform.
How to get started using it
First, you have to set up Paddle on your EzyCourse dashboard. To do that, create a Paddle account and log in to the dashboard. From there, navigate to Developer’s Tools -> Authentication on the left sidebar.

Here, you will find the public and secret keys. API keys refers to the secret key and Client-side tokens refers to the public key.

If you cannot see the Client-side key, then click the Generate token button.

Give the name and add a description, and then click the Generate button.

To copy any key, click the three dots and select the Copy key option.

You have to use both the keys in order to set up the Paddle payment gateway. After copying, go to your EzyCourse dashboard and navigate to Site Settings -> General Settings -> Payment tab.

Scroll down to find the Paddle gateway. Enable the setting, and paste the respective keys in their fields. You can also choose the tax type from here. Click the Update button to save the changes.

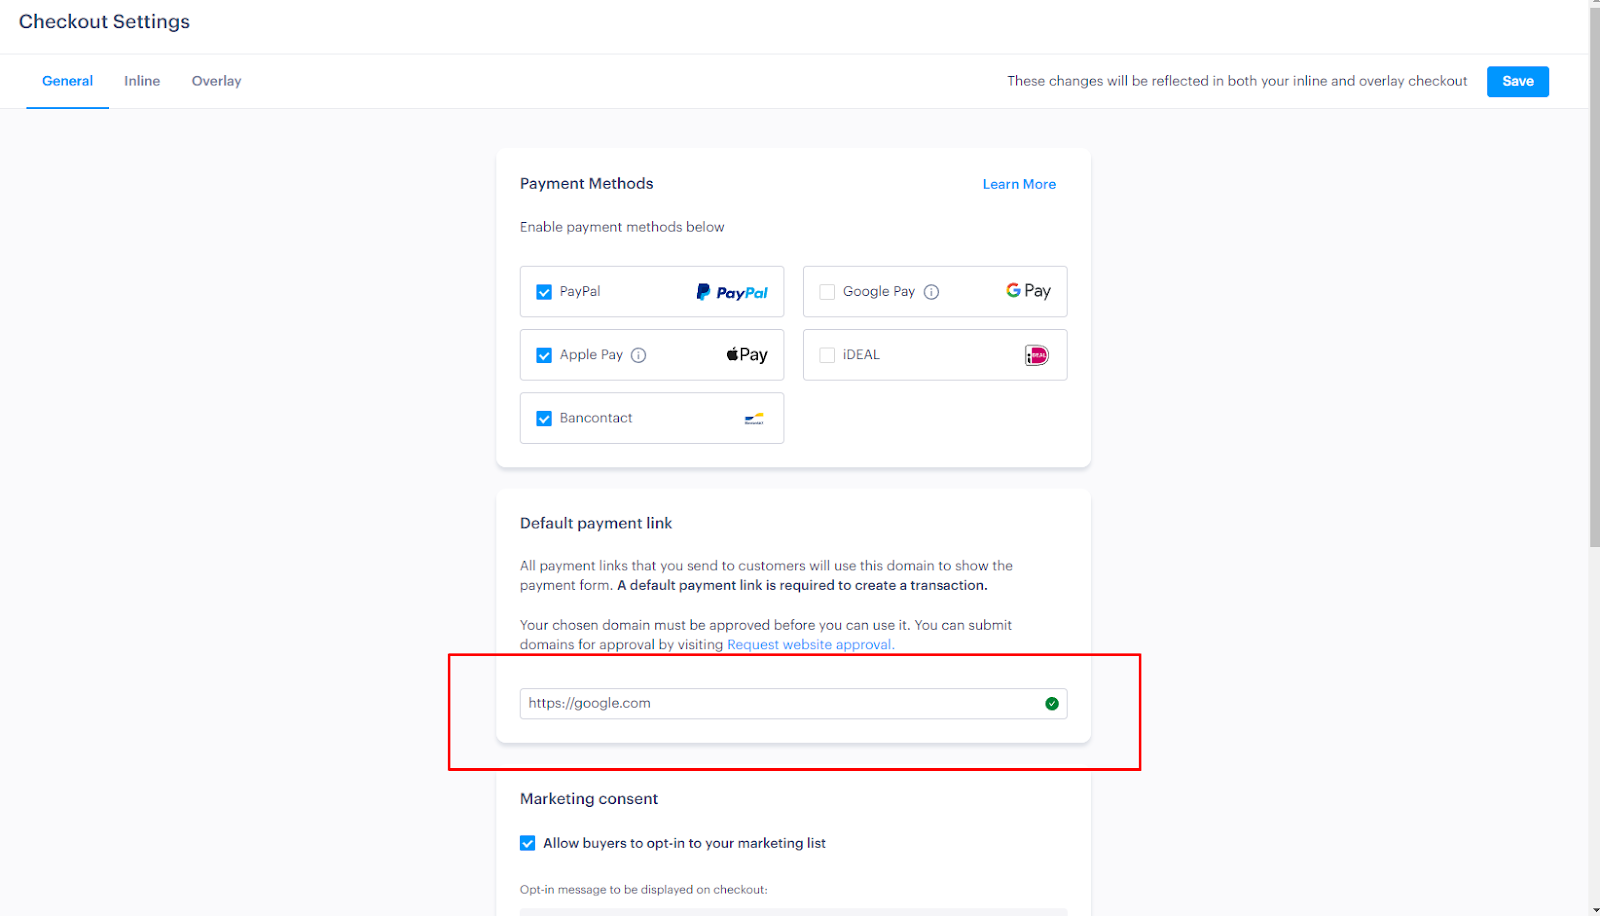
One more option you have to set is to give the URL which is approved by Paddle. Log in to your vendor account and go to checkout settings. From there, give the Paddle approved URL on the Default payment link section and save the changes.
With Paddle integrated, customers can use it to make payment on the product checkout page.