
Back
Membership Upgrade Downgrade Feature and Item Lock for Marketing
What is it & why you need it
You could package together courses and any other products, and sell them as memberships on your platform. But, there were no options to make your memberships tier based i.e. you couldn’t set any upgrade or downgrade options.
Now, you can offer true membership experiences with tier-based upgrades and downgrades. This will allow you to also upsell higher tiers to your customers as they can move between tiers any time they like.
Moreover, customers will be less likely to cancel your membership if they can downgrade instead of quitting altogether.
How it works
As usual, you can still create membership plans, set different prices, and add any type of products to your plans. Apart from these features, you can now create groups and add your membership plans to the groups.
By adding multiple plans to a single group, you create a tier-based membership system, allowing your customers to upgrade/downgrade to the other plans in the same group.
[Note: This feature is only available for subscription-based membership plans created with Stripe. But, subscription pricing with a cardless trial will also not work.]
Suppose, you have three different membership plans called plan1, plan2, and plan3; all added to a single group. Now, when a customer purchases any one of the three plans, they can still upgrade or downgrade to the other two plans directly from their student dashboard.
Course progress will stay the same in terms of any upgrade or downgrade. In other words, if the same course is present in two plans, then switching plans will not cause any loss of course progress. Your students can continue learning right from where they left off. The same applies for all the other products including communities and group chats.
How to get started using it
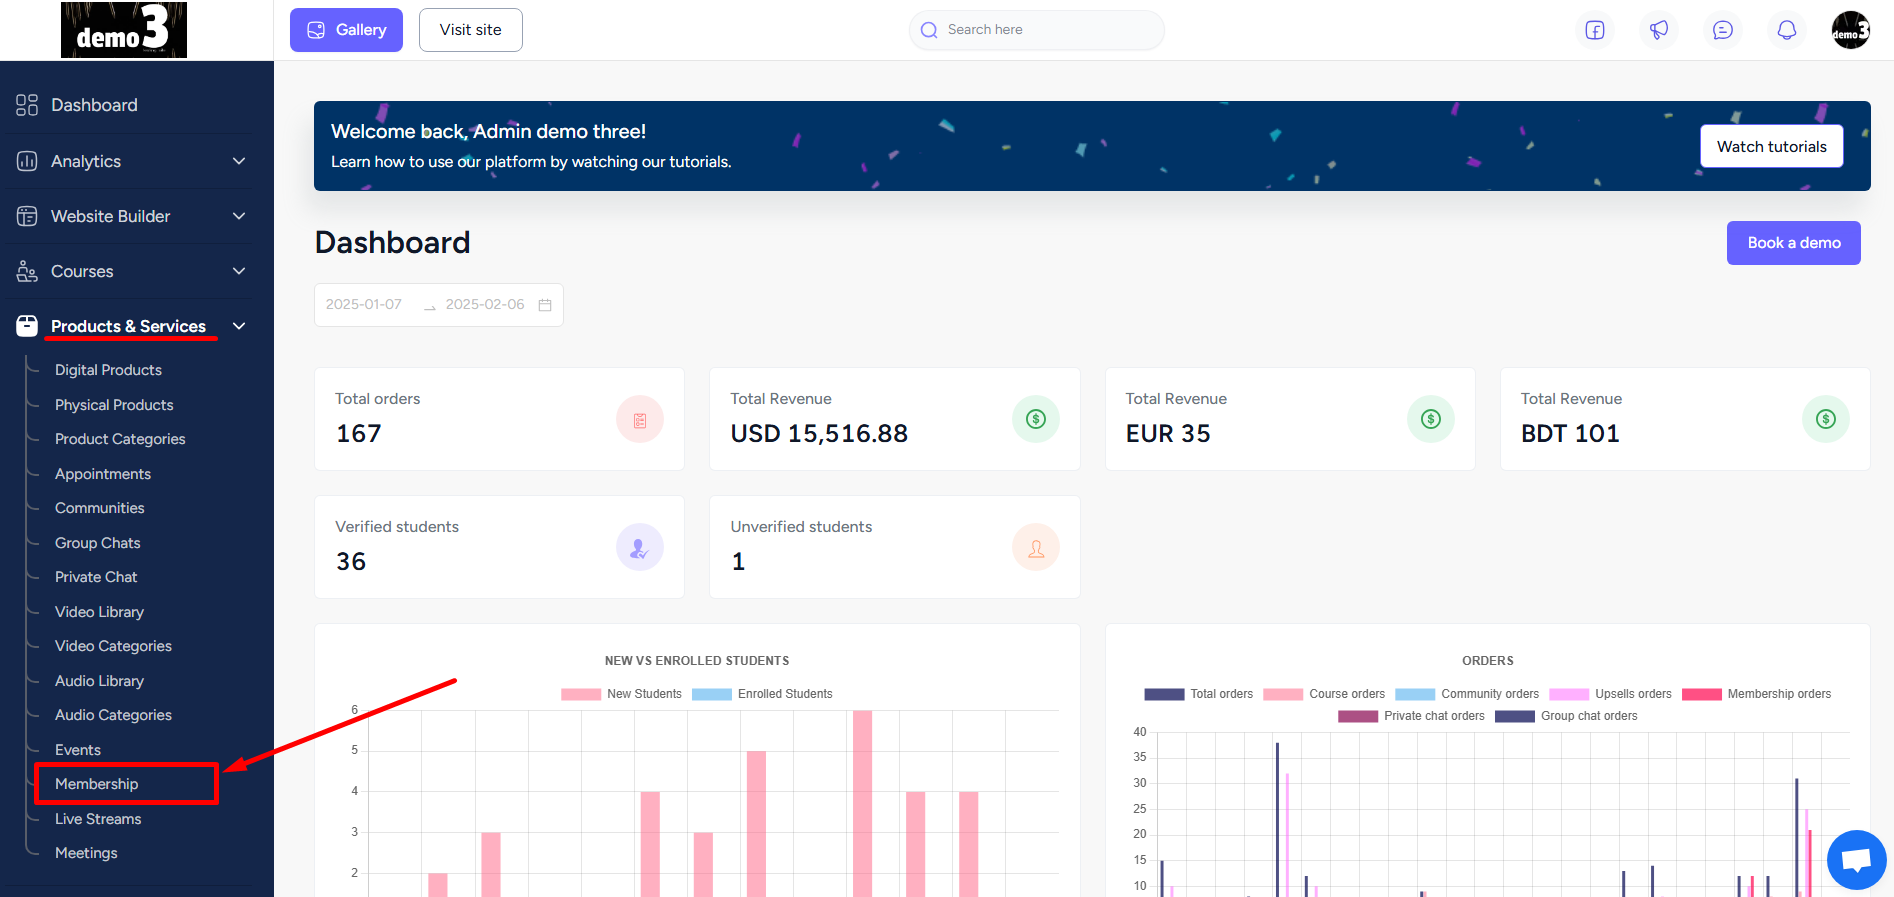
To create a complete tier-based membership system, you’d have to first create a membership plan. To do that, log in to your EzyCourse dashboard and go to Products & Services -> Membership.
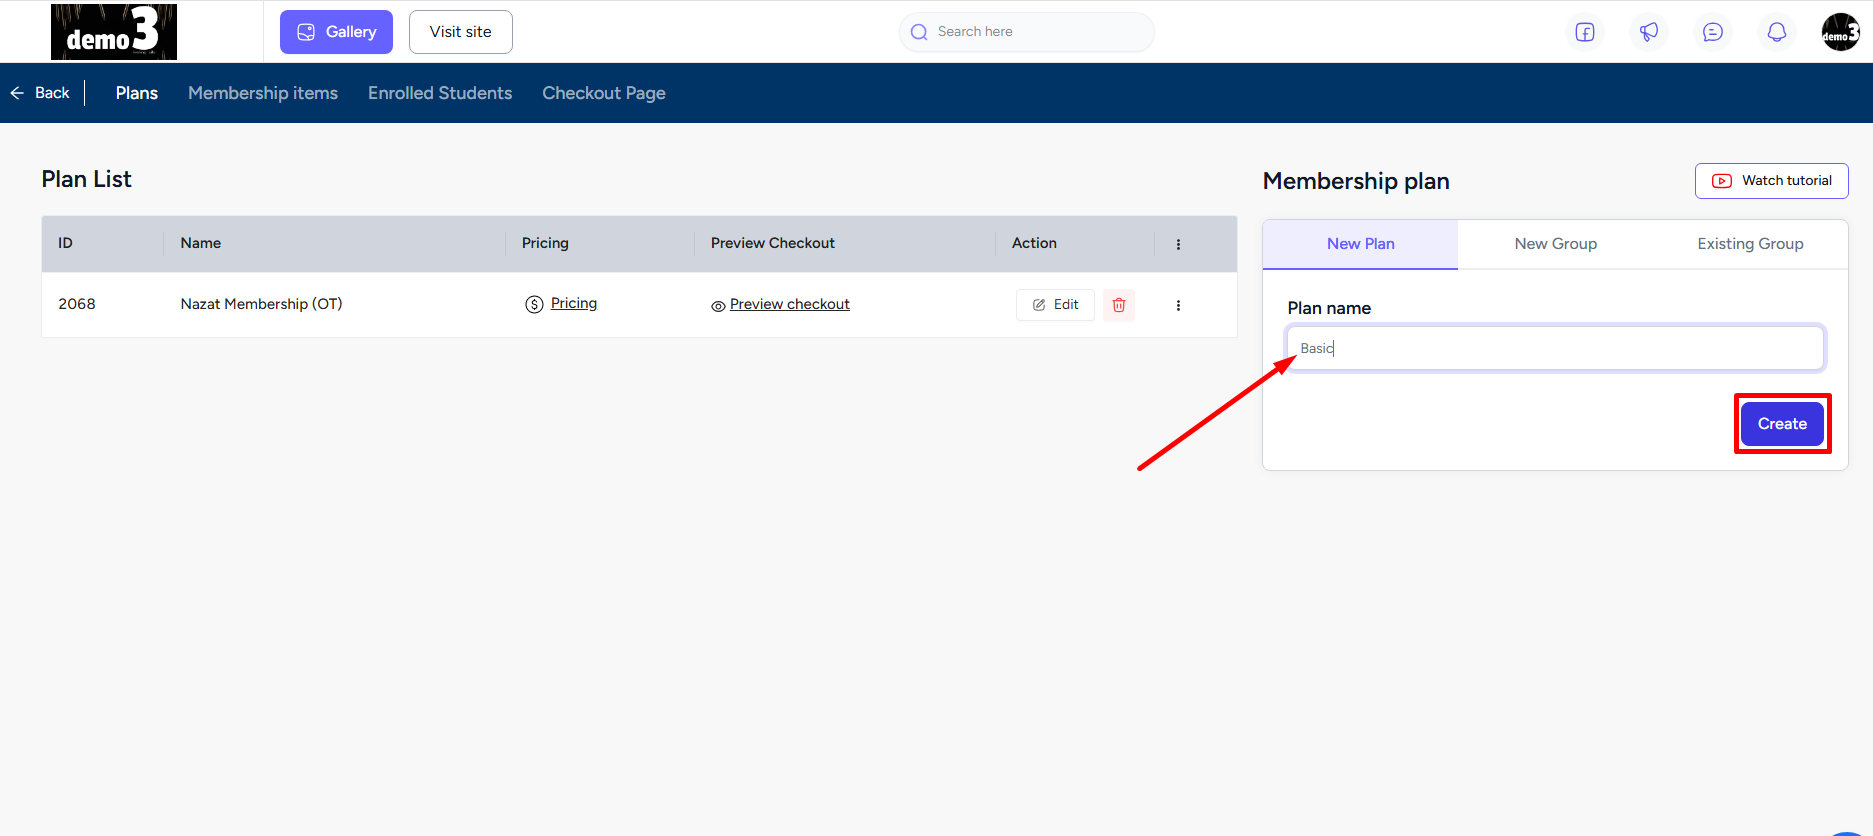
On the right side of your screen, you’ll see the Membership plan panel. Simply enter a name for your plan and click the Create button.
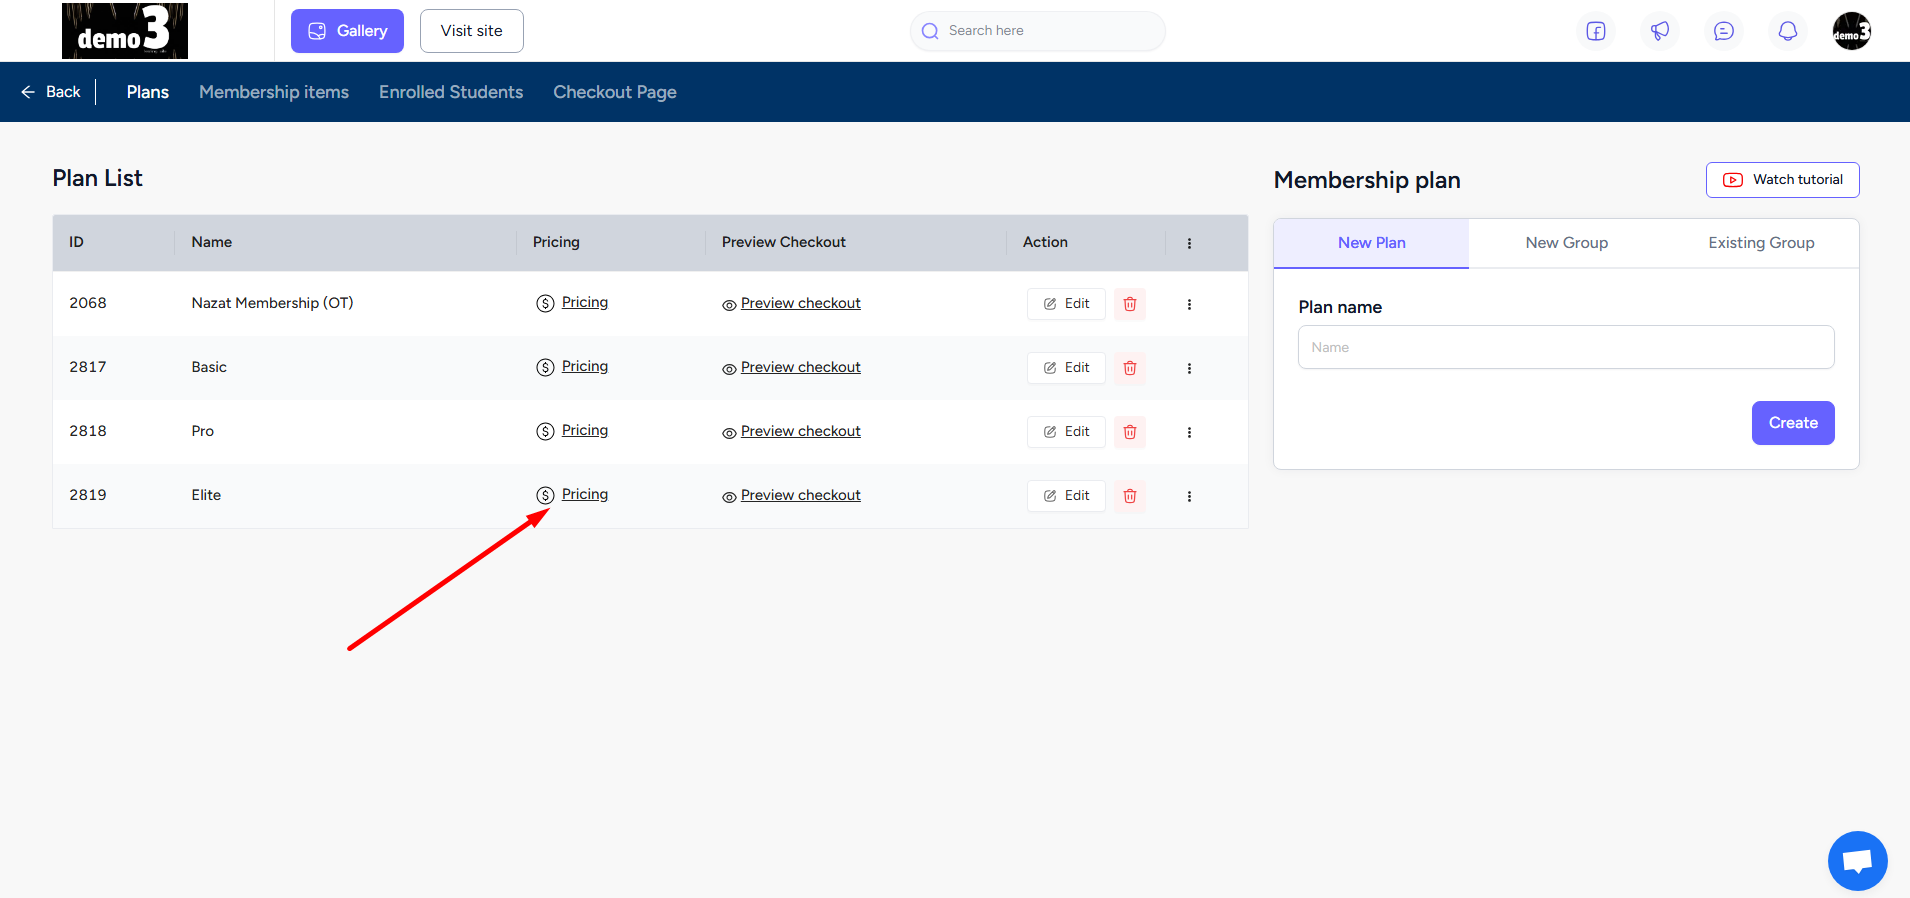
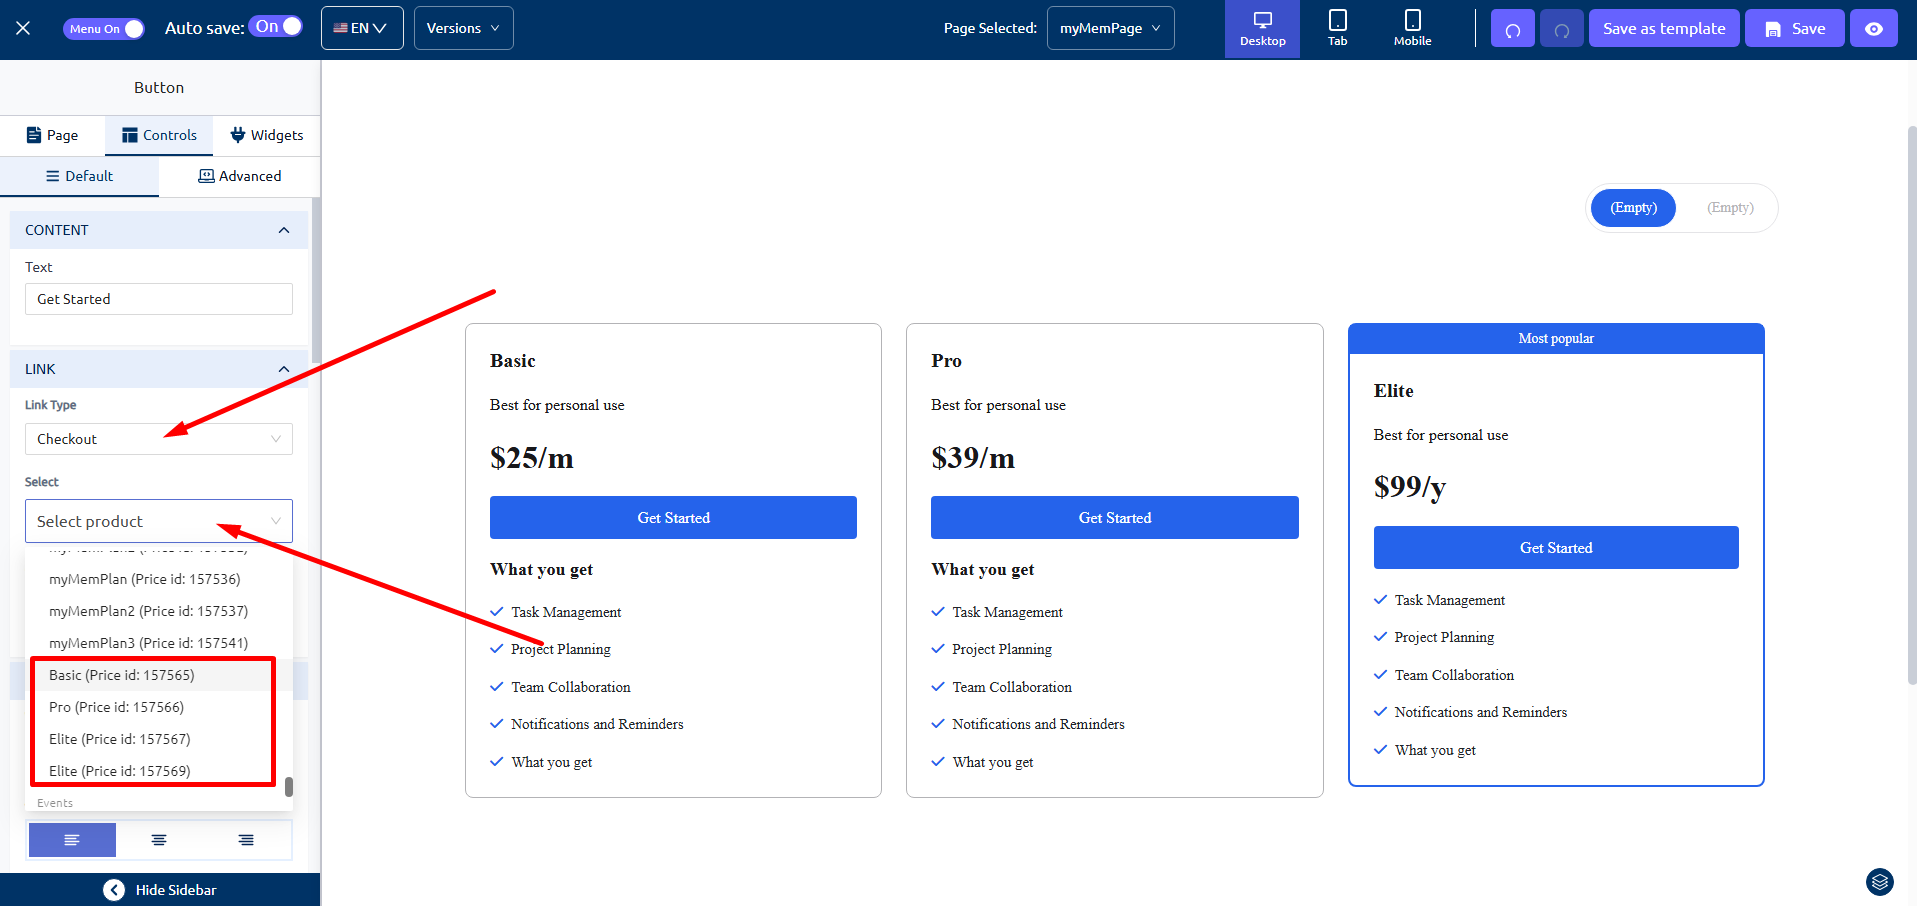
With relevant plans created, set the pricing for each one. Remember that the tier system will only work when your plans have subscription pricing. After adding the pricing, you can add products to your plan from the ‘Membership Items’ tab.
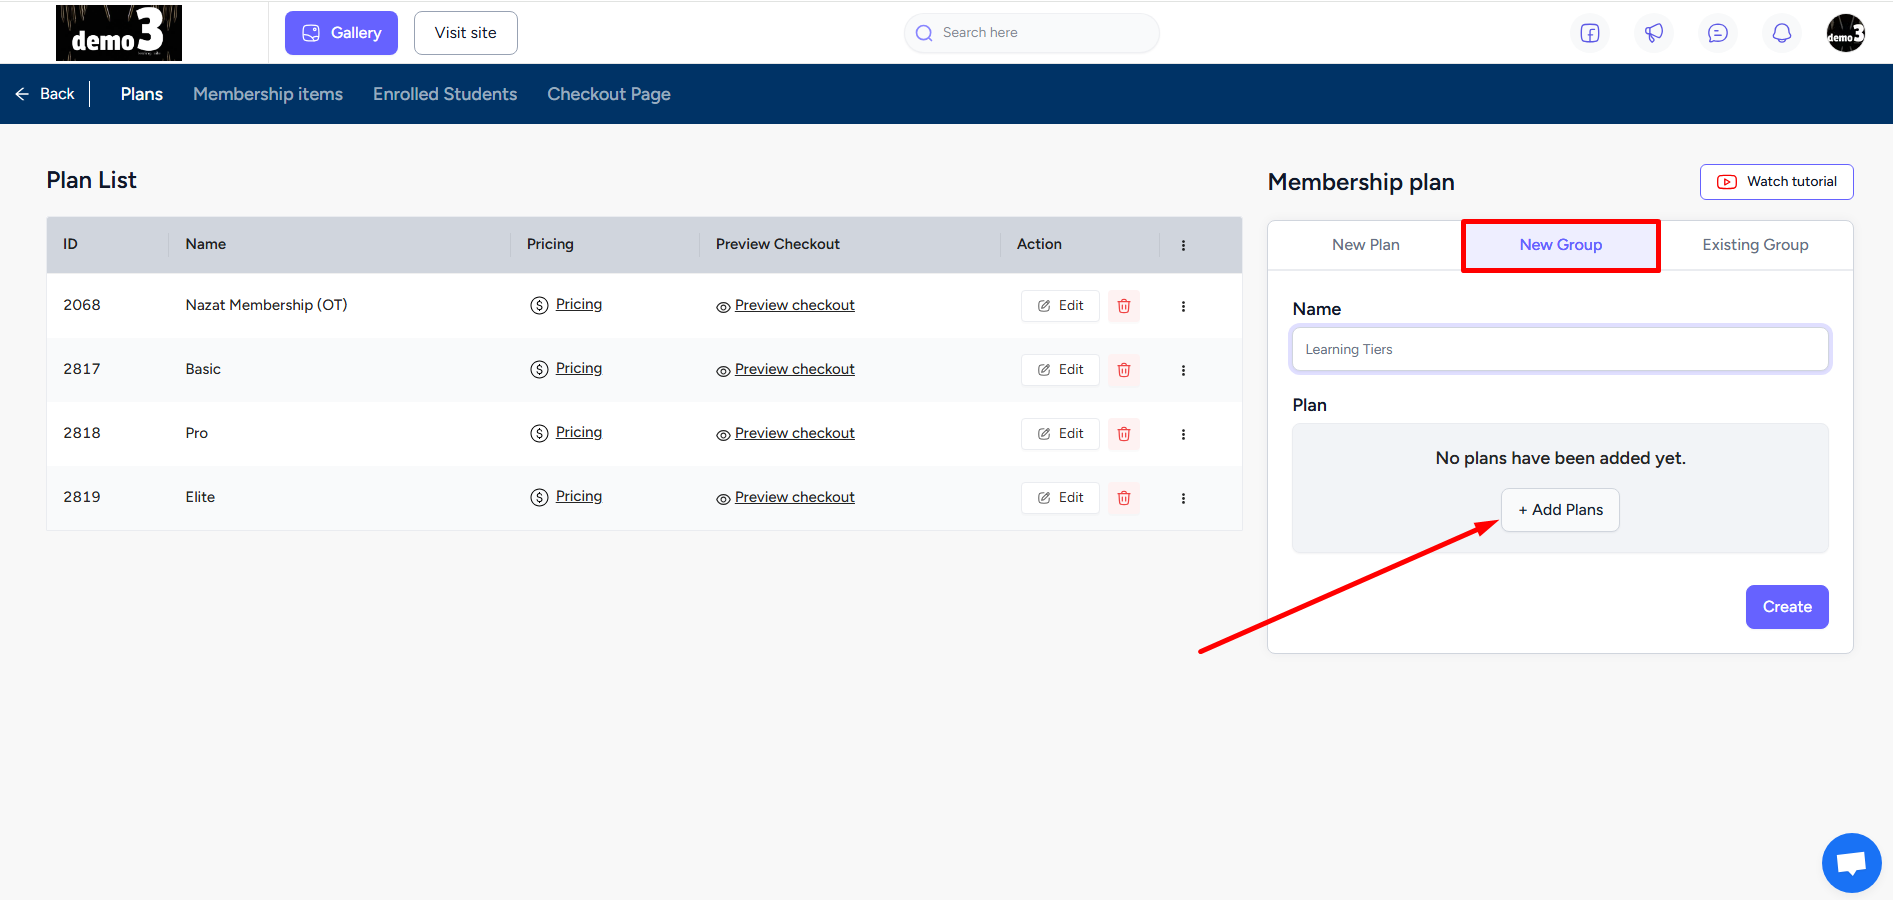
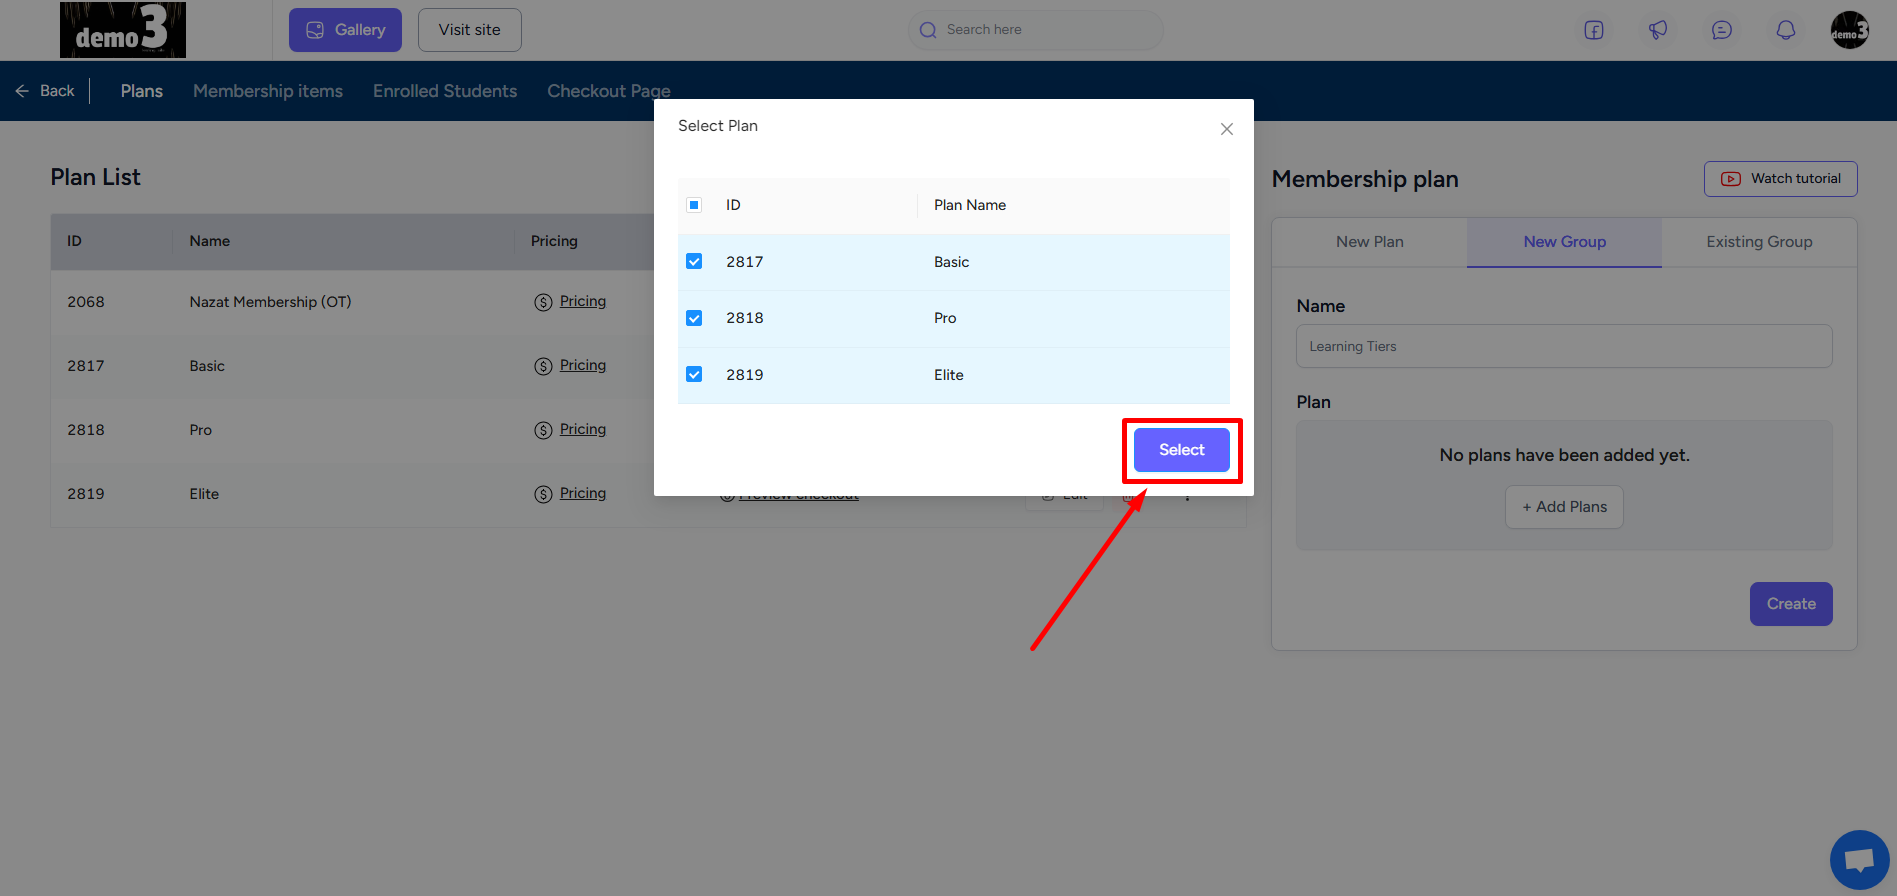
Once pricing is set for the plans, you can go on to create a group. Click the New Group tab on the Membership plan panel. Give a group name and click the Add Plans button to start adding plans to the group.
Select the plans and add them. You cannot add a single plan to more than one group. Therefore, the plans that are already added to any group will not appear in this popup.
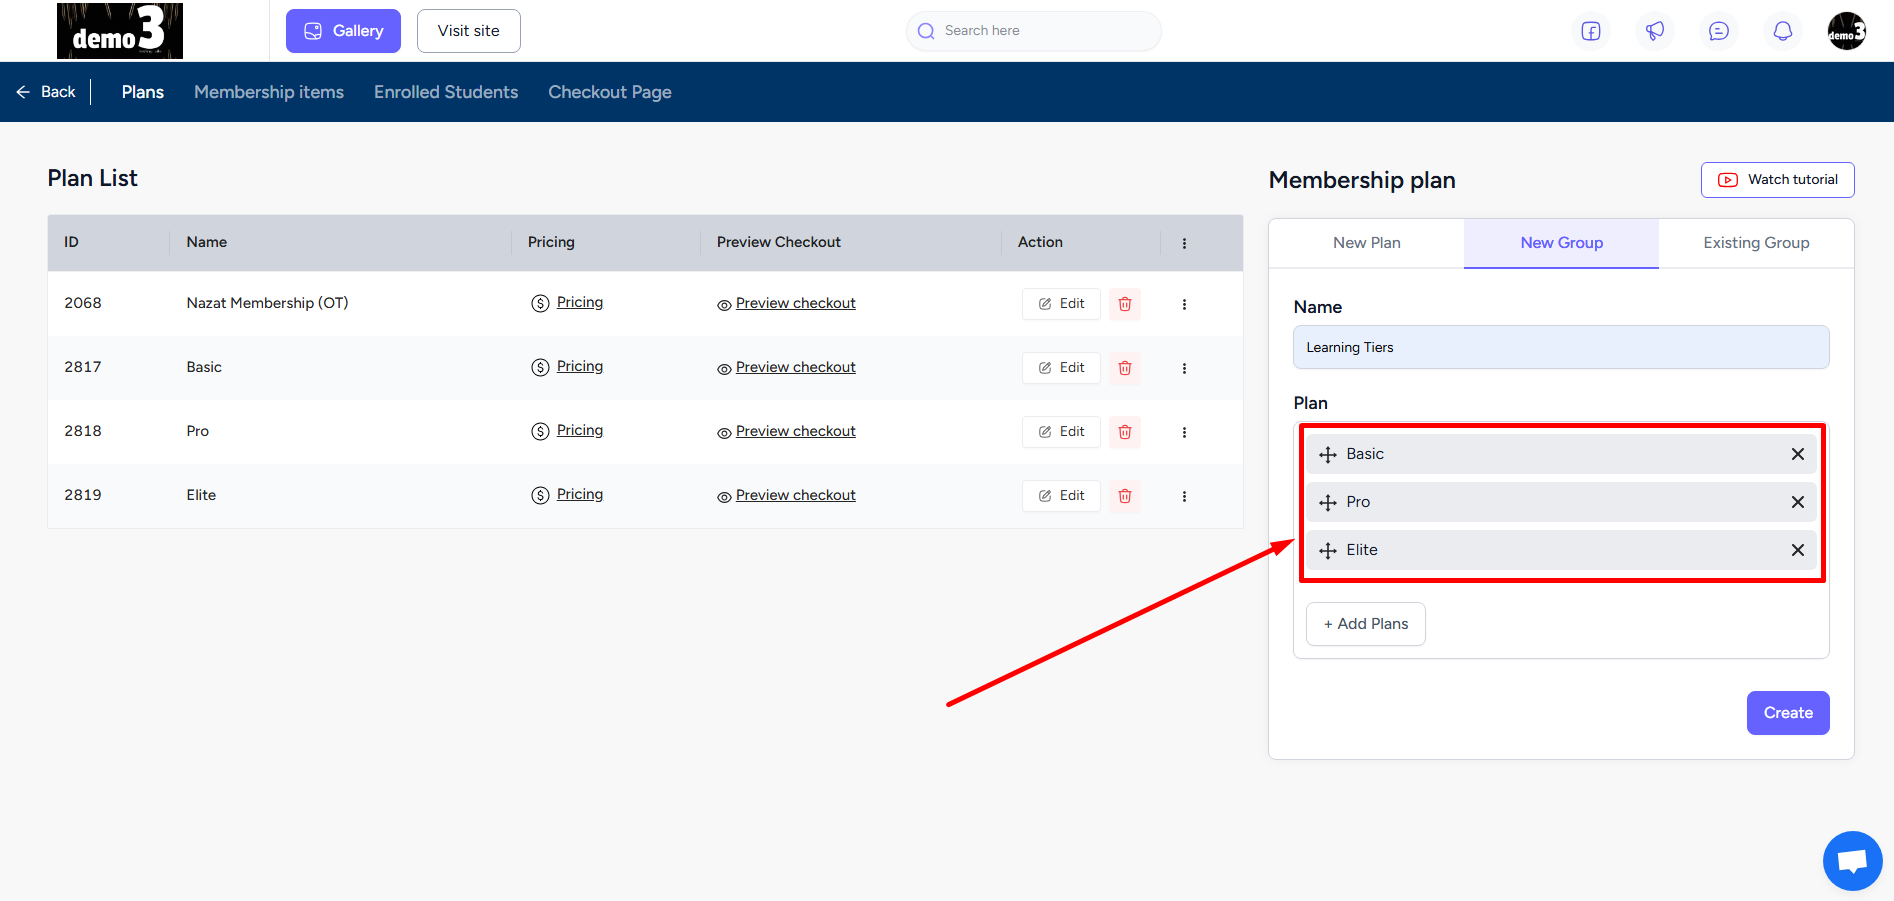
You can drag the plans to order your tiers. It is important to understand that the order you set here will determine the upgrade and downgrade system. So, in the screenshot below, the Basic plan is the lowest tier, then comes Pro, and then Elite is the highest tier.
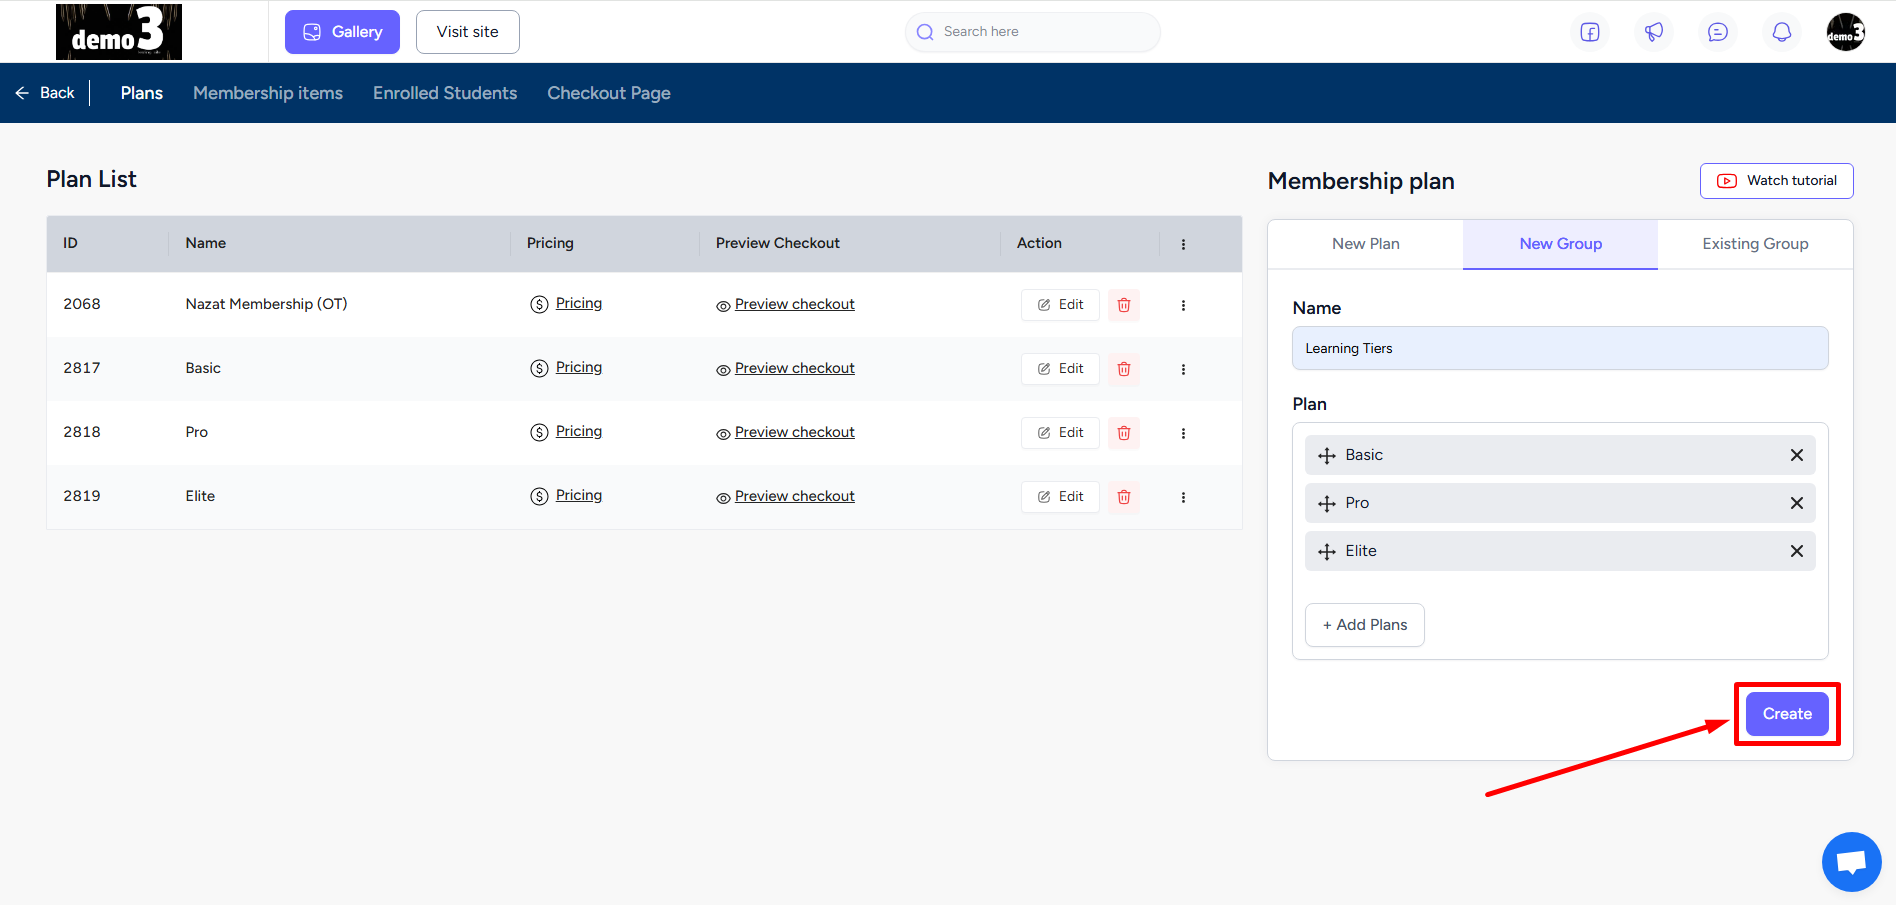
Click the Create button to finish creating the group.
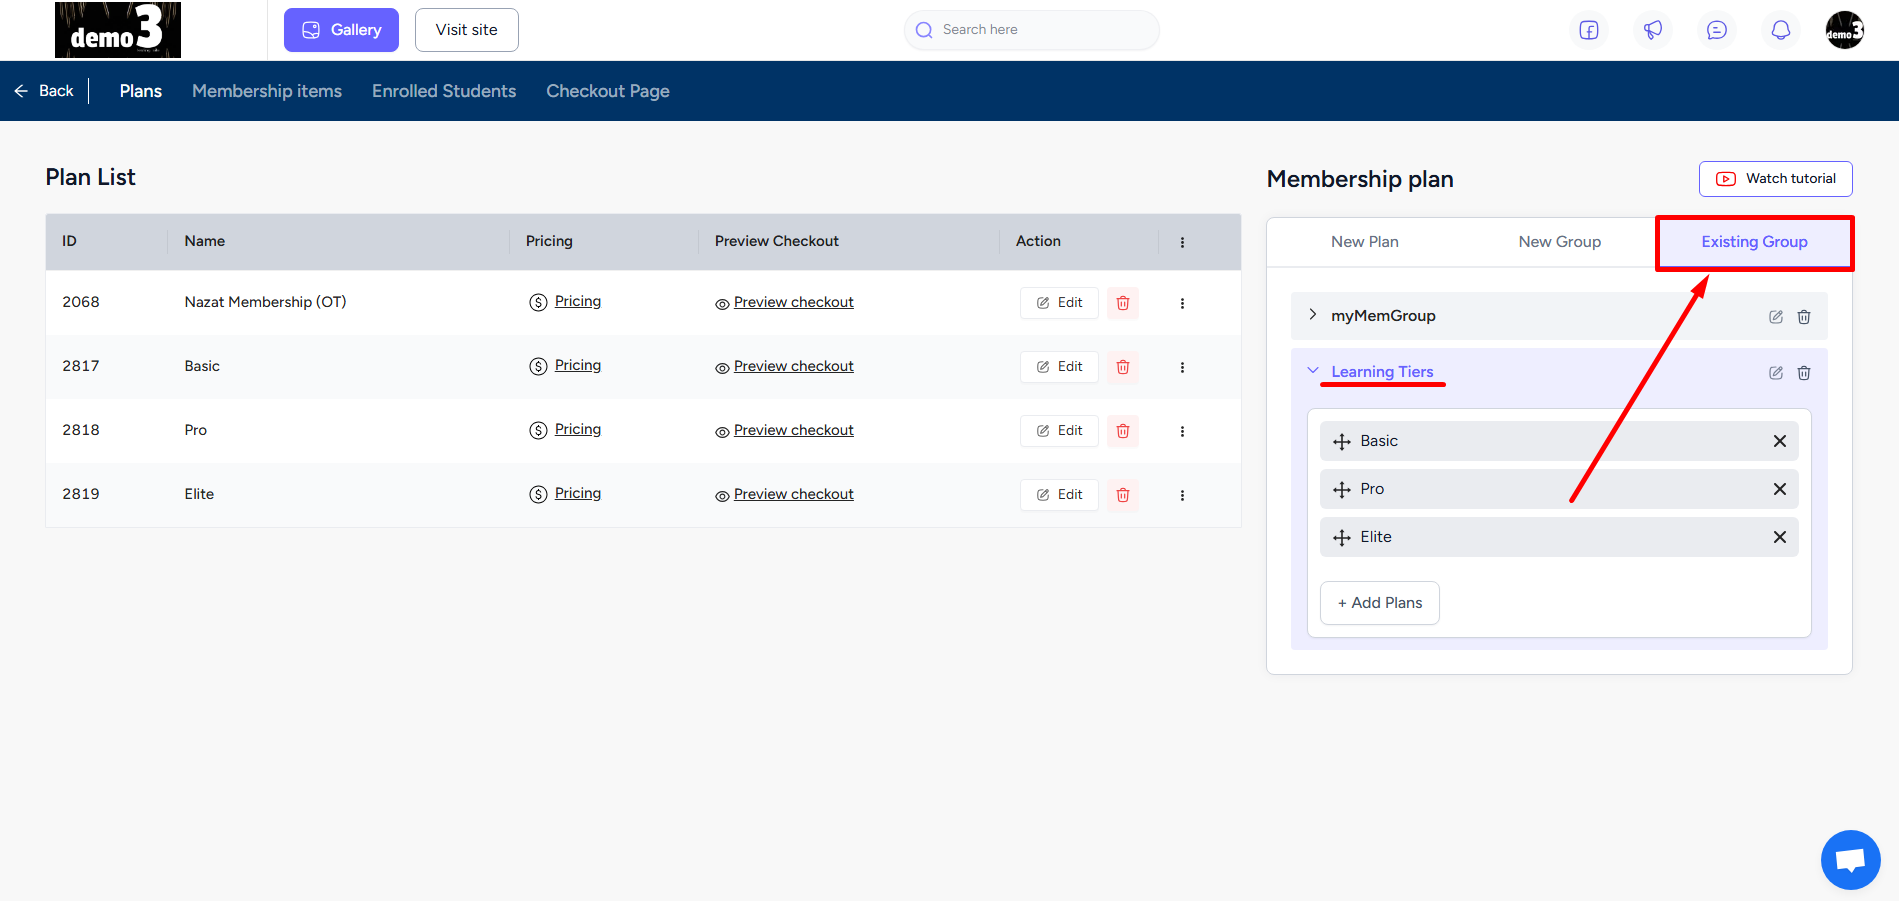
The Existing Group tab will show all the groups you’ve created. You can edit the group name, add plans, and change the plan order from here.
With the plans added to a group, use the EzyCourse builder to show the membership on your website.
Students can purchase any plan under the group and they will see the other plans available on their student dashboard so that they can easily upgrade/downgrade any time. They can view all the plans you added to the group from the Memberships menu.
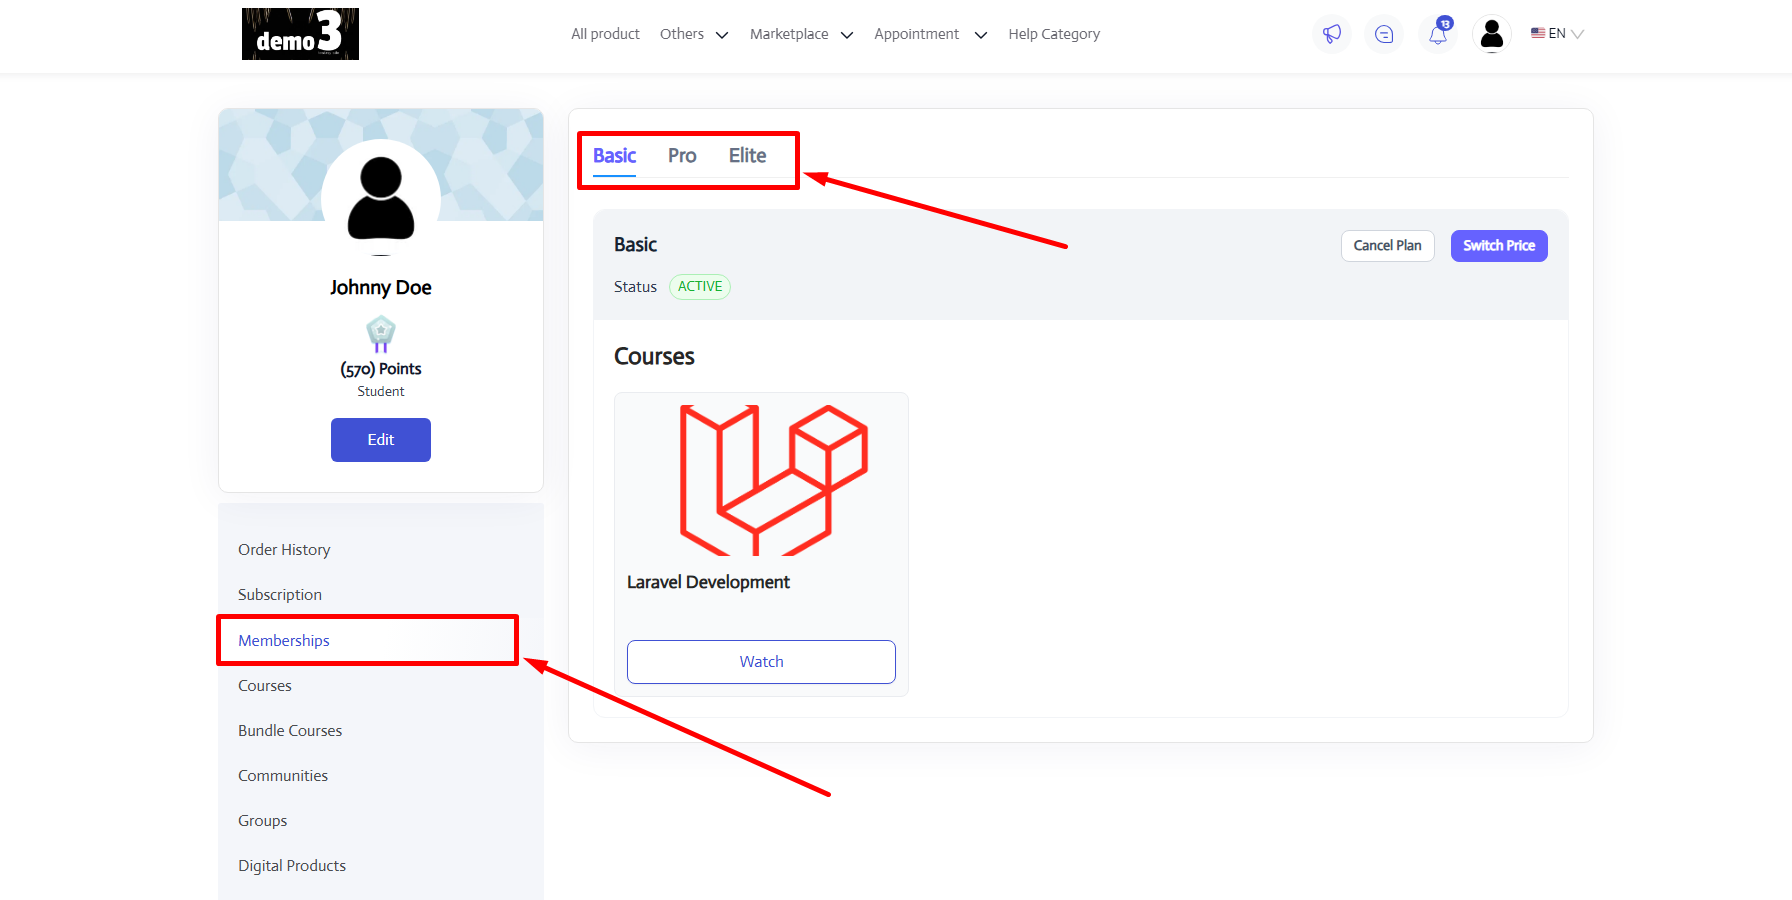
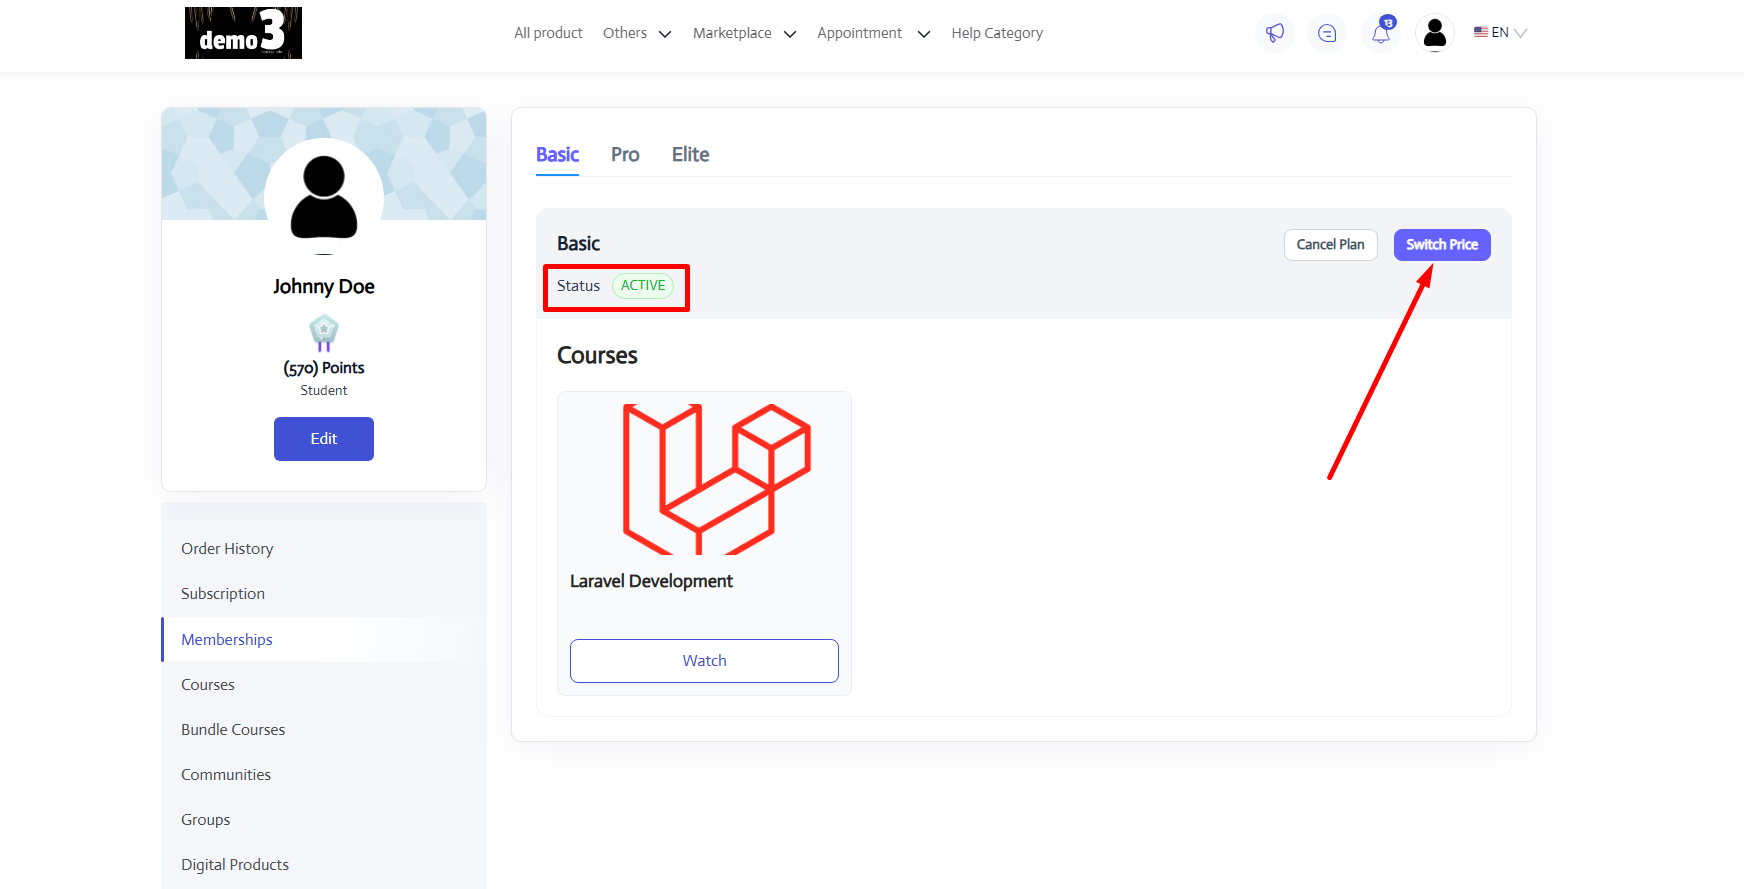
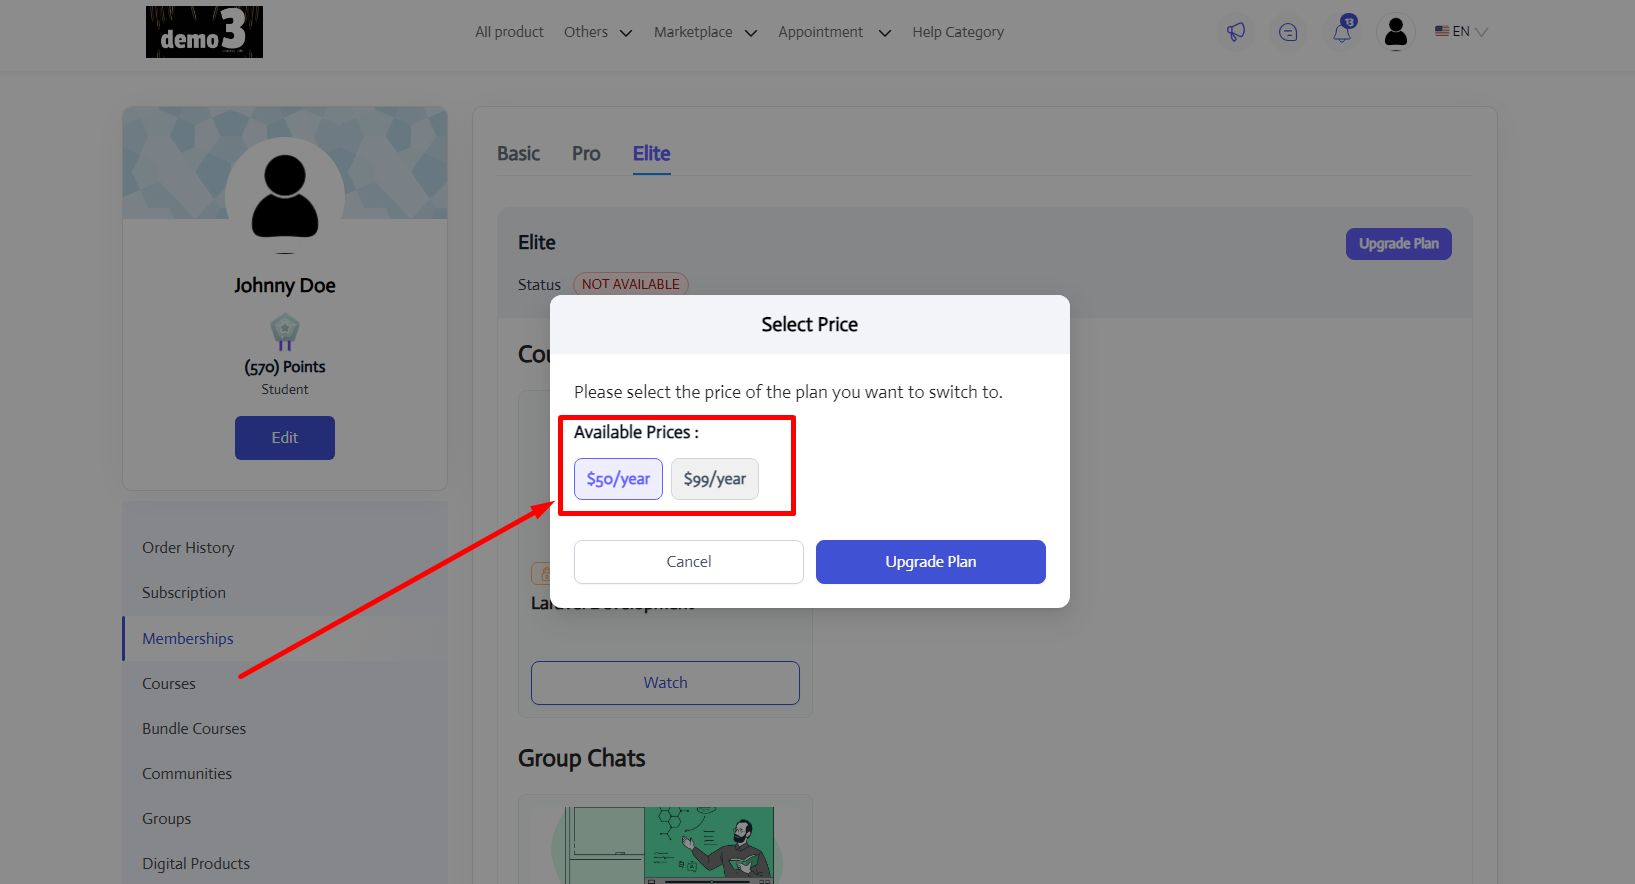
If you’ve set multiple subscription prices for a single plan, then they’ll be able to view all the prices. In fact, they can even switch to a different pricing of the same plan that they purchased. To do that, they can click the Switch Price button.
To switch plans, students can move to the tab and then click the Upgrade Plan or Downgrade Plan button. They can view all the products available on each plan, but the products will remain locked unless they purchase the plan first.
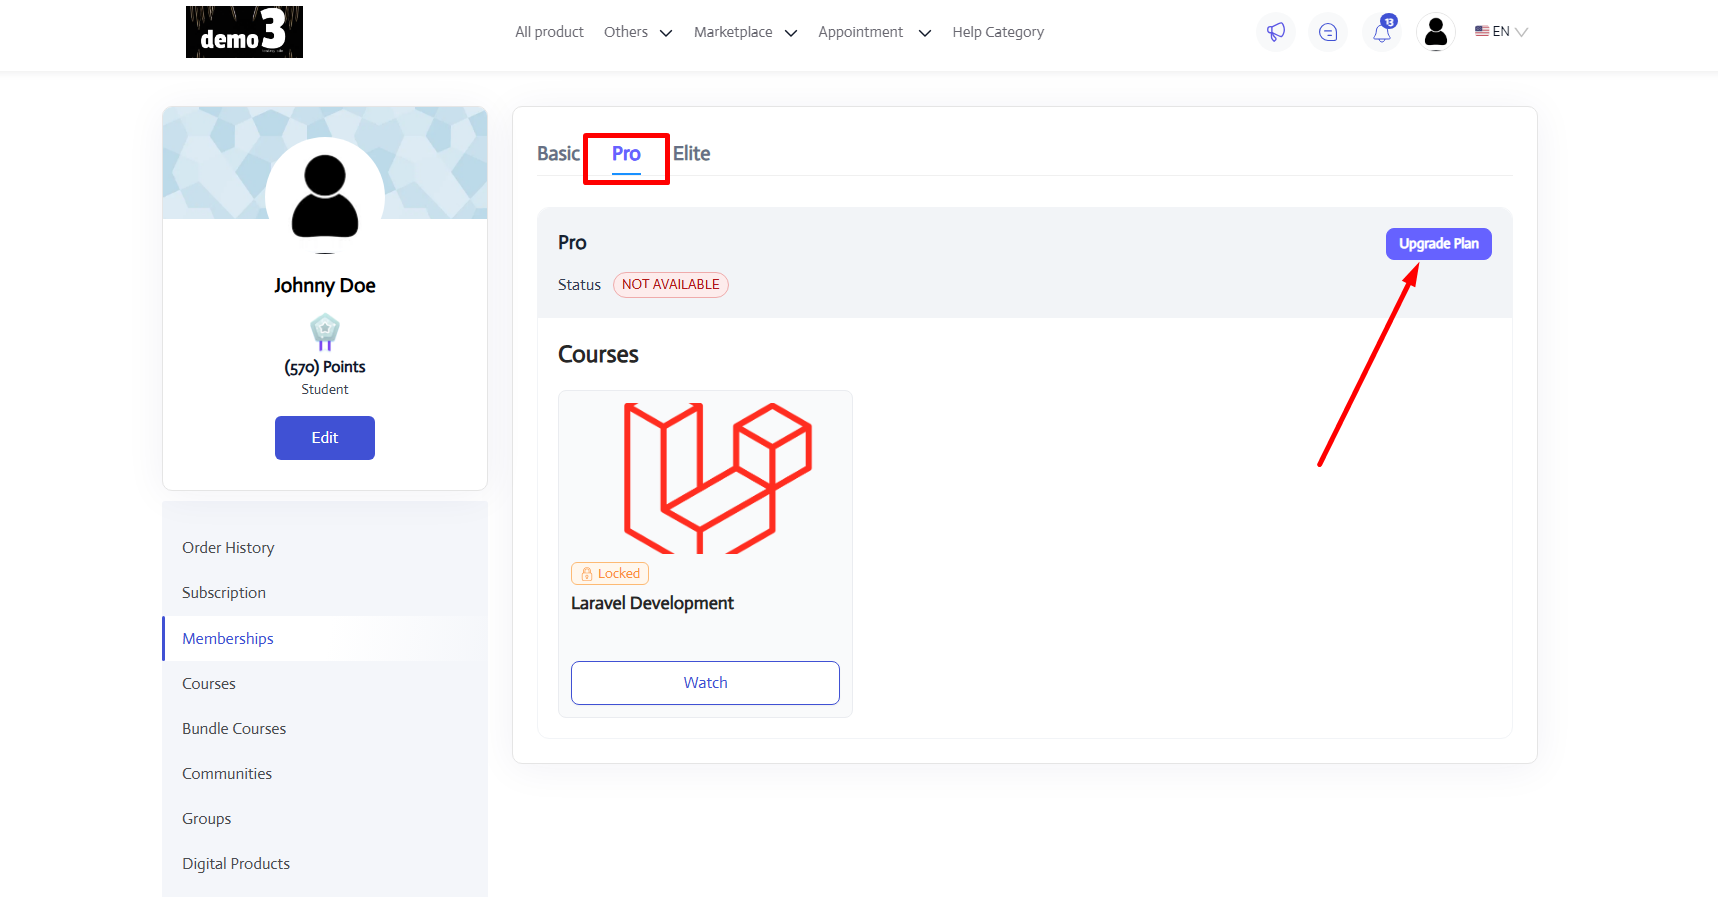
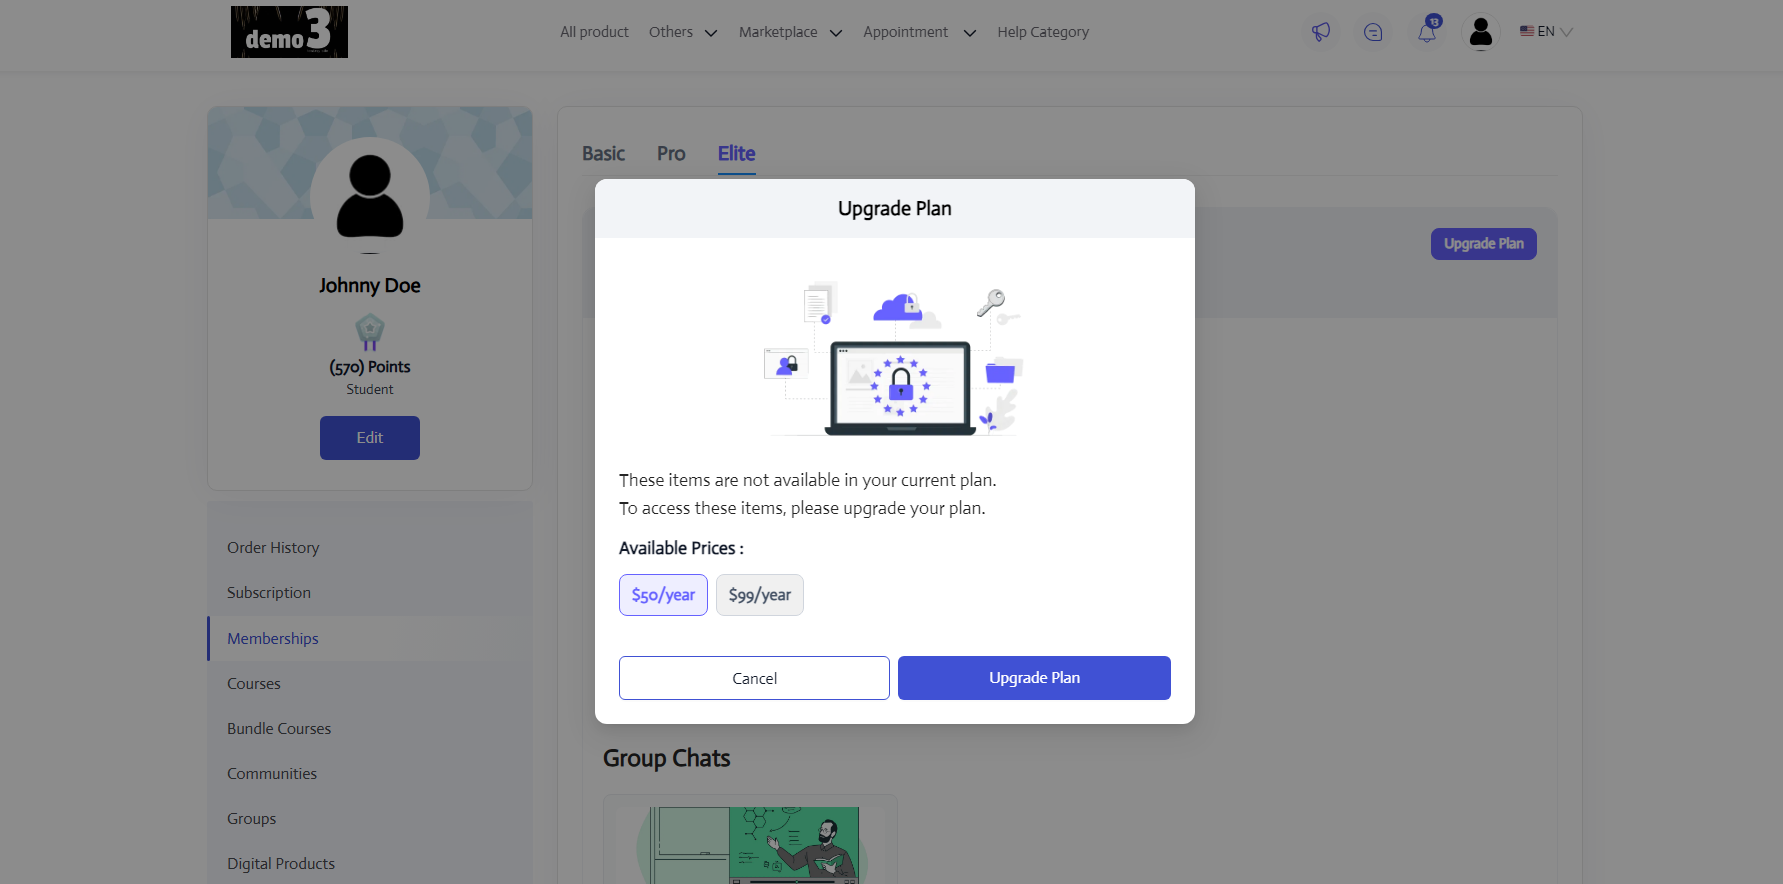
Clicking the Upgrade/Downgrade plan button will show all the prices as set for the plan. So, they can choose the option that best fits their need.
If the students click on any locked content under a plan, they will see a popup to motivate them to upgrade their membership plan.
In terms of trial plans and charging the price when the customer is switching plans -
• If a customer is switching from a trial plan to another trial plan then they will be charged after the end of the trial days. The trial period will be updated based on the new plan, but it won’t restart. Instead, the remaining trial days will be adjusted accordingly.
• If a customer is switching from a trial plan to a non-trial plan, then they will be charged instantly.
• For non-trial to a trial plan, charging will also be immediate.