
Back
Live Lessons
How to Create Live Lessons on EzyCourse
Dish out some lessons, lectures, and get up close and personal with the students in a Live session on EzyCourse.
This article covers how you can create live lessons and use the different settings related to the lesson. In addition, you’ll also see how your students interact with the live lessons in your course.
Also read : SCORM/HTML Lessons
Create a New Live Lesson
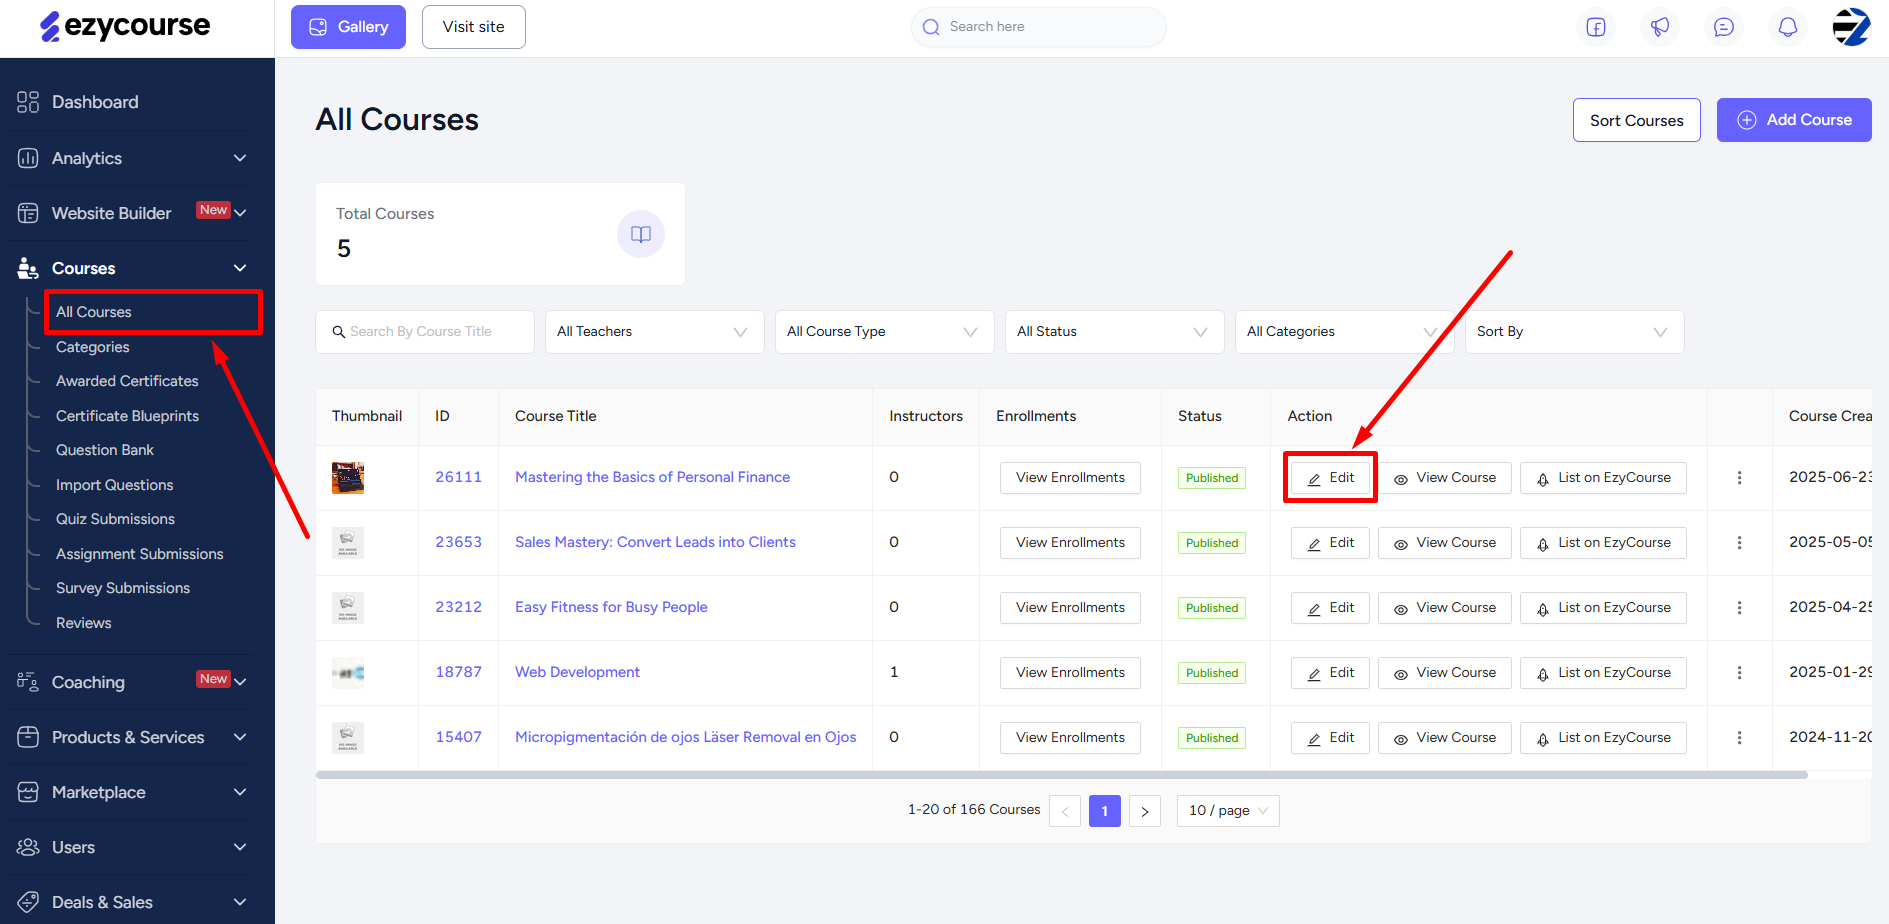
Go to Courses → All Courses → and click the Edit button on a course.
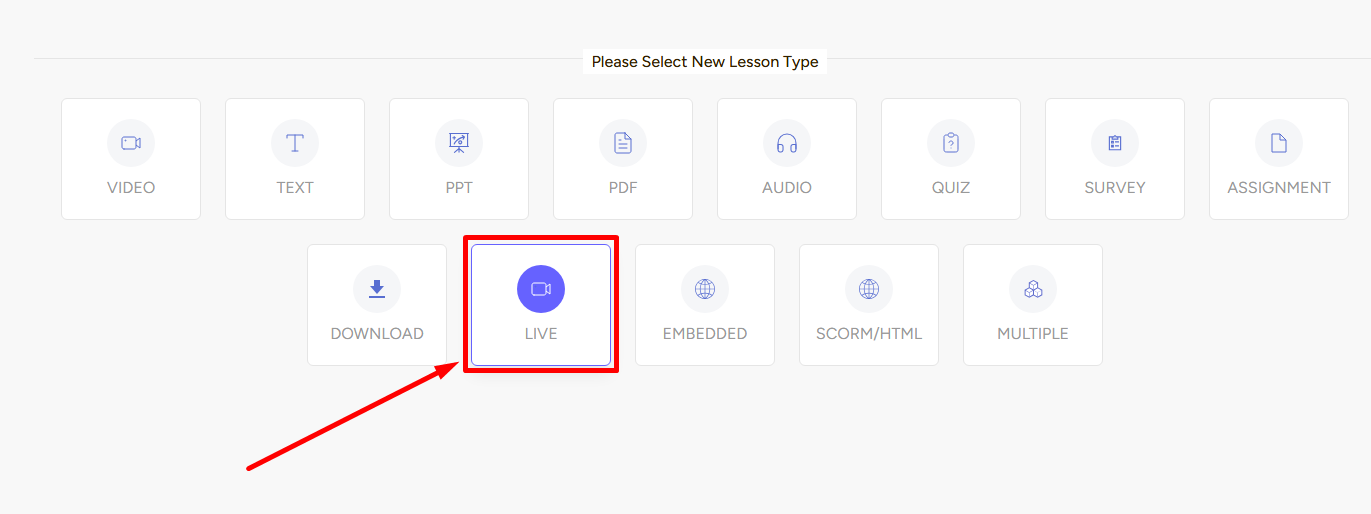
Stay on the Curriculum tab → select a chapter → click the Create New Lesson button and then select the Live card to get started.

Once you click the Live lesson card, you’ll see a form section in the middle of the screen and Lesson Settings on the right panel.

In the Form section, you can enter a name for the live lesson, pick a specific lesson type which consists of external live and native live (built-in).
External Live
External live allows you to conduct live meetings by redirecting students on any other external platform like Google Meet or Microsoft Teams. You only need to paste the Meeting Link, set date, start time, and time zone.

Native Live
This is a built-in live meeting solution with better and more powerful features. Select Native Live and configure the meeting settings. On the configuration modal, set the meeting start time, duration (minimum 15 minutes to maximum 180 minutes depending on your subscription plan), and timezone.
[Note: You cannot schedule the start time any earlier than 20 minutes so that it can sync with the specific server.]

You can also enable the Secured Meeting option to keep your sessions secure and prevent unauthenticated users from joining. Although sharing the meeting invite link allows users to join directly without logging in.
In addition, you can select a specific server location (50 locations) for your meeting. By default, the system selects the nearest server based on your location.

With the three Lesson Settings — Draft, prerequisite, and discussions. Selecting draft allows you to keep the lesson as a draft and later publish it. Enabling prerequisite will require students to complete the lesson to advance further. Lastly, enabling discussion allows students to chat with you and among themselves.
Click the Create button to add a Live lesson to your online course.

Student Perspective
Students can see the live countdown to the time set for joining the class. Once the time comes, they’ll see a button to join the class.

External Live Meeting (Google Meet)

EzyCourse Native Live

Of course, what platform you use to take the live session is up to you. Google Meet, EzyCourse Native Live, or any other platform of your choice.