
Back
EzyCourse One-Click Upsell & Downsell
What problem it solves or why you need it
There are countless ways to generate revenue on the EzyCourse platform. In addition to selling products, you can also use different features such as coupons to persuade customers into buying your products.
And now, you can easily create upsell items which will let you promote any products & services as a customer is done purchasing another product. This way, you can persuade them to buy something additional or more expensive with a click of a button. As a result, you will ultimately add more to your revenue collection.
Moreover, you can also add downsell items to ensure the customer is getting something within their budget. You can offer a more affordable alternative product as the downsell. This will help to generate revenues from customers who are hesitant to purchase.
How it works
As an admin, you can create upsells where you select the primary and secondary products. Secondary product here is the upsell item. Also, you have to choose a custom page where the user will be redirected to after purchasing the primary product.
[Note: Primary product could be any course or any products & services on your platform. However, the membership option is not included in this feature.]
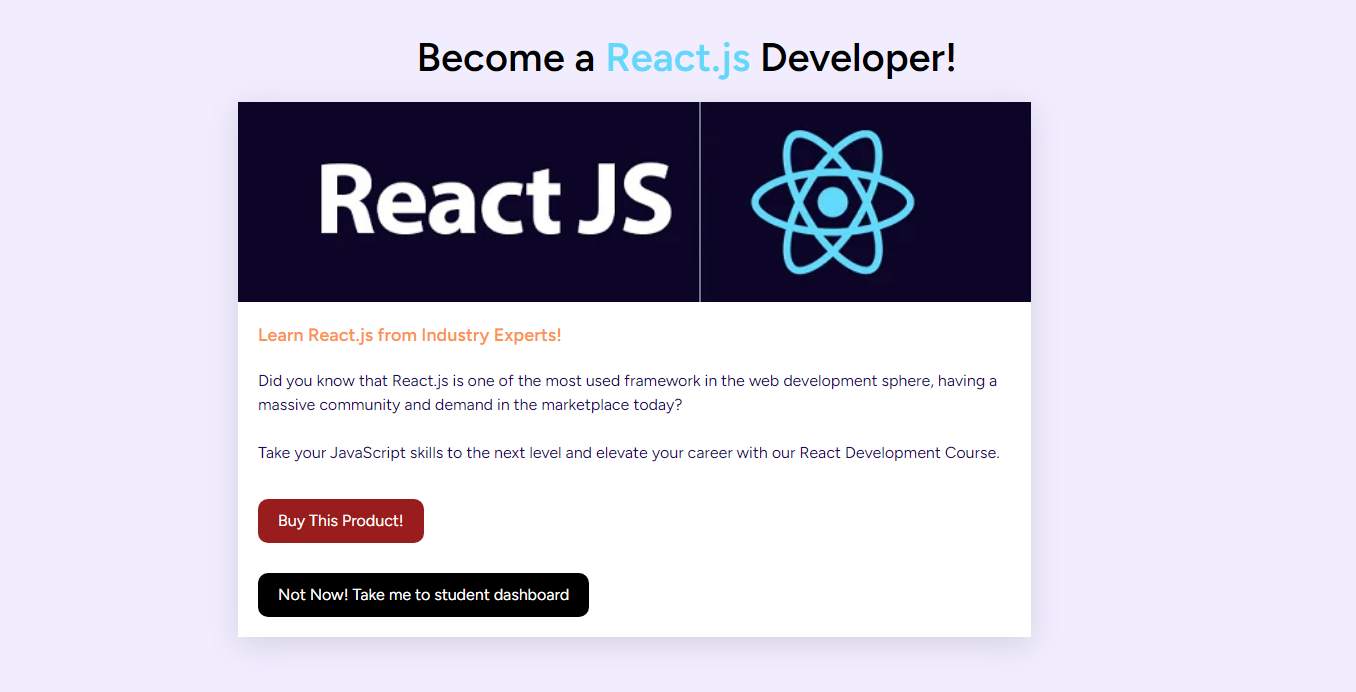
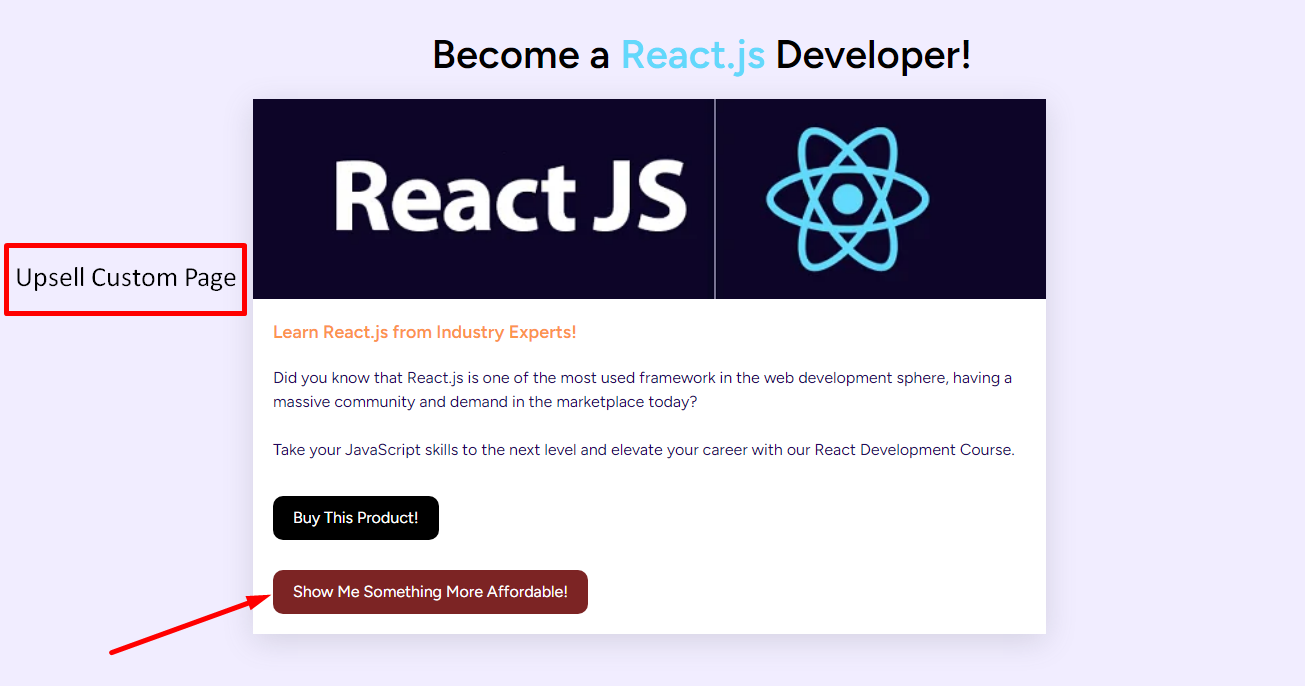
Primary product is the one which is being purchased by your customer. The primary product can be selected from any course, product, and service. After purchasing, they will be redirected to the custom page where you can showcase the secondary/upsell product. On the custom page, they can either choose to buy the upsell or simply go to their student dashboard.
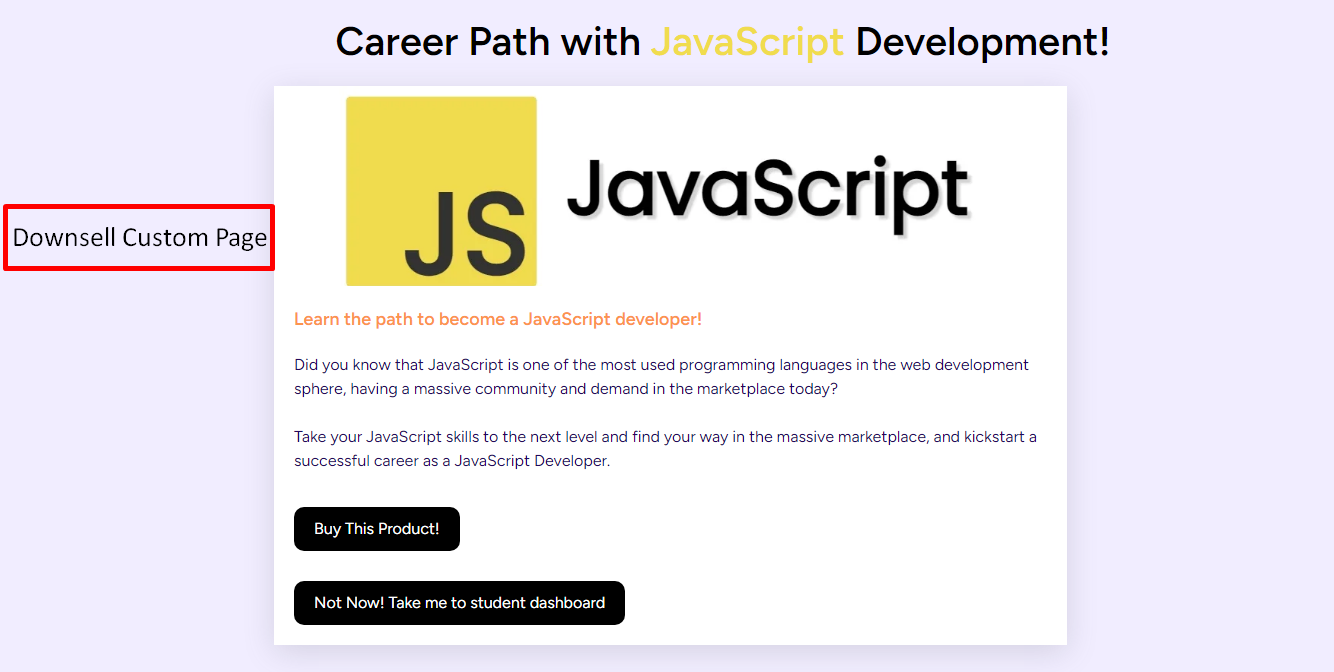
After adding an upsell, you can also add a downsell. If you set a downsell, then it will be shown to your users when they choose to not buy the upsell product. Adding a downsell also requires you to select another custom page where you’ll show the downsell item.
[Note: You have to use the Website Builder to create your custom page for showing upsell/downsell items.]
How to get started using it
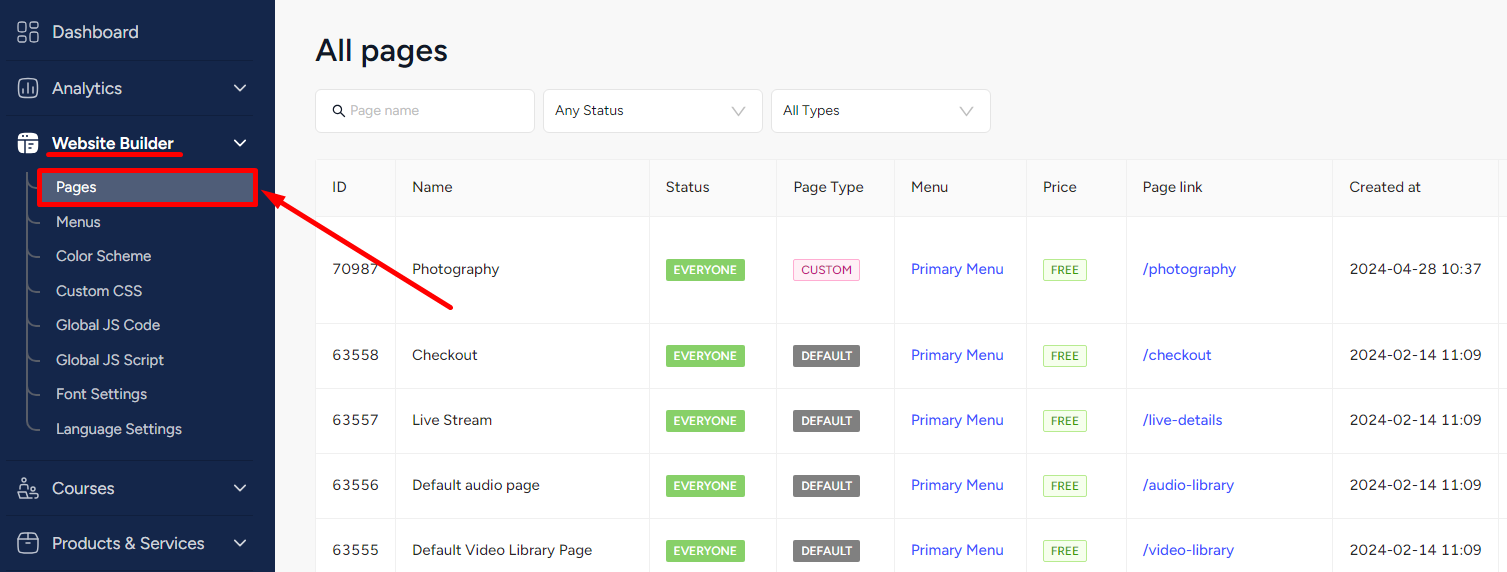
The first thing you should do is make the custom pages for the upsell and downsell. You can do that using the EzyCourse Website Builder on your dashboard.
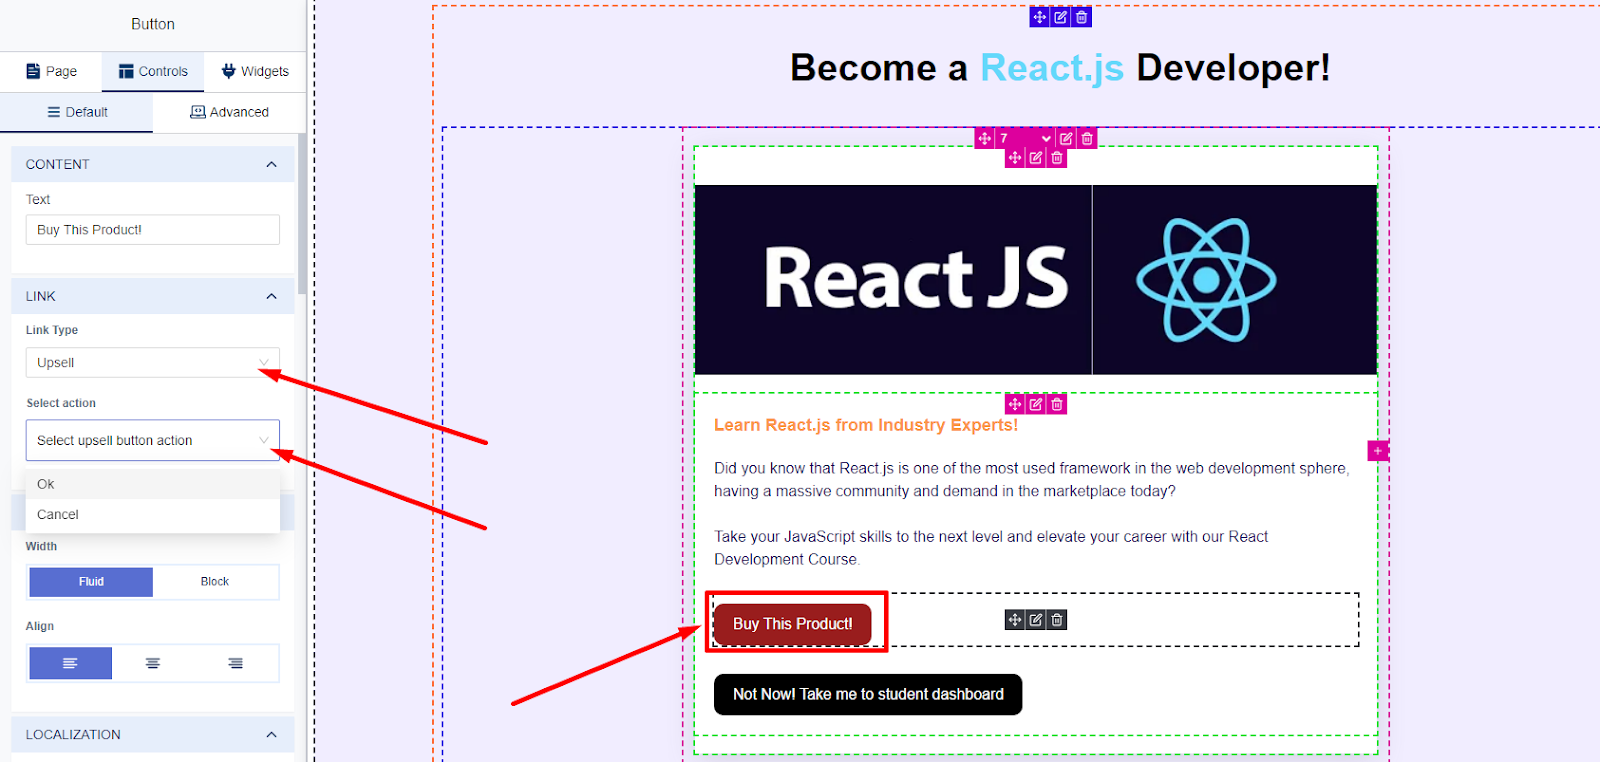
Your custom page should ideally have two buttons which will let users choose whether to buy the upsell/downsell or simply go to the student dashboard. It doesn’t have to be buttons, you could use any type of link.
On the builder, click a button, choose the Link Type to be “upsell” and then choose action to be OK. Do the same for the second button but select Cancel for that one. The button/link with OK selected will work as the upsell purchase button. The button/link with Cancel selected will simply redirect the user to the student dashboard, or the downsell custom page if downsell is set.
[Note: You have to create separate custom pages for the upsell and downsell. You will find templates on the website builder specially designed for upsell and downsell page. Using them will save you time and effort.]
With the custom pages created, you can go on to add an upsell on your platform. To do that, go to Deals & Sales -> Upsells -> and click the Add Upsell button on the top right corner of your screen.

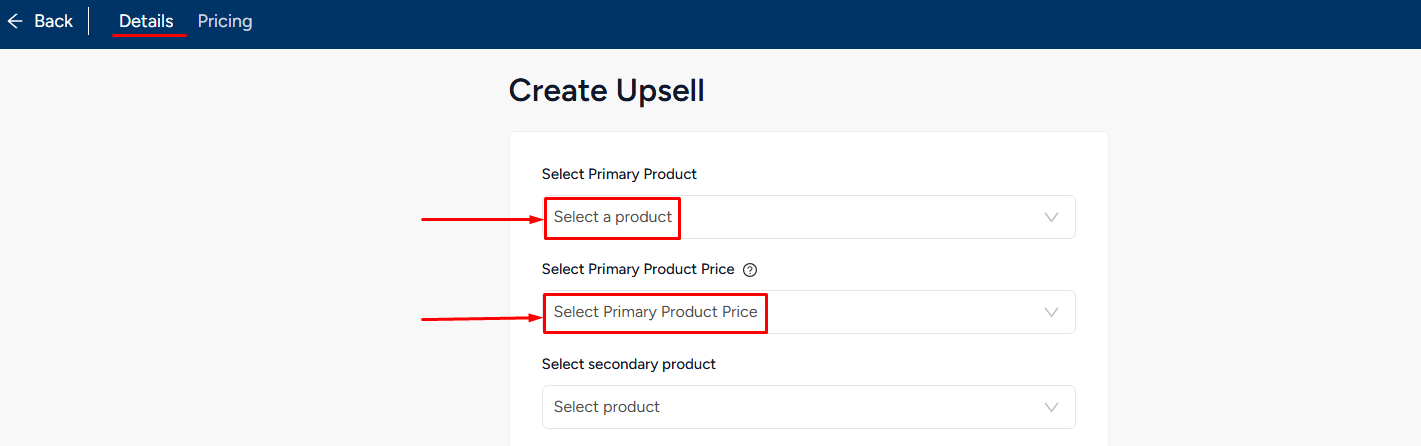
When creating an upsell, you have to choose the primary product and also the price of the primary product for which you wish to show the upsell.
[Note: If you ever change the price of the primary product then you’d have to simply edit and update the upsell also. Otherwise, the upsell will not work.]
Then select the secondary product which is in fact the upsell. And also select the custom page which will be shown after your user purchases the primary product.
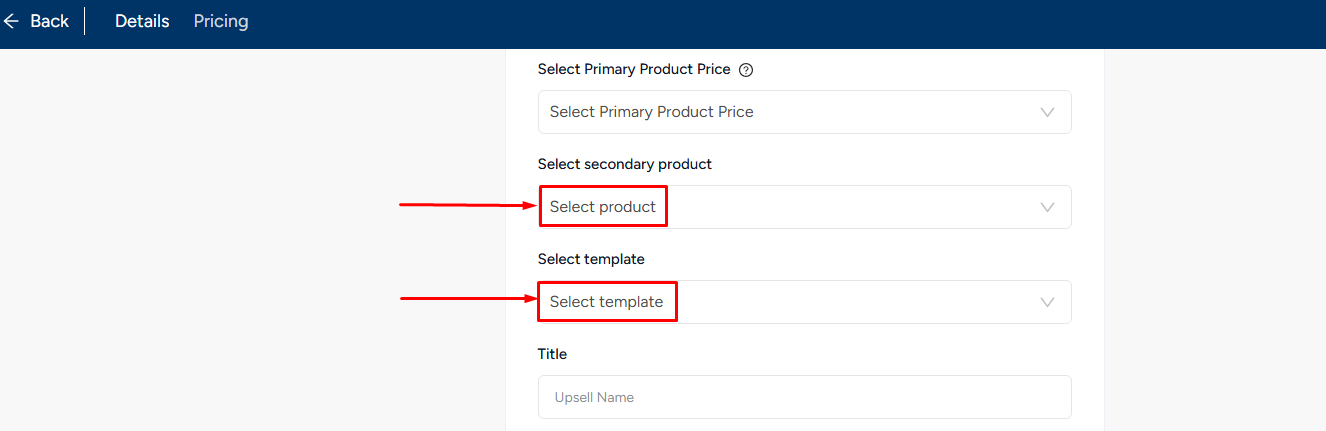
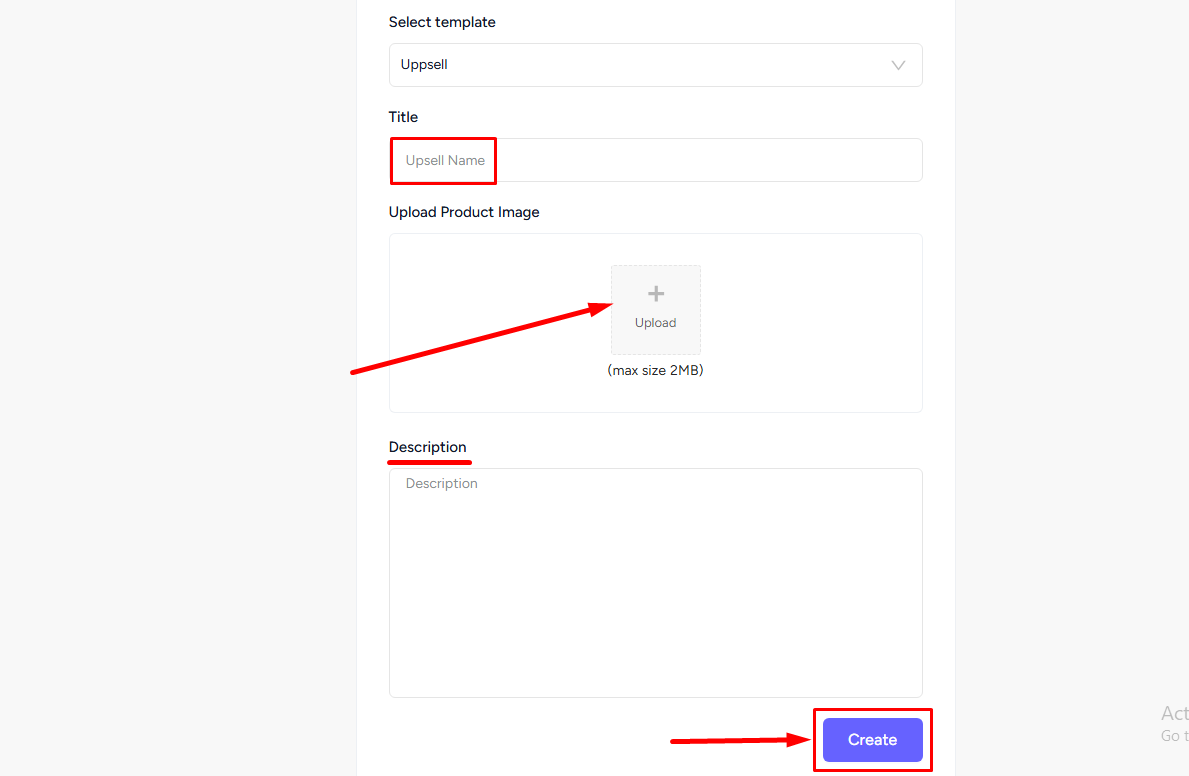
Finish creating the upsell by giving the title, image, and description. Don’t forget to hit the Create button.
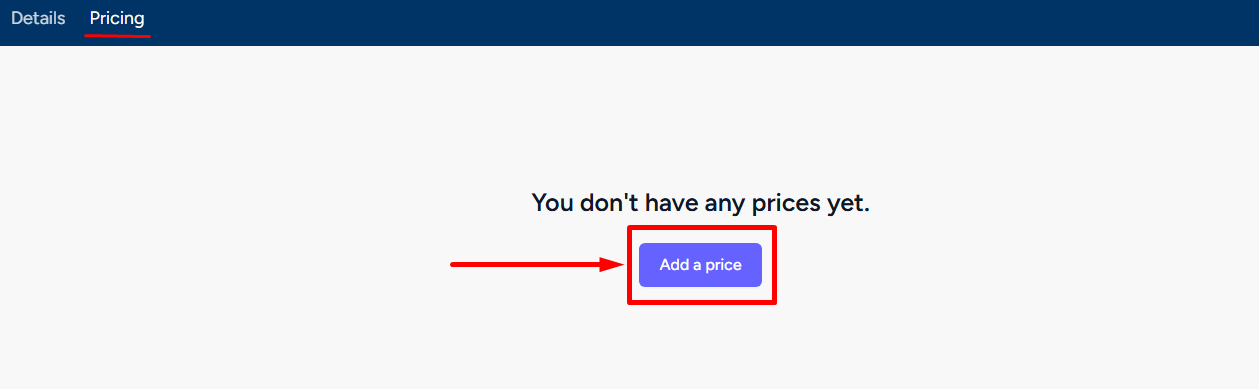
Once you have created the upsell, you can set the pricing for the upsell. For that, you have to go to the Pricing tab and click on the Add a price button.
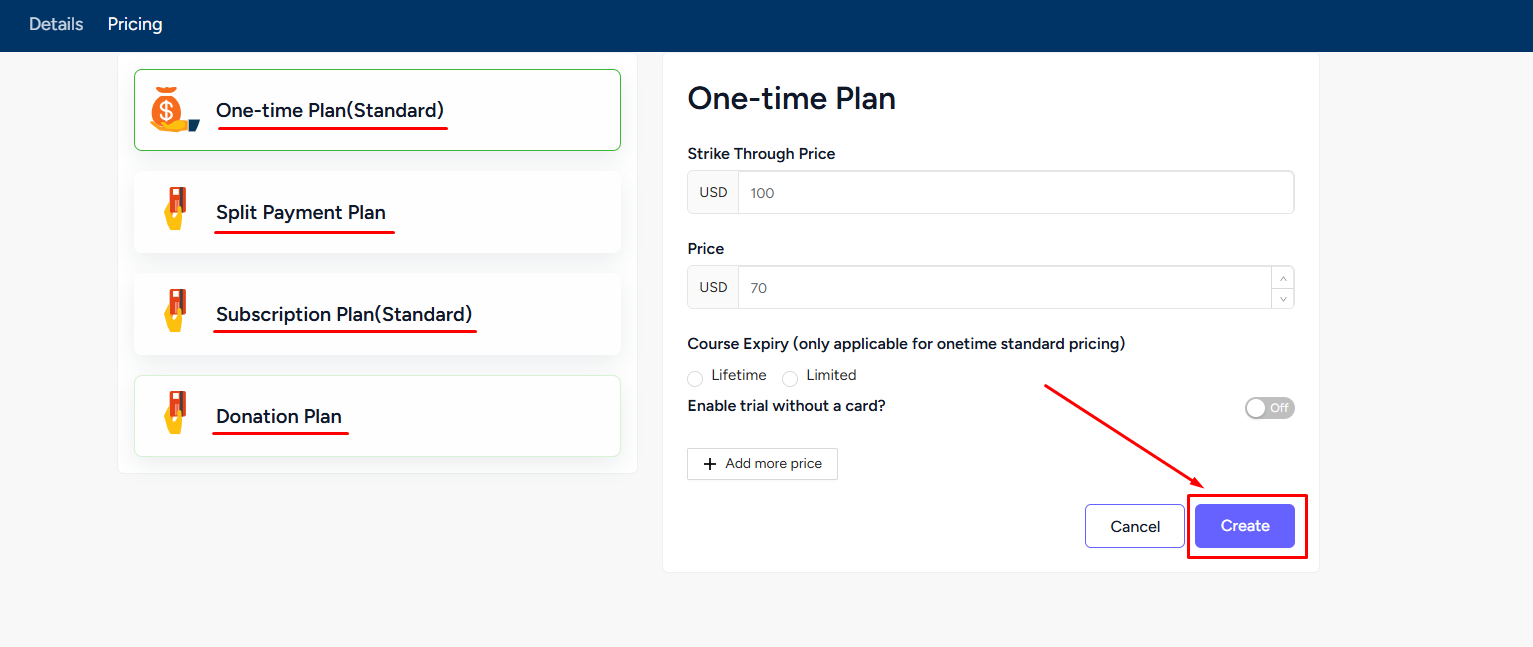
Here, you will find 4 pricing options available to set up your upsell pricing. These are - One-time Plan, Split Payment Plan, Subscription Plan, and Donation Plan. Hit the Create button to finalize the pricing procedure.
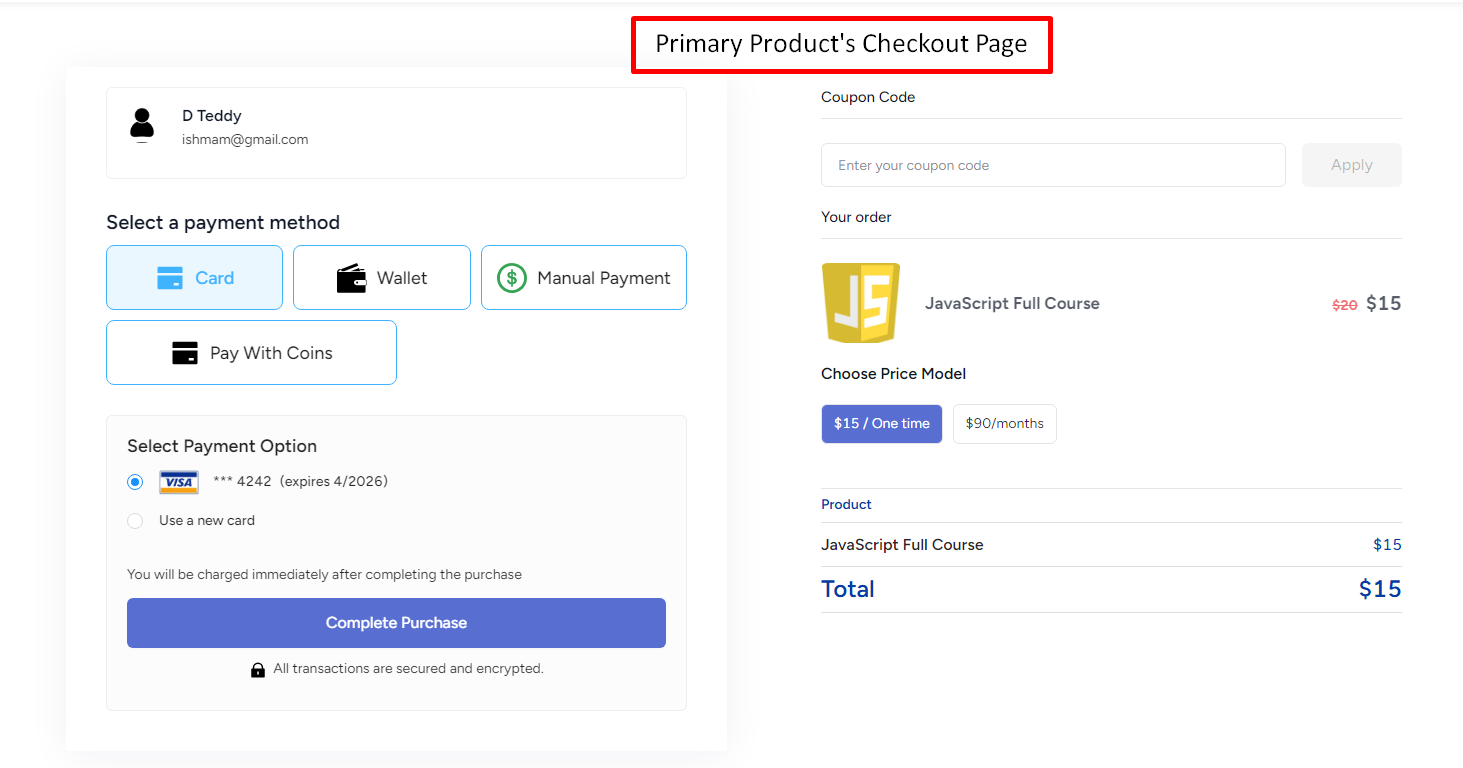
Now, when the student purchases the primary product, they’ll be redirected from the primary product’s checkout page to the custom page where you will show and promote the upsell. From there, the student can choose to buy the upsell item with a click of a button or simply reject i.e. go to the student dashboard.
[Note: You can create multiple upsells for the same price of a primary product. But, you cannot add any upsell for Free or Free-Trial.]
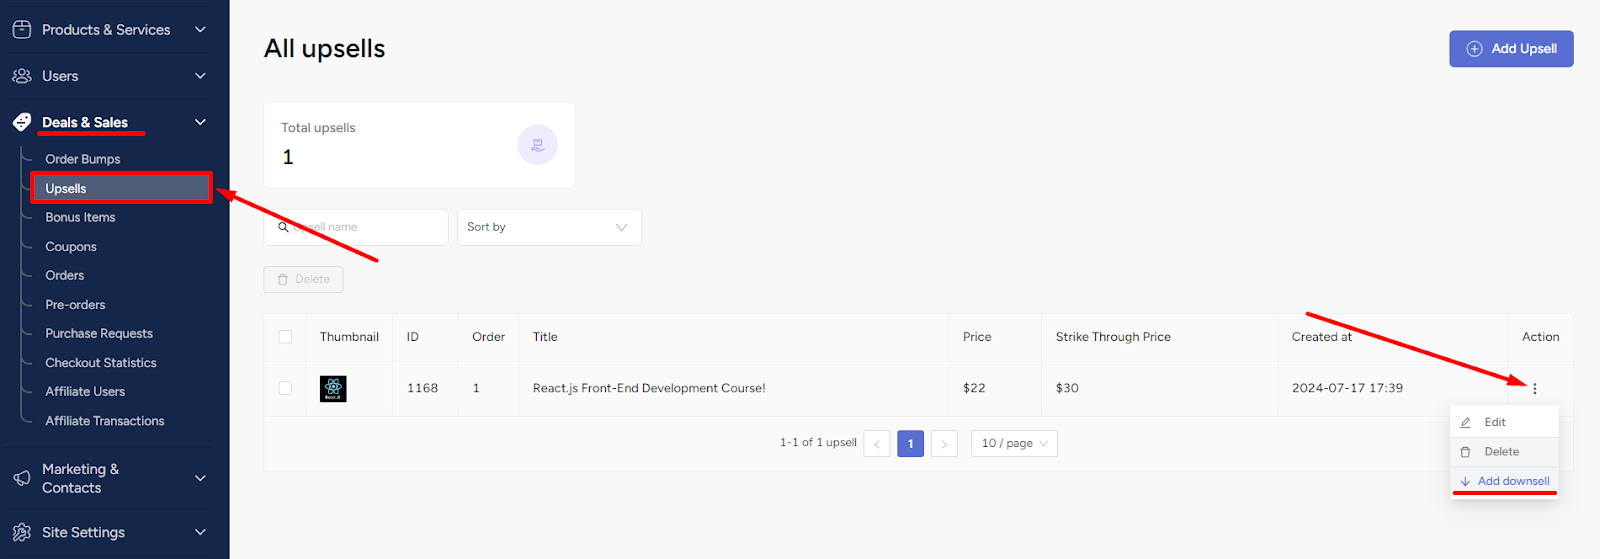
With no downsell set, the button where you selected Cancel will take the user to the student dashboard. To set the downsell, go to Deals & Sales -> Upsells -> click the three dots on an existing upsell and choose the Add downsell option.
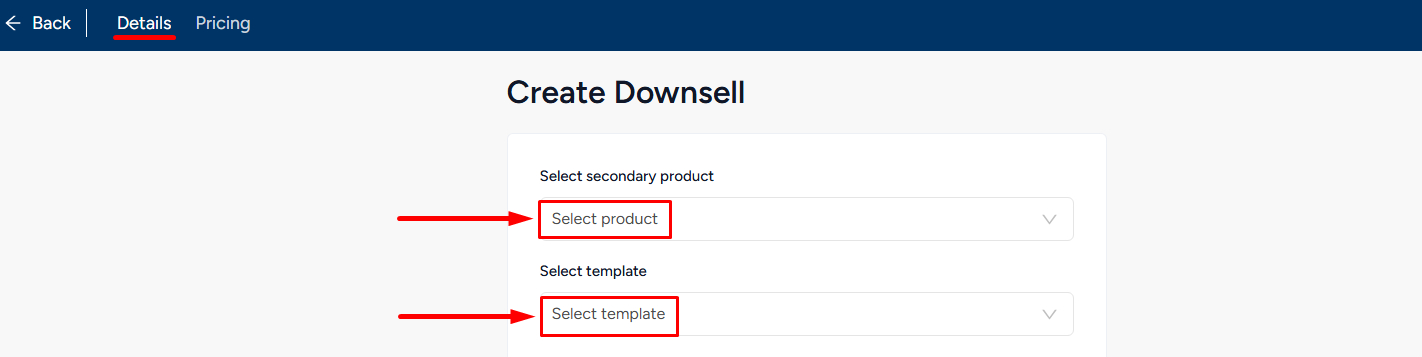
For the downsell, you have to choose the secondary/downsell product. Also, choose the custom page for the downsell promotion and create the pricing.
[Note: Remember that the primary product for the upsell and downsell will be the same one. But, the custom pages for the upsell and downsell should ideally be separate pages.]
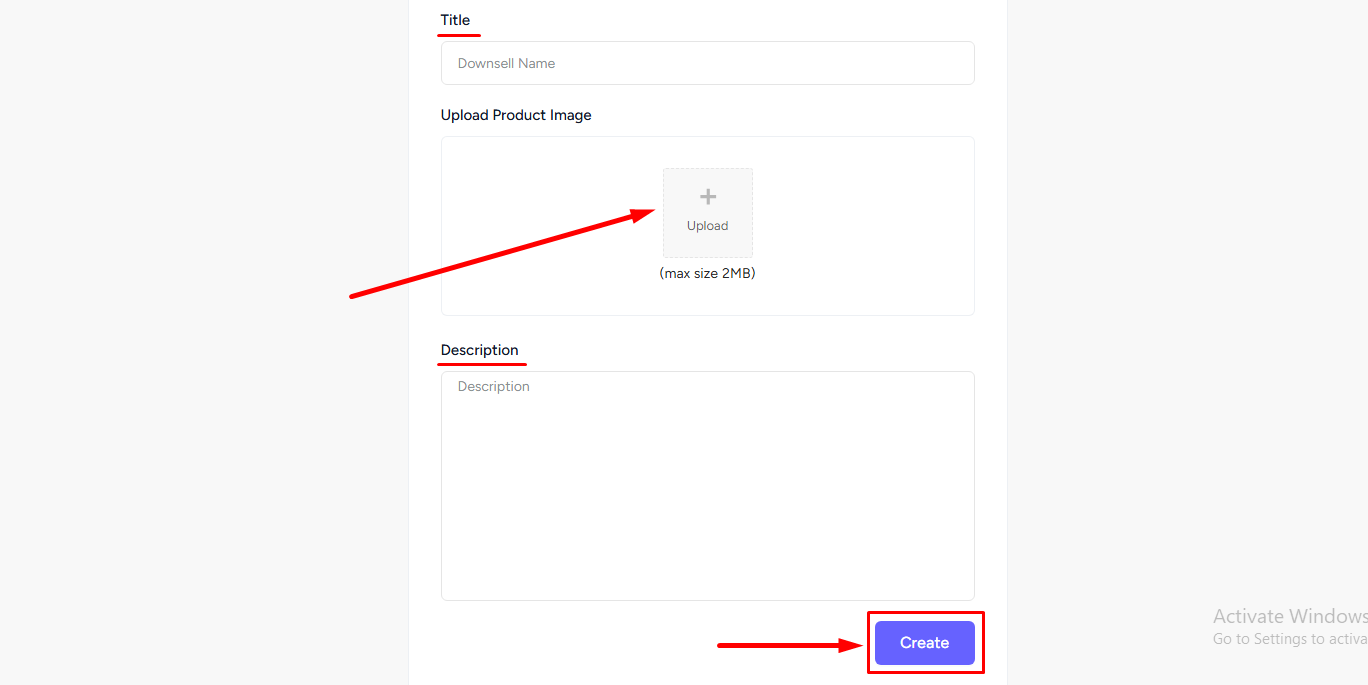
Finish creating the downsell by giving the title, description, and uploading an image. Don’t forget to click the Create button.
Once you have created the downsell, you can set the pricing for the downsell. For that, you have to go to the Pricing tab and click on the Add a price button.
Here, you will find 4 pricing options to set up your downsell pricing. These are - One-time Plan, Split Payment Plan, Subscription Plan, and Donation Plan. Click the Create button to finalize the pricing procedure.
With the downsell set, now when the student rejects buying the upsell, they’ll be redirected to the downsell custom page. From there, they can either buy the downsell or simply head over to their student dashboard.
Complete Flow
Just so there’s no confusion, here’s how the flow works when you use upsell and downsell with any product.
Case 1: You have only set upsell and no downsell is set.
- Students after purchasing the primary product will be shown the upsell custom page. They can either buy the upsell item from there and go to the student dashboard. Or, opt to not buy the upsell and redirect to the student dashboard.
Case 2: You have set an upsell and also a downsell.
- Students after purchasing the primary product will be shown the upsell custom page. They can either buy the upsell item and get redirected to the student dashboard. Or, they can cancel the upsell and go to the downsell custom page.
In the downsell custom page, they can either buy the downsell item with a click of a button and get redirected to the student dashboard. Or, they can cancel the downsell and redirect to the student dashboard.
Case 3: You have created multiple upsells for the same price of a primary product, and also set downsell for any upsell.
- Students after purchasing the primary product will be shown the first upsell custom page. If they choose to buy then they’ll be redirected to the 2nd upsell custom page. And so on. If they choose to not buy any of the upsell then they’ll be redirected to the student dashboard.
[Note: It is recommended to use separate custom pages when you are using multiple upsells for the same price.]
But, if any downsell is set then canceling an upsell will take users to the downsell custom page. From there, they can choose to get the downsell or simply redirect to the student dashboard.