
Back
Webhook Integration w/ Pabbly
You can use webhook to automate data transfer between EzyCourse and any other app. It allows real-time communication between applications, and removes the burden of manual data entry from your shoulders.
So, integrating Webhook means automating your tasks which otherwise could take hours and hours of boring work. You can automate new student sign up, enrollment to products, unenrollment from products, and more.
And now that the EzyCourse app is integrated on Pabbly Connect, transferring data from and into your EzyCourse platform has never been easier.
How to use Pabbly
Let’s see how you can use Pabbly, which has the EzyCourse app integration, for transferring data between your EzyCourse platform and other apps.
First, log in to your Pabbly Connect dashboard. On the dashboard, click the Create Workflow button.

Pabbly gives you the freedom to create a workflow using three separate ways. For this tutorial, we’ll use the “Create from scratch” option which gives maximum flexibility and the most advanced options.

On the popup, provide a name for the workflow. And then click the Create button to create the workflow.
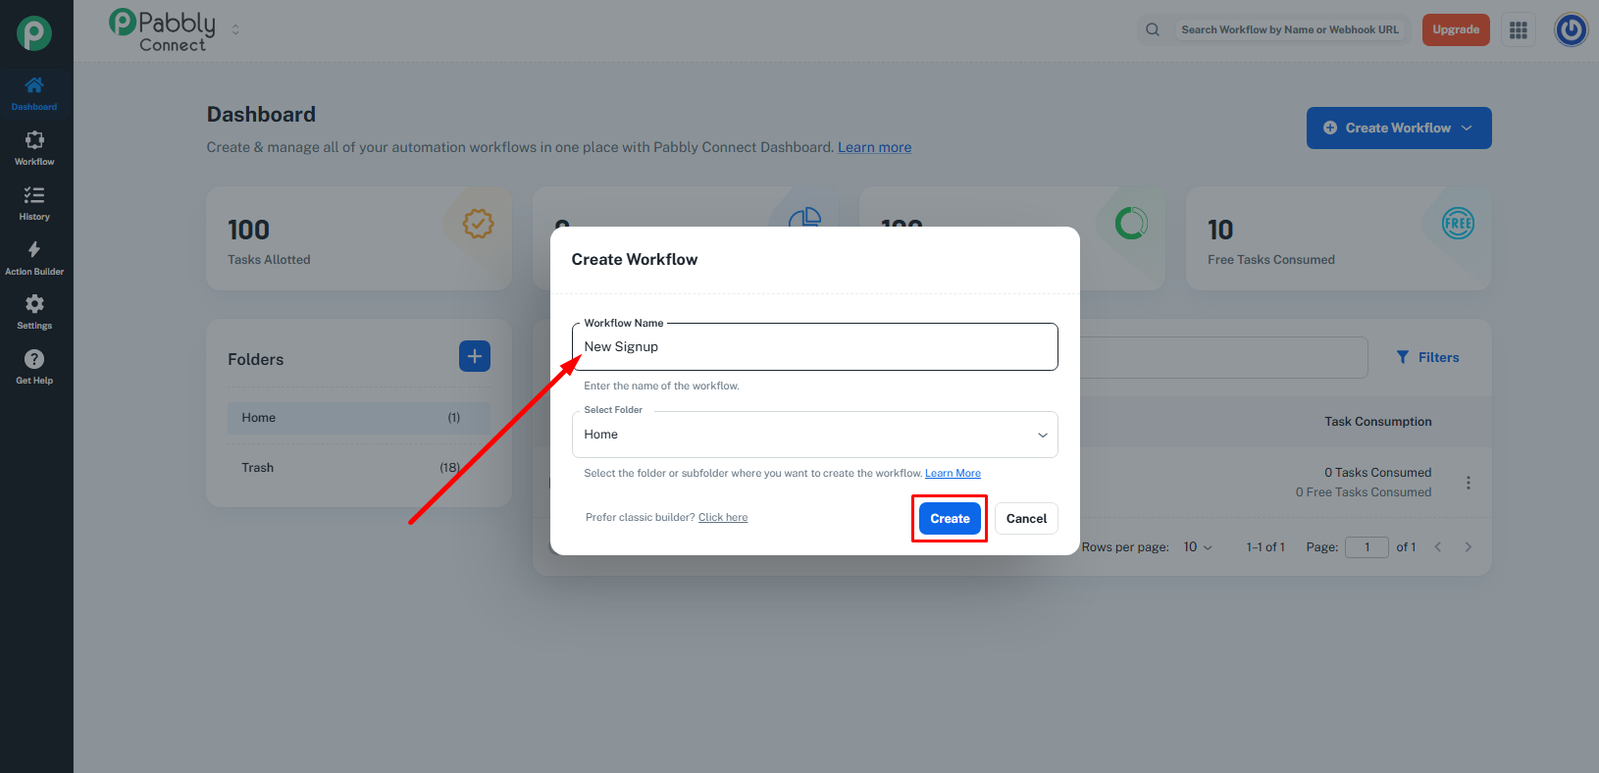
Once you create the workflow, you’ll be on the page where you define the trigger and then receive the responses based on the trigger. There are two elements called Trigger and Action. Trigger is for capturing the responses from an app (Data Out), and Action is for sending data to another app (Data In).
Data Out
Click the trigger section to transfer out data from your platform. Search for EzyCourse and you’ll see the app. Select it.

When you select EzyCourse, you’ll see a new field called App Event. You can choose different triggers such as New Signup, New Product Enrollment, Course Completed, etc.

Once you select a trigger option, click the Connect button and you’ll see the webhook URL. Copy it.


Now, go to your EzyCourse dashboard and navigate to Site Settings -> Webhook (Data-out). Here, you’ll see all the triggers. Depending on the one you selected on Pabbly, you have to choose here also.
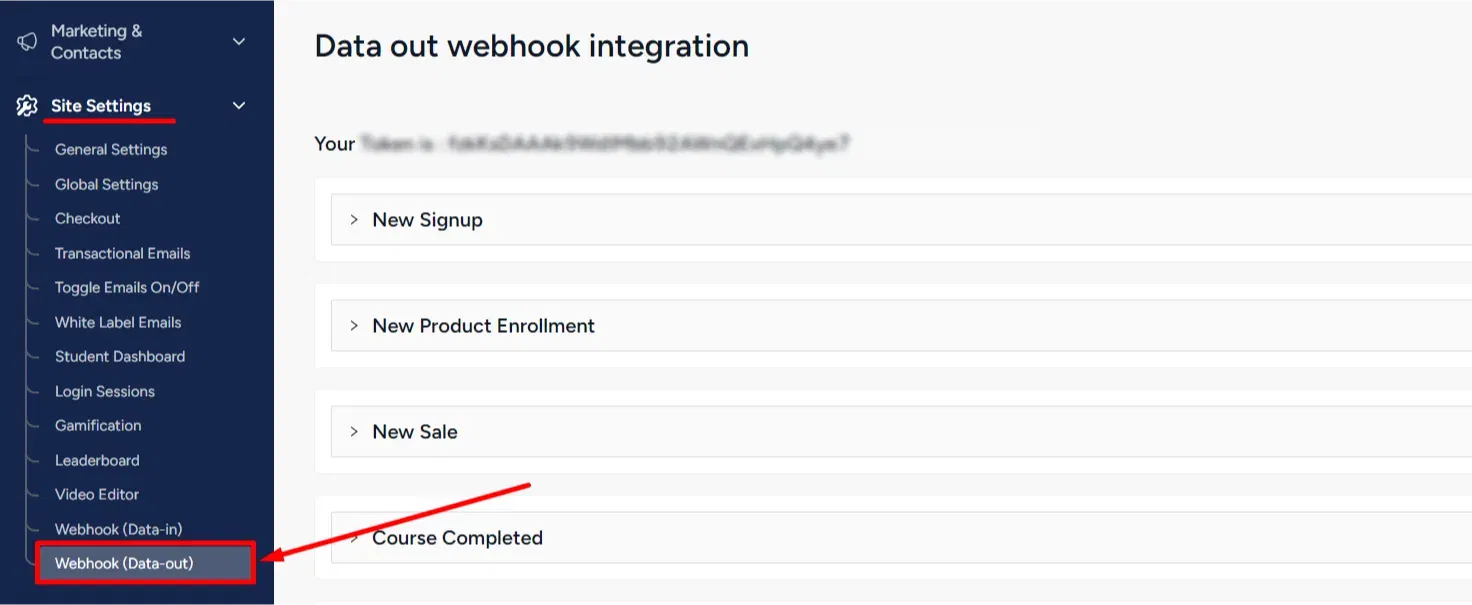
Expand the one you chose on Pabbly and paste the webhook URL. Don’t forget to tick the trigger checkbox, and click the Save button.

You can click the Send Test Data button to send the “Sample Return Body” parameters to Pabbly, and allow webhook to capture that data automatically.
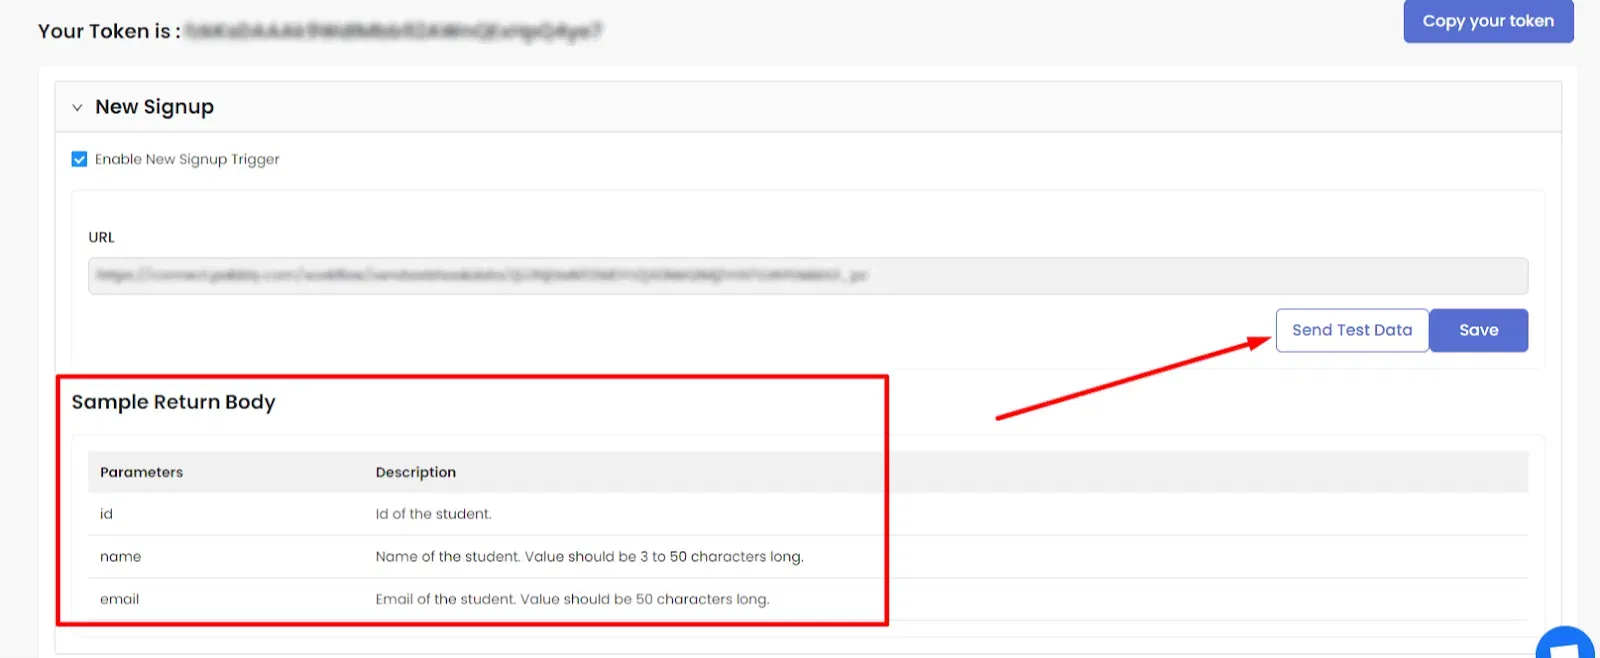

If the response from your EzyCourse platform is captured on Pabbly, you can send it to another app using the Action section.
Data In
For receiving data from another app into your EzyCourse platform, you have to first capture the data from the other app using the Trigger section.
Once you have captured the data, click the add-icon to add a new action step.

Again, search and select the EzyCourse app.

Choose the app event which you wish to accomplish. And then click the Connect button.


To connect, you need the token which is found on your EzyCourse dashboard. So, head over to your EzyCourse dashboard and go to Site Settings -> Wehbook (Data-in). Copy the access token.

Paste the token on the given field in Pabbly and click the Save button.

Once you connect, you’ll see all the fields and the values against the fields that you sent from the other app. You can map those data easily on each field since you’ve already captured them on the Trigger section.

Now, click the Save & Send Test Request button.

If everything works okay then you should see some sort of message indicating that the process was successful.
