Back
How to use the Form Element
You can show the in-built forms on your website using the Form element inside builder 2.0. Besides, you can perform different builder operations, allowing you to add styles and customizations to the form.
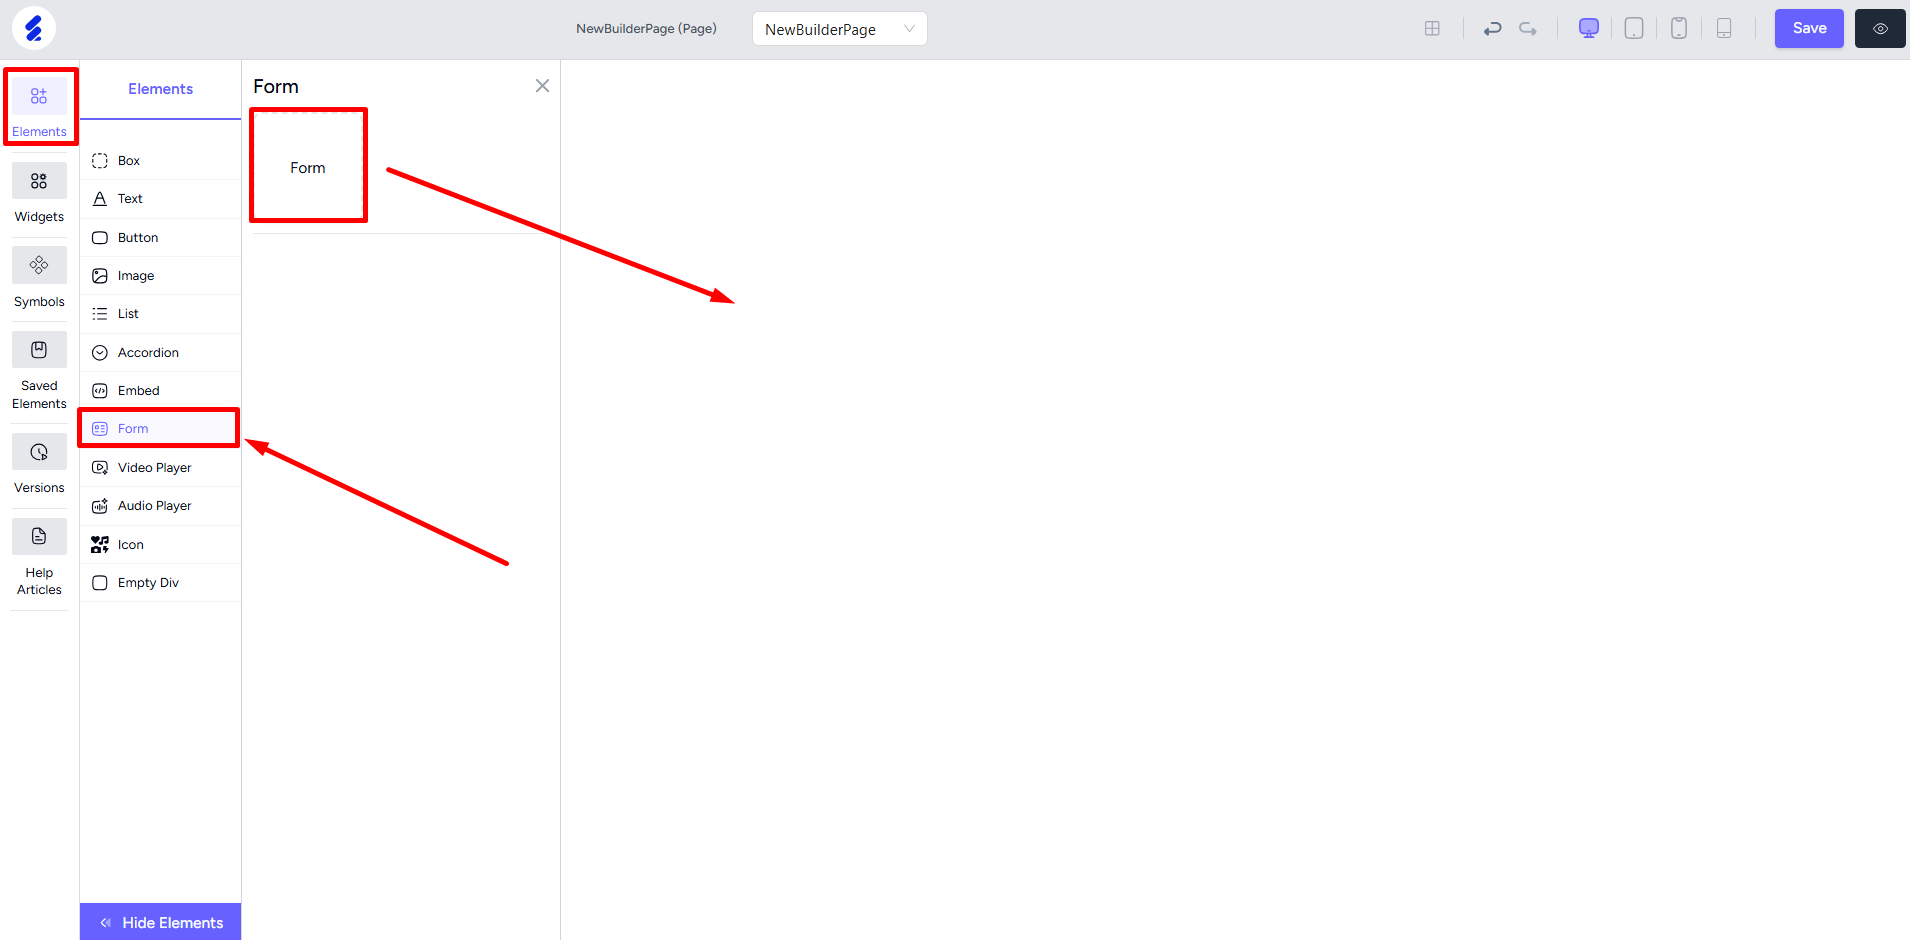
To use it, open the Elements menu from the left sidebar. Select the Form option and then drop the element onto the builder.
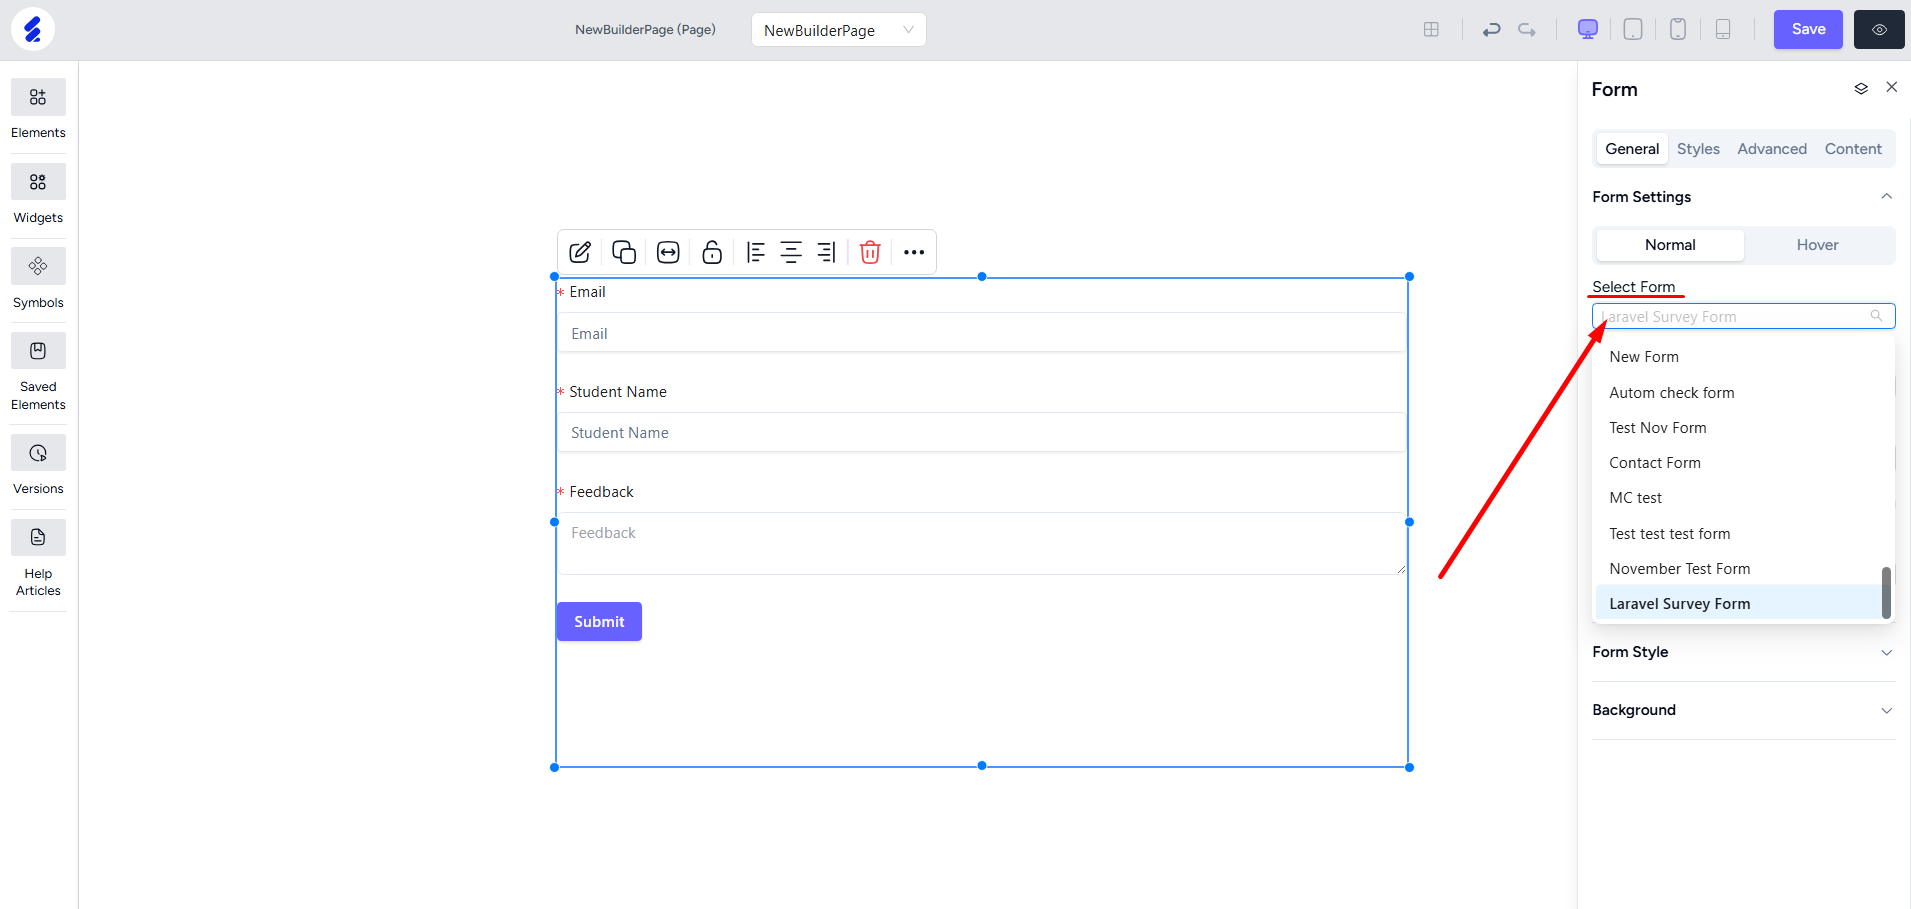
Right-click on the element to open the editing panel. From here, you can select the form you want to show on the page.
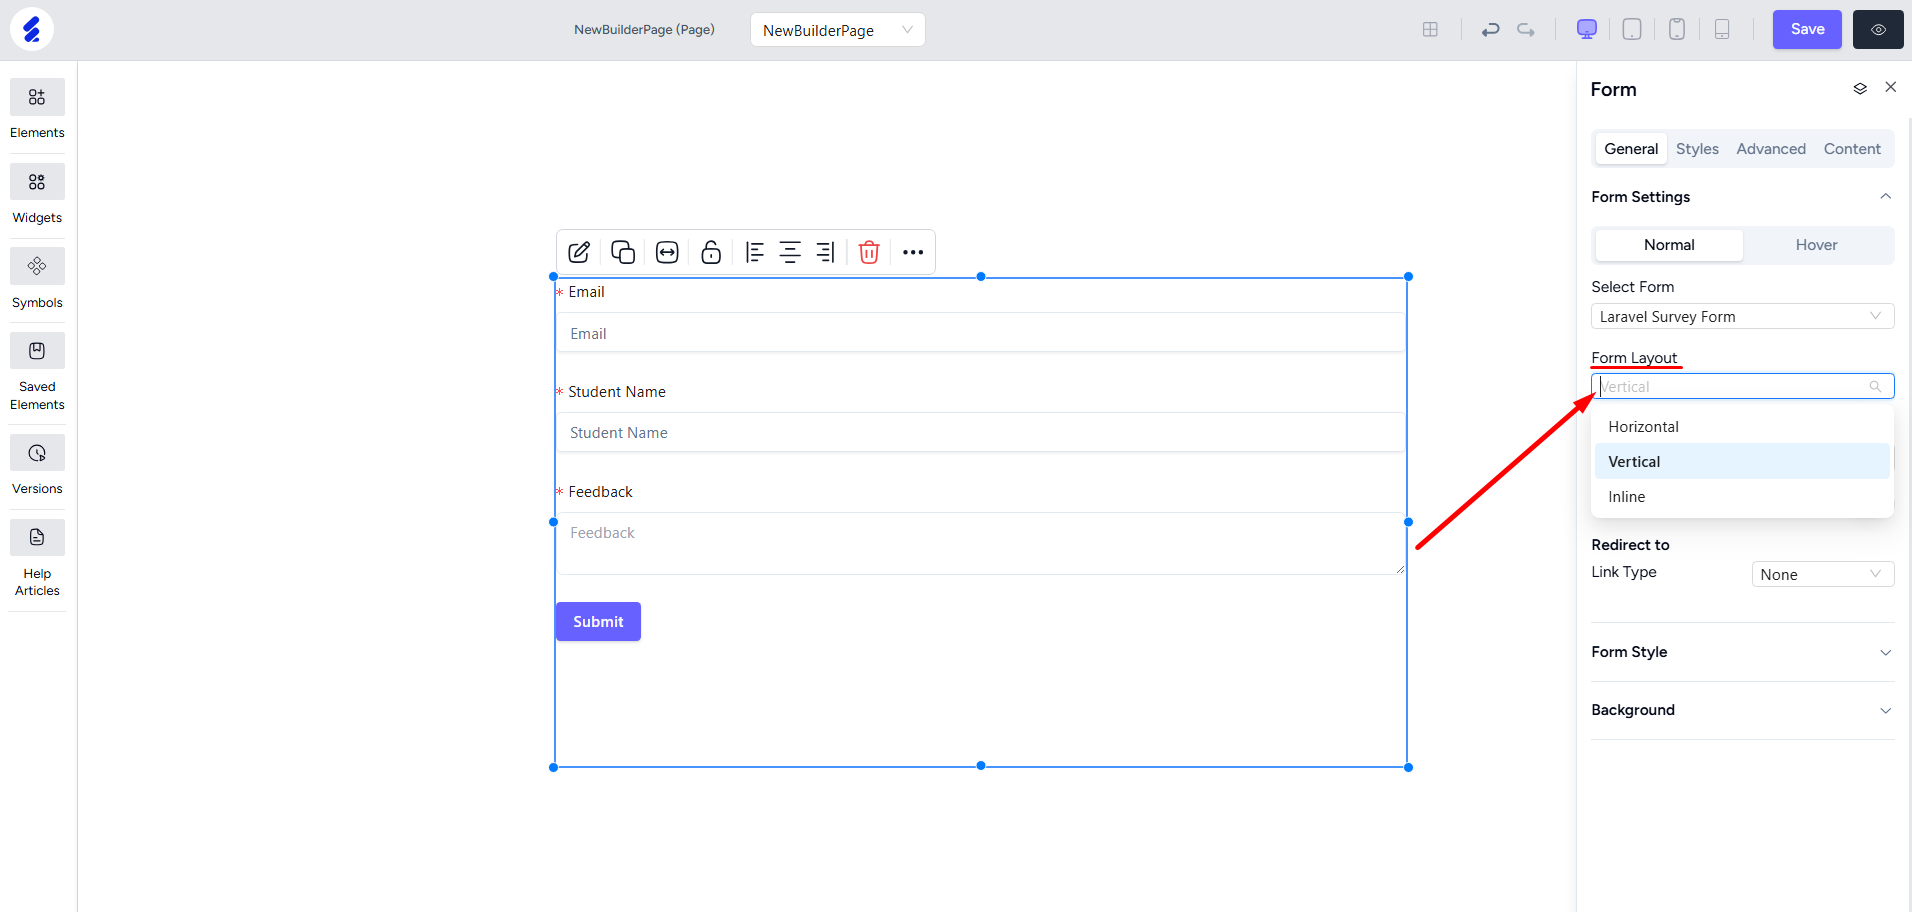
The default form layout is vertical. You can change it to horizontal or inline too.
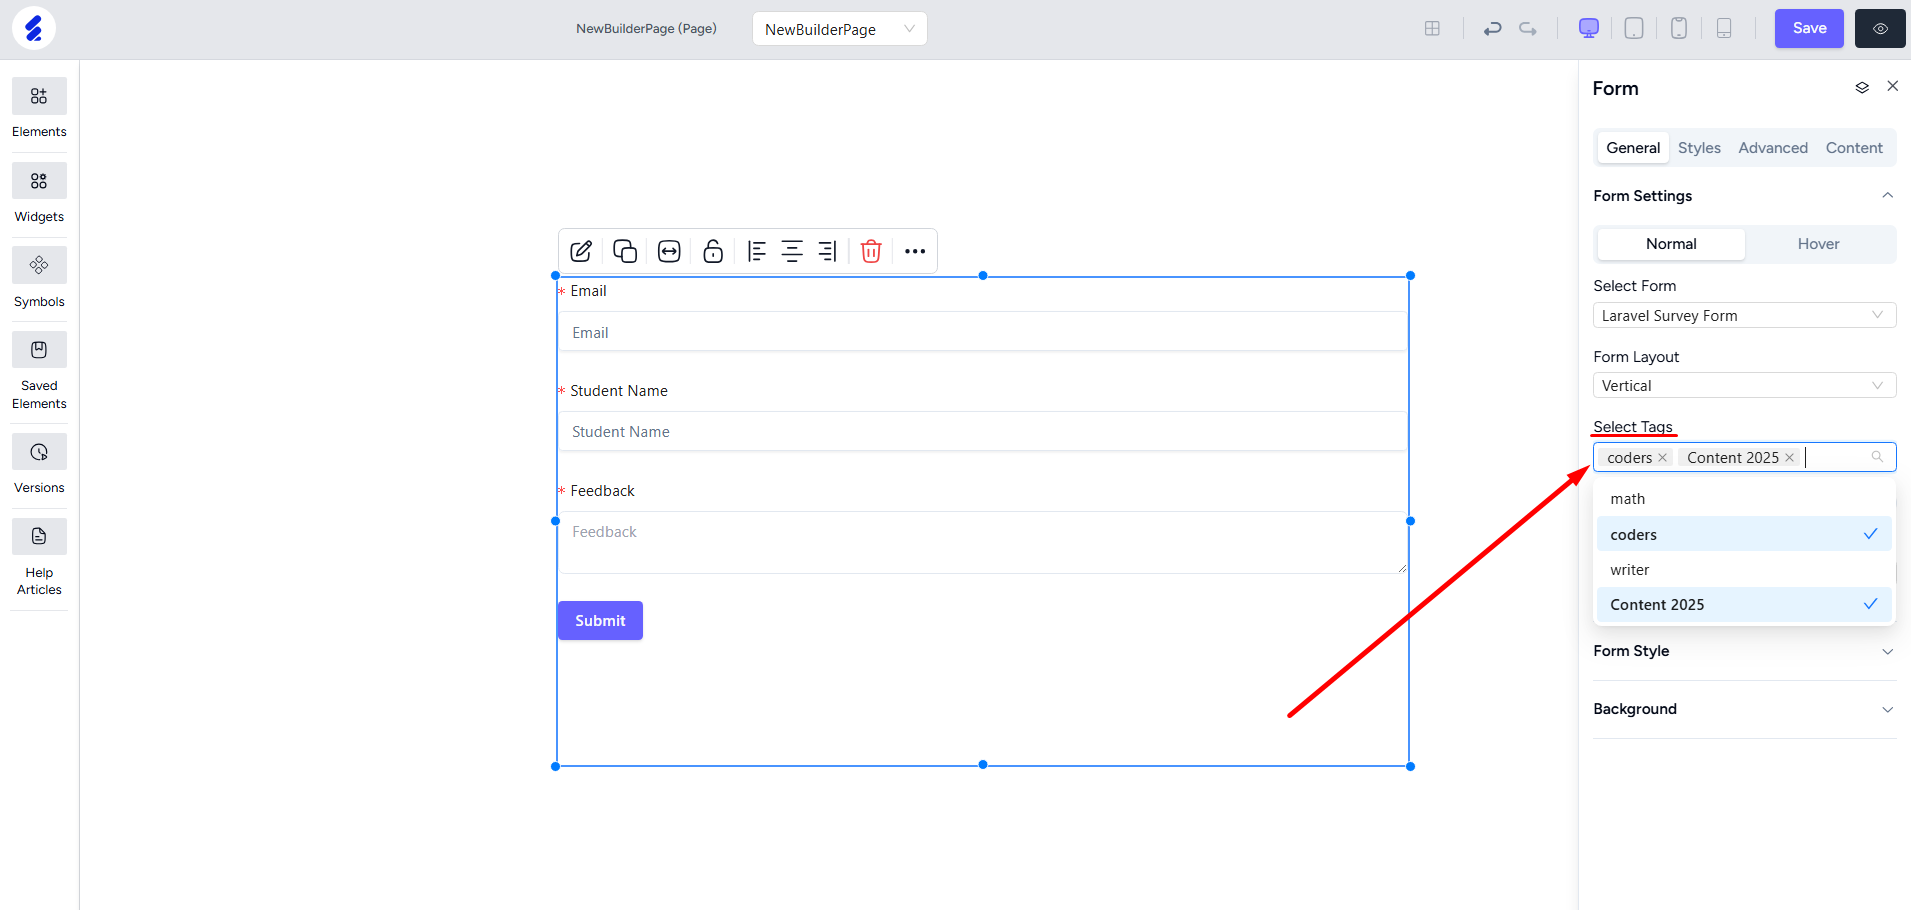
You can also add tags to the form. Any visitor that submits the form will be assigned these tags so that you can target them later in email and automation campaigns.
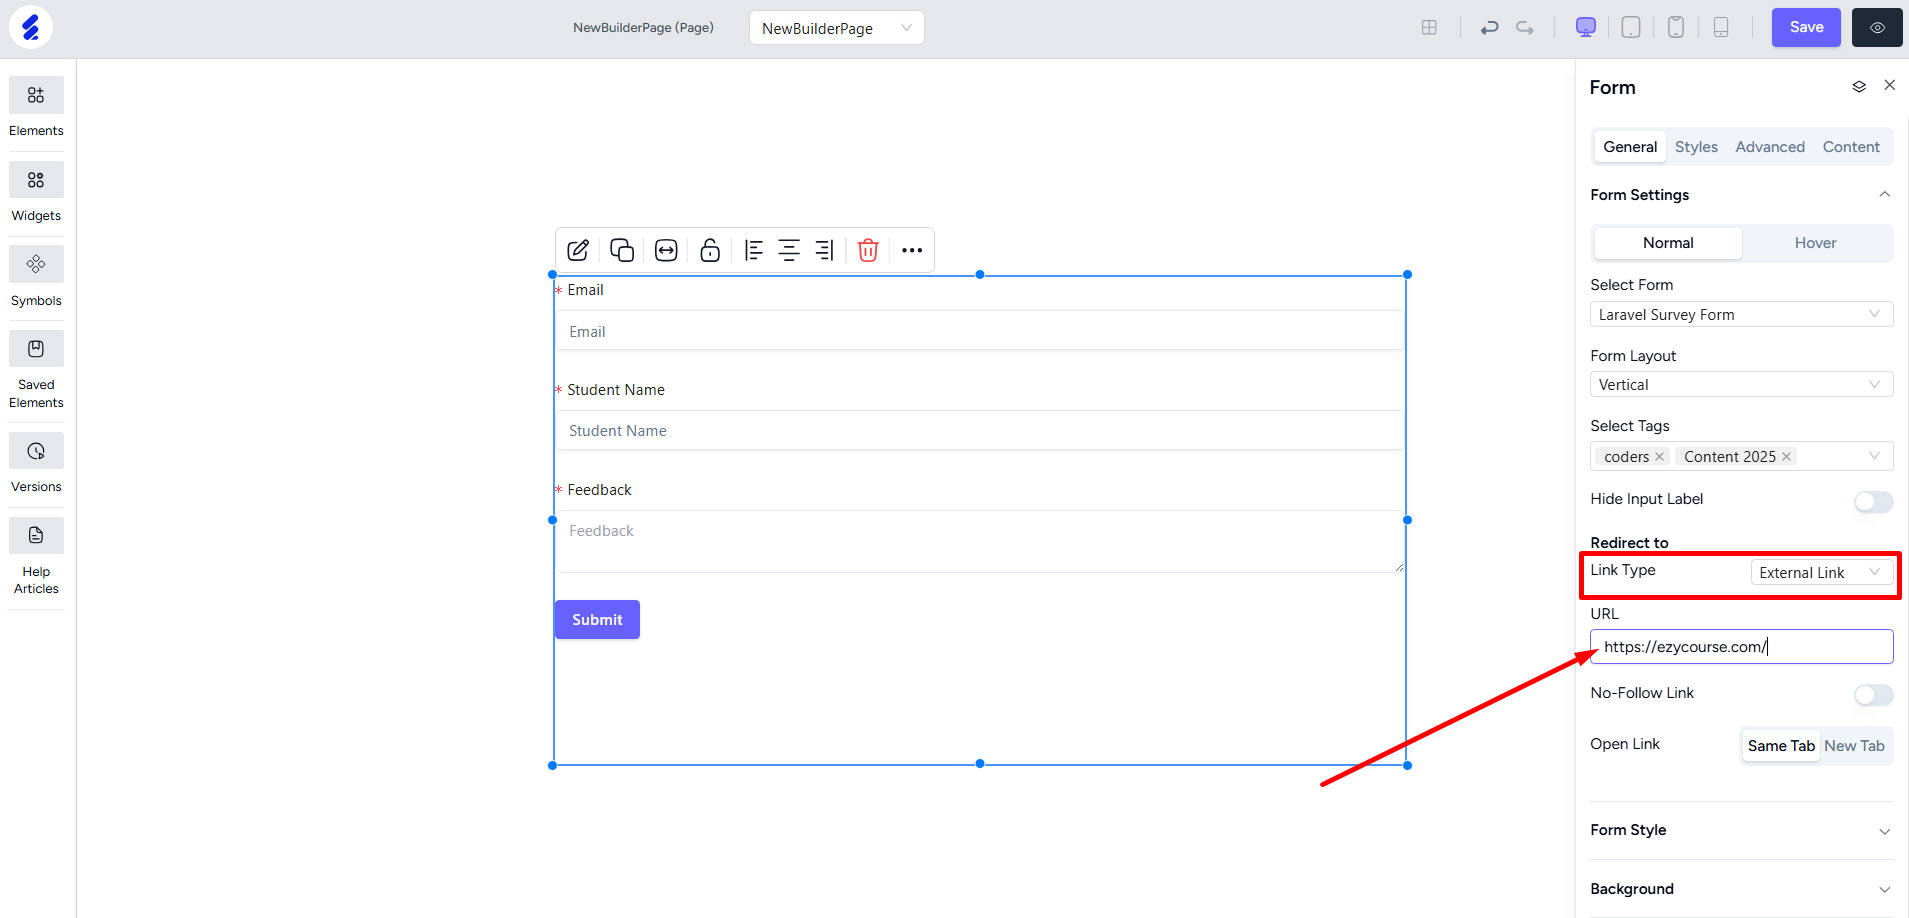
One interesting option is that you can control where users get redirected to right after submitting the form. It could be an internal page on your website, a popup page, or an external link. For external links, you simply provide the URL.
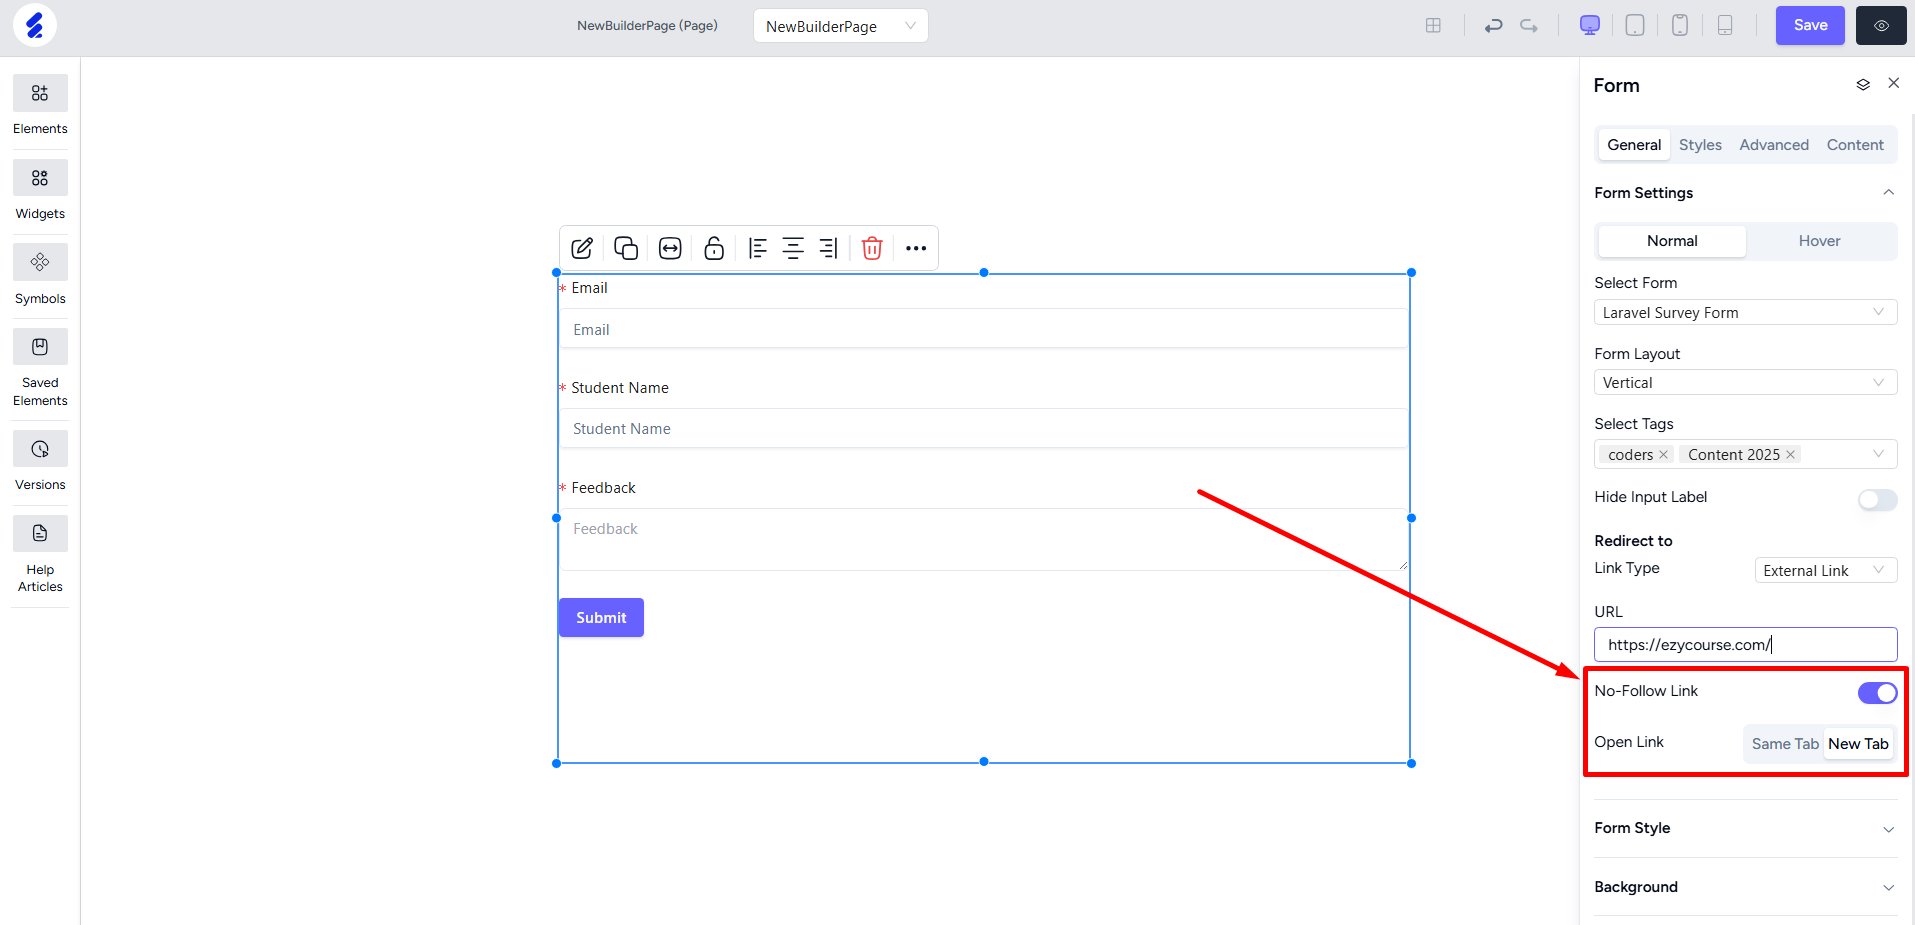
For SEO purposes, you can set the link or page to no-follow. This will prevent bot crawlers from visiting the redirected link or ranking it. You can also ensure the redirected page opens in a new tab.
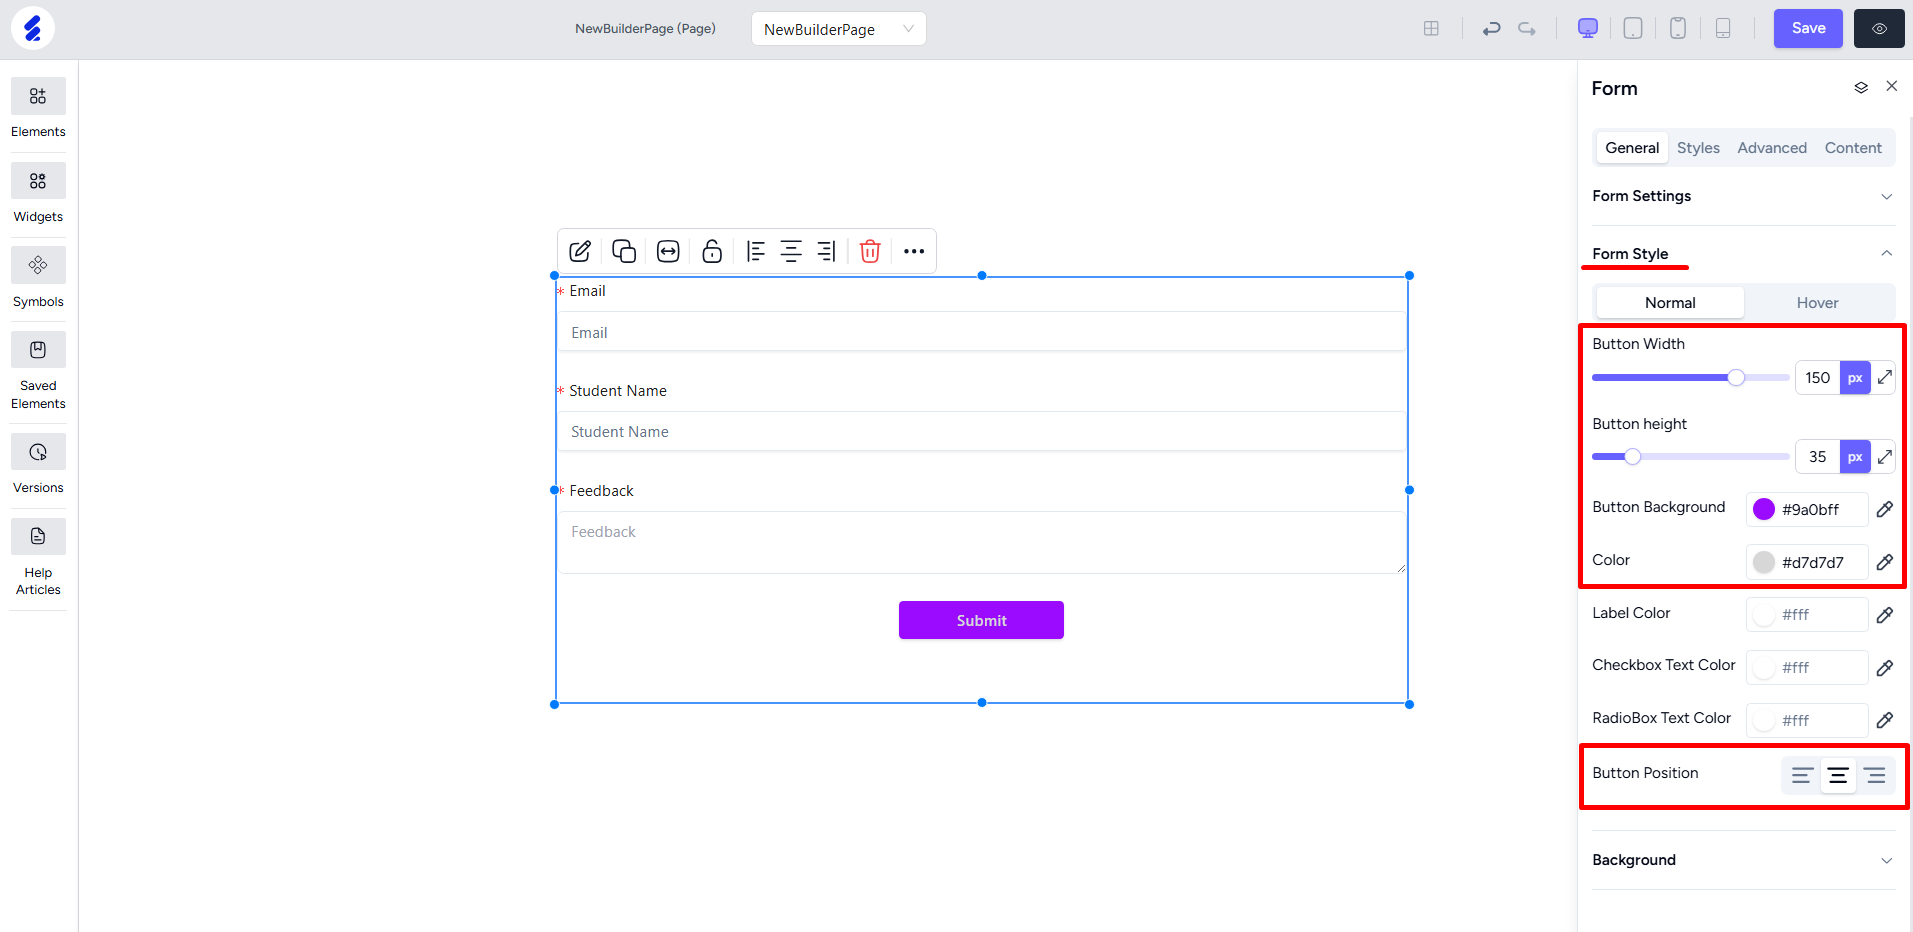
Customize the button from the Form Style option. You can set your own width and height instead of using the default size. In addition, there are options to customize the background color, text color, and the position of the button.
You can also change the color of field labels, checkboxes, and radio buttons, if they are present in your form.

The Background setting lets you change the background color of the form.

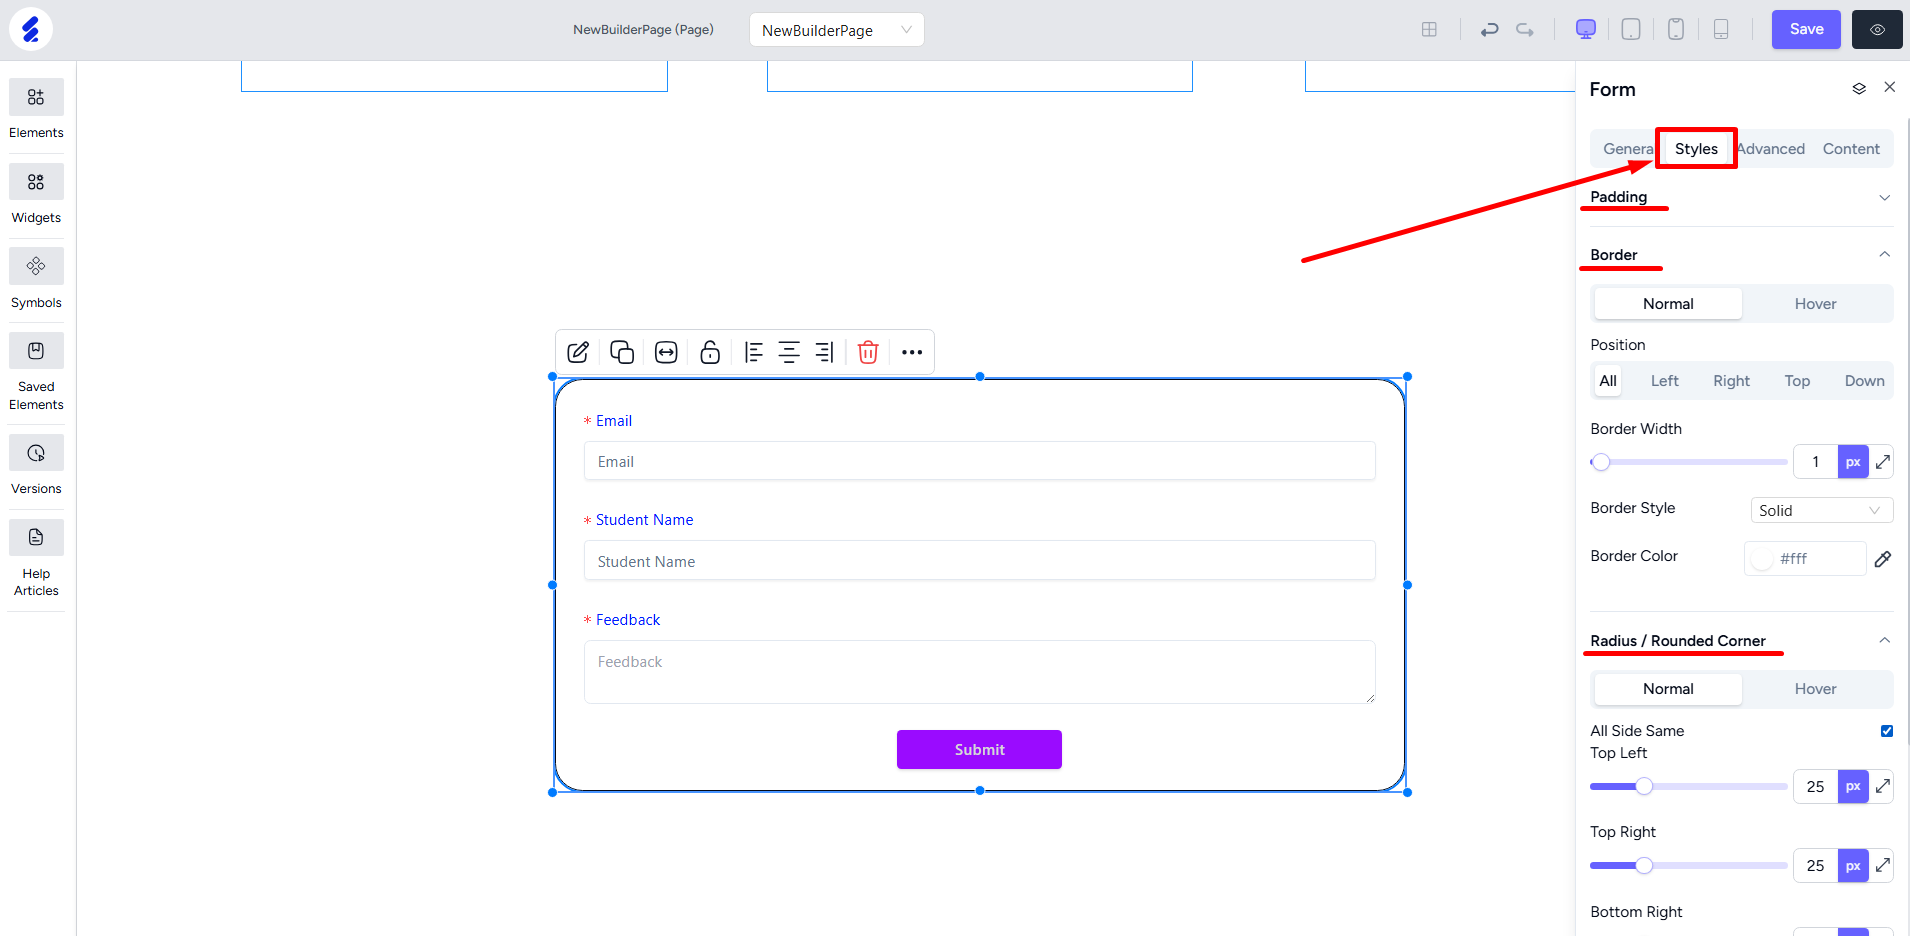
From the Styles tab, you can add form padding, border, and border radius.
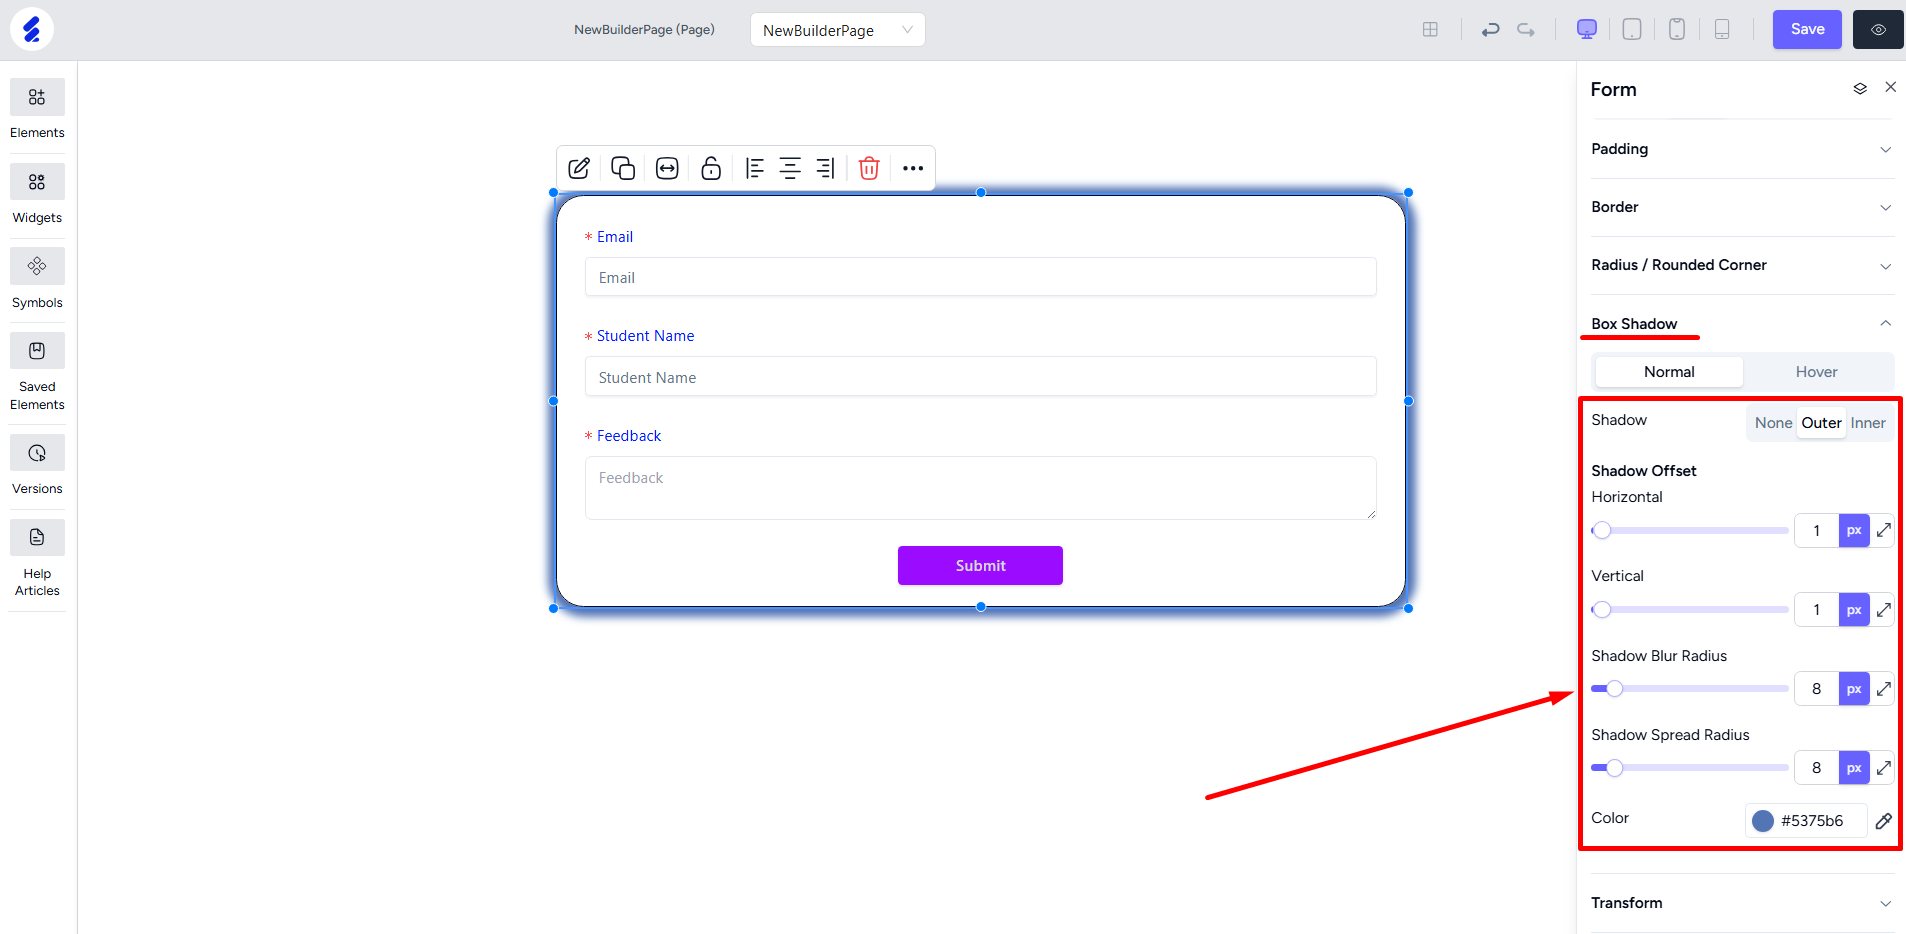
You can also design the form using box shadow options.
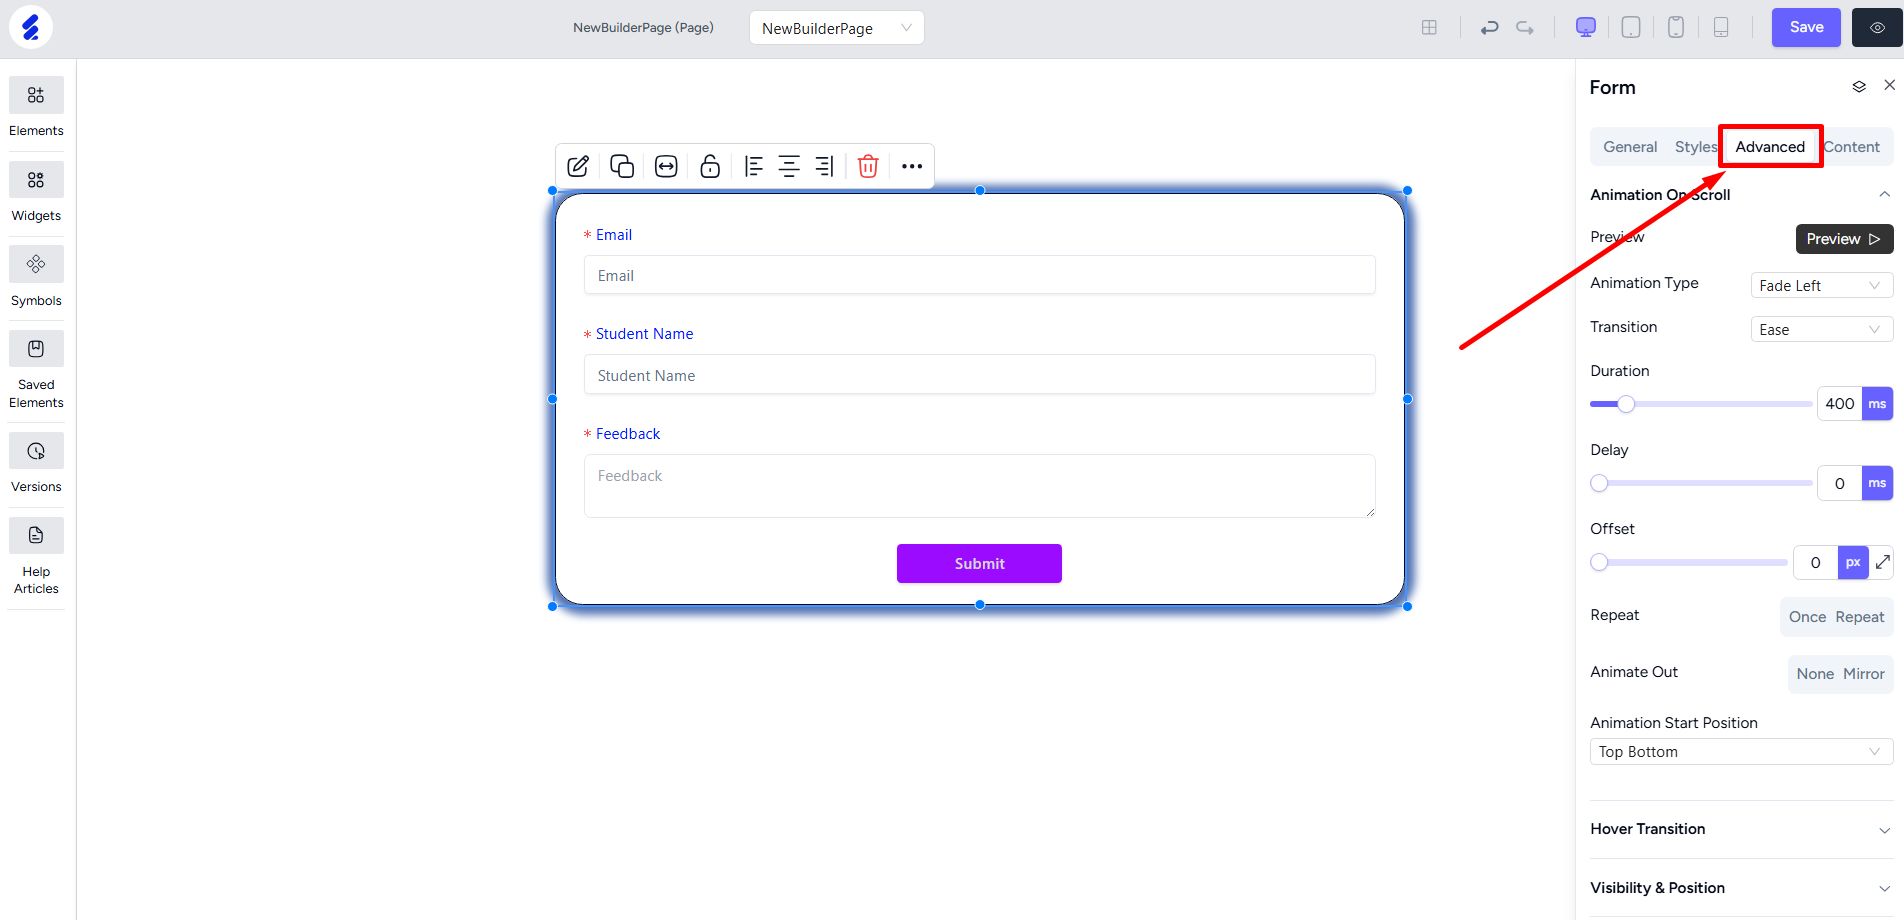
The Advanced tab lets you adjust the animations for the form.