
Back
How To Create an Accordion
You can easily add an accordion on your page using the Accordion Element. In this article, you’ll learn how to use the Accordion Element and then edit the element to suit your needs.
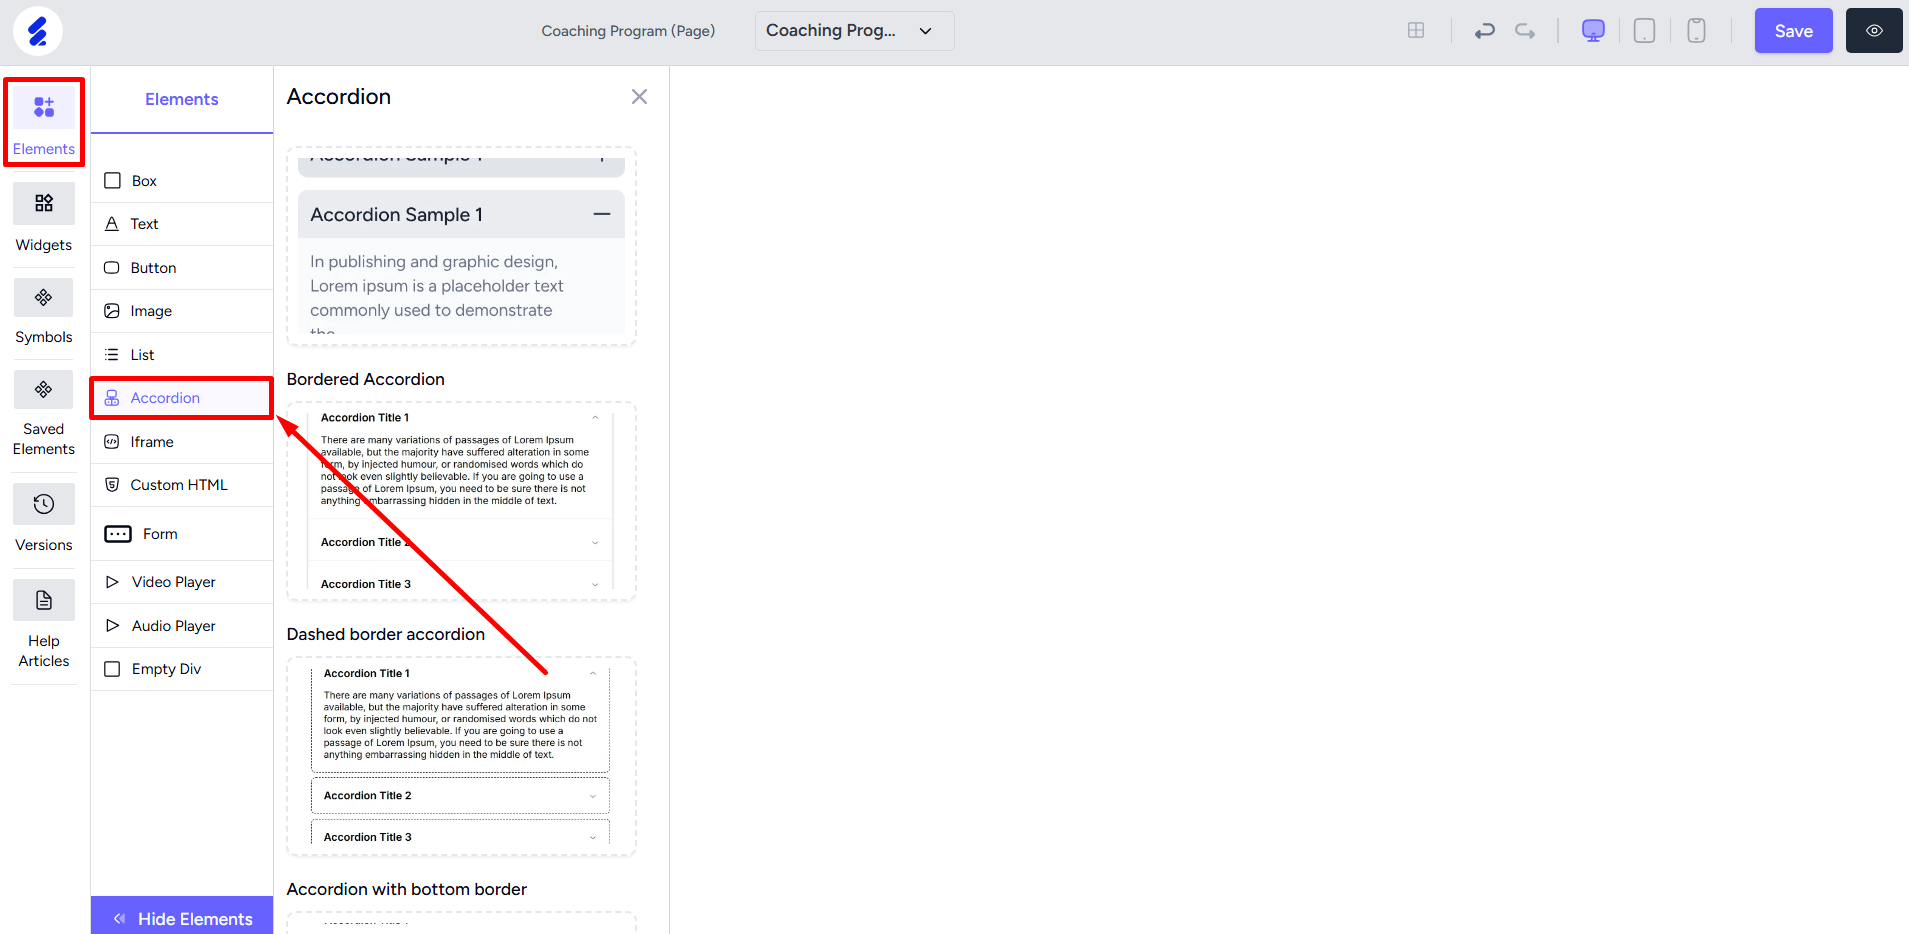
To create an accordion, click the Elements menu on the left sidebar. And then select the Accordion option. Here, you’ll see ready-made accordions already created for you in different designs.
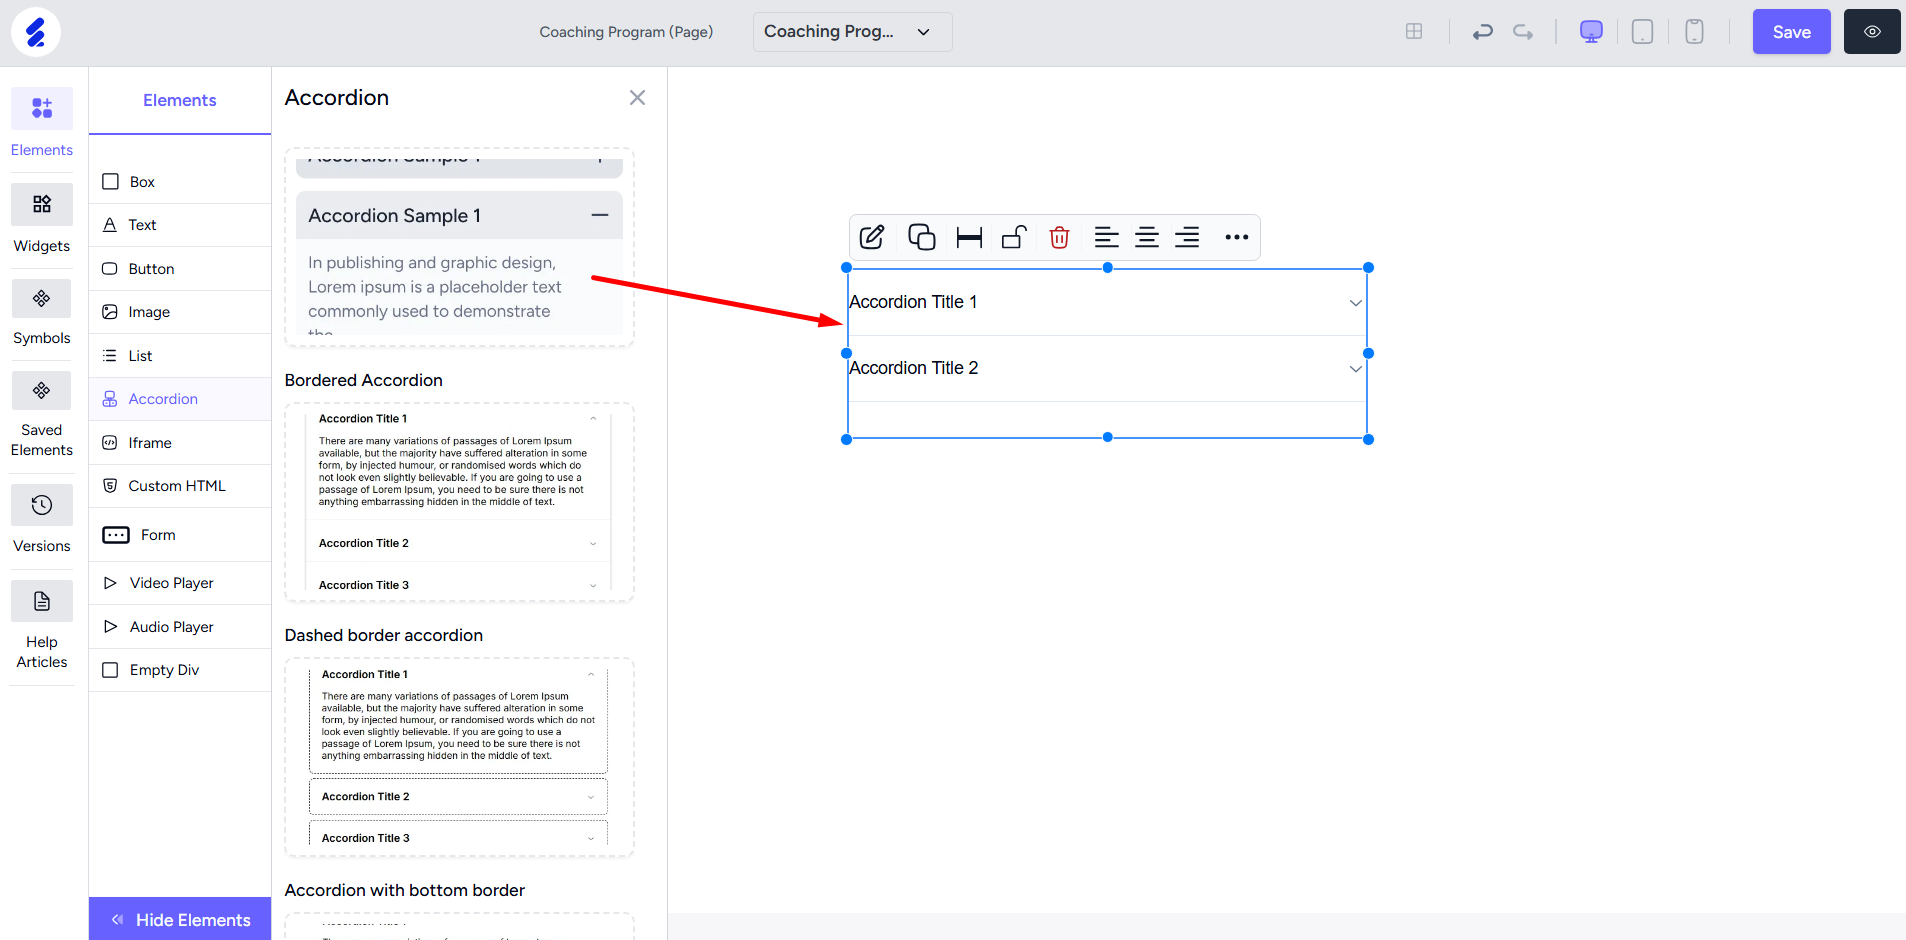
Drag and drop any accordion onto the builder.
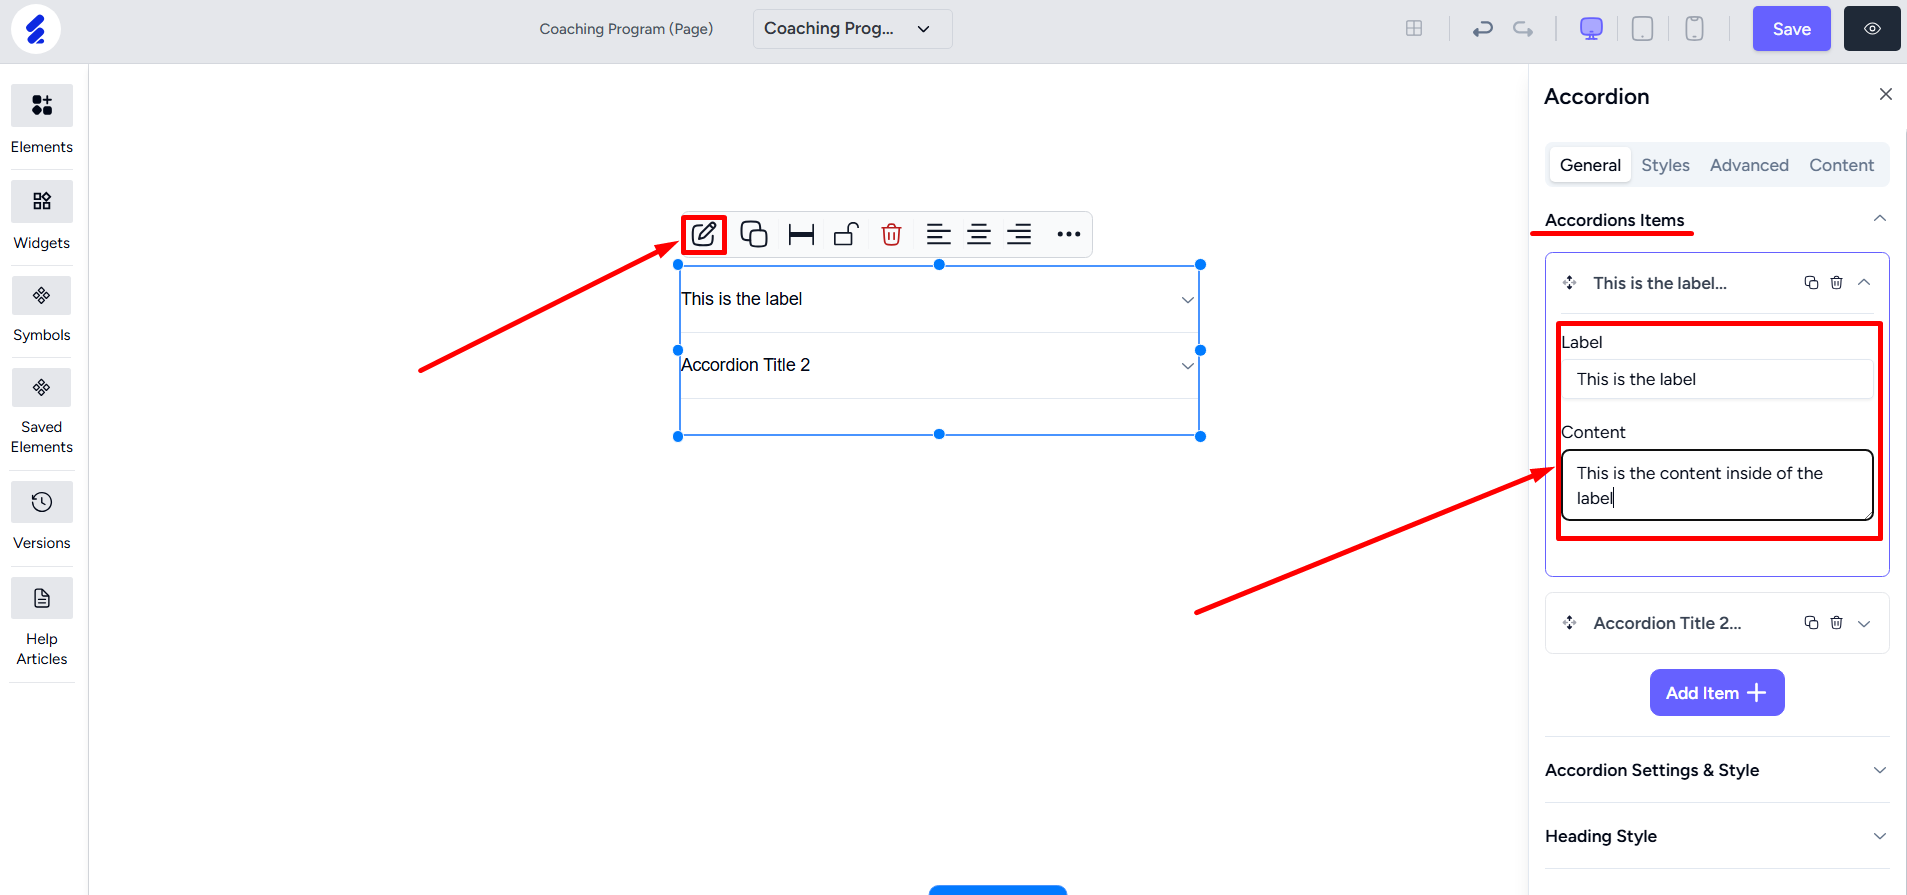
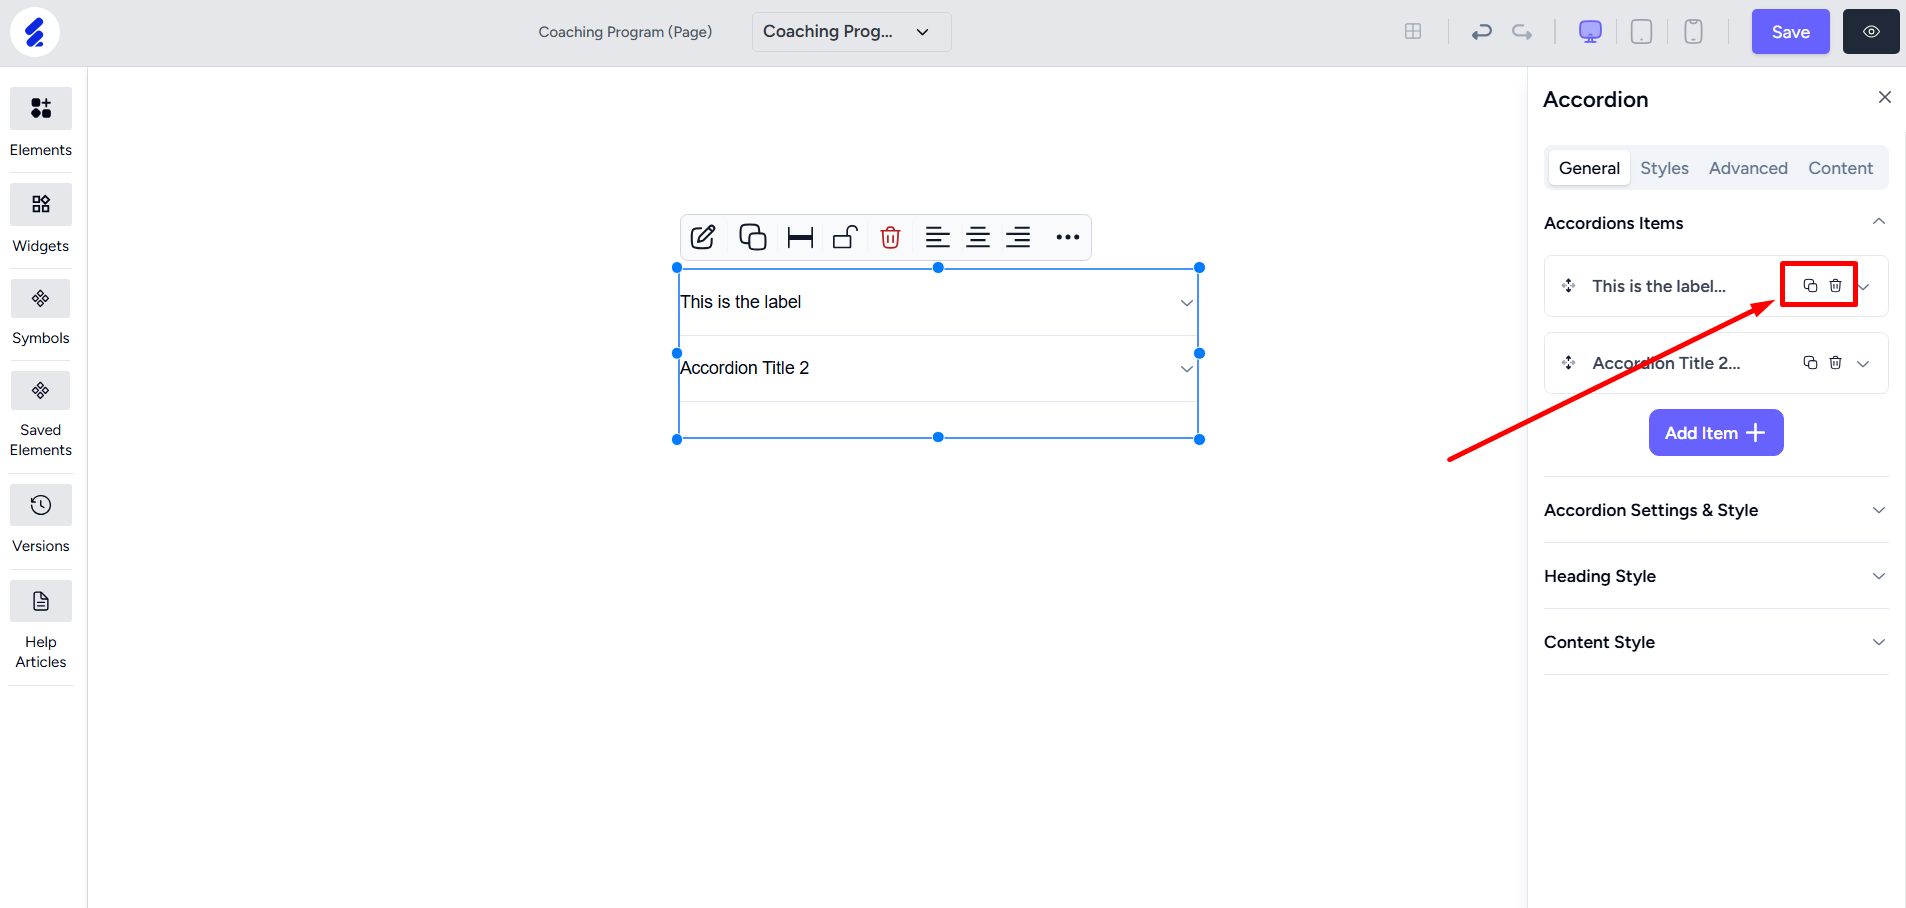
To edit the label and the content inside, open the editing panel by right-clicking the accordion element. Select an item and then edit the text content.
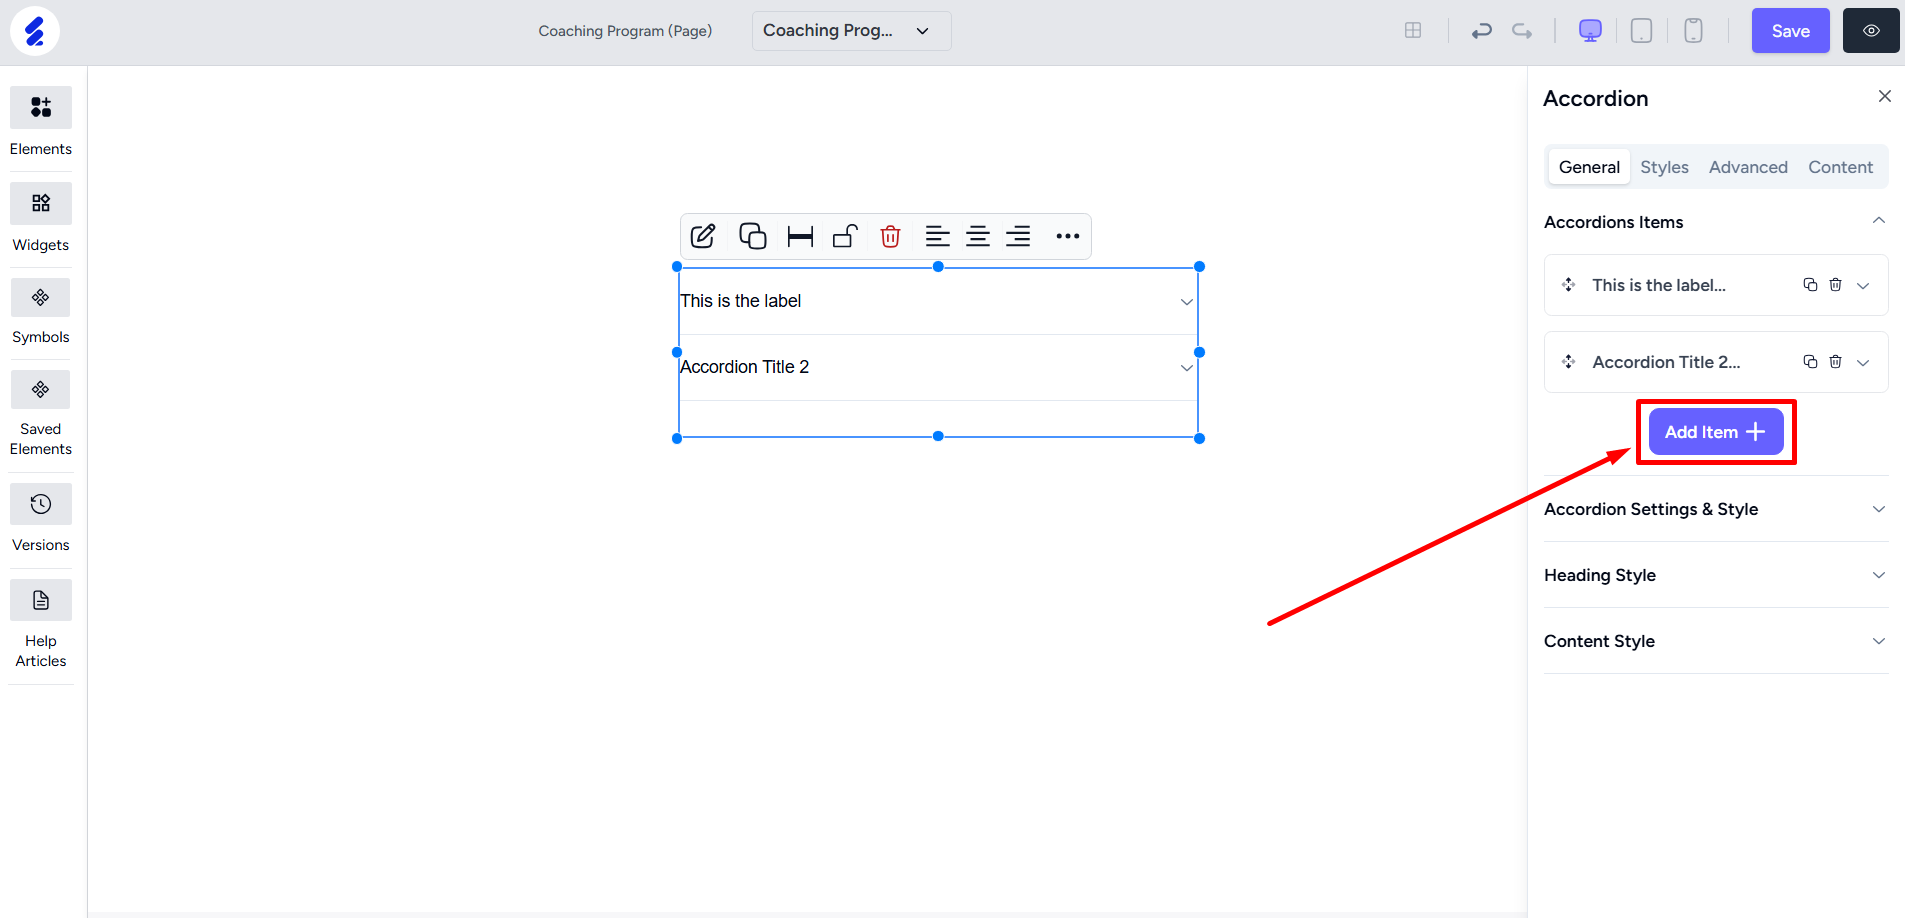
Click the Add Item button to add a new item to the accordion.
You can also copy or delete an accordion item. Copying will copy the label and the content also into the new item.
[Note: Sort the items by dragging and dropping.]
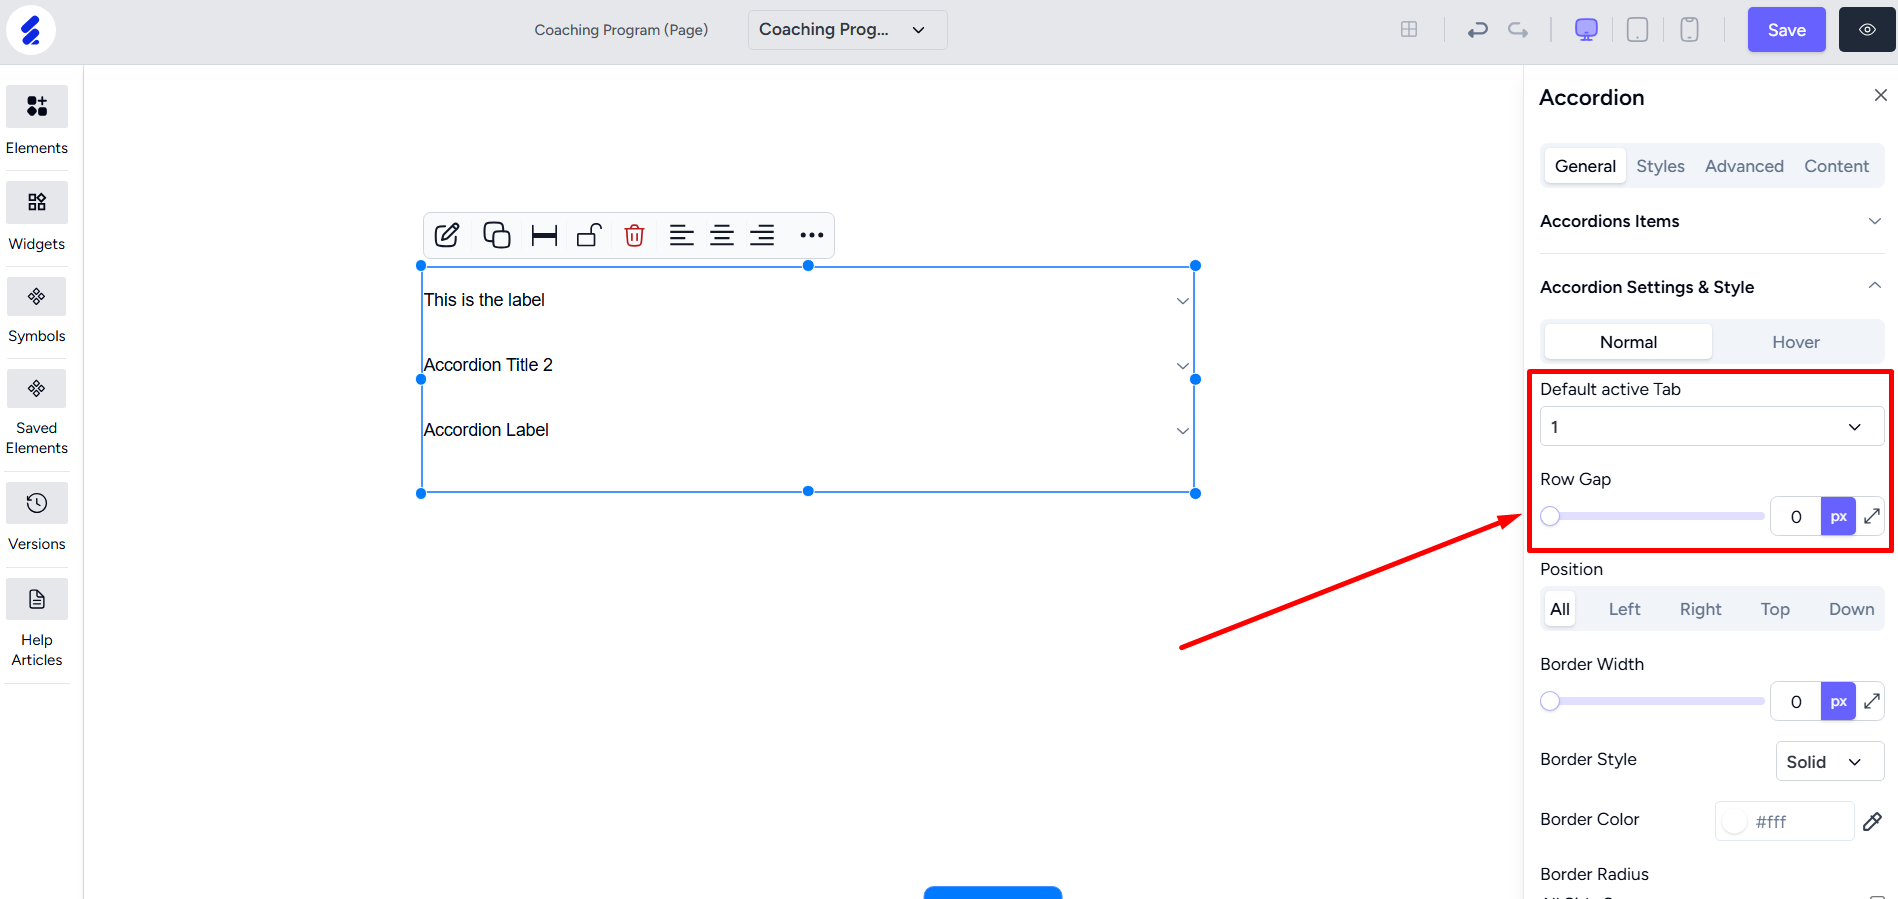
The Accordion Settings & Style menu consists of several customization options. You can choose the default active item or tab i.e. which one is opened by default. And also select the row gap which is the vertical gap between the items.
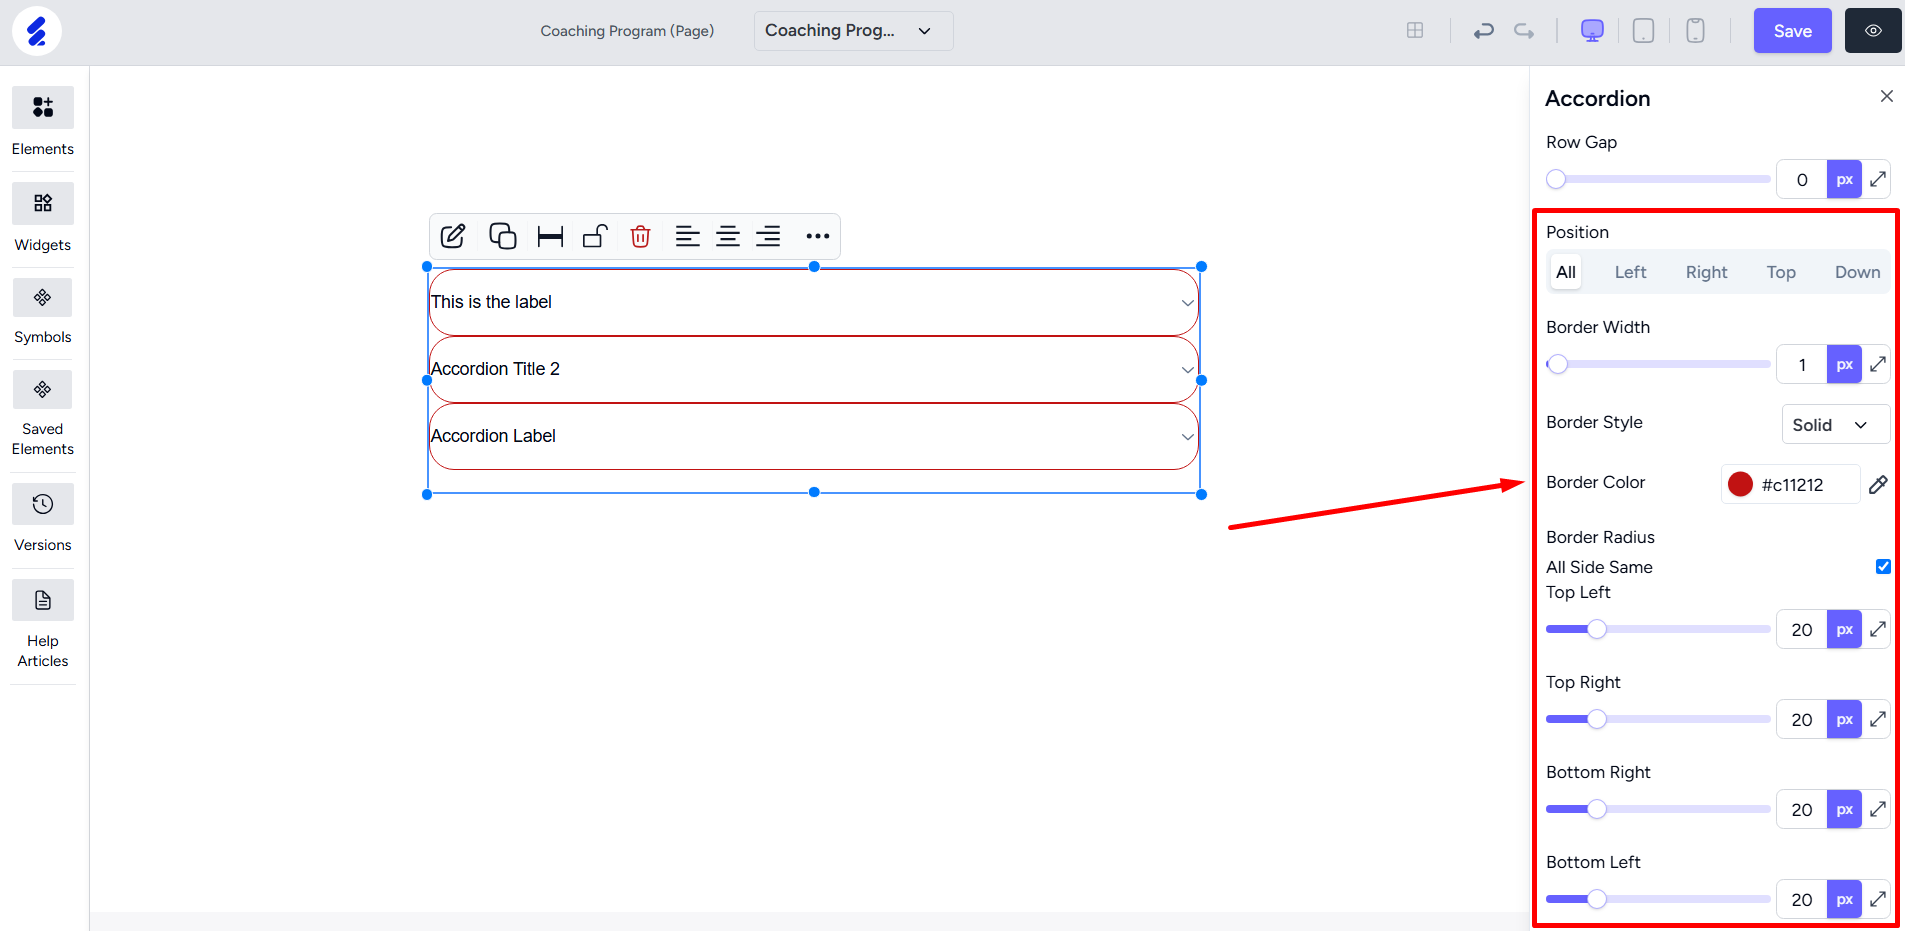
The menu also lets you set up and customize borders. You can choose to border from all sides or a specific side. In addition, you can choose the color for the border and also define border radius. And give paddings too for a better looking accordion.
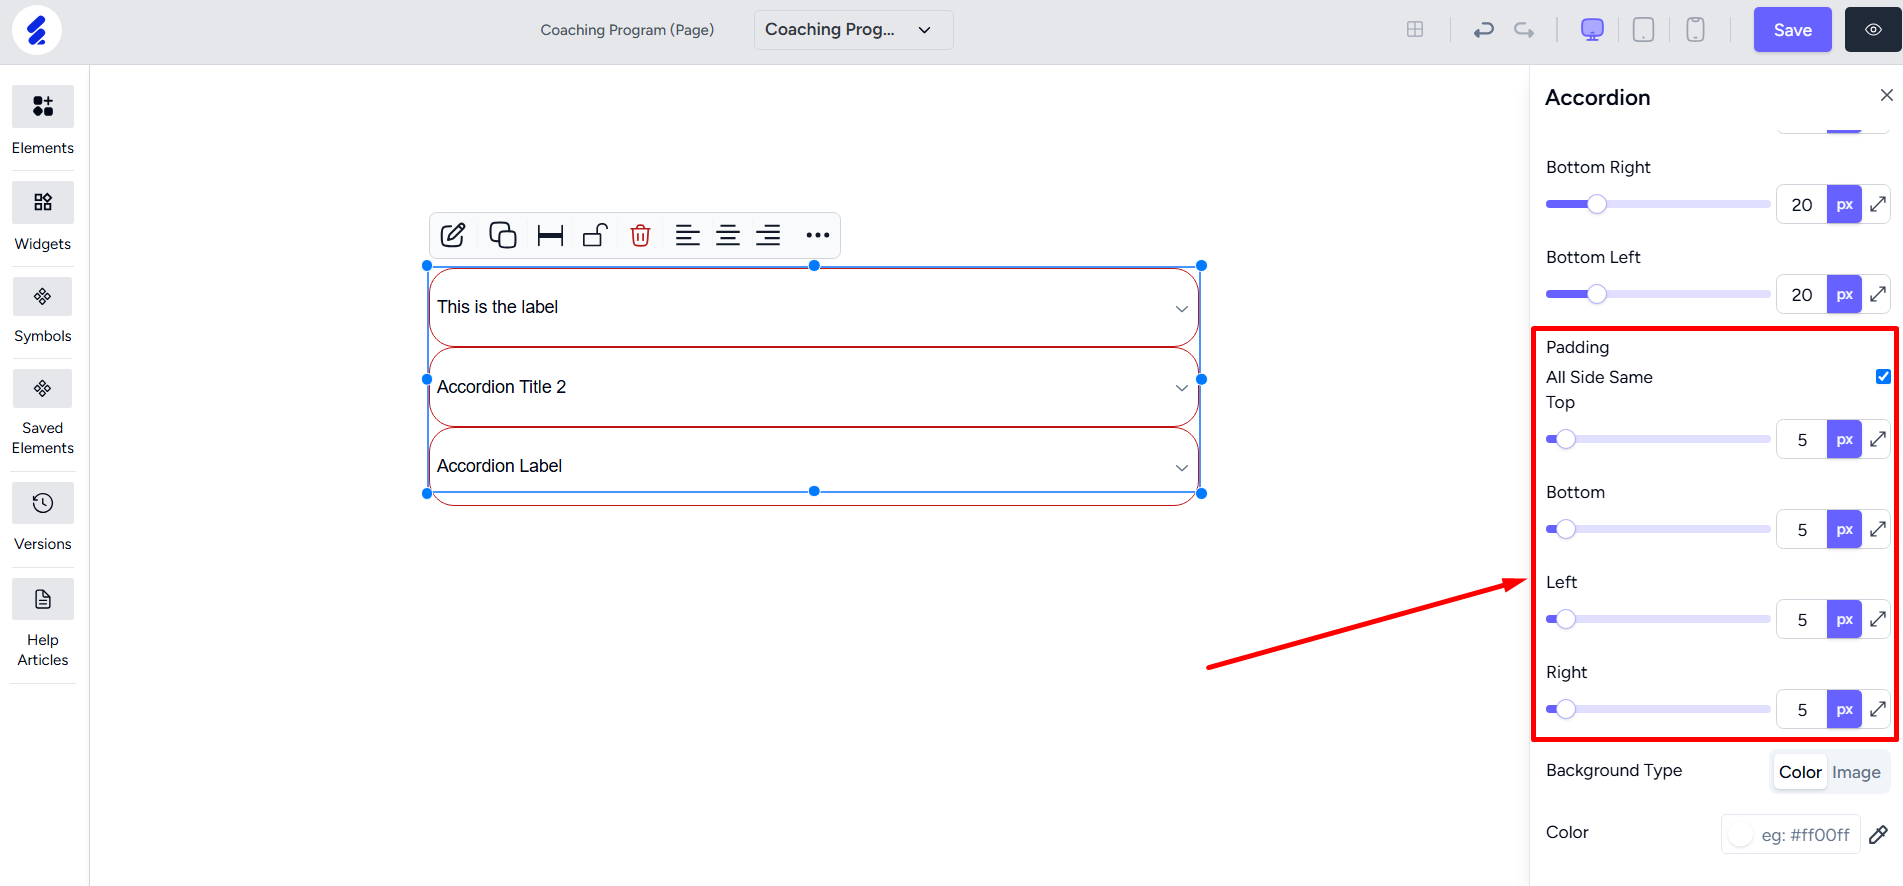
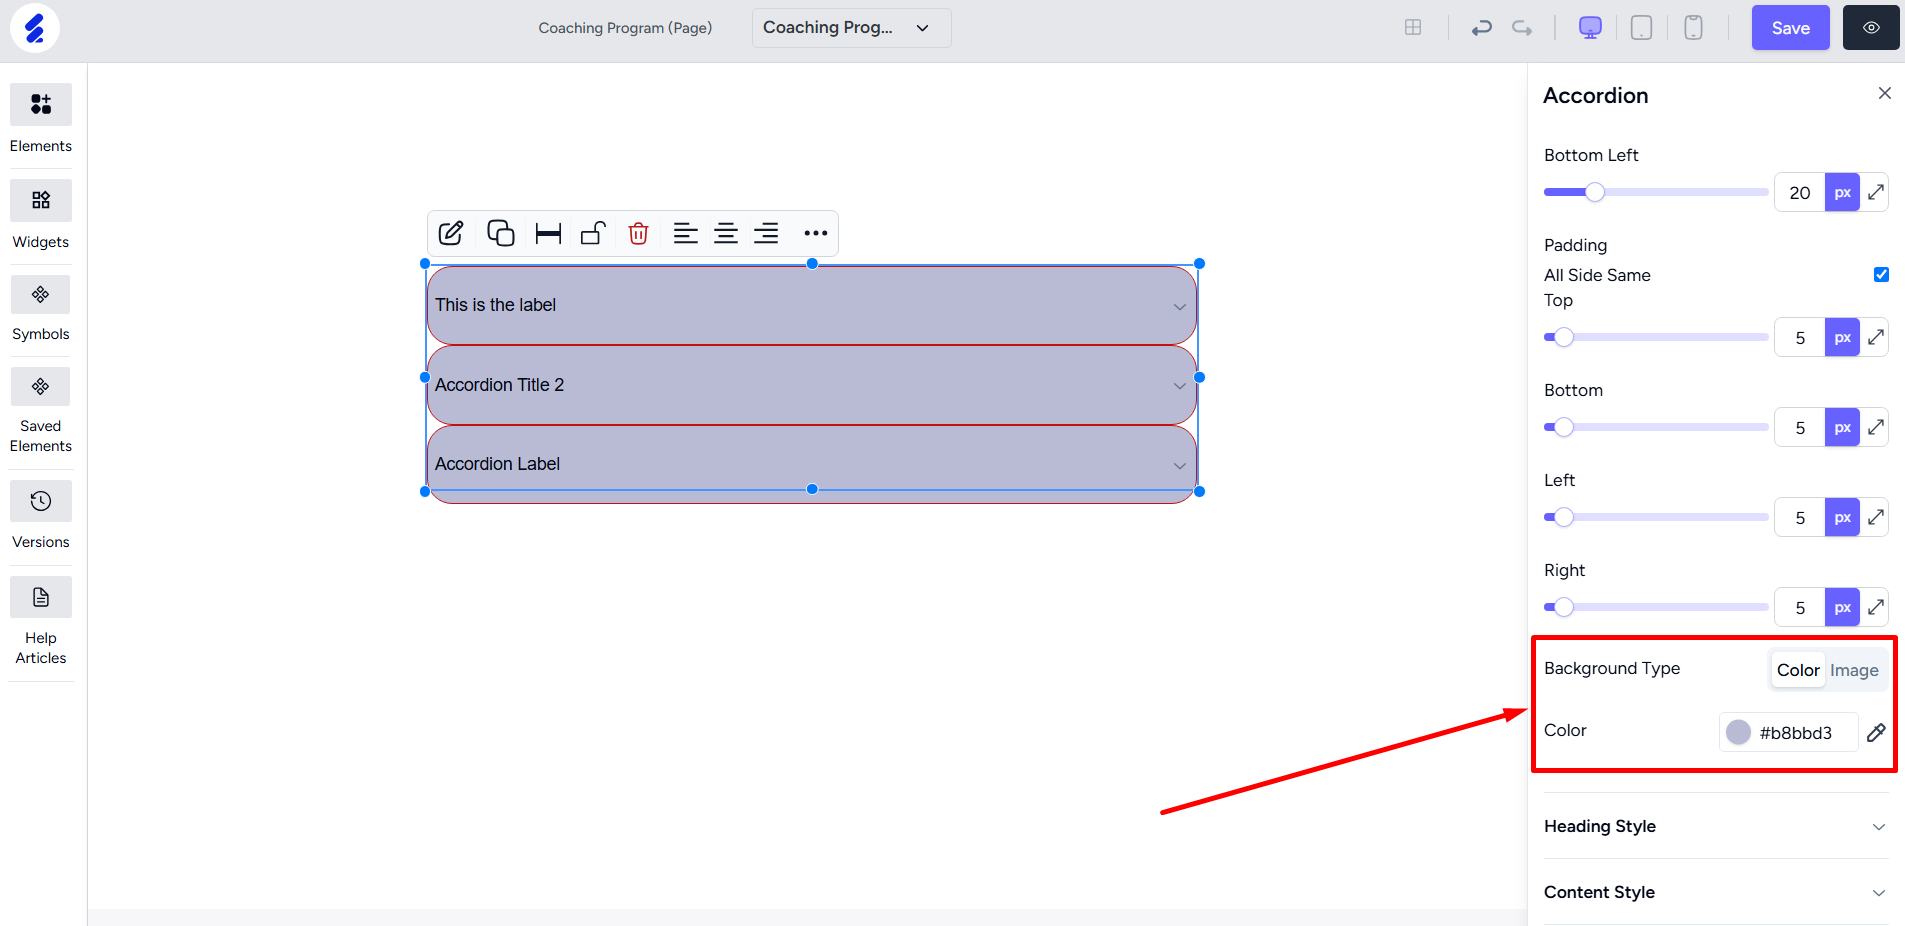
An interesting option you have is the ability to set a background type from either a color or an image. This makes your accordion appear more beautiful.
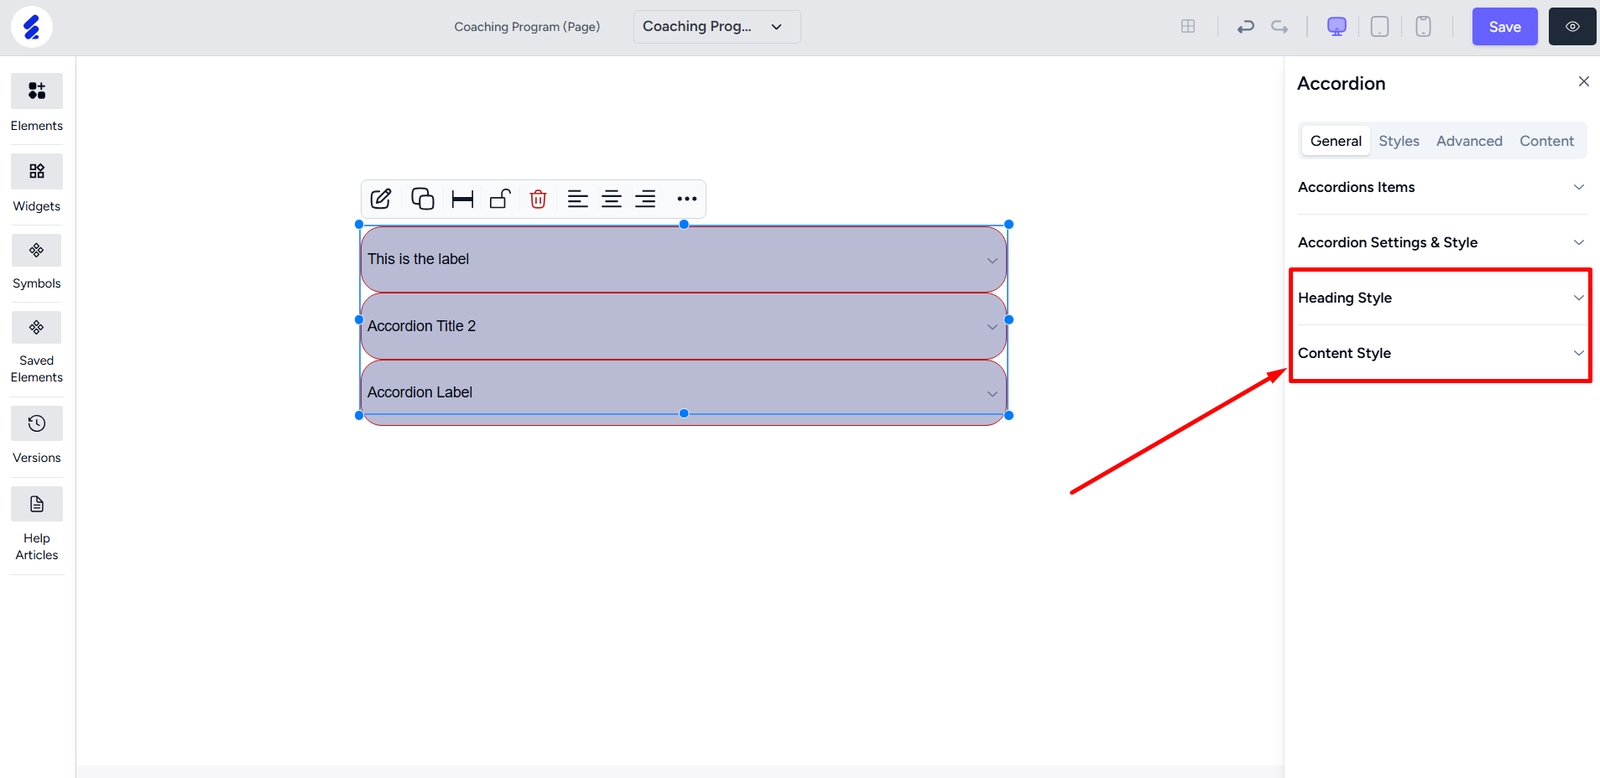
For your accordion, there’s also options to customize the heading style and content style. Both options will let you customize the text font size, text color, letter spacing, decorations such as underline and strikethrough, etc.
Note that you can also select the customization for mouse hover effect for all the styles. And like any other element, you can add animations and border customizations from the Styles and Advanced tabs.