
Back
Category: Products on EzyCourse
After-Checkout Page for Group Chats
Customize an After-Checkout Page for Group Chats
You can set up a custom page to show when students join a group. In this article, we show how you can set an after-checkout page for your groups.
The default after-checkout page for groups is the Groups section in the student dashboard.

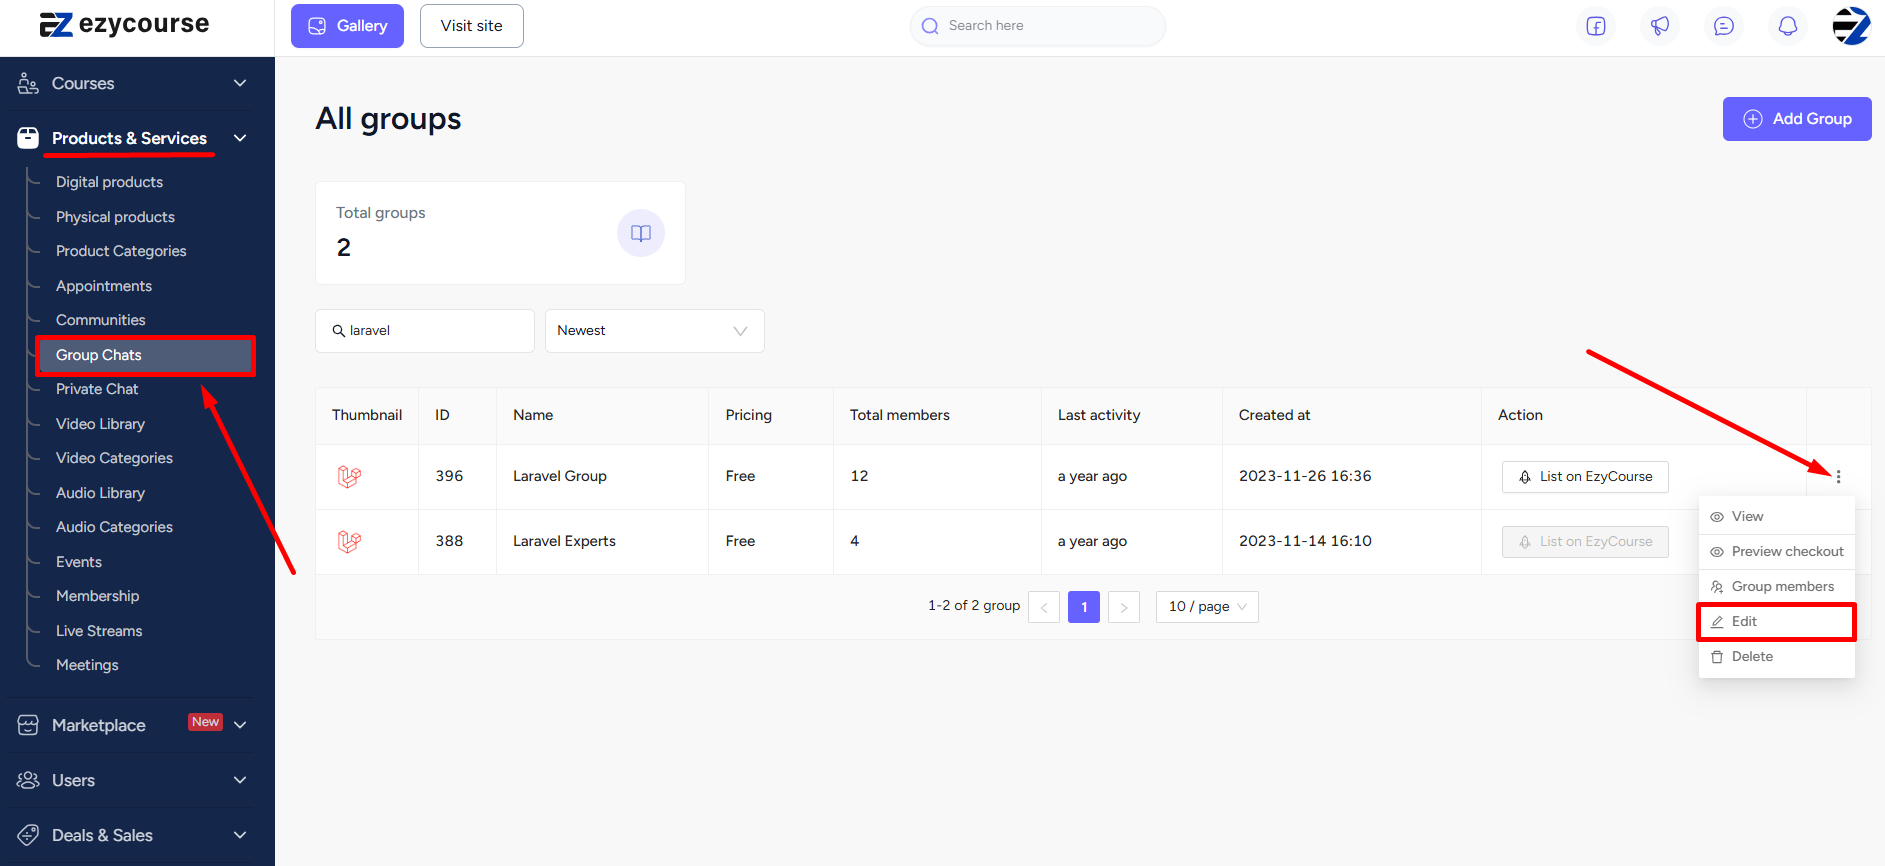
To set a custom page as the after-checkout page, go to Products & Services-> Group chats -> click the three dots and select the Edit option.
Scroll down to find the after-checkout page option. And click the Choose custom page button.

Now, select the custom page from the drop-down menu. And click the Update Group button to apply the new after-checkout page to your group.

You can go back to the default after-checkout page at any time. Simply click the Reset to default button.
