Back
How To Use The Tab Widget in EzyCourse Website Builder: Easy Ways!
The Tab Widget in EzyCourse Page Builder allows you to create engaging and organized content by displaying information in tabs. This versatile widget is perfect for showcasing different types of content without cluttering your page.
In this documentation, we will explore the features and settings of the Tab Widget to help you make the most out of it.
How To Use The Tab Widget in EzyCourse Website Builder: Step-by-Step
Let’s learn how to work with the Tab Widget in EzyCourse Website Builder in a step-by-step guide.
Step 1: Create a new page/edit the existing page from the EzyCourse dashboard
To create a new page or edit an existing one, log in to your EzyCourse dashboard and go to Website Builder → Pages.
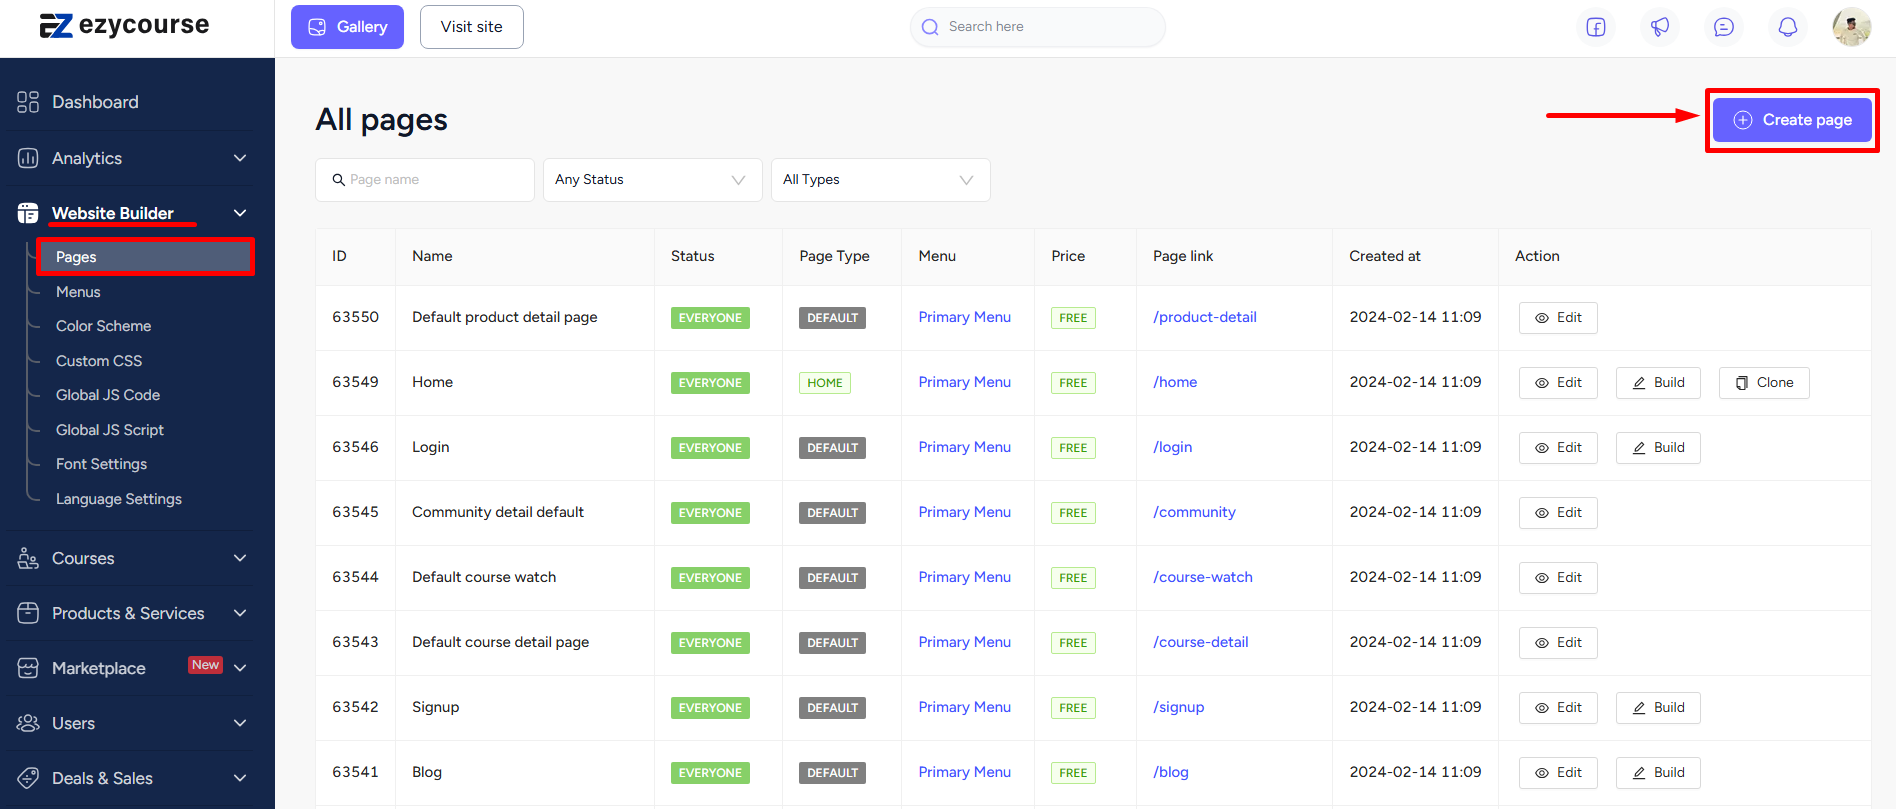
Step 2: Add the Tab Widget to Your Page
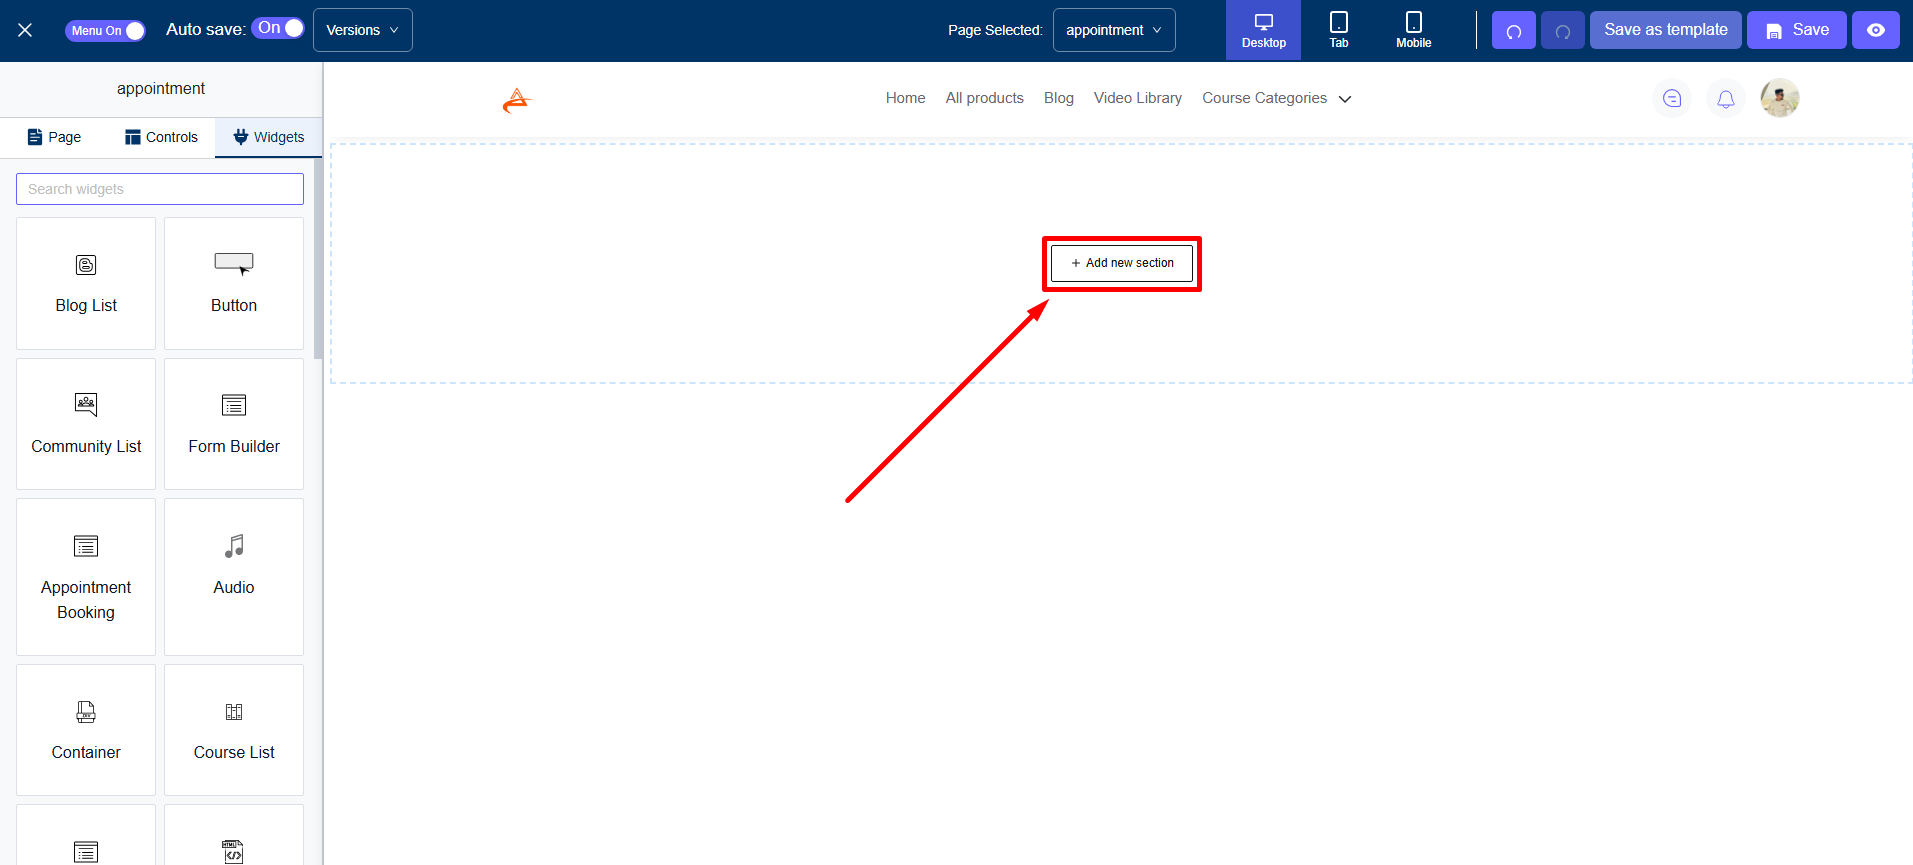
To add the Tab Widget to your page, first click on “Add new section”.
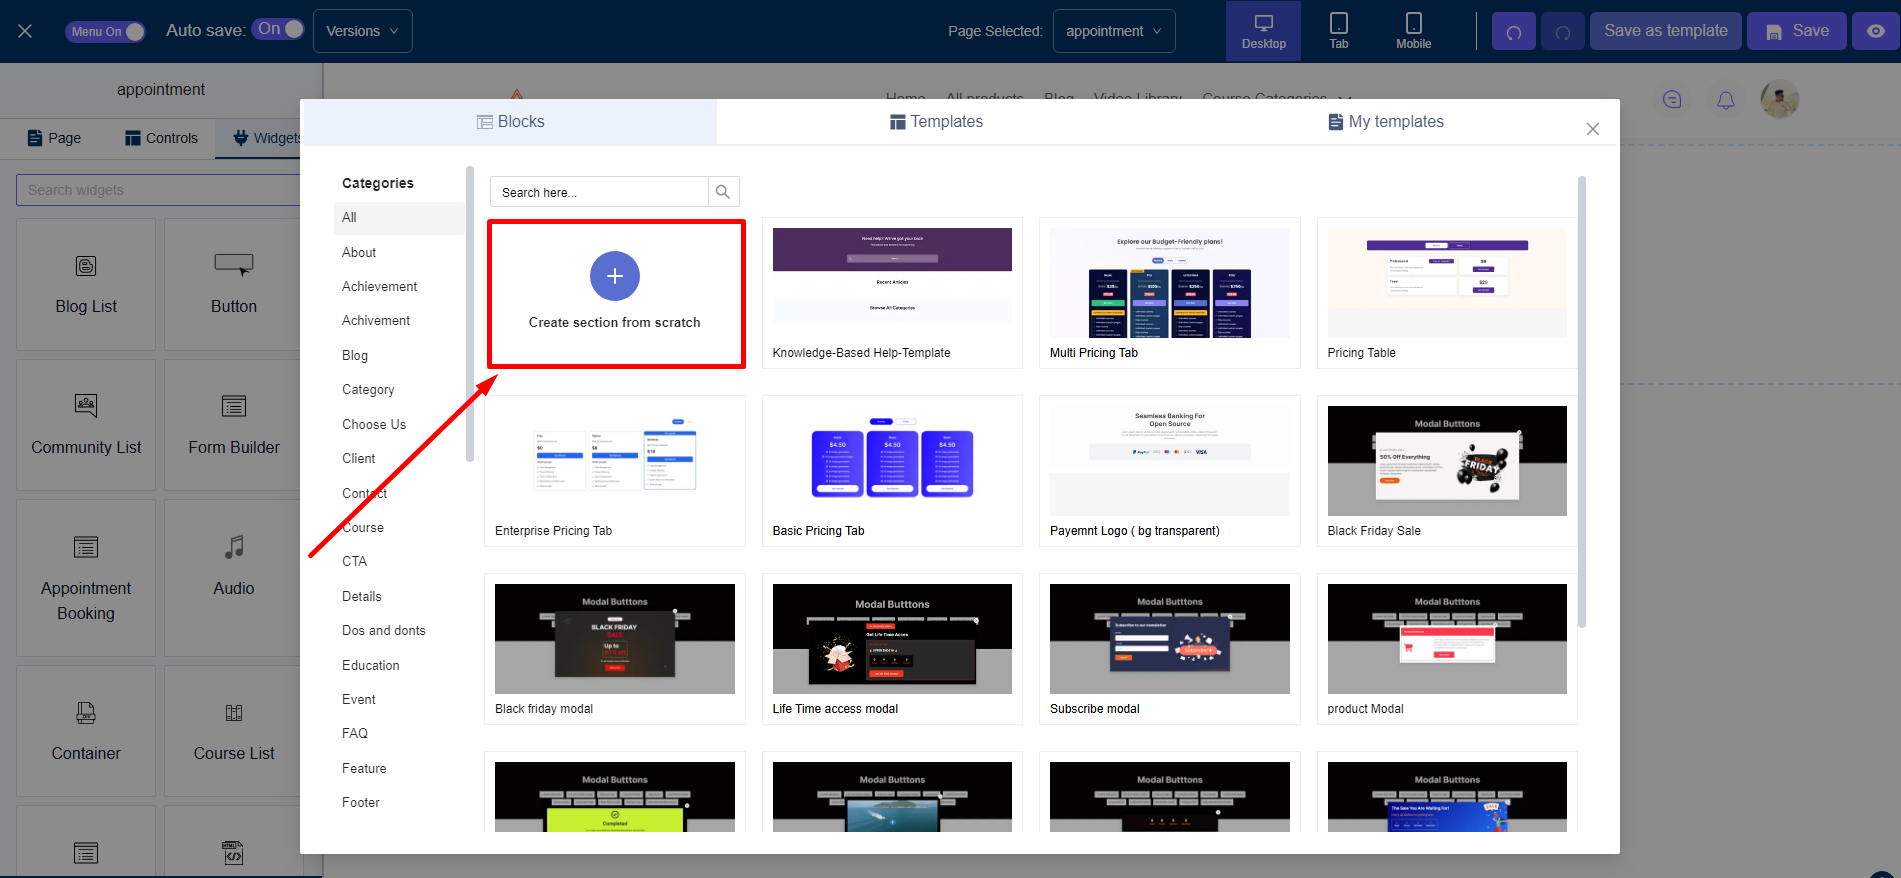
On the popup, click Create section from scratch and then choose the layout you want.
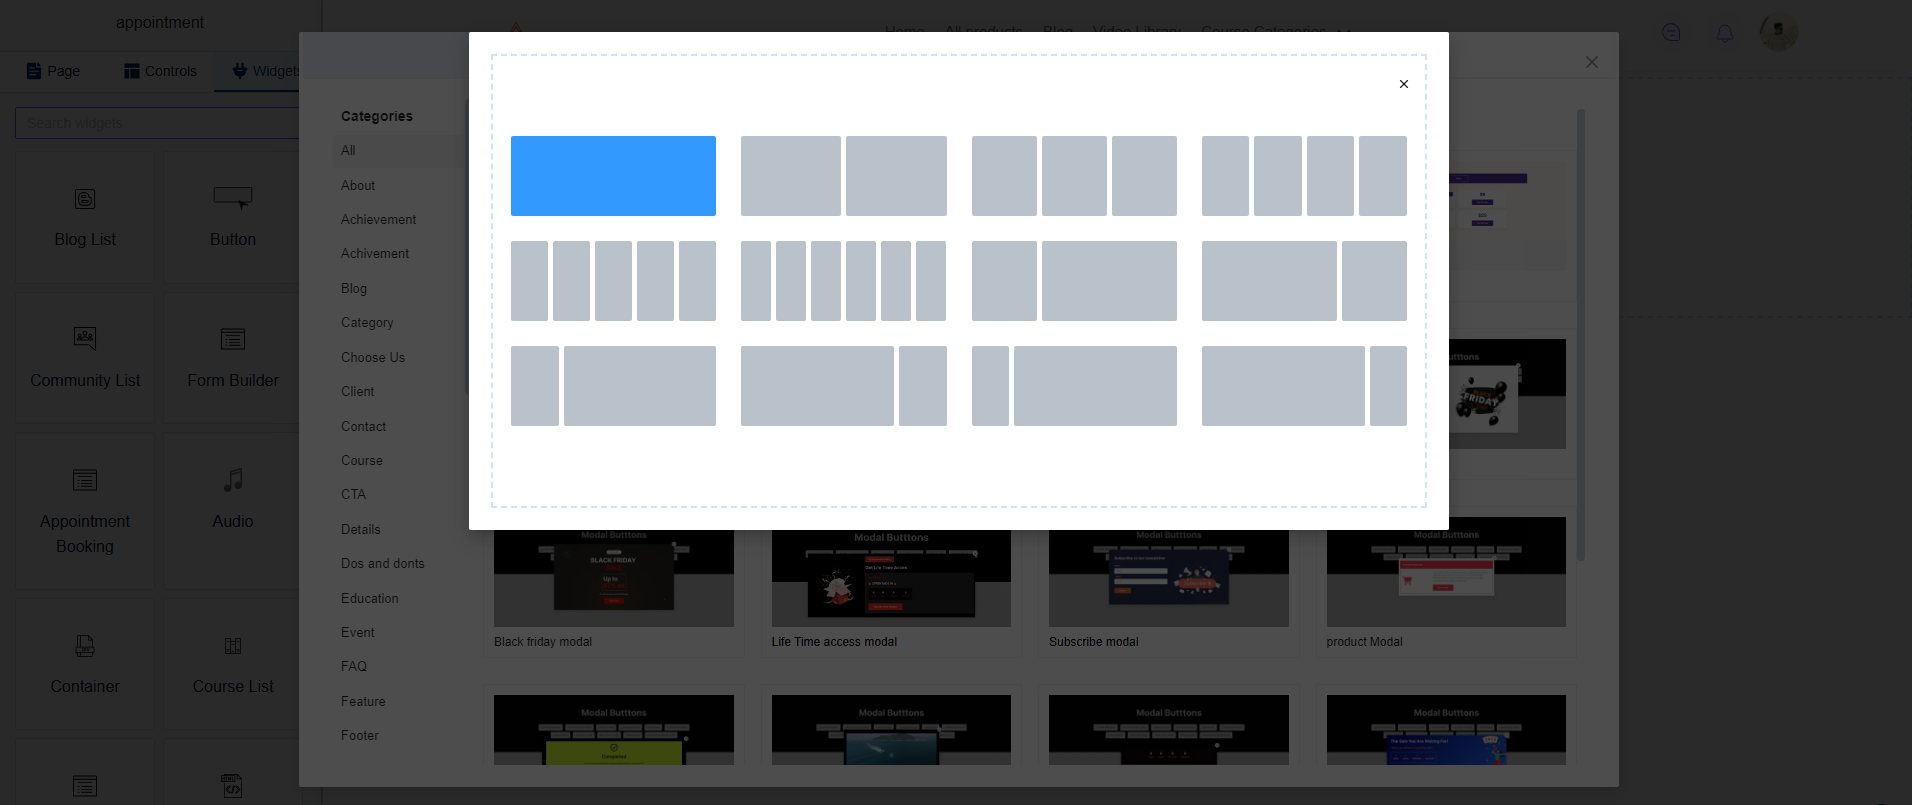
Search for the tab widget, then drag and drop the “Tab” Widget from the Widget panel onto your desired section.
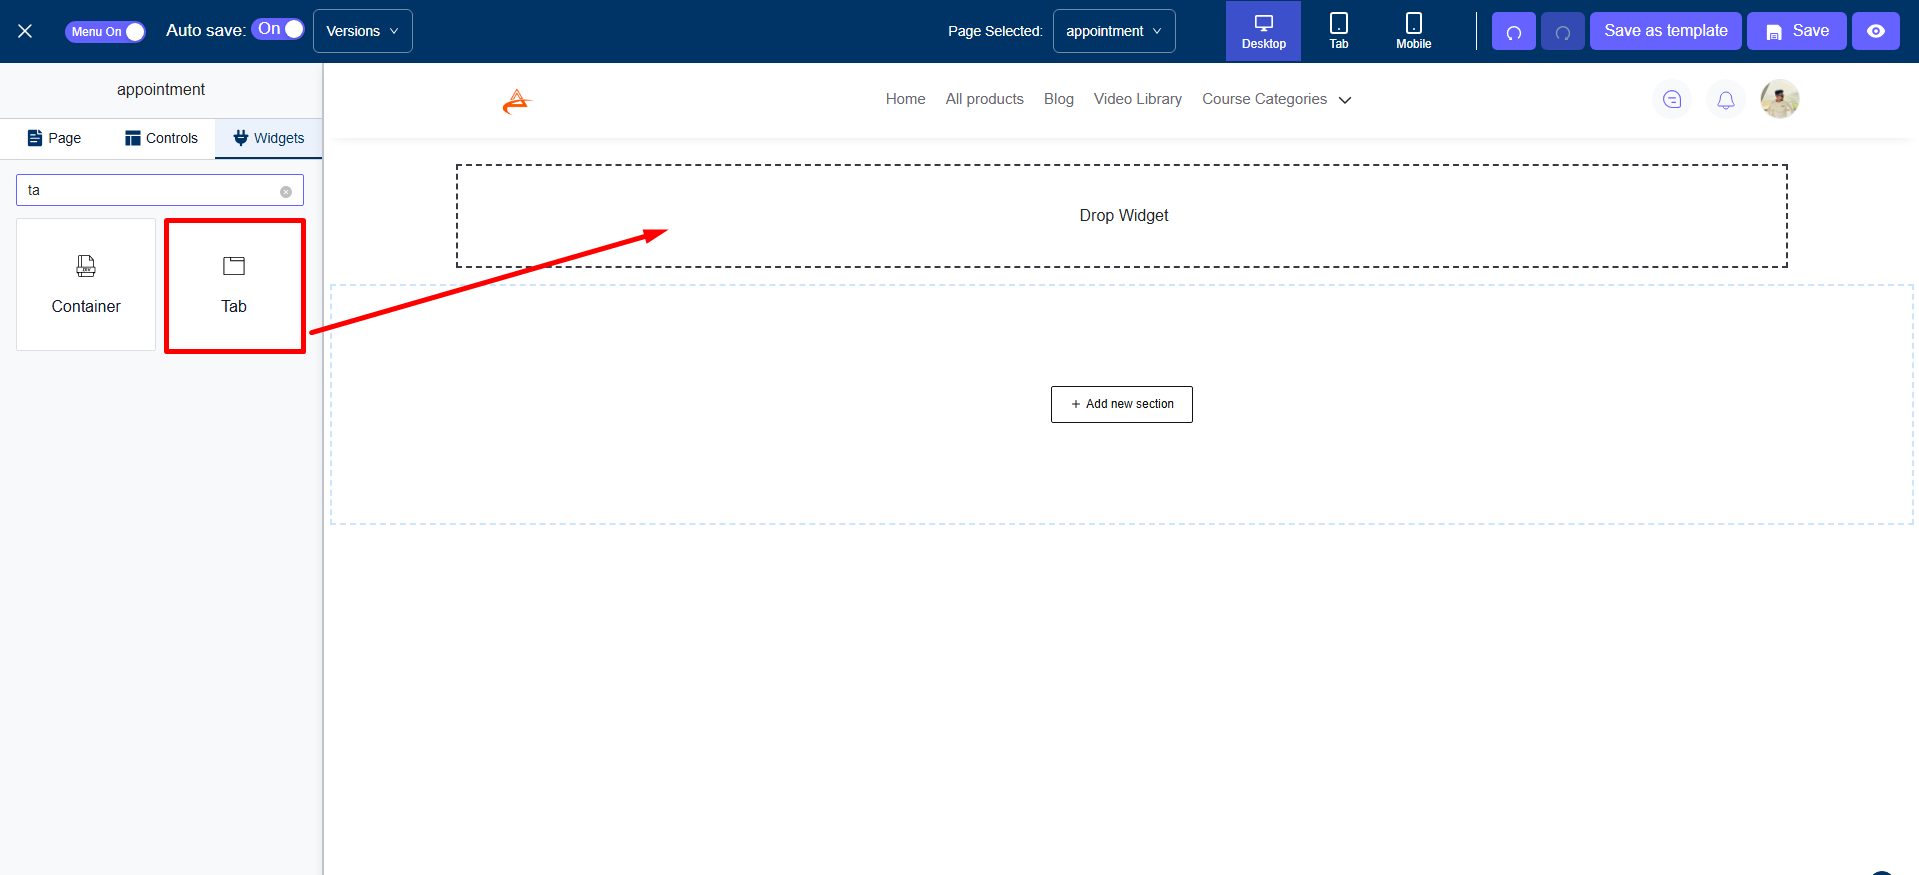
With the widget in place on the builder, you can customize and configure different tab related settings.
Step 3: Configure the Tab Widget Settings
If you click on the tab widget, you will get the option to configure the tab widget. Under the “Control” panel, you will get the following options:
Tab settings
When you click on the tab widget you’ve added to the page, you can access all the relevant settings from the TAB SETTINGS menu on the sidebar. There you will get the following options:
-Tab list
-Default Tab
-Tab Nav
-Tab Content
Tab list
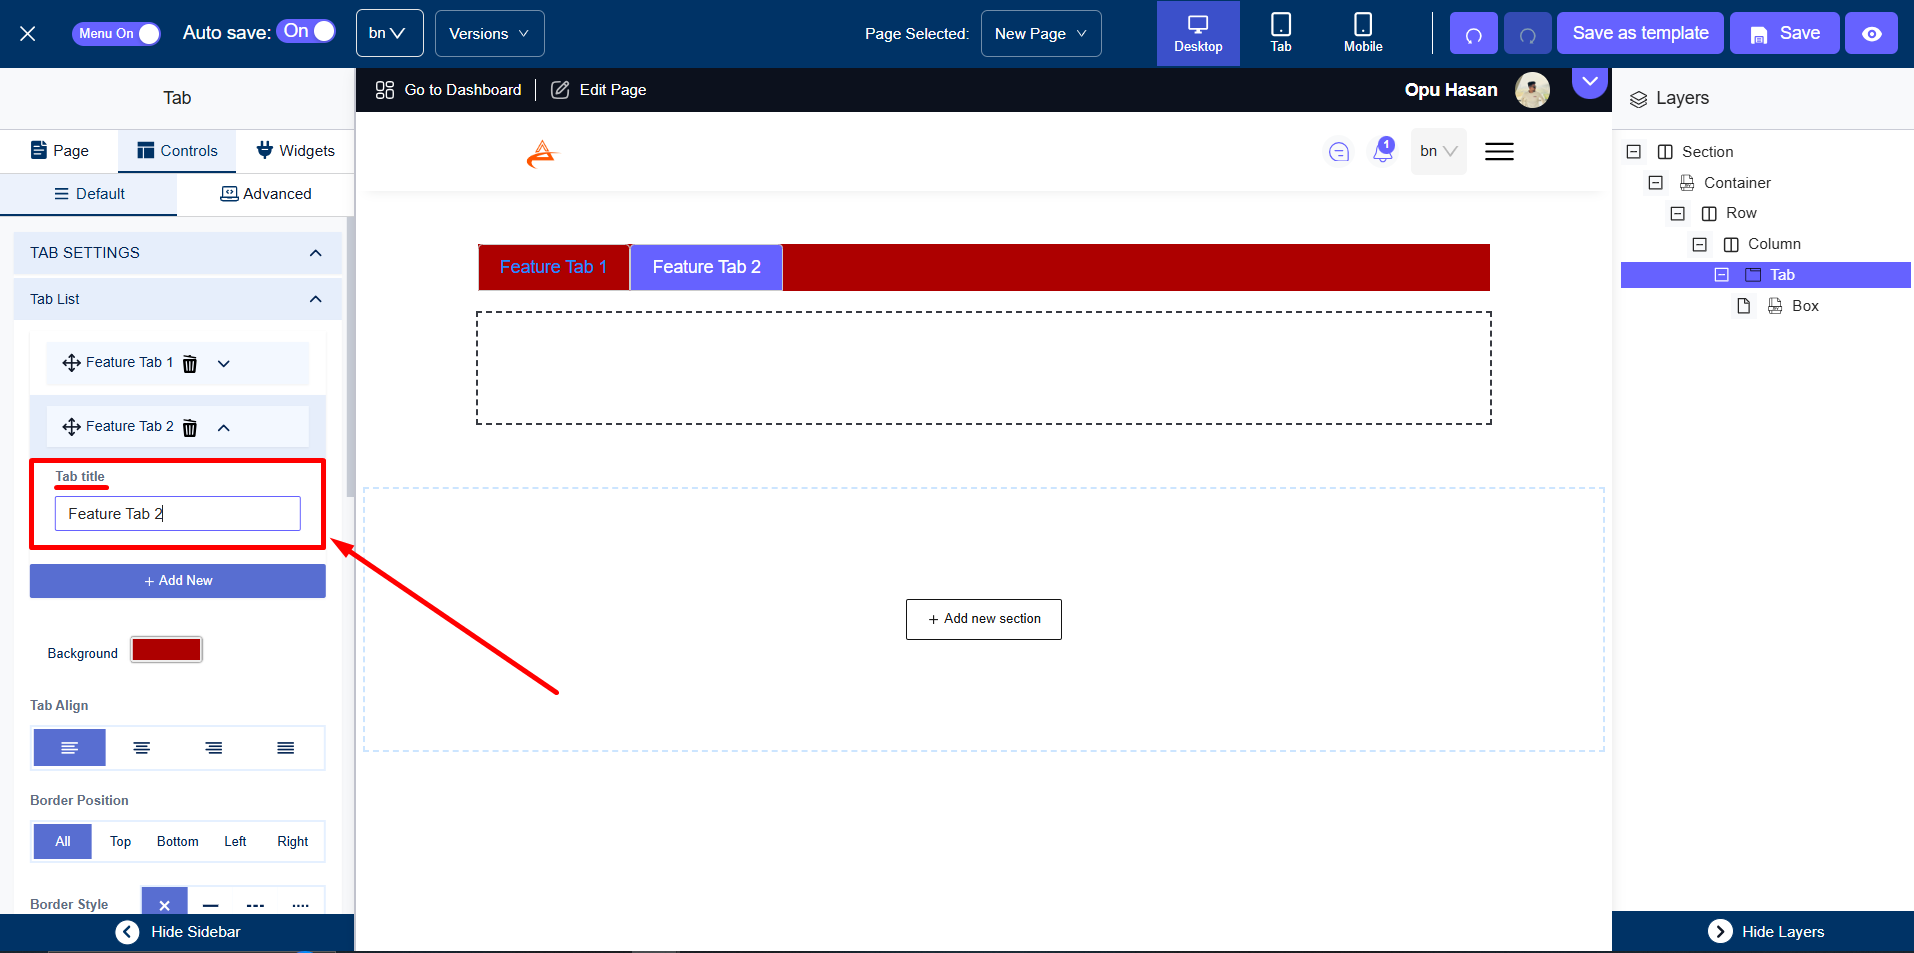
From the Tab list, you can add a new tab by simply clicking on the “Add New” button.
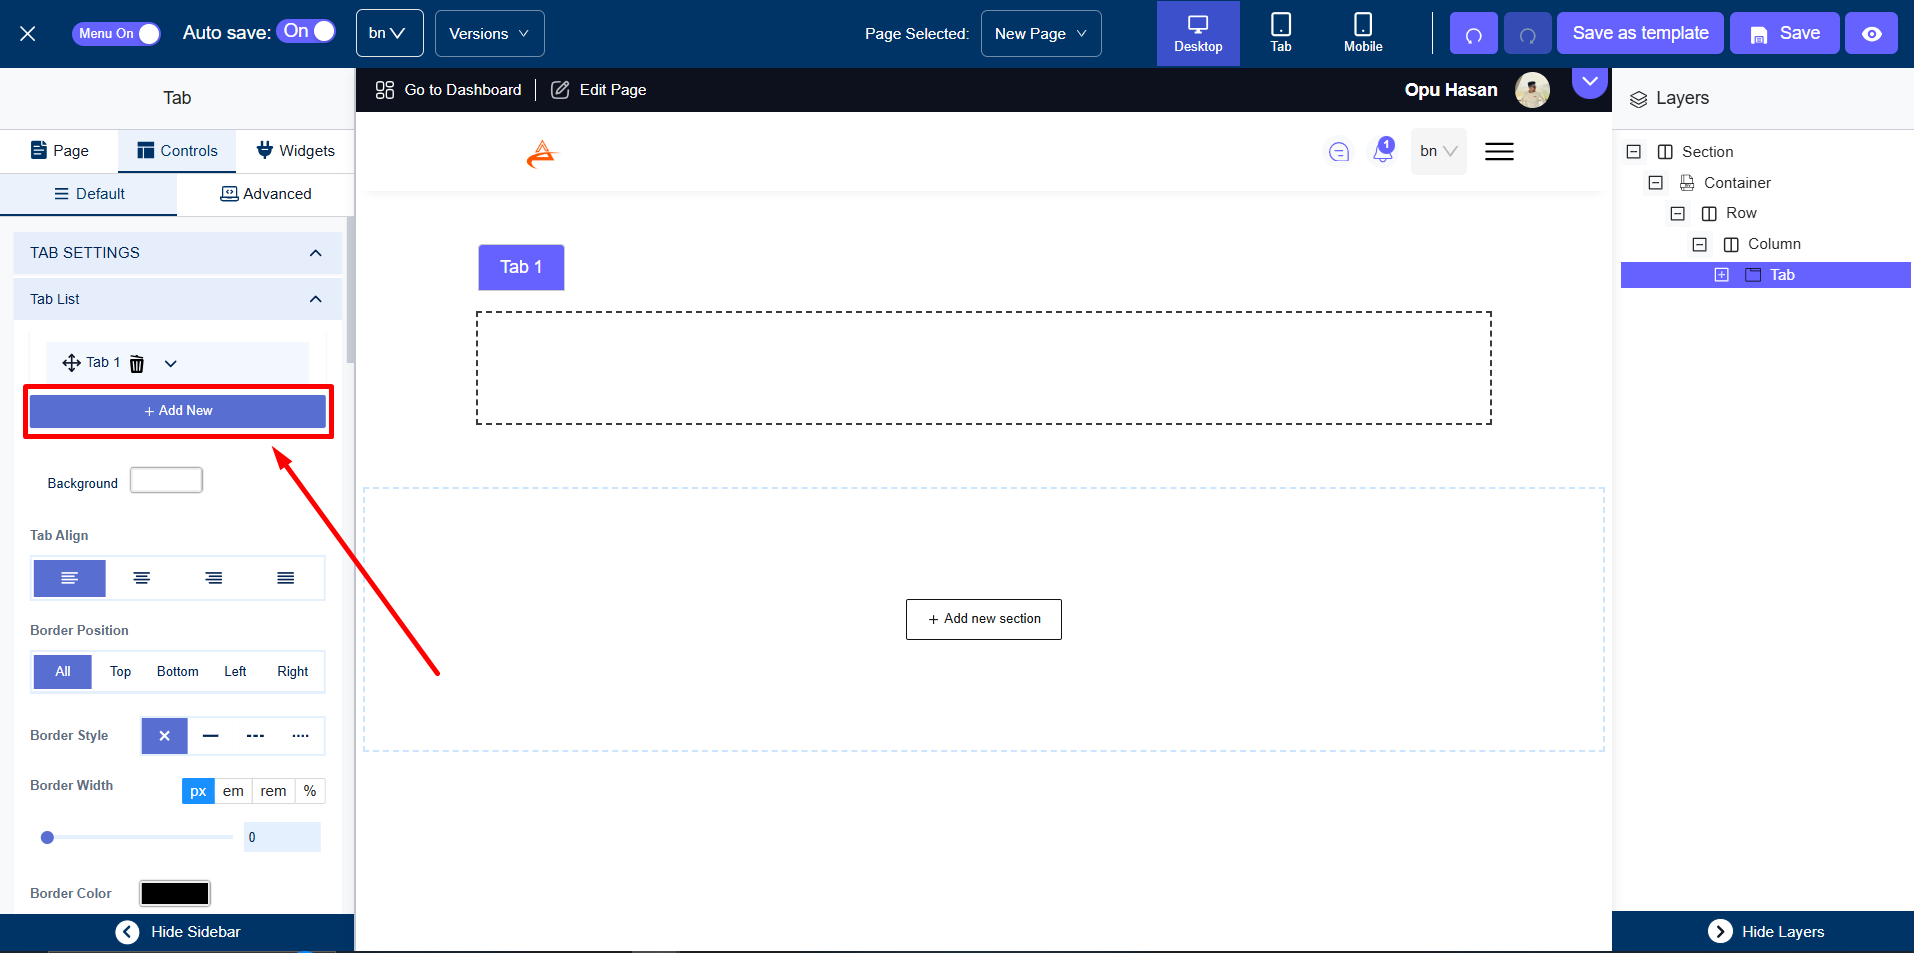
Below you will get other Tab Settings like:
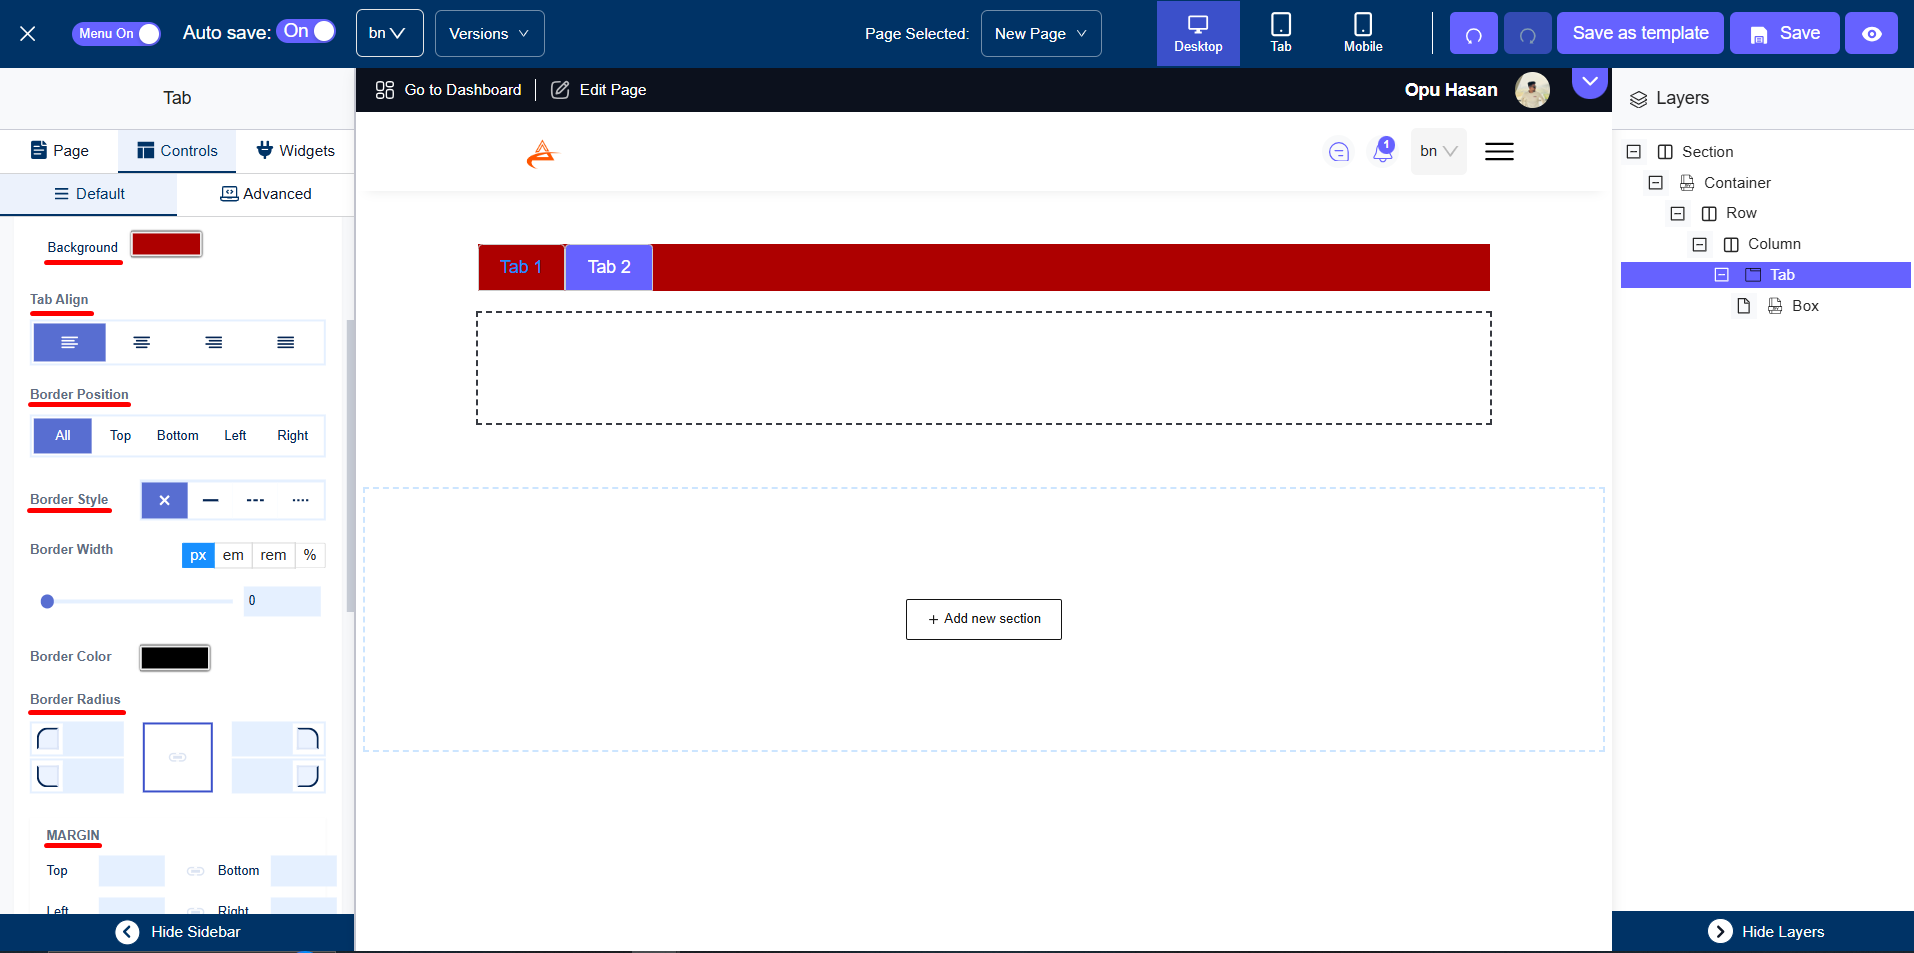
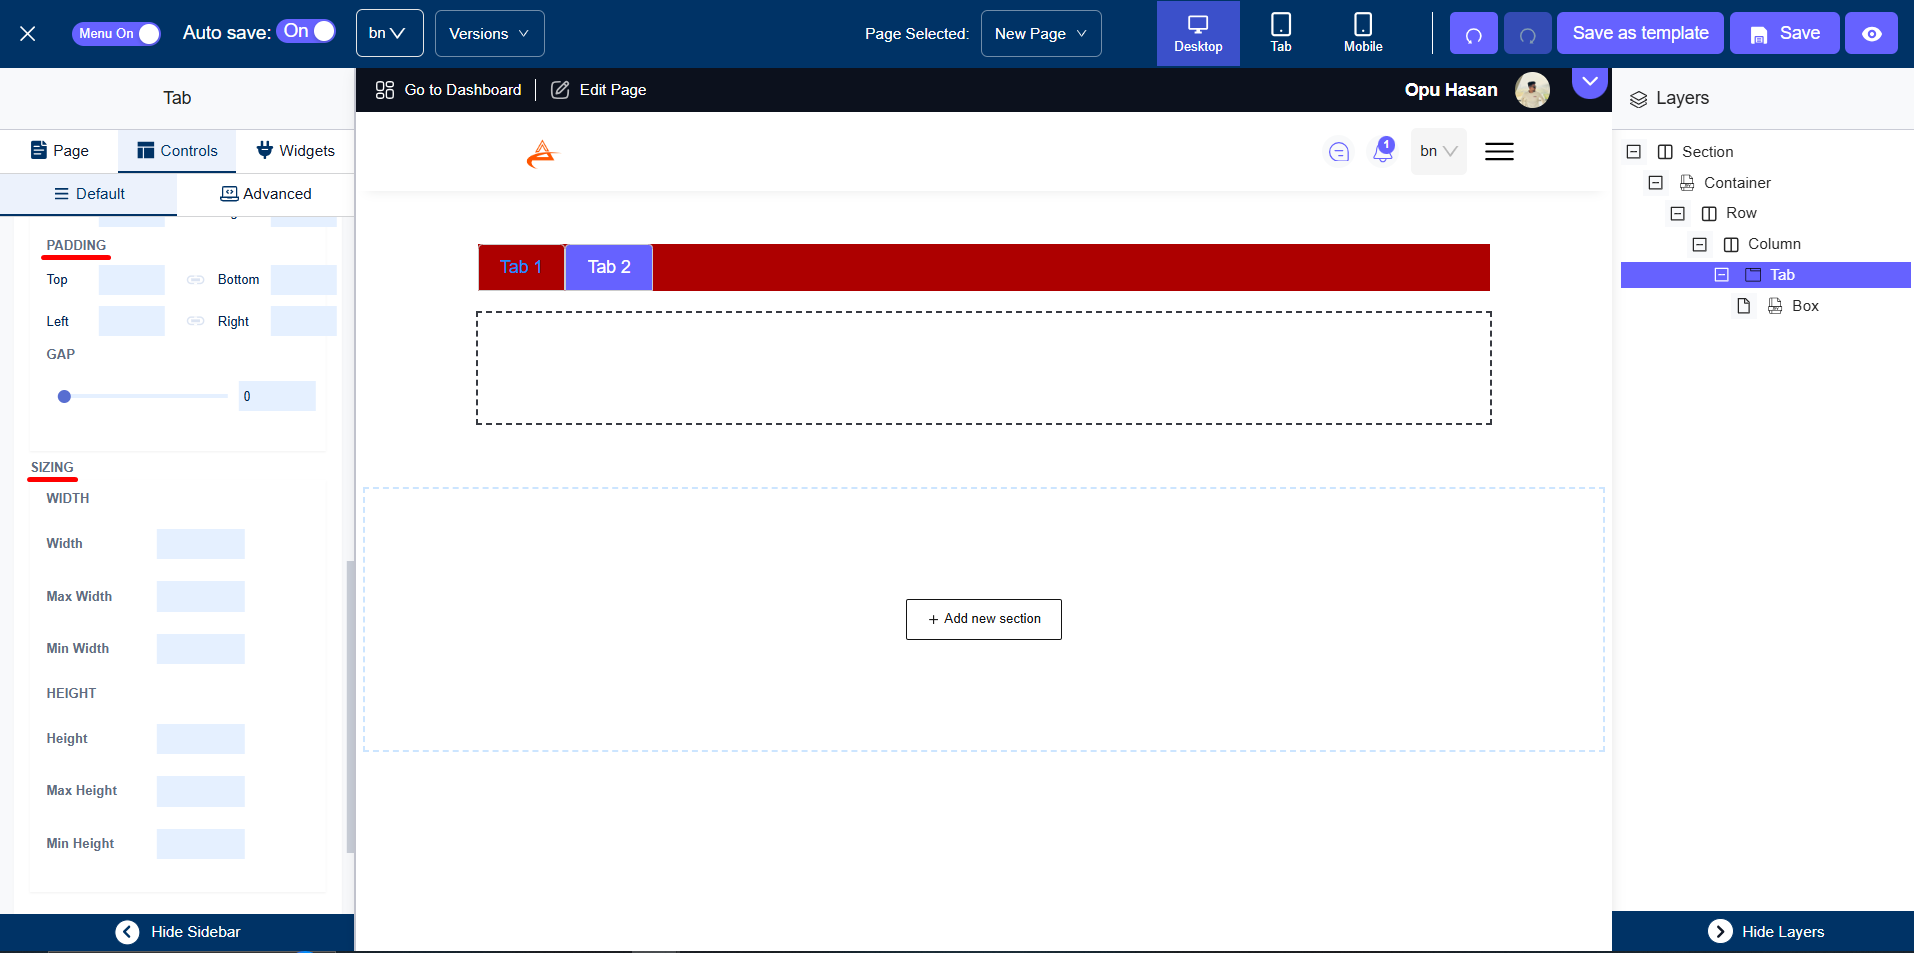
There you can set the background color, adjust the tab alignment, select border position, style, color, radius, margin, padding, etc according to your requirements.
Plus you can also edit the Tab name from here-
Default Tab
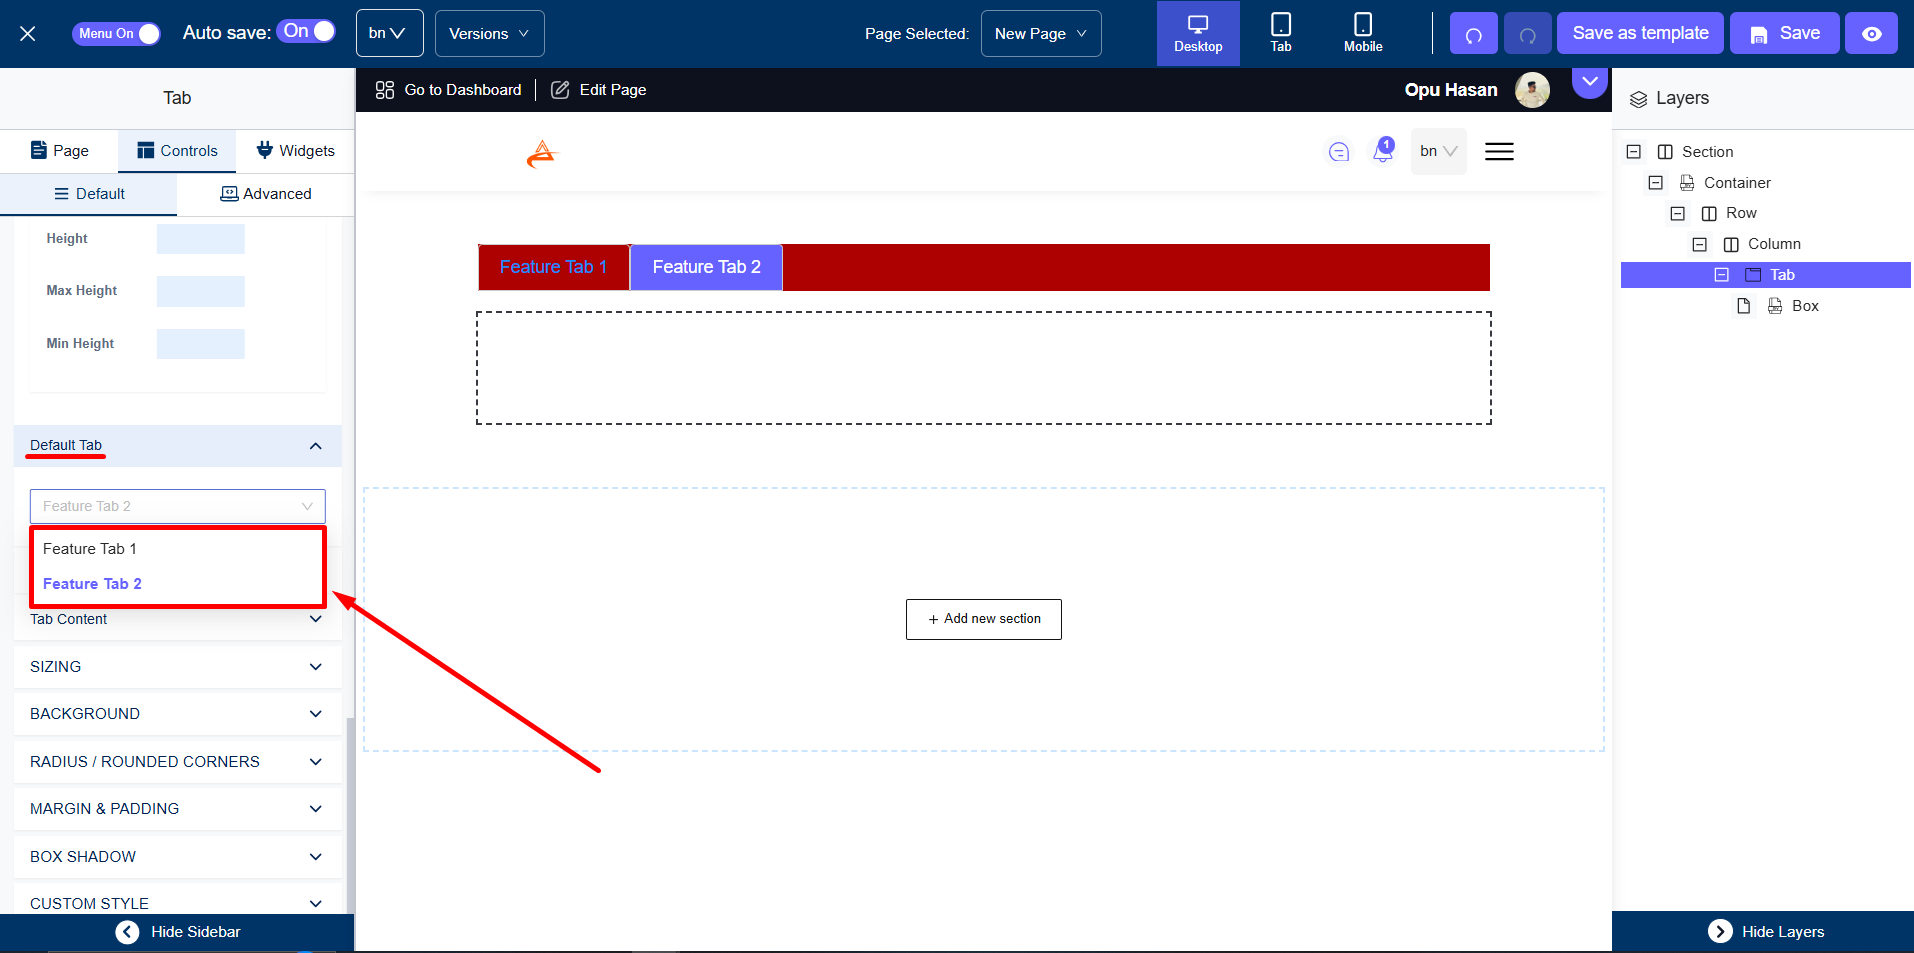
The Default Tab is the tab set as default (colored background). You can set any of your tabs as a Default Tab.
Tab Nav
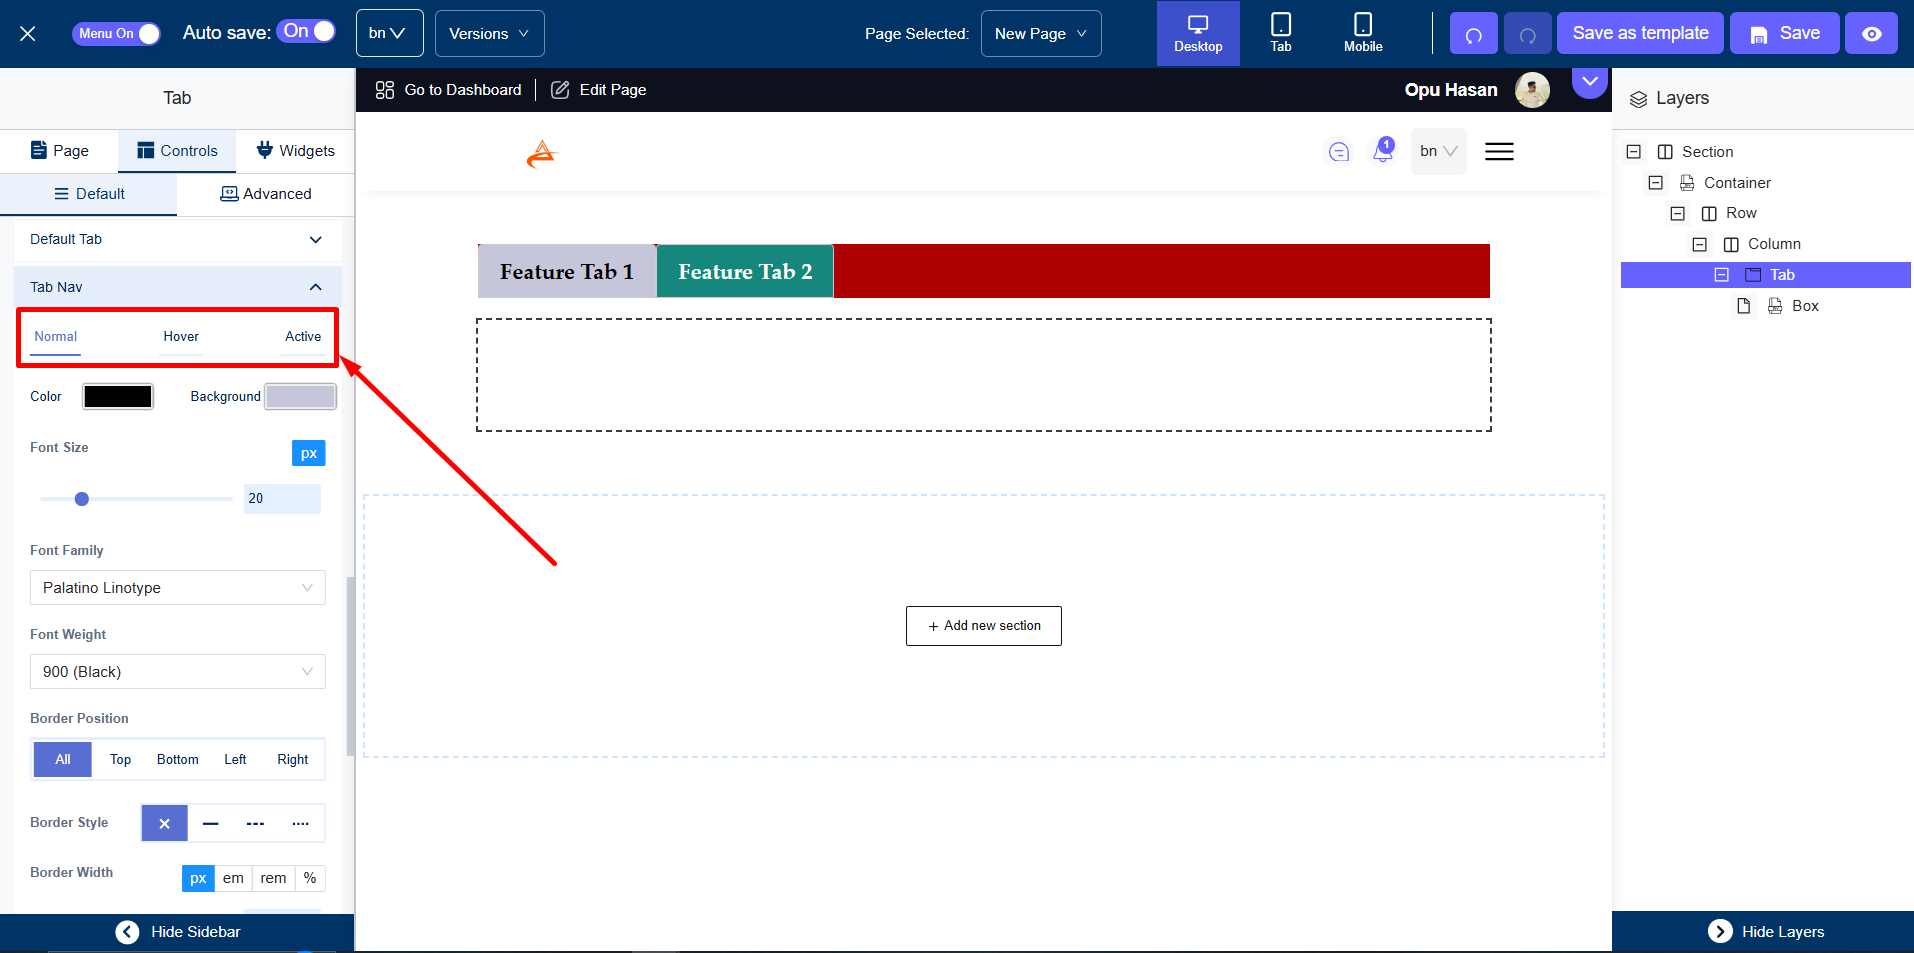
Under the Tab Nav menu on the sidebar, you will get 3 items-
Normal
Hover
Active (Indicates the active tab)
You can adjust the color and background of each item.
Tab Content
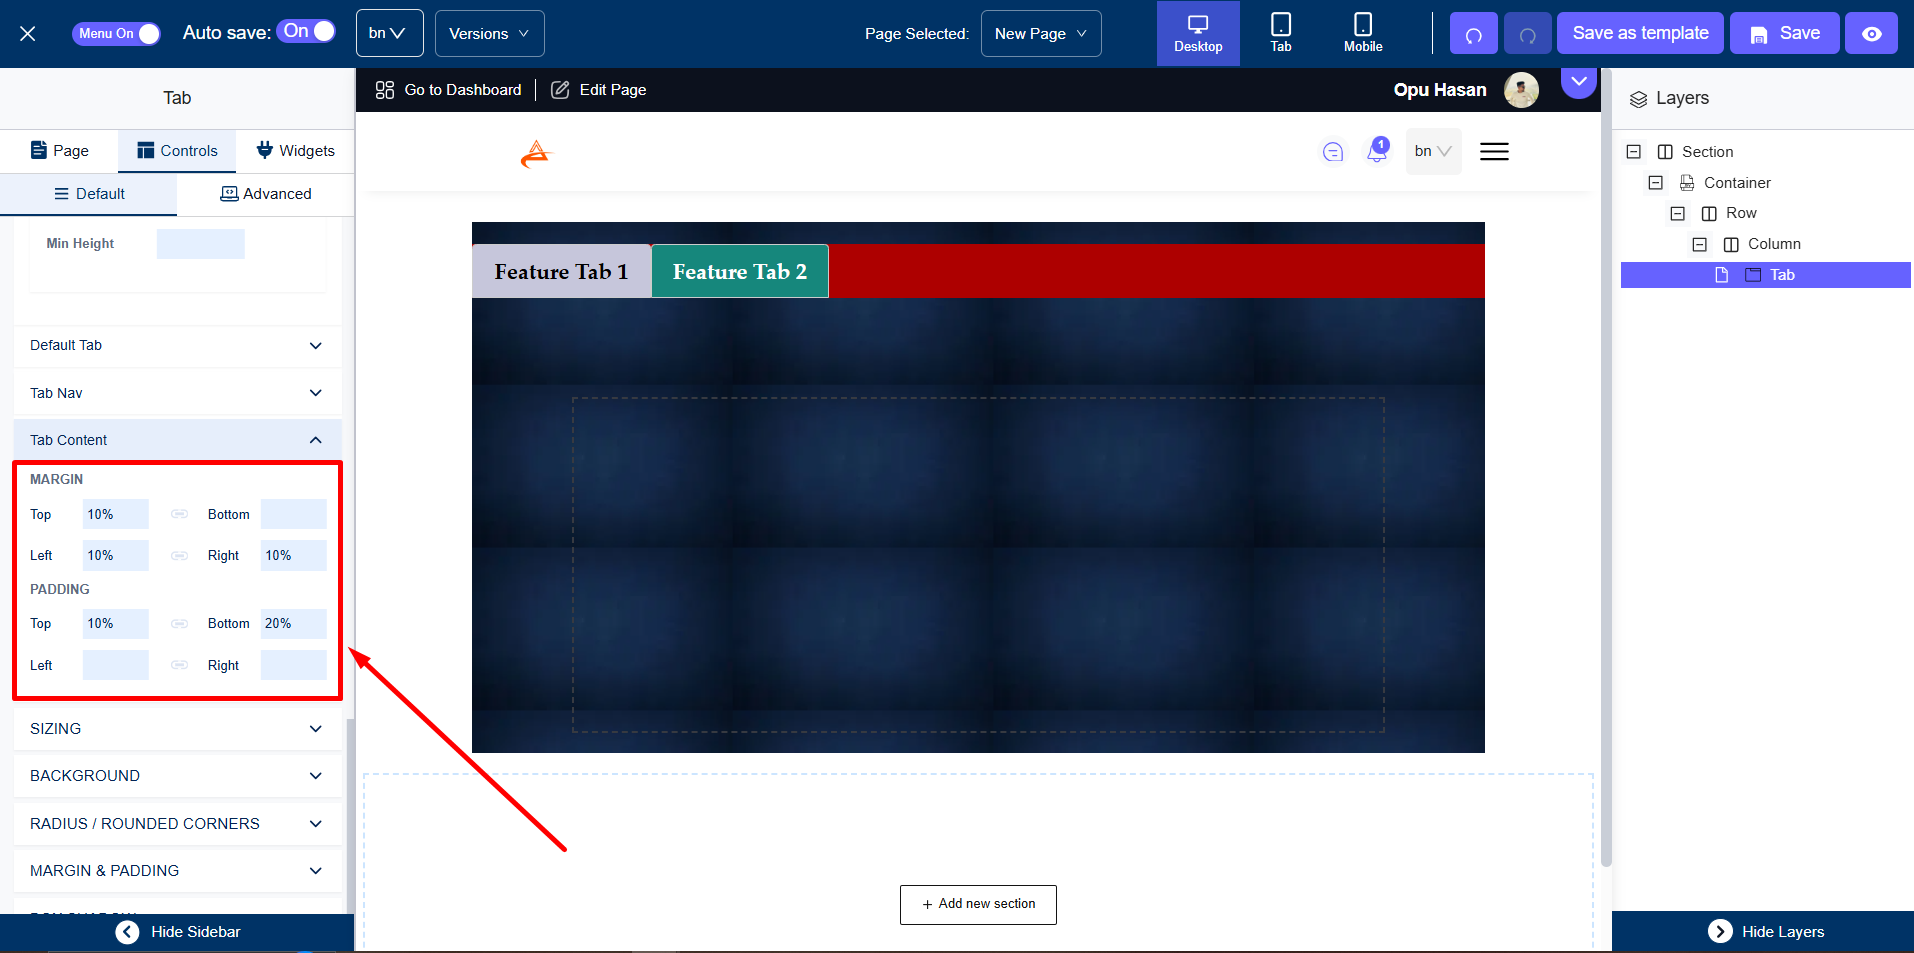
Here you can set the padding and margin according to the design of your tabs. For example -
There are some other Tab Settings like-
-SIZING
-BACKGROUND
-RADIUS & CORNER
-MARGIN & PADDING
-BOX SHADOW
-CUSTOM STYLE
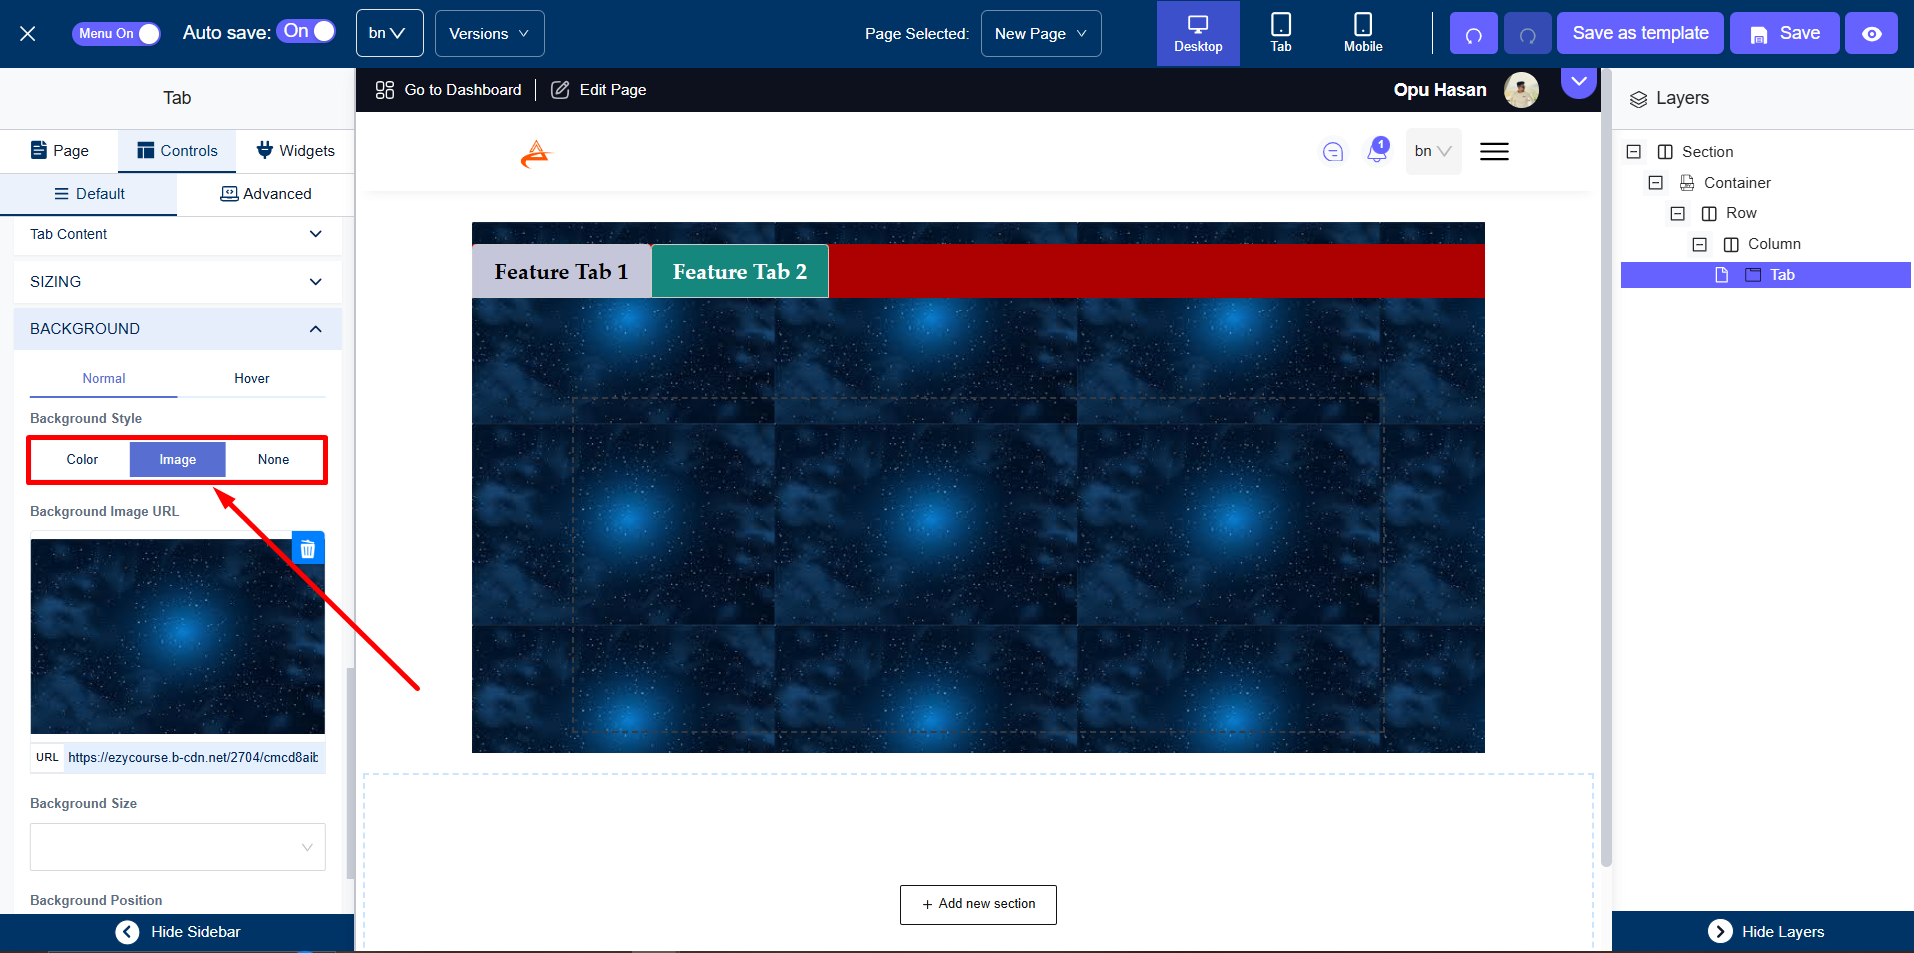
From the BACKGROUND tab, you will get options like-
-Color
-Image
-None
You can either set the background color, keep an image as background, or select none for a blank background.
Advanced Tab Settings:
You can get some advanced settings from there -
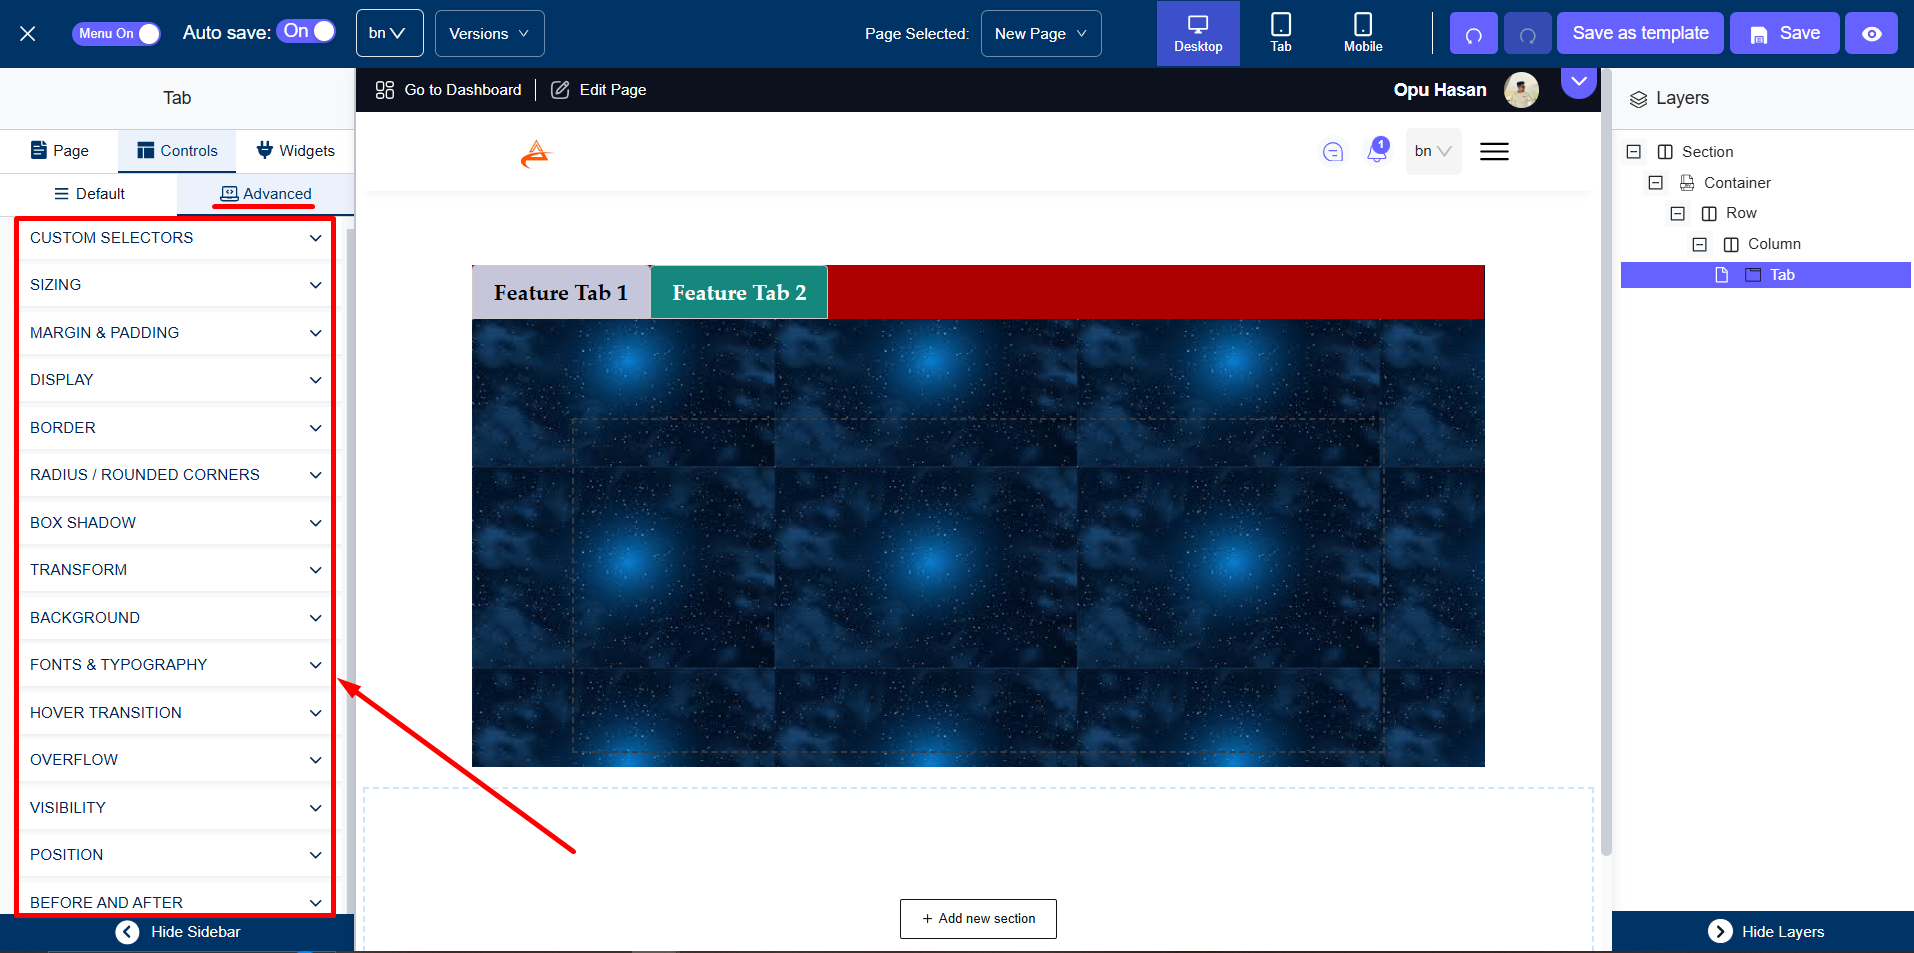
There you will get some more settings like Hover, Transform, Fonts, Overflow, etc.
Step 4: Customization & Responsiveness in the Tab Widget
You can explore advanced customization options, such as custom CSS, to tailor the Tab Widget to your specific design requirements.
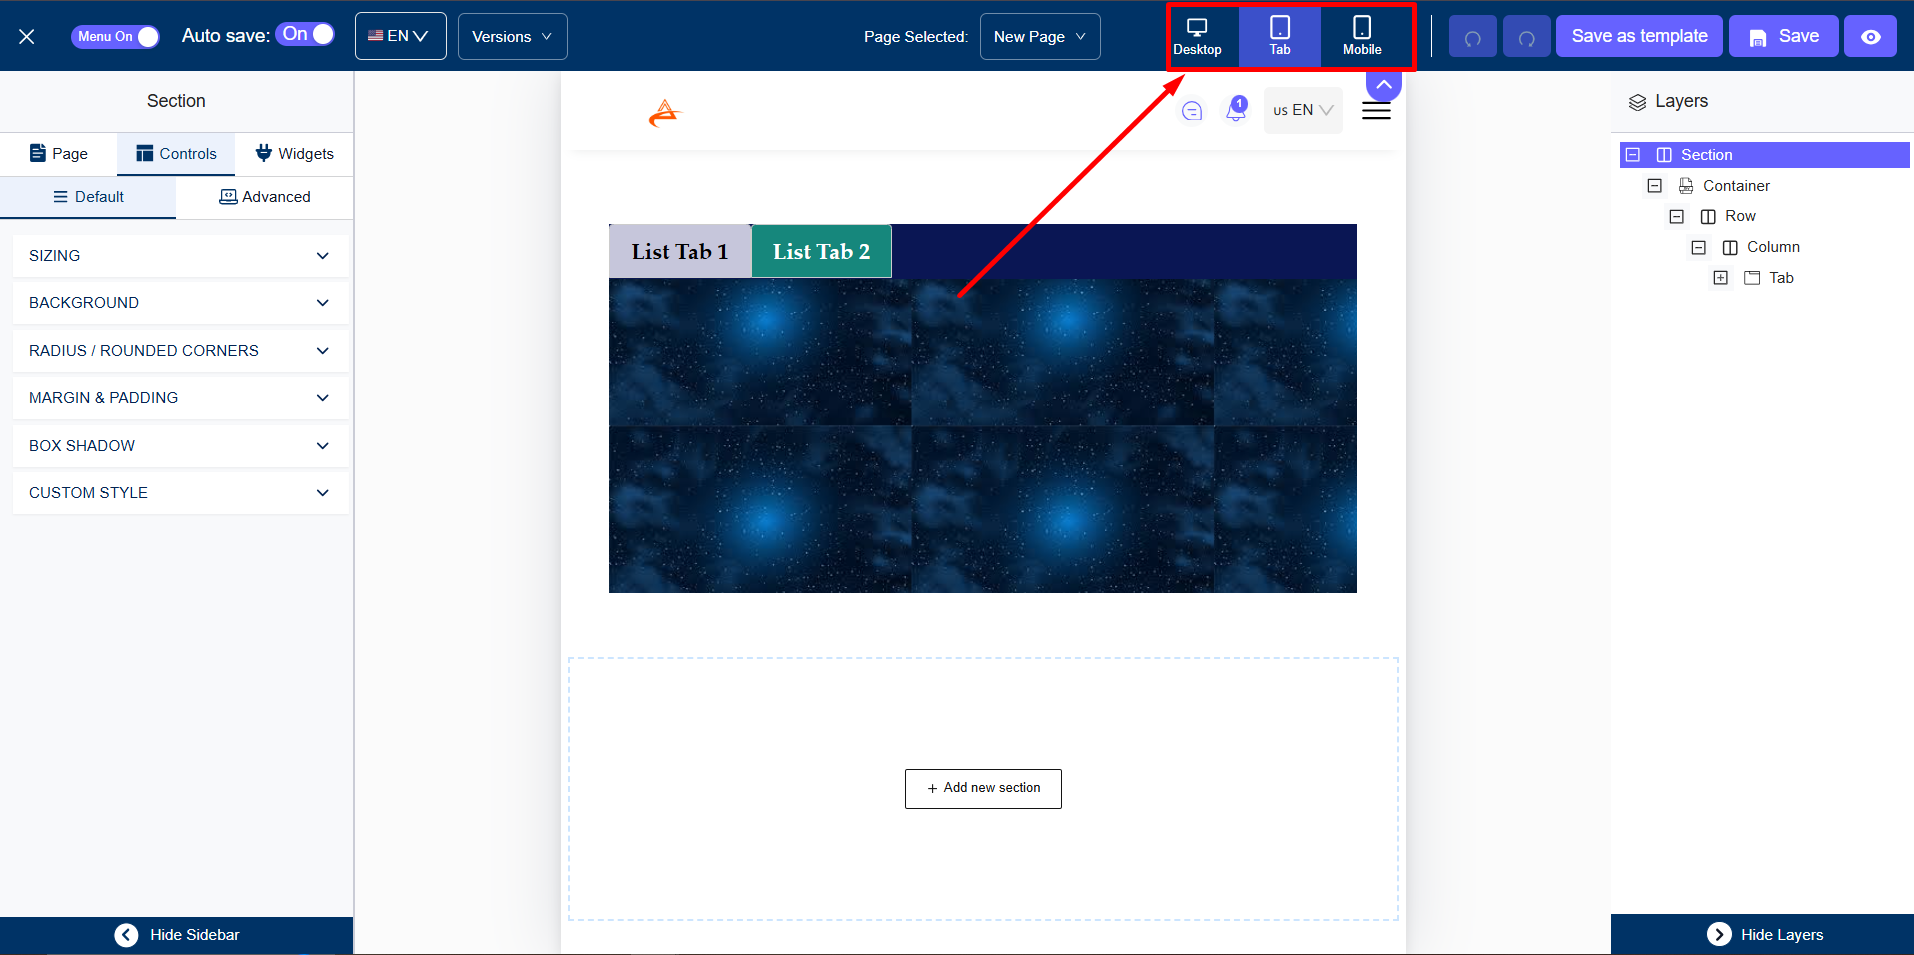
Plus, control the visibility of tabs on different devices. See the style from different device modes on your builder. Adjust the sizing accordingly.
Step 5: Copy & Paste Pre-Built Blocks into Tab Content Area
You cannot insert any content directly into the tab content area. Rather you have to copy the content from outside and then paste into the tab content area.
To do that, follow these steps:
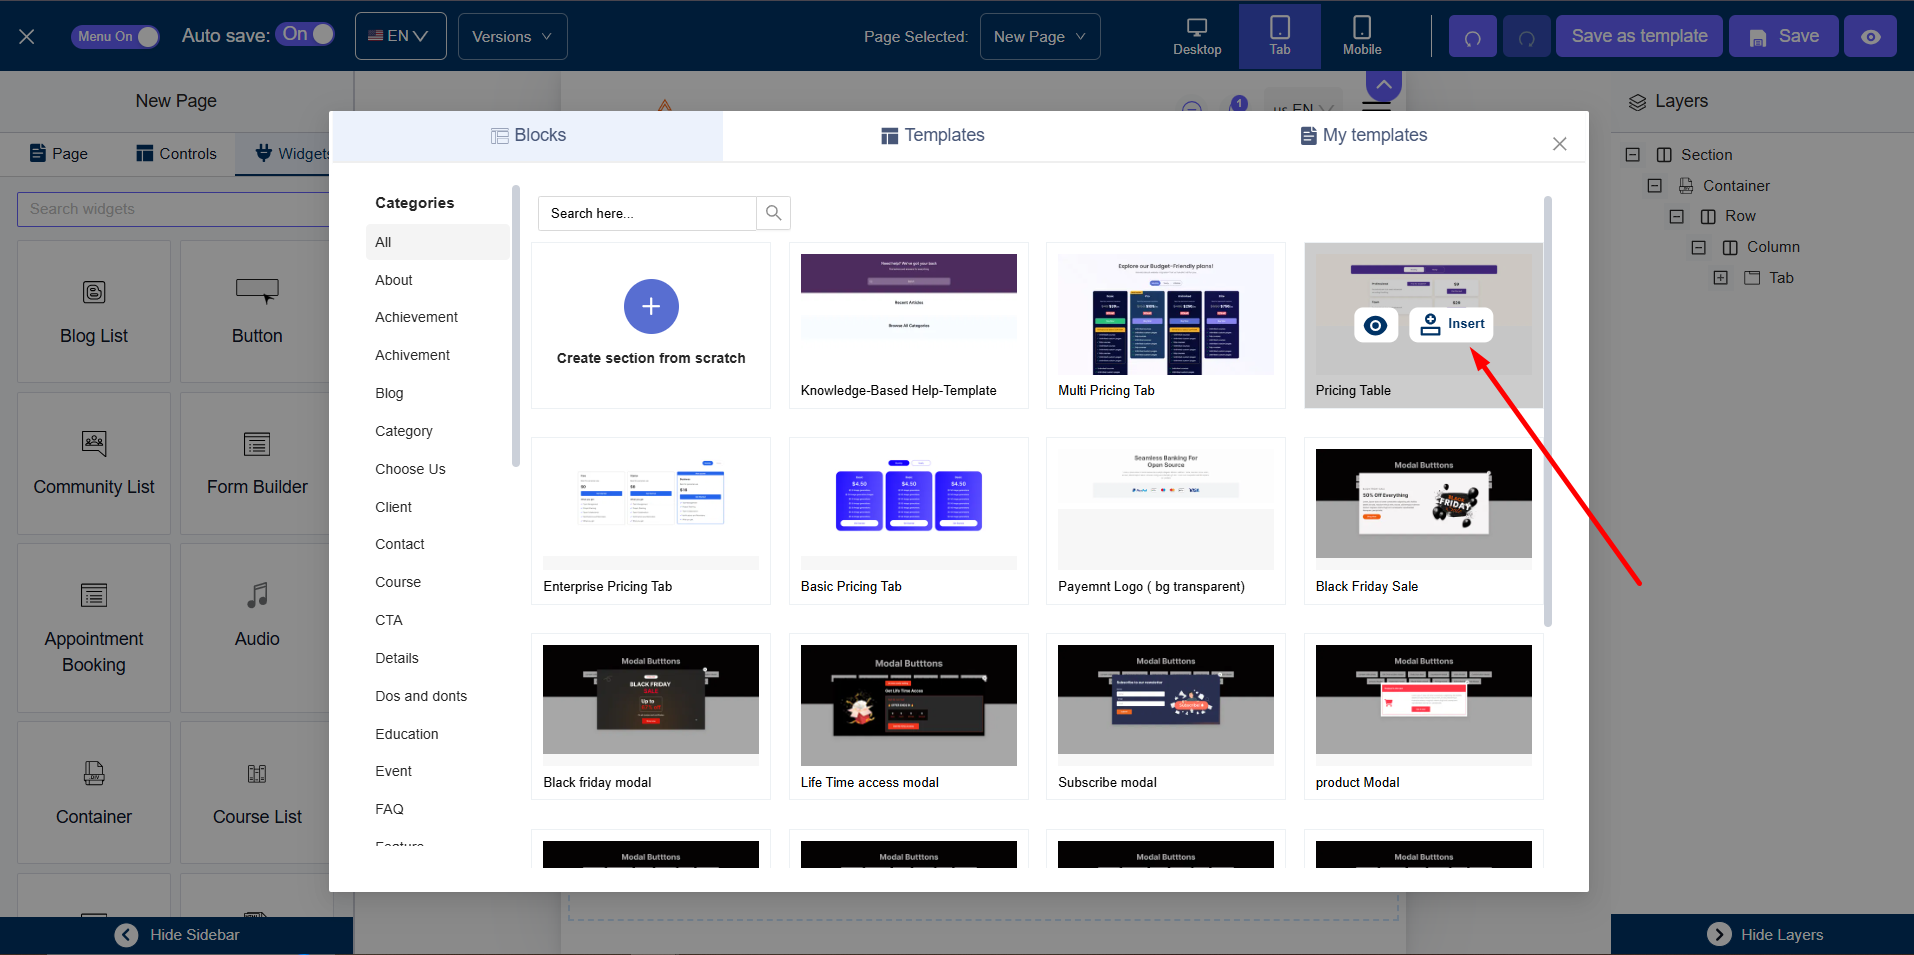
First, insert a pre-built block into an area outside of the tab widget. To do that, click the Add new section button and then insert a block.
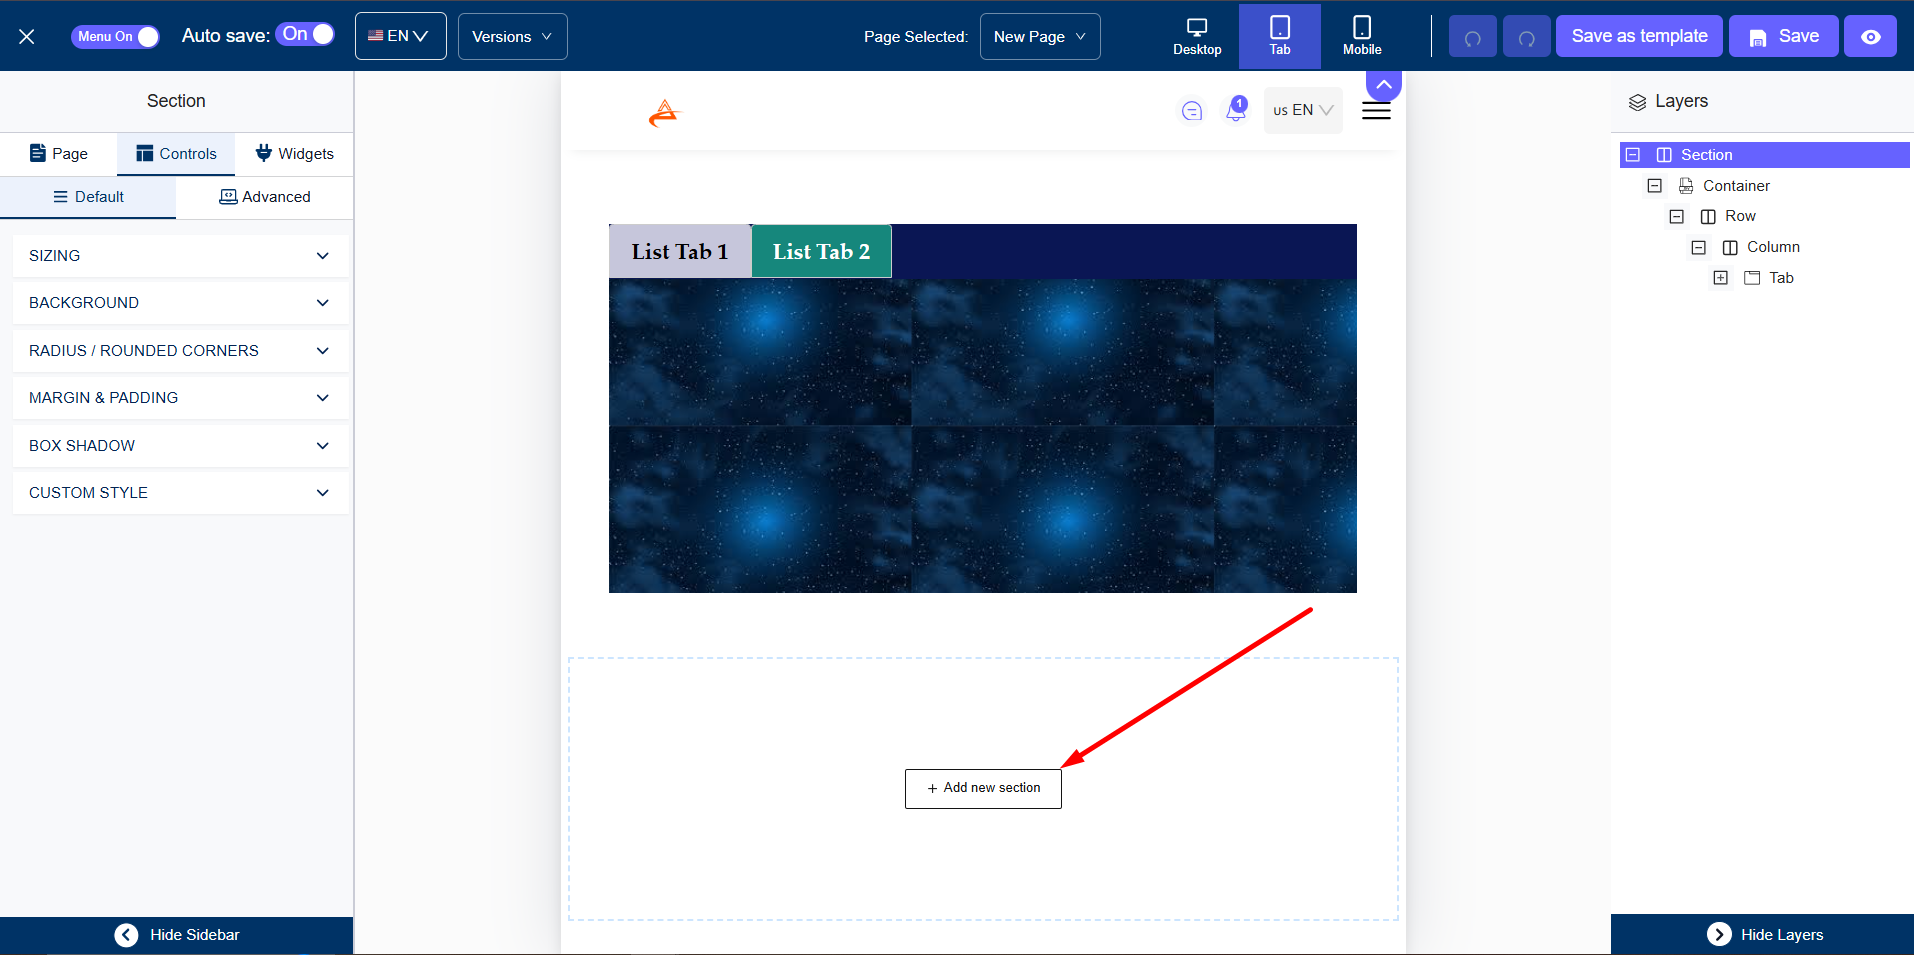
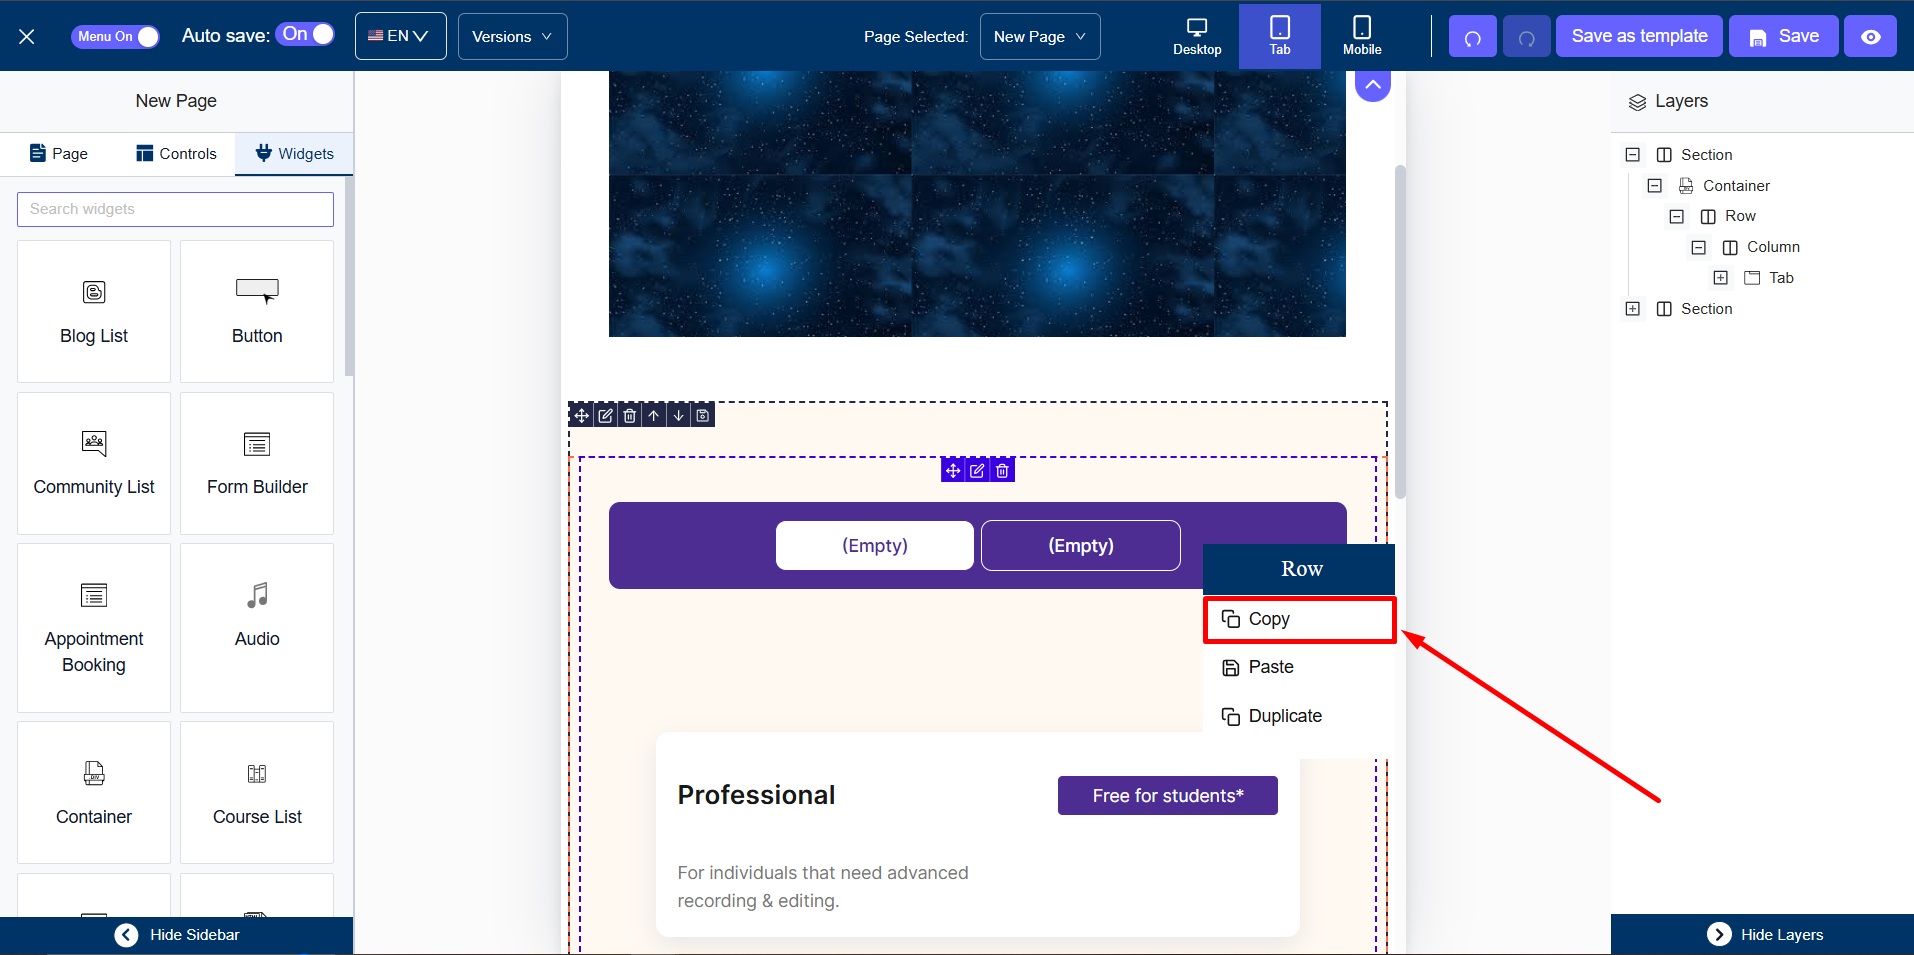
Now, copy the content you’ve just added. Ensure you right-click on the blue row. And then click the copy option.

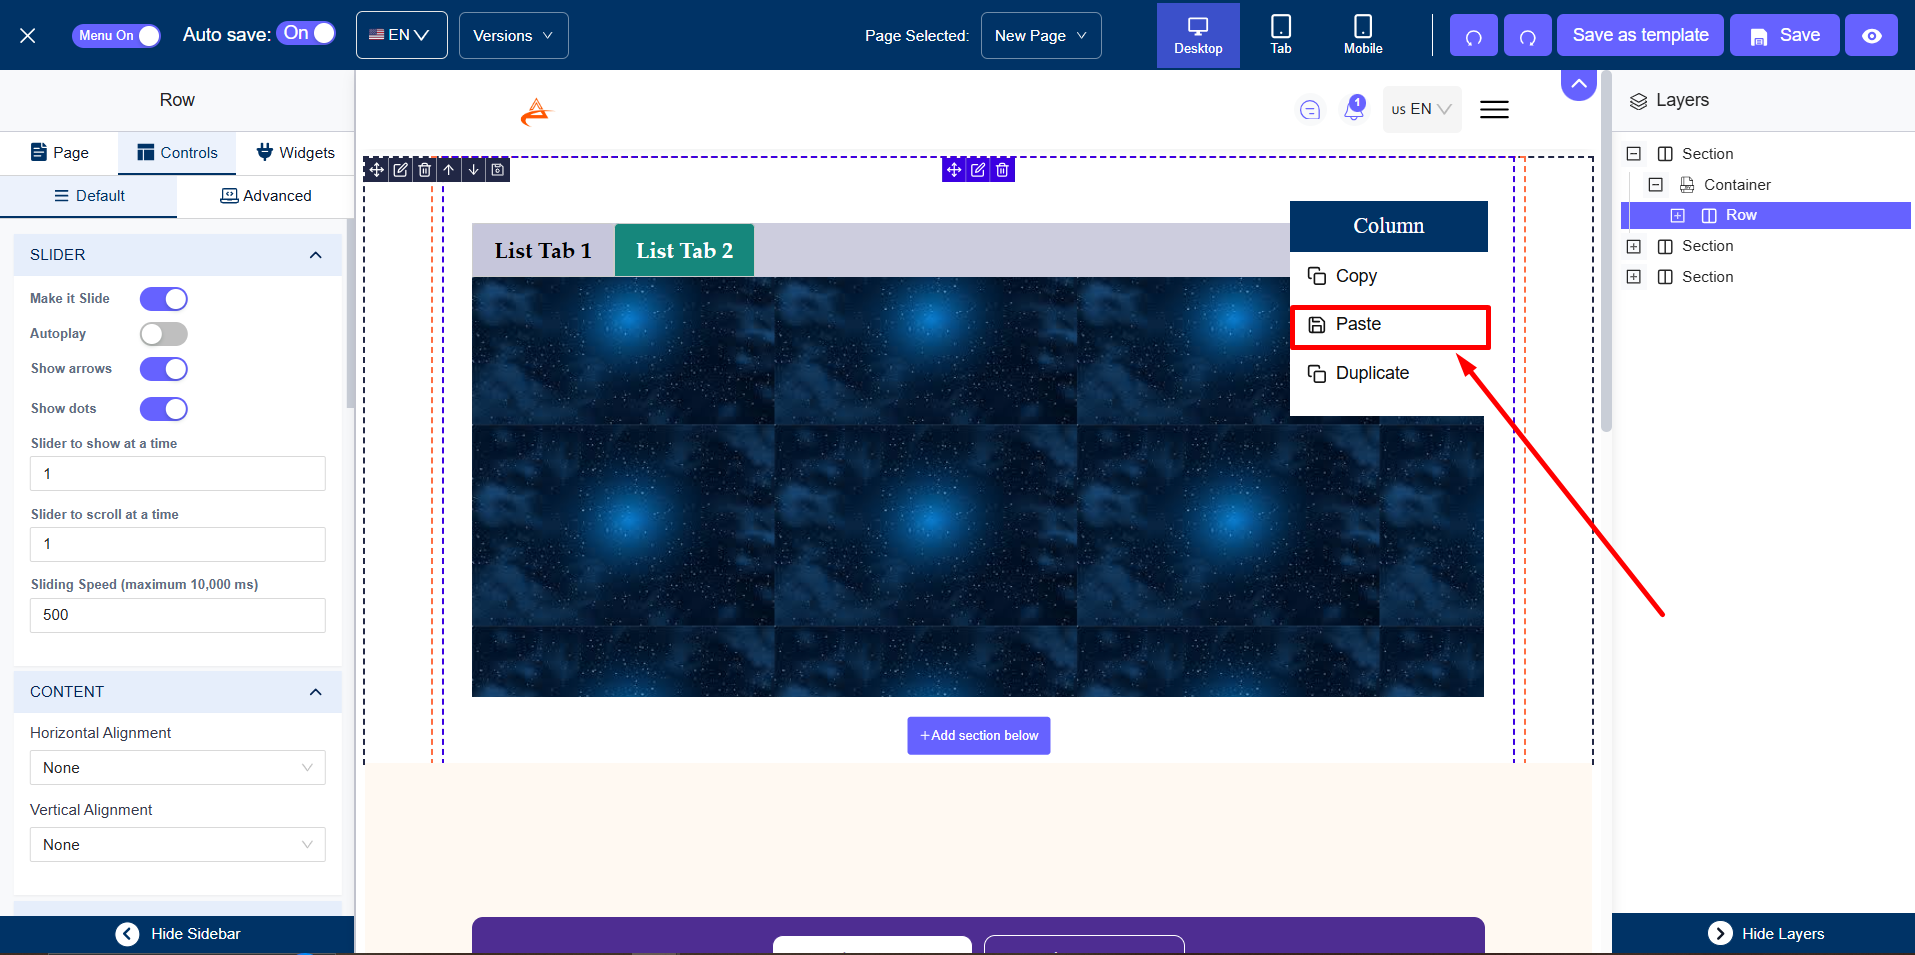
Now, you can simply right-click inside the tab content area and select the paste option.
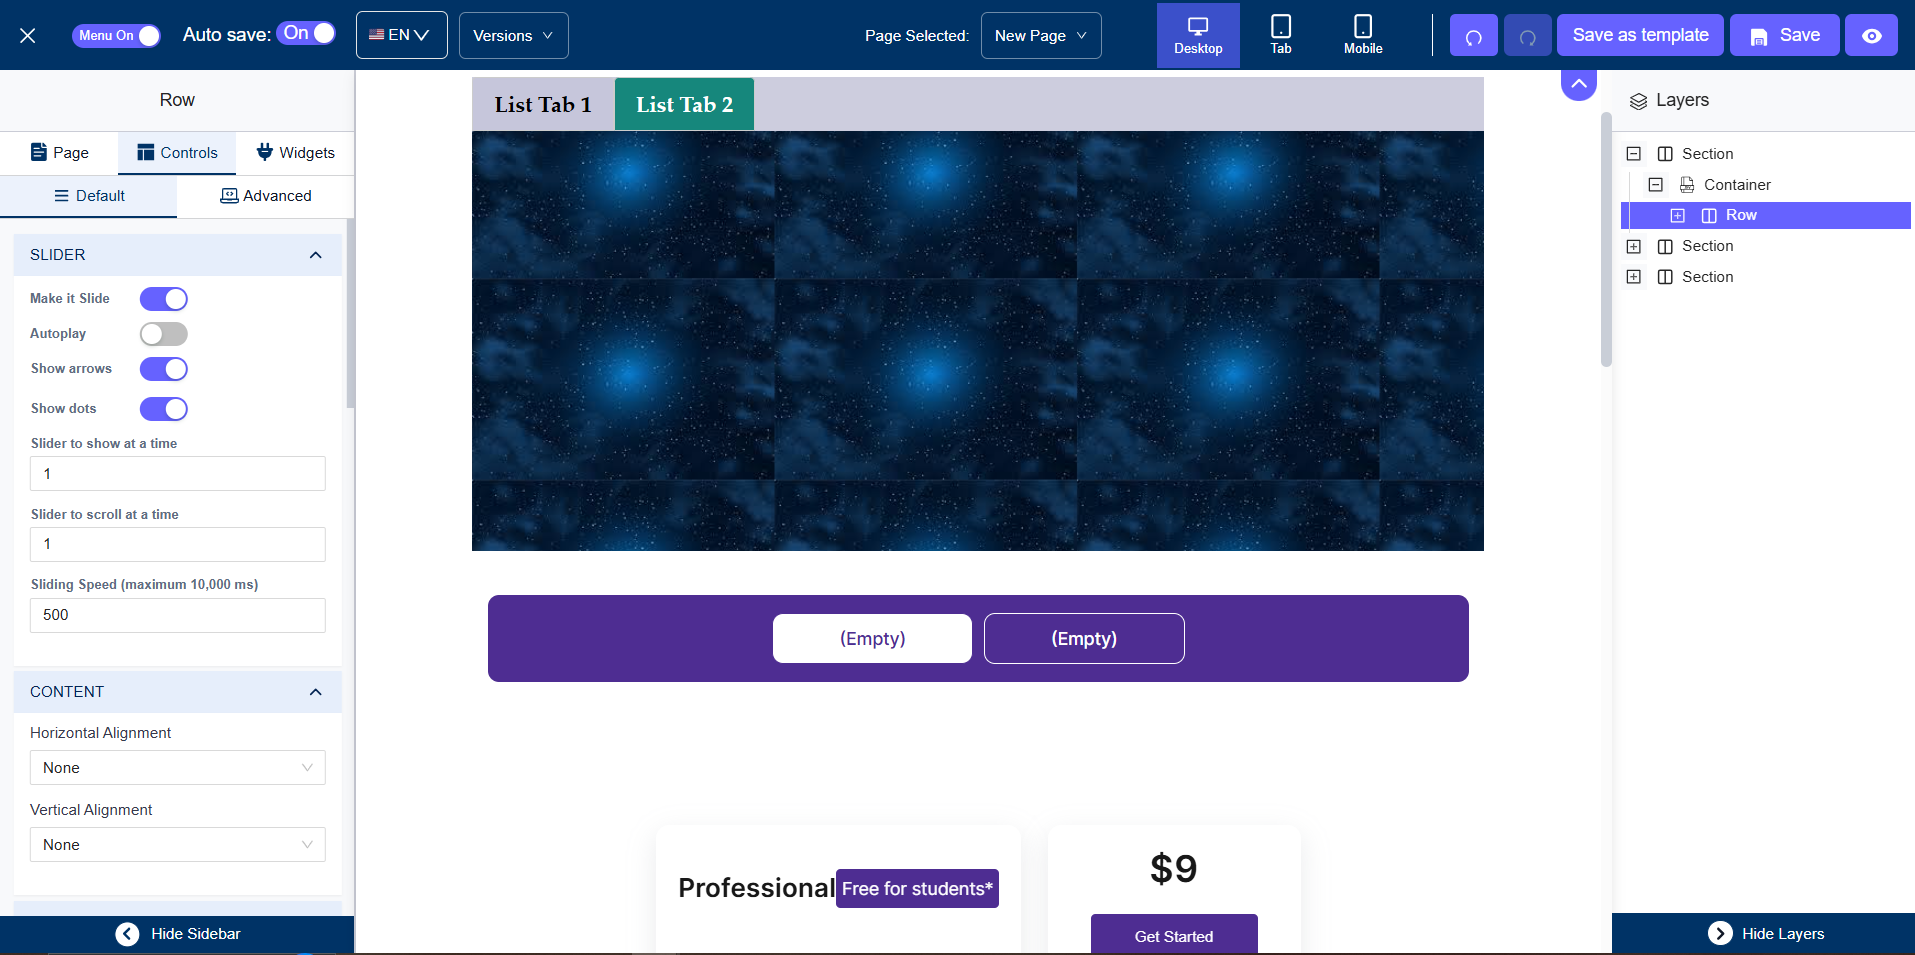
You can do the same thing and copy contents from one page to another page’s tab widget.
Bonus Step: Tips for Effective Tab Widget Usage with EzyCourse Builder
Maximize the impact of the Tab Widget with these useful tips:
-Organize Content: Use tabs to organize related information neatly.
-Combine with Other Widgets: Enhance the widget's functionality by combining it with other widgets.
Usually, the builder formats in the way- Section> Container > Row > Div > Column
-Test on Different Devices: Ensure your tabs display correctly on various devices for a seamless user experience.
-Try using pre-built blocks: You can also use pre-built blocks such as pricing table blocks from the builder to get started with ease.