
Back
Email Automation Workflow Builder
What is it and why you need it
Automation Workflow is a powerful upgrade to EzyCourse’s existing email automation. This new feature gives you much more flexibility and control. You can now build smart, branching workflows that react to your users’ real behavior like signing up, purchasing any product, or filling out a form, and guide each of them through a personalized journey.
You can create multiple workflows for different goals, add conditions like “purchased X product” or “has X tag,” and even split test emails. It also lets you run several actions at once, like sending an email, tagging a user, and waiting steps —all from one trigger.
Whether you're welcoming new users, nudging students to complete lessons, or sending promo offers, everything flows smoothly in the background. And that’s not all, you can also track results with detailed insights like opens, clicks, and bounces.
How it works
Automation Workflow in EzyCourse let you set up smart, hands-free paths that react to your users’ behavior. Instead of sending one email after another in a fixed order, this feature helps you build flexible and branch-based workflows on what your users do, like signing up, buying any product, or filling out a form.
You simply choose what starts the workflow (a trigger), then set up what happens next (actions). You can even set multiple triggers and run several actions at once—so you have full control over how users move through your system.
Let’s break it down.
Step 1: Set a Trigger – "When Should the Workflow Start?"
A trigger is the starting point of your automation. You can choose one trigger or add multiple. The workflow begins when a user sets off the chosen trigger(s).
Here are some trigger examples:
• Someone signup
• Someone submit a form
• Someone purchase x product
• Abandon Checkout
Let’s say someone purchases a Membership plan—you can set that as the trigger. Right after the purchase, the automation starts sending emails based on the actions you’ve set.
Step 2: Add Workflow Actions – "What Happens Next?"
Once the workflow is triggered, it runs the actions you define. You can add one action or multiple, and stack them however you need. These are the steps that the system will do for you, like sending emails or waiting for a few days before doing something else.
Here are some common actions you can add:
• Send Email: Send a welcome email, a reminder, or an offer
• Wait Step: Delay the next action (e.g., wait 2 days before sending the next email)
• If-Else Condition: Add smart rules to branch user journeys based on actions or attributes, like products/plans, tags, form list, visit time, or subscription status. Also, use AND or OR logic to decide exactly who sees what next.
• Split Test (A/B Test): Send different versions of an email to see which performs better.
• Add/Remove Tags or Contact Lists: Organize your users based on behavior.
[Note: Get more triggers and actions with the internal automation addon. Buy the addon if you haven't purchased it yet.]
As you’re not limited to one action at a time, you can chain multiple actions to build more powerful workflows.
For example, here’s a setup after someone purchases a course:
• Send confirmation email
• Add to premium contact list
• Enroll user into a bonus course
• Wait 3 days
• Send an upsell offer
Step 3: Track Everything in Real-Time
Once your workflow is active, you can view user progress and different metrics in the Logs tab. See who received, opened, clicked, or bounced from an email—all in one place.
These insights help you understand what’s working and what might need tweaking, so you can keep improving over time.
[Note: The Email Automation Workflow feature is available starting from Pro plan and currently allows you to add unlimited sequences/steps.]
How to get started using it
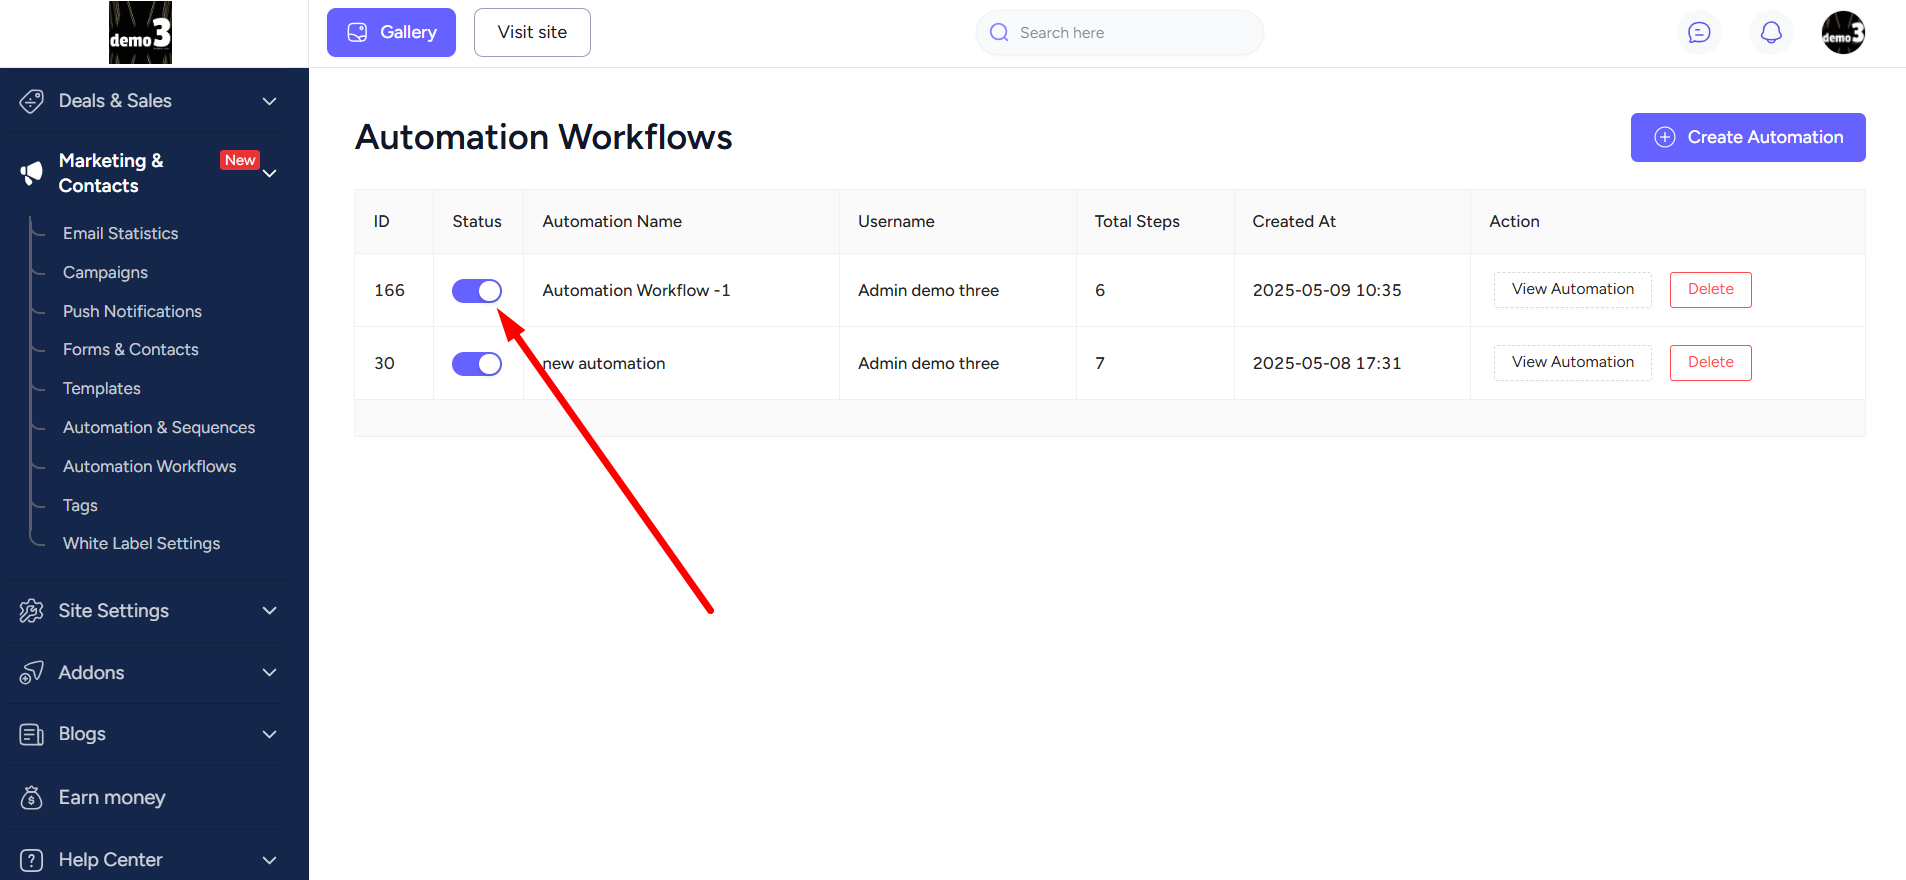
To create your first automation workflow, go to Marketing & Contacts → Automation Workflows and then click the Create Automation button.

Give your automation a name and then click the Create automation button.

Click the Edit Workflow button to start creating the workflow.

Notice that you can edit the automation name from here, if needed.

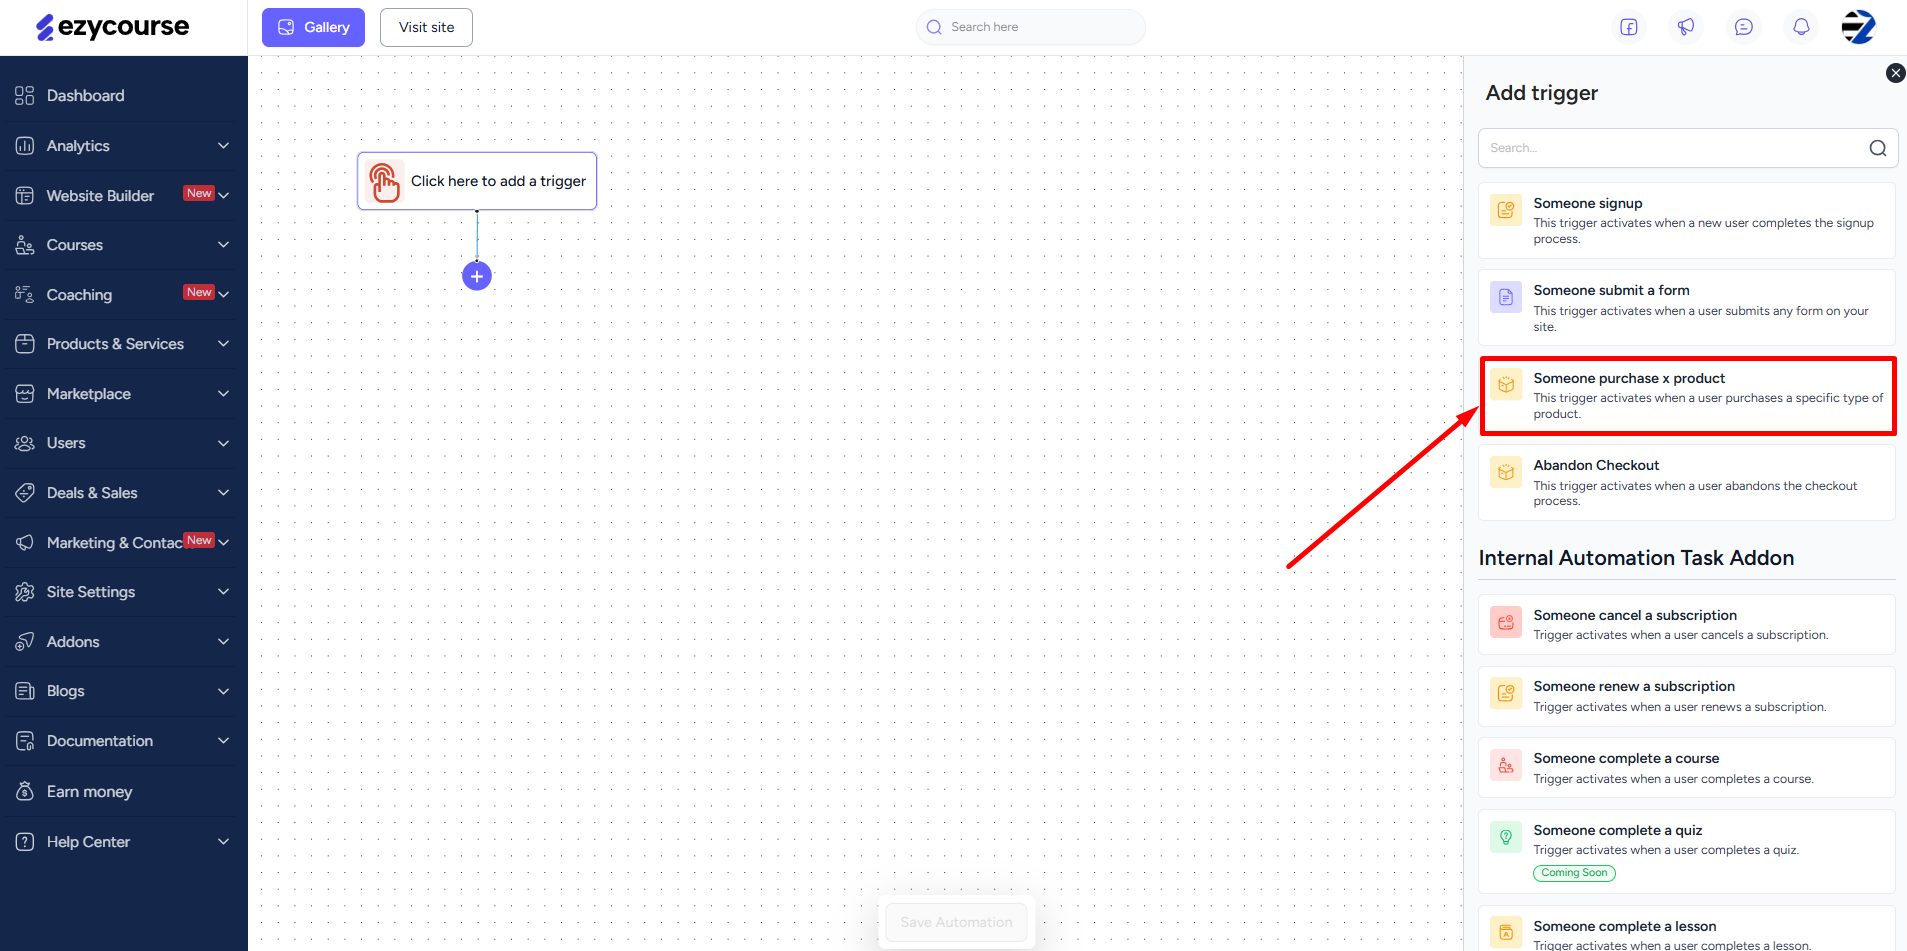
So, the first step is to set the trigger. To do that, simply click on the ‘Add Trigger’ option and you will see the triggers on the right-side panel. Note that additional triggers under the Internal task automation addon are only usable if you’ve purchased the addon.

Use any trigger as necessary. For the purpose of this tutorial, we’ll use the ‘Someone purchase x product” trigger.

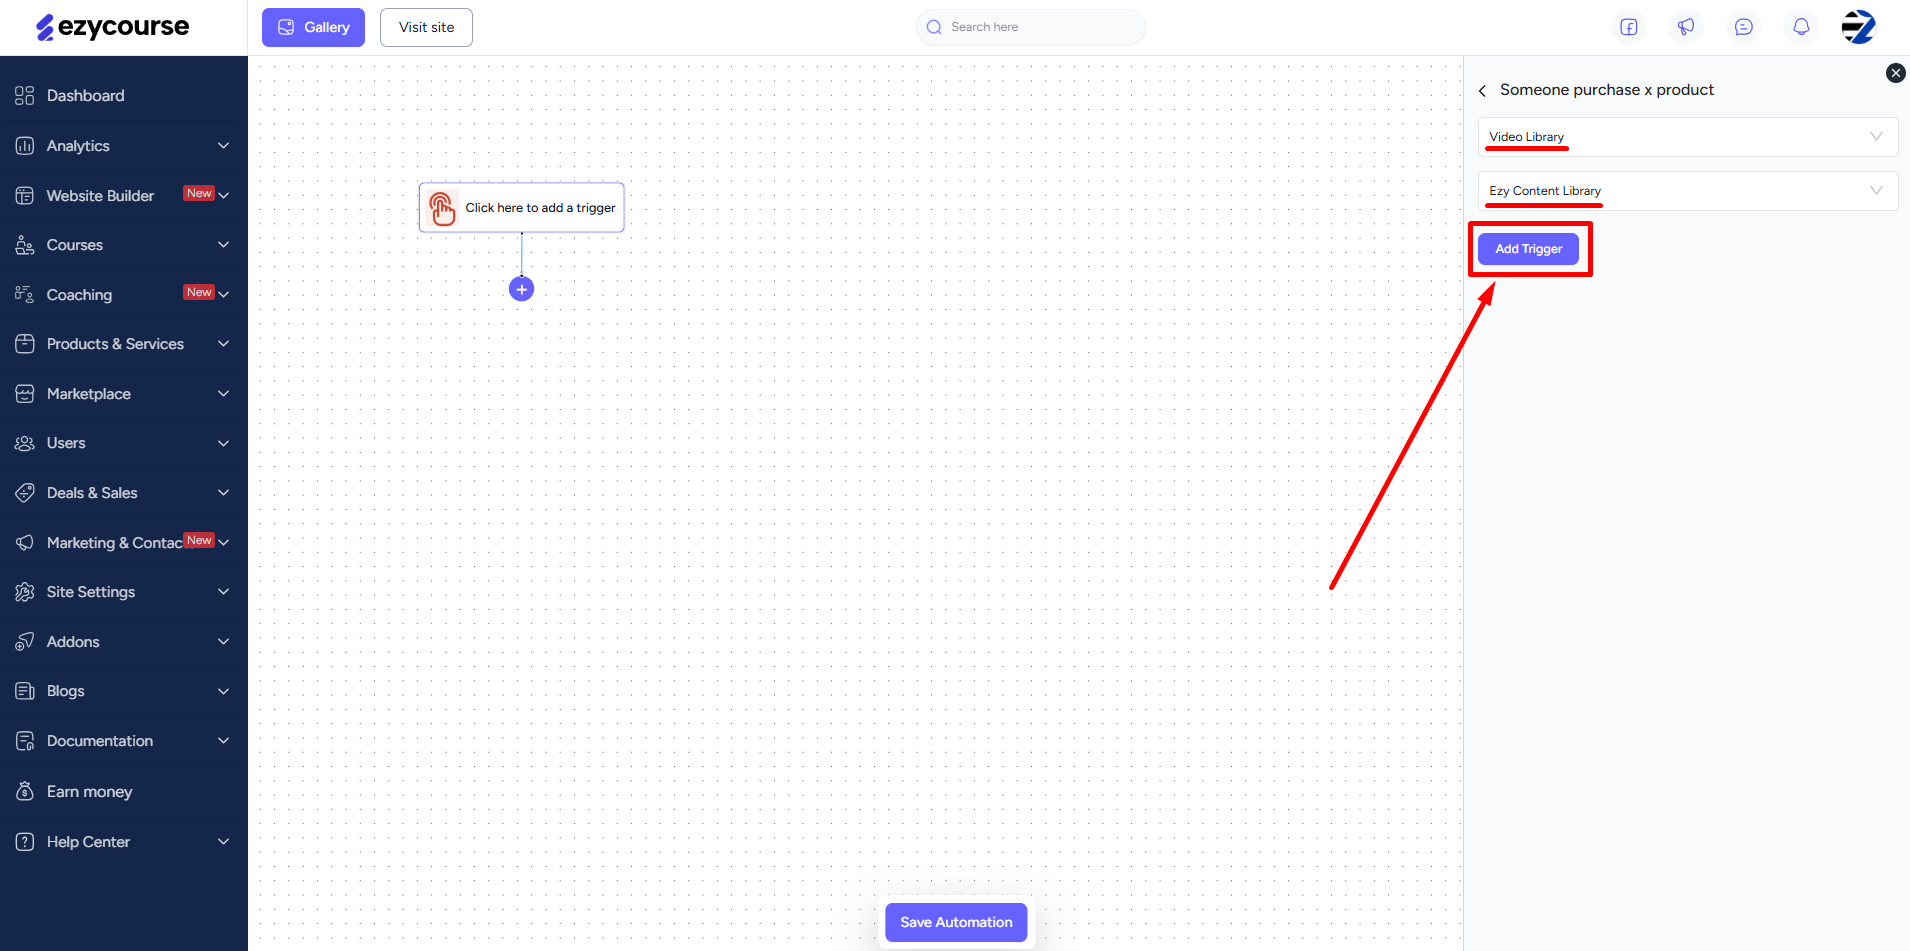
Choose the product type and select a product. And then click the Add Trigger button.

You can add multiple triggers to one automation. If you use more than one trigger, you can decide whether the automation should run every time the same user activates any trigger. Enabling the checkbox means the automation will run for each trigger the user activates i.e. multiple times. Otherwise, it will run once and only for the first trigger the user activates.

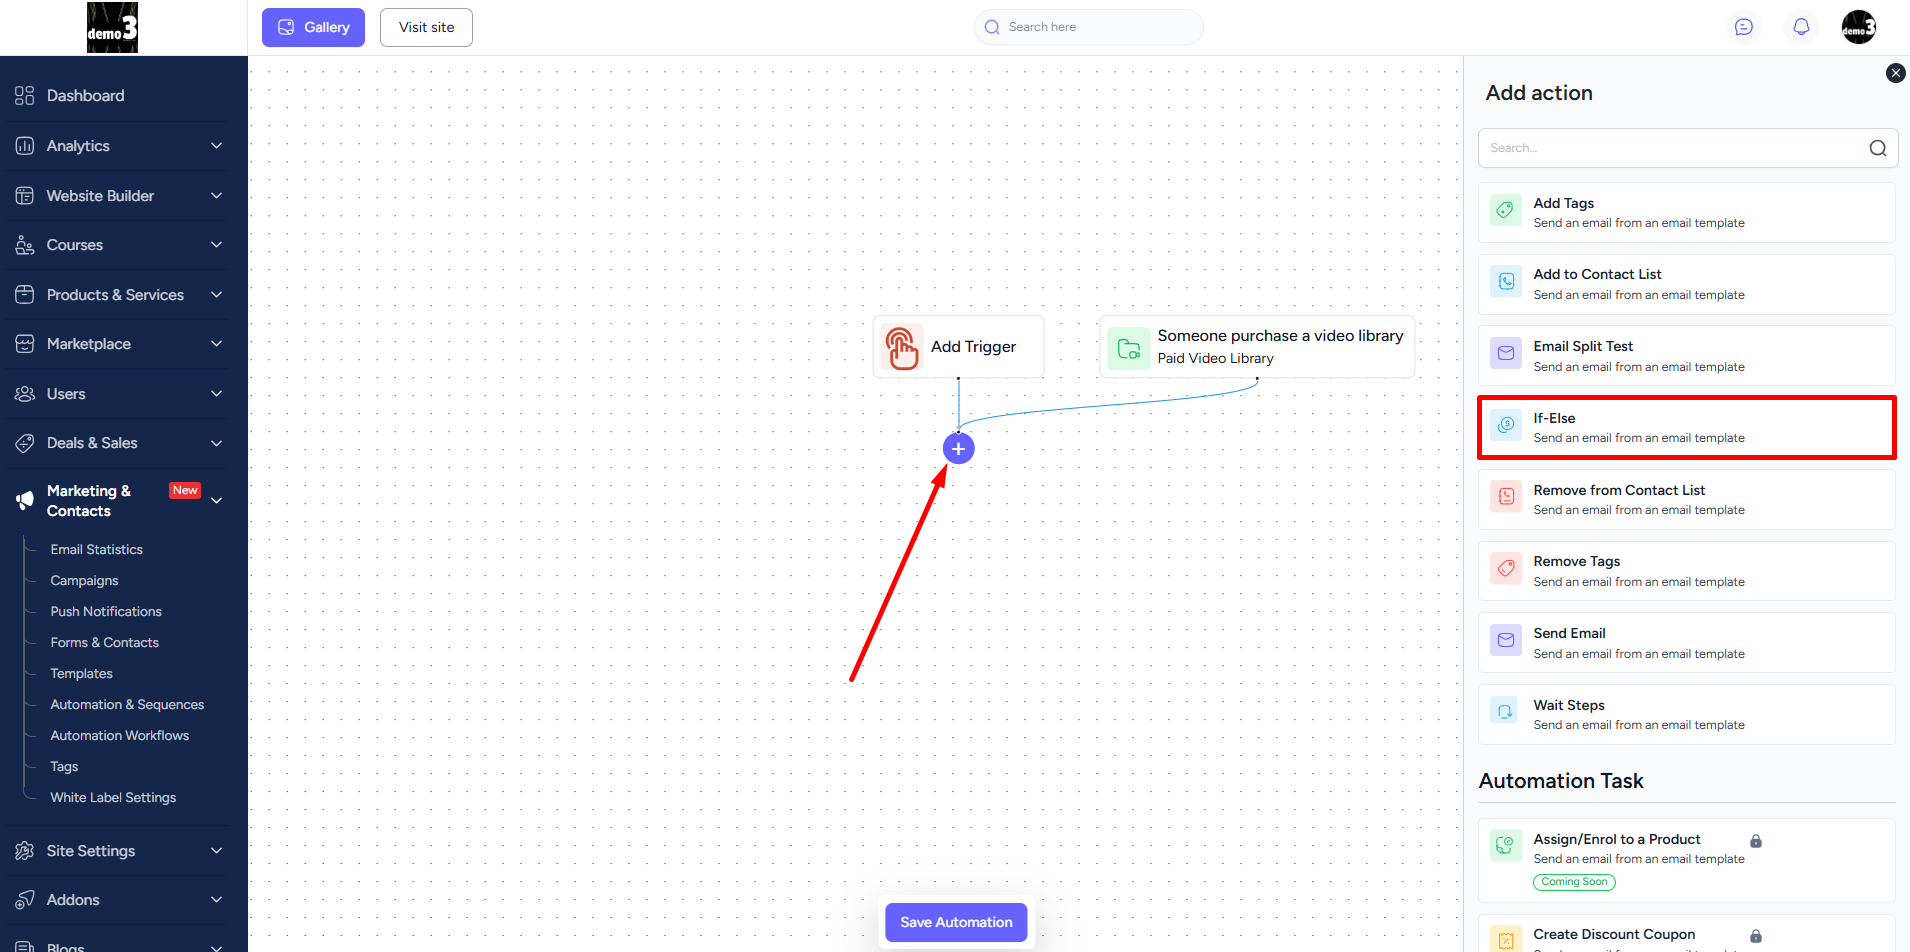
Now, start adding actions by clicking the + icon. There are various actions you can use depending on your needs such as sending an email, adding/removing tags, or using the more advanced if-else action. Here, we’ll use the Email Split Test action. Note that having the Internal task automation addon gives you additional actions.

Once you click the option, you have to input how many branches you are going to create. This helps to test different versions of email. The system automatically divides the audience and sends the emails.
[Note: The summation of all branches should be 100%.]

With this particular action, you can set up emails for each branch. Simply click the ‘+’ sign icon and click the ‘Send Email’ on the right side panel.

As soon as you click on it, you will get the options to send email. Either you can create an email on your own, or choose from existing templates. You can edit the subject line and sender email from here also. Add the action, and you can follow similar step for any other branches you might have.

Don’t forget to click the ‘Save Automation’ button to keep the changes.

Multiple Workflow Actions
You can try multiple actions if you want. For example, select the ‘Someone purchase x product’ trigger.
Choose the product type as ‘Video Library’, select any library from the dropdown and then click the Add Trigger button.
Now to add action, click the ‘+’ sign icon and choose the If-Else action.
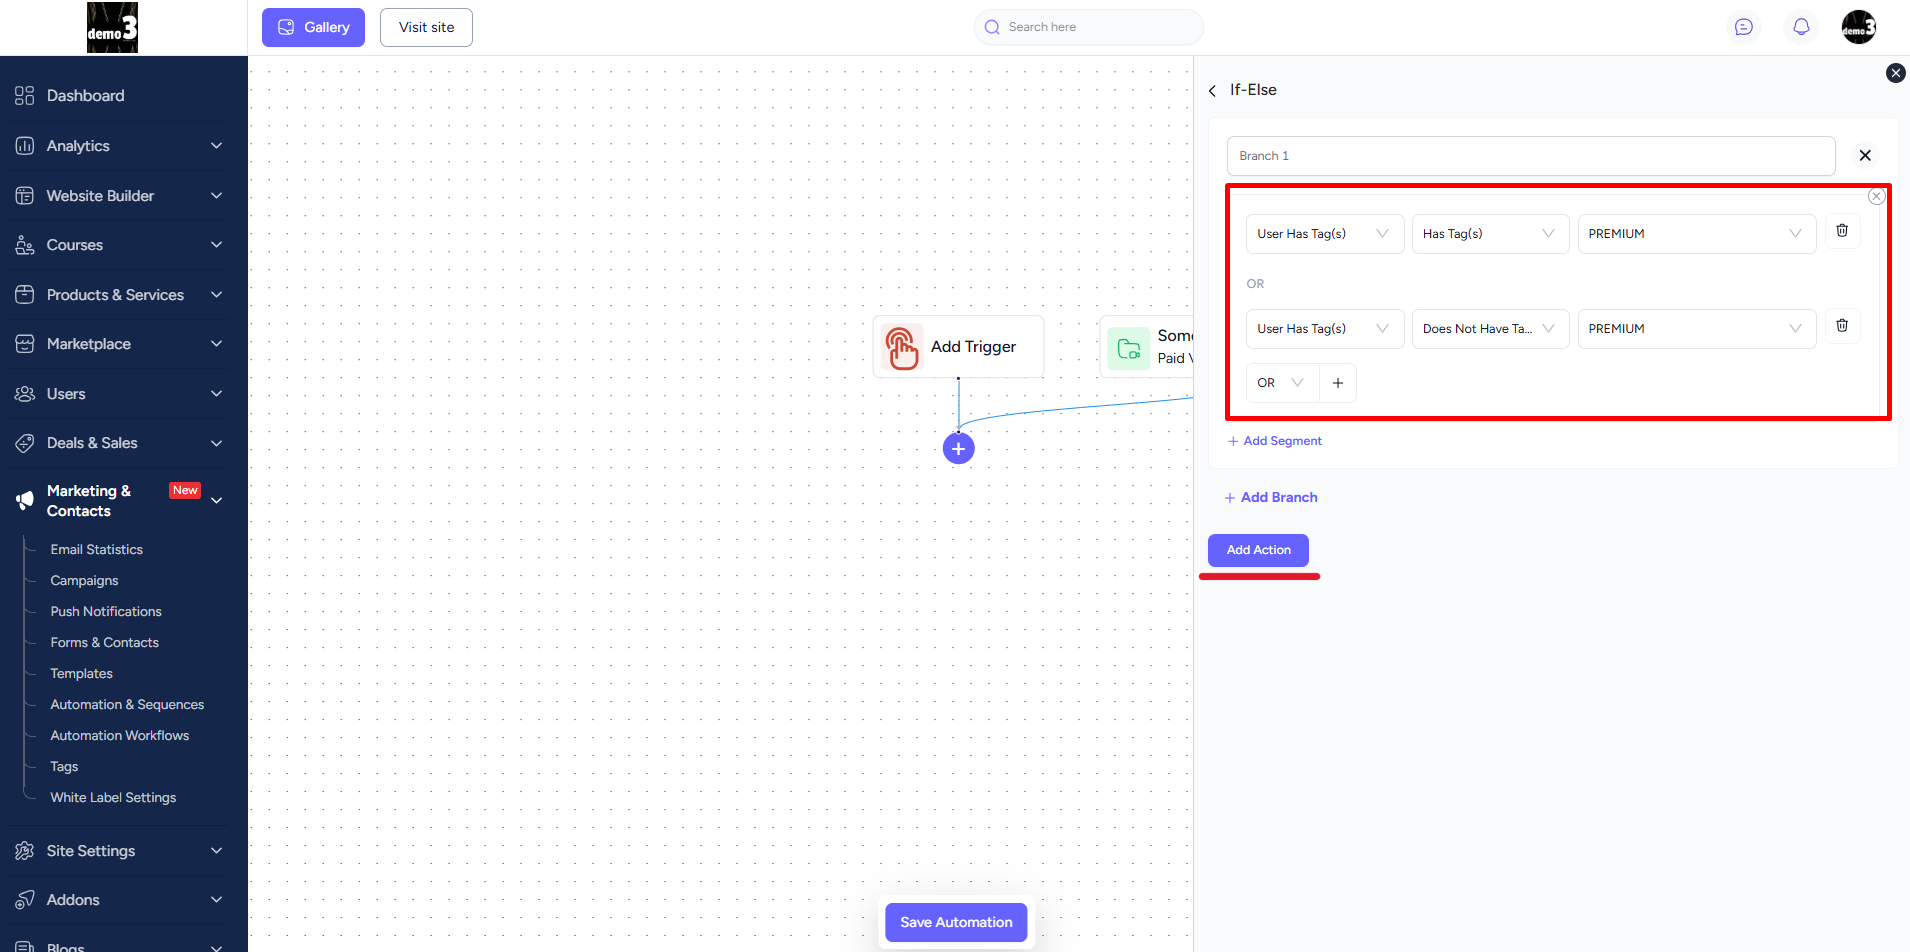
You can set the If-Else action with at least two conditions. Once you’re done, click the Add Action button.
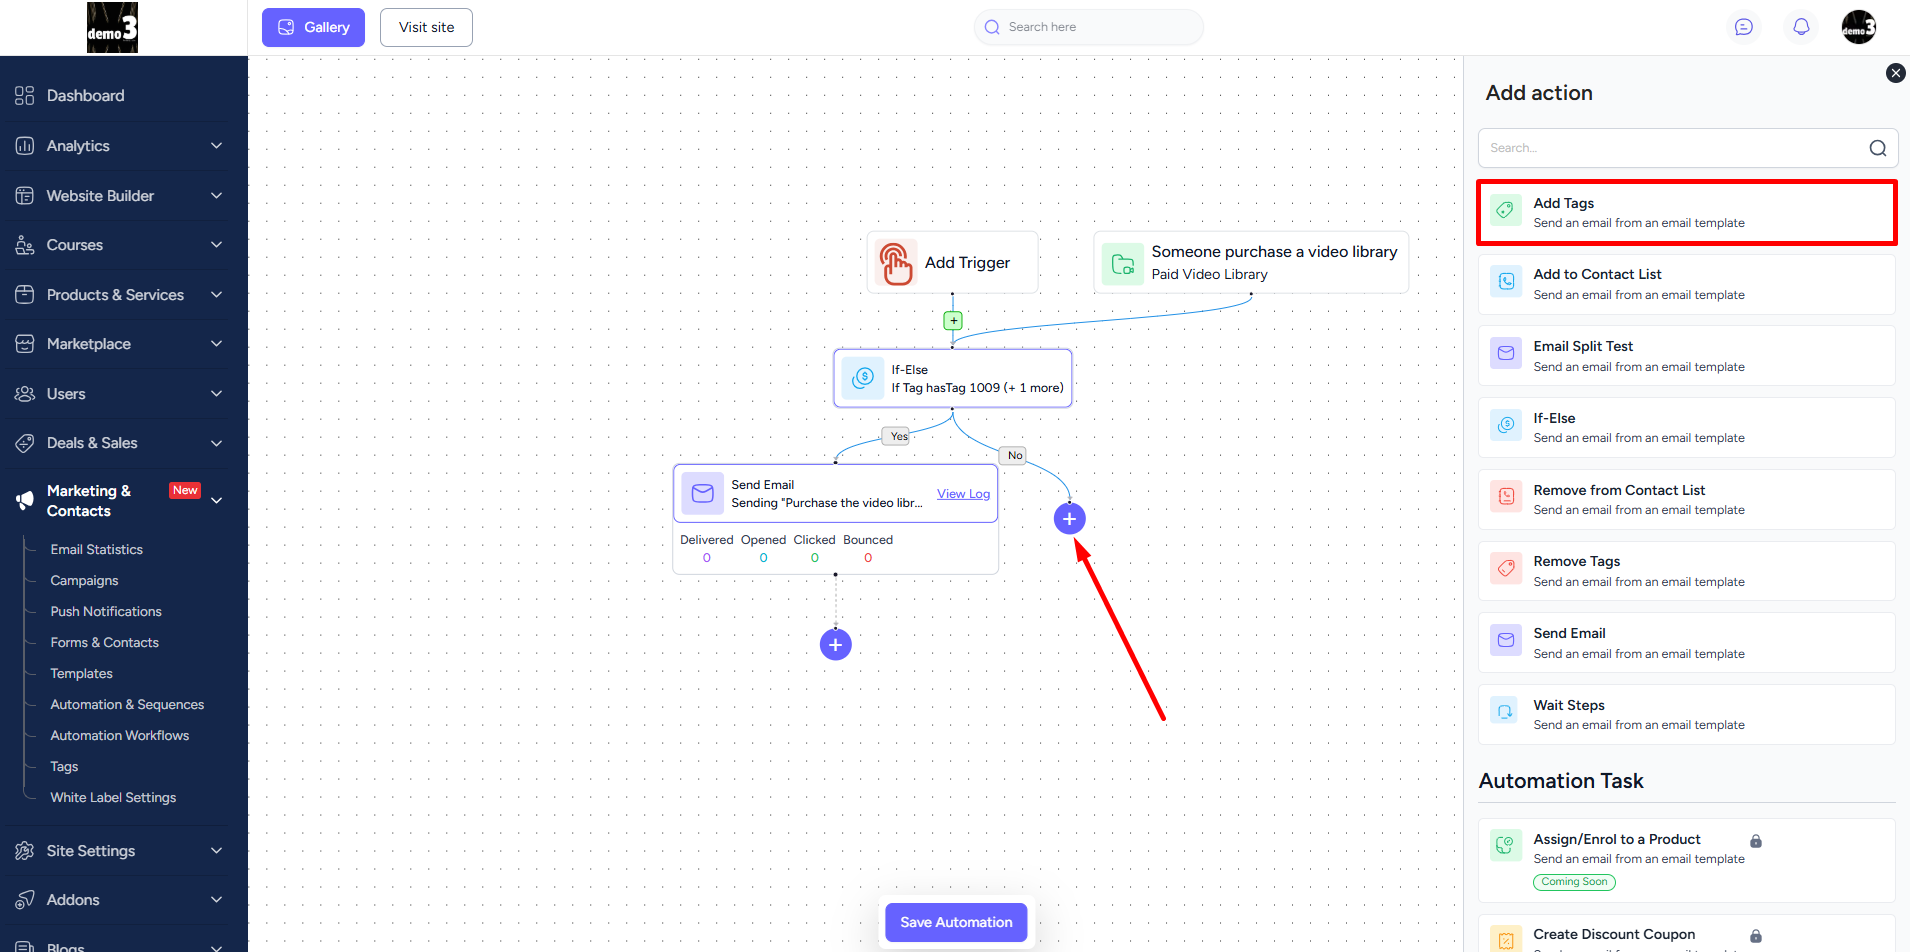
Based on the conditional logic, you can set an email to send to your users who have the tag that you have selected. To do that, click the “+” icon on the Yes route -> select the Send Email action and then set the email you want to dispatch.

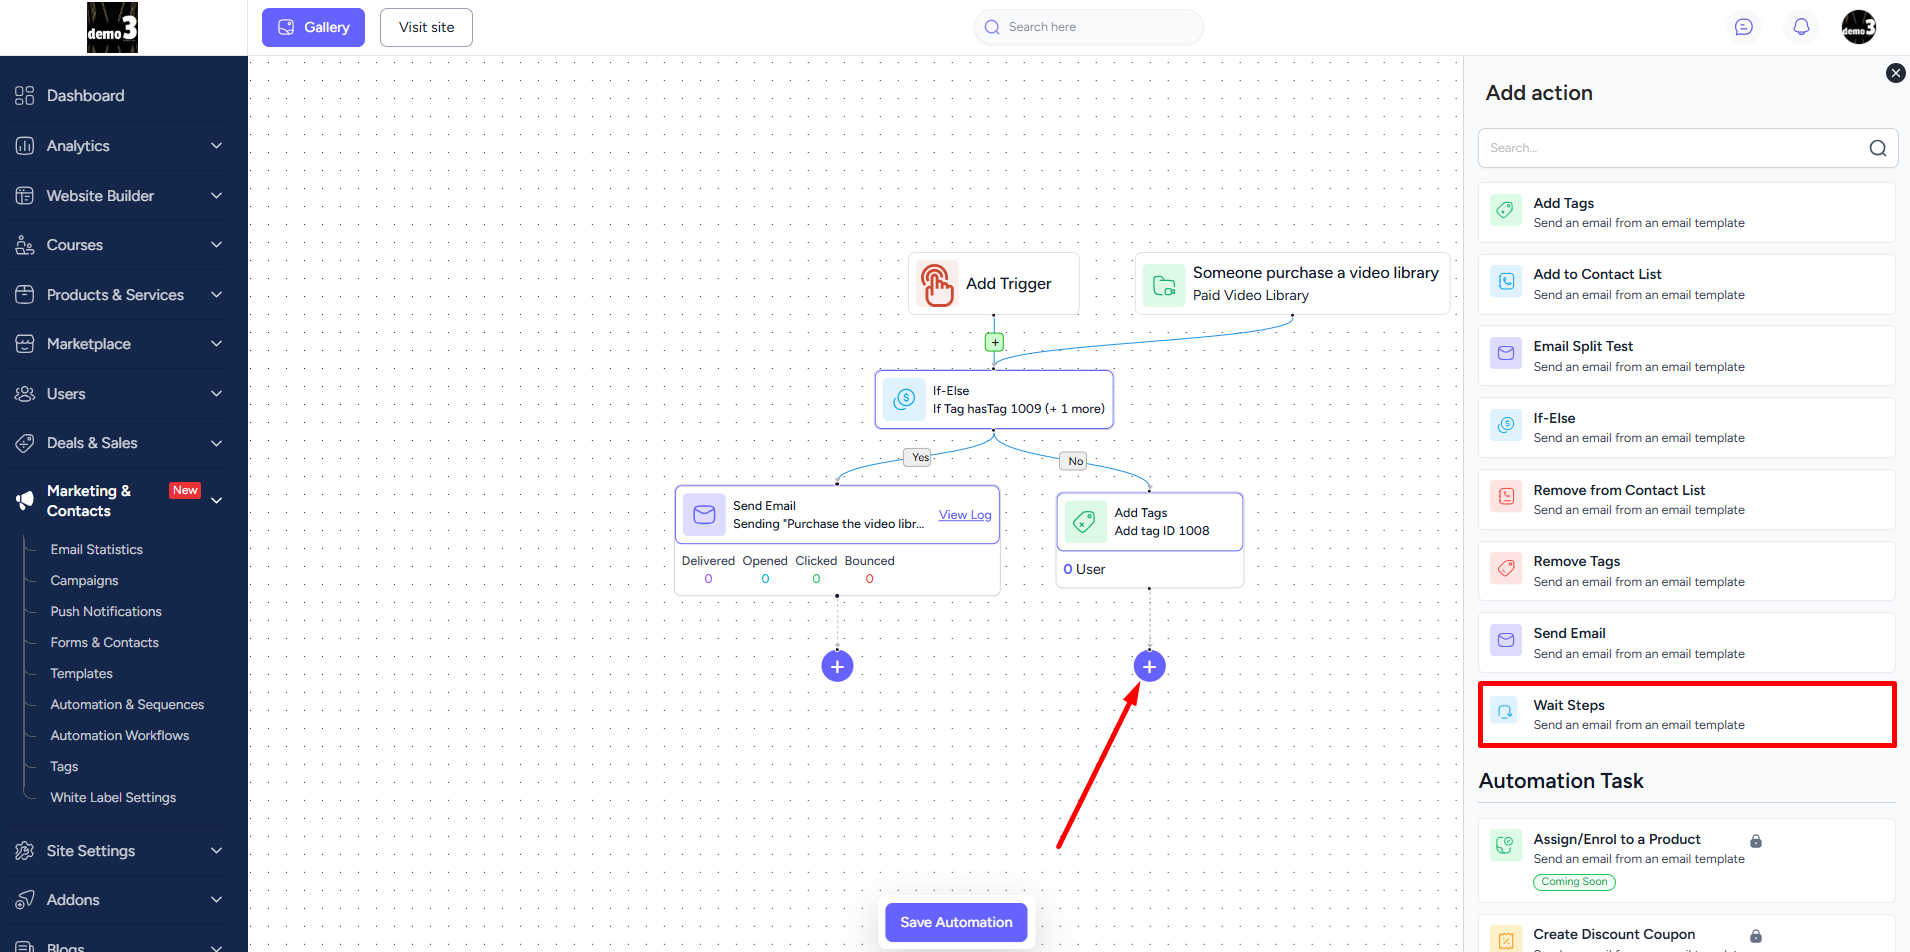
And you can set an action using the Add Tags for the users who don’t have this tag. To do that, click the “+” icon on the No route and then configure rest of the settings.
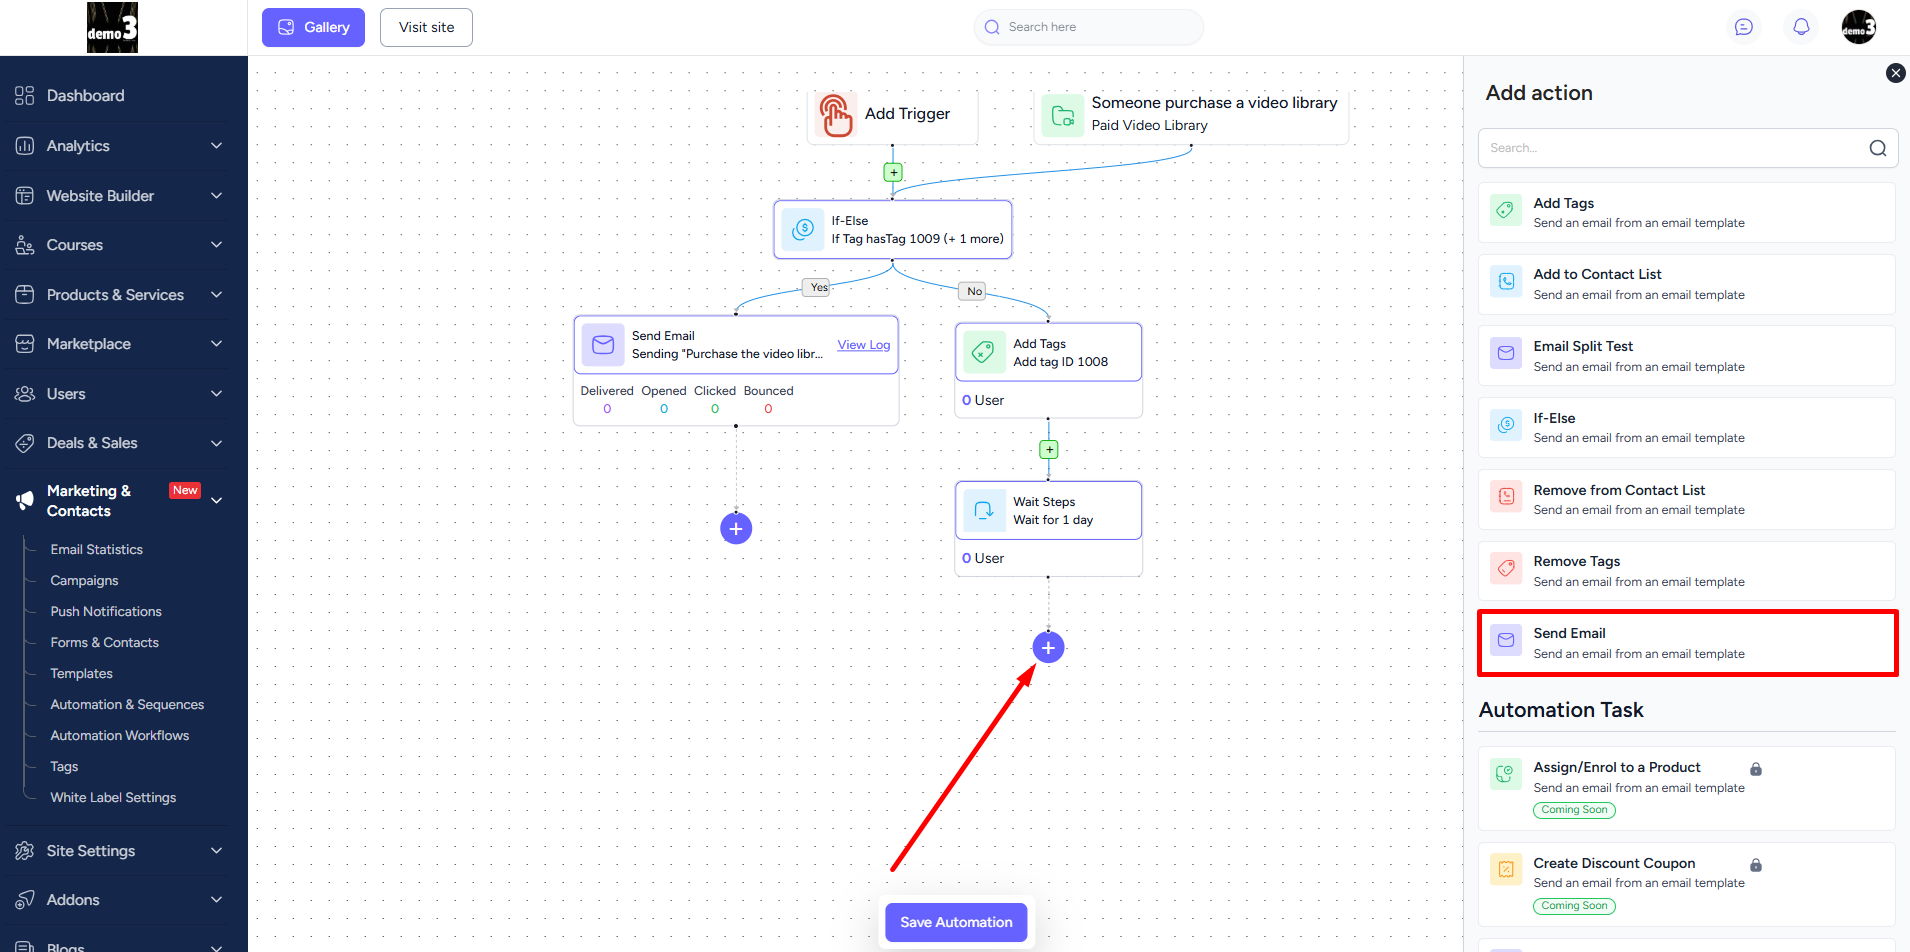
In addition, you can add Wait Steps as the next action after the add tags action and set a specific number of days, hours, or minutes for the system to wait before executing the action.
Here, the next action we choose is again Send Email. This action will send an email to the specific tagged users after the end of wait steps action period you’ve set.
Finally, this is how your multiple action based workflow will look like. After creating the workflow, click the Save Automation located at the bottom of the page.
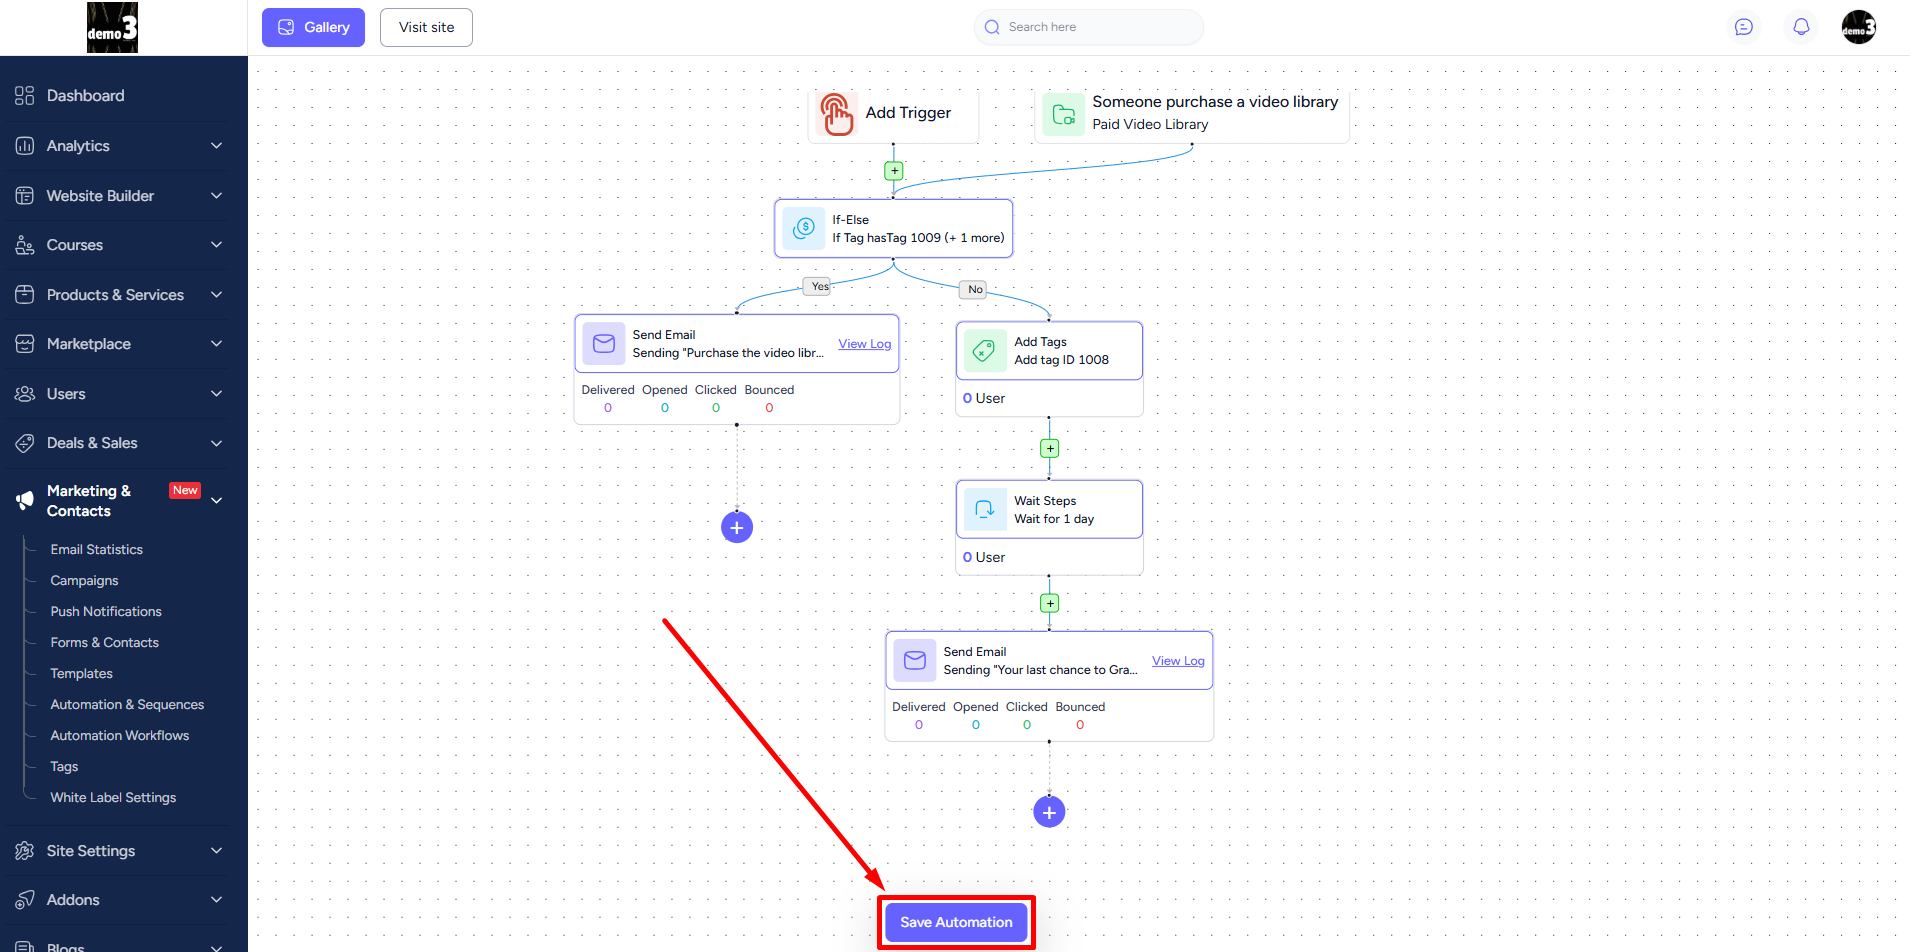
Moreover, you can view email statistics directly from here and see logs for delivered, opened, clicked, or bounced emails by clicking the View Log option.

Furthermore, you can enable/disable any automation workflow using the status toggler.
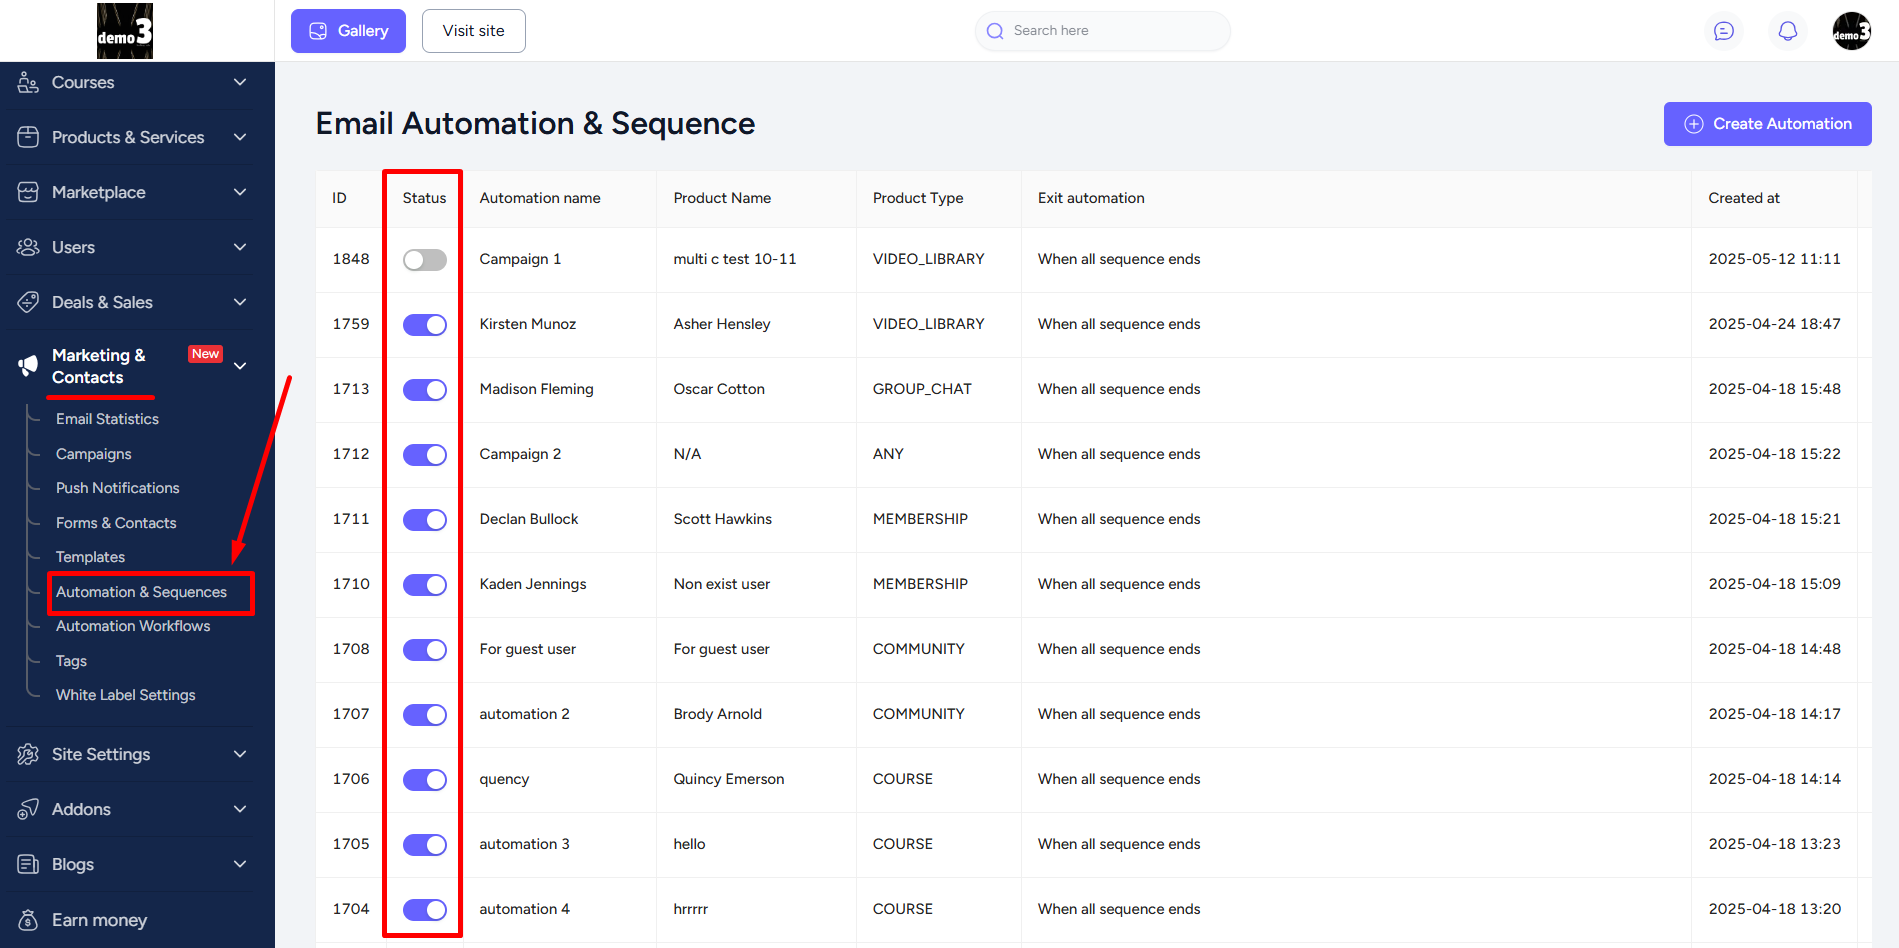
And to avoid sending repetitive emails, we have updated the ‘Automation & Sequences’ sub-menu. With this new update, if you create the same automation again for workflows, then previously created one in automation & sequences will have to be disabled to avoid duplication.
To do that, go to Marketing & Contacts -> Automation & Sequences then from the sidebar's status tab turn off the toggle for the duplicated automation.
Grab more advanced and useful triggers and actions with the internal task automation addon. Here are just some of these:
• Create Discount Coupon.
• Fetch and Use Coupon in Email Template
• Generate AI Assistant Reply
• Give Coins
• Give Points
• Send Mobile Push Notification.
• Send Pop-Up Notification In App
• Send Private Message
• Send Self Email Notification
• Send Transactional Email
• Trigger Webhook and Send Data and more.