Back
Improved Manual Payment
What is it & why you need it
EzyCourse offers many different payment gateways to manage all your online transactions faster and more securely. But, there’s also an option called Manual Payment, which lets you provide instructions to your users and accept payment directly to any bank account, mobile banking system, etc.
Now, the manual payment process is improved and provides you with more functions to enhance the transaction experience on your platform. Aside from giving instructions, you can add custom fields to take any necessary information from your users.
Moreover, your users will be able to send purchase requests for the manual payment option and track approval progress on their dashboard. You’ll have the option to accept/reject the order and see all the details including what they’ve provided on the custom fields.
All this makes the manual payment option more reliable and useful, for you and your users.
How it works
You only had the option to provide instructions on how to manually pay. Now, students can send purchase requests and track whether their request is accepted or not.
As an admin, you can add custom fields to show the students on the product checkout page. You will have options to add field validations and add three different types of fields such as Text, Number, and Text Area.
On the dashboard, you can see the details of the order requests including custom fields, student info, etc.
Throughout the manual order processing, admin and the student will be getting email notifications. These emails will work when -
• The student requests for the purchase (To admin & student)
• The admin approves the purchase request (To student only)
• The admin cancels the purchase request (To student only)
Manual payment will only be available on the one-time, split payment, and tiered (one-time) pricings.
How to get started using it
To create custom fields for manual payments, log in to your EzyCourse dashboard and navigate to Site Settings -> General Settings -> and then go to the Payment tab.

Scroll down to find the manual payment option. Apart from writing manual payment instructions, you can add custom fields to show at the product checkout page. Custom fields appear when the user chooses the manual payment option at checkout.

Create three different types of fields: Text, Number, and Text Area.

To add a field, give the field name, select the field type, and then click the Add Field button. You can also give the placeholder name, or keep it empty to keep it the same as the field name.

To add validation, tick mark the Show validation option. You can make the field required i.e. students must fill up the field. There’s also options to set the minimum and maximum characters.

Once a field is added, you can edit a field by clicking the edit icon positioned on the right side of the field.

Click the Update button to save the changes.

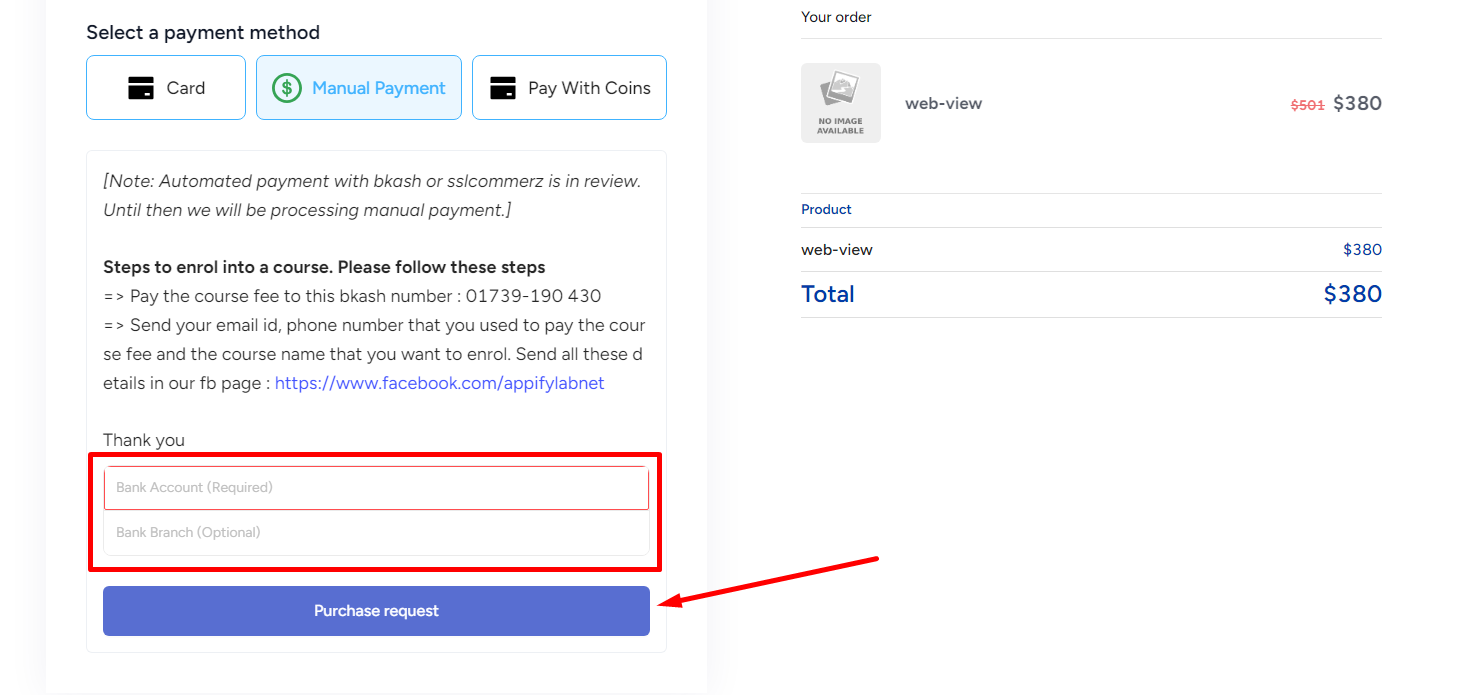
When students select Manual Payment, the checkout page displays the custom fields and payment instructions. They can then submit a purchase request.
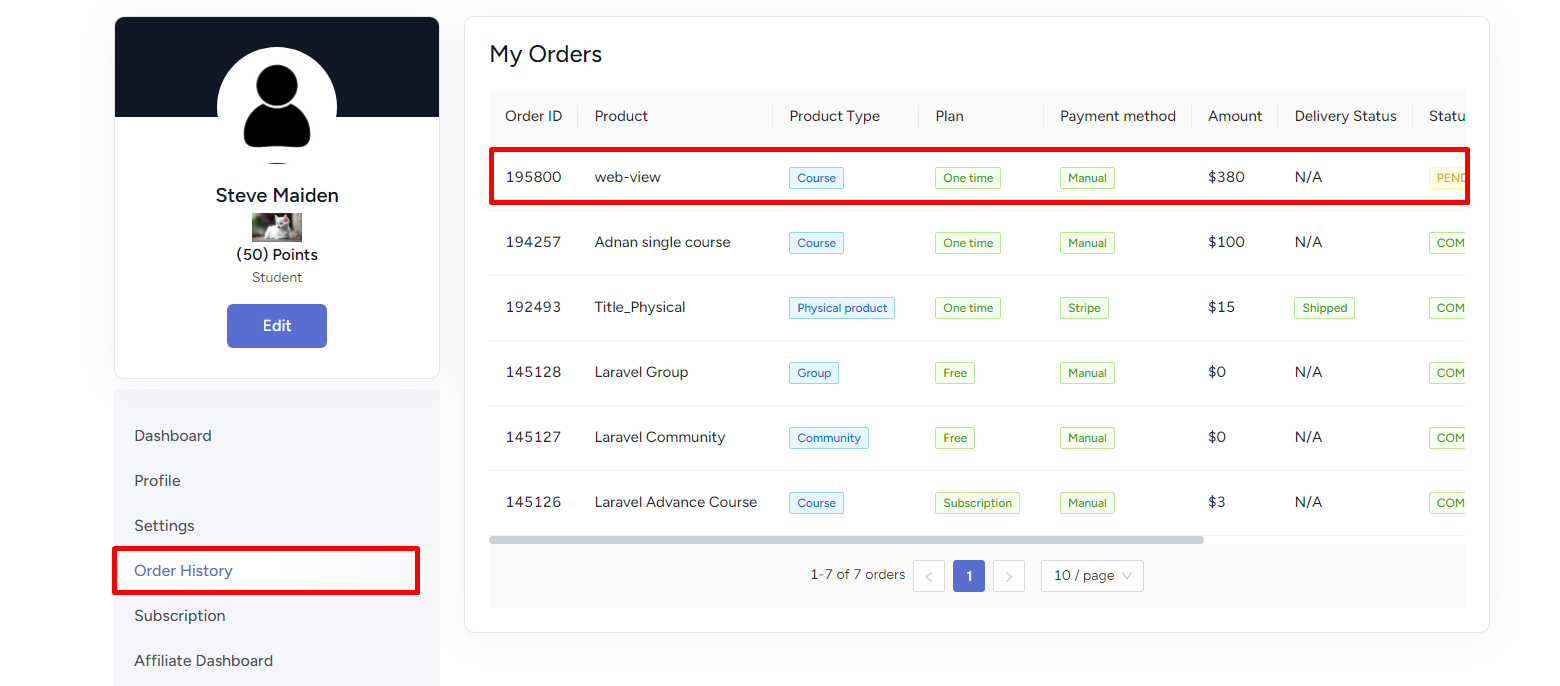
After submitting the request, they can view the review status from Order History. Unless you approve the request, the purchase invoice will remain disabled for the students.
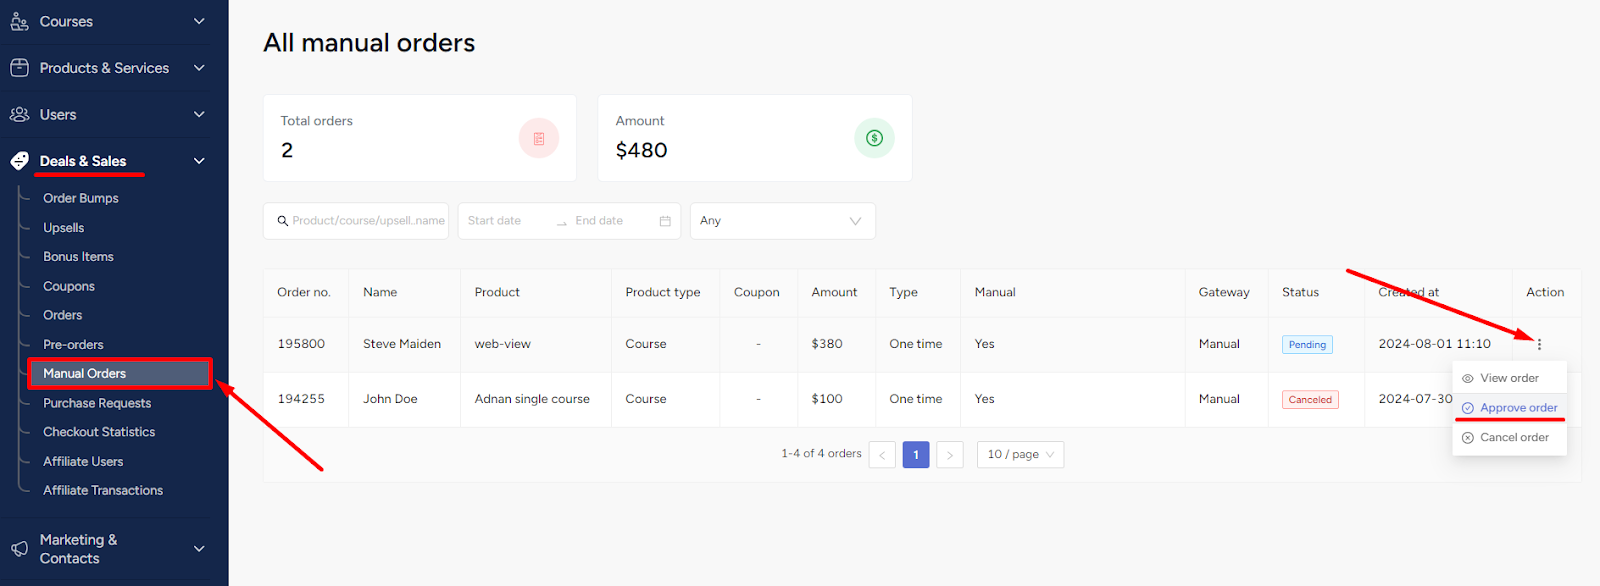
To approve or cancel manual purchase requests, navigate to Deals & Sales -> Manual Orders -> click the three dots on an order and select the Approve order option. You can also view all the order details from the View order option.
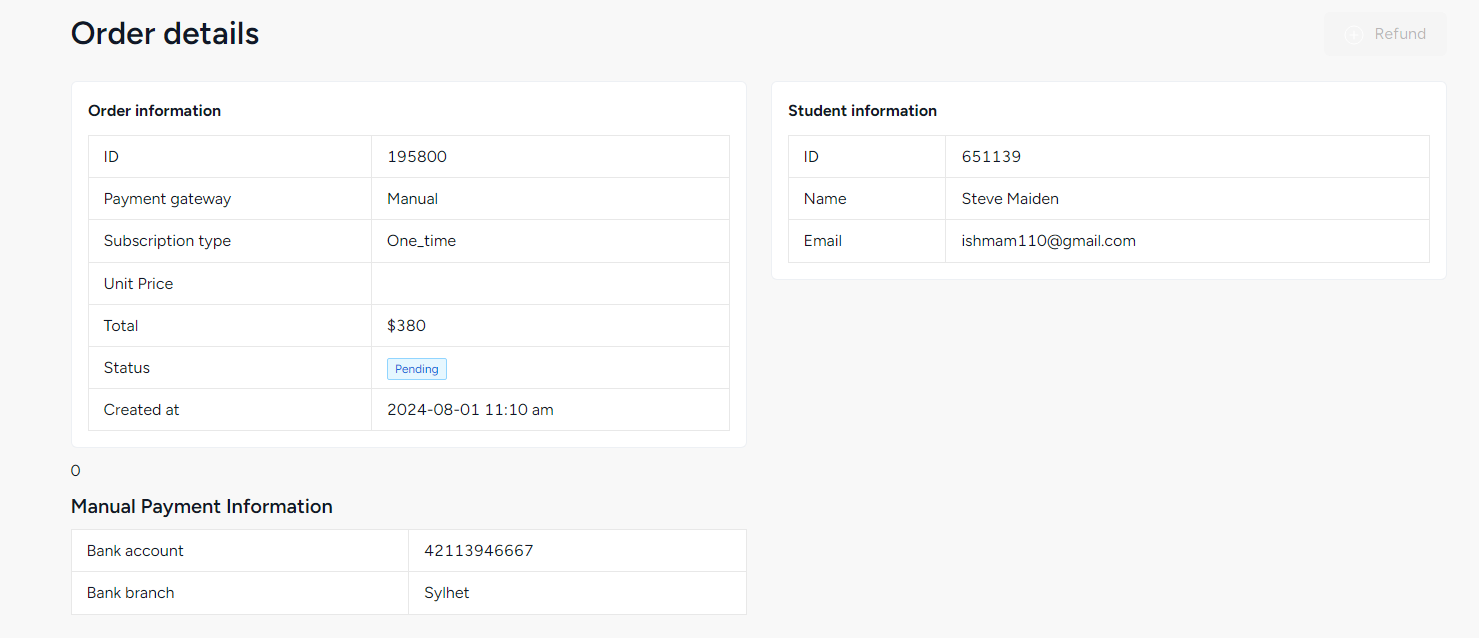
On the order details page, you can see student info, product details, and also the custom fields as filled by the student.
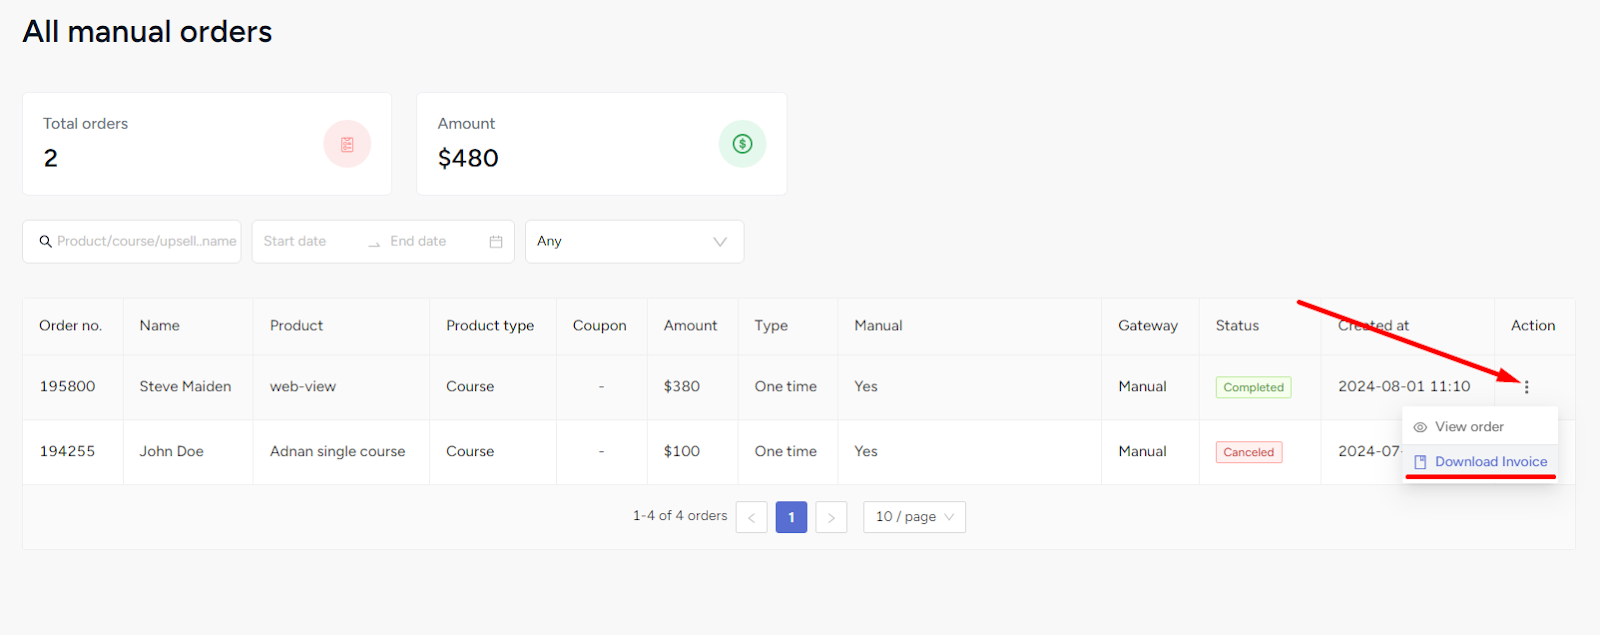
You can also download the invoice after approving a manual order.
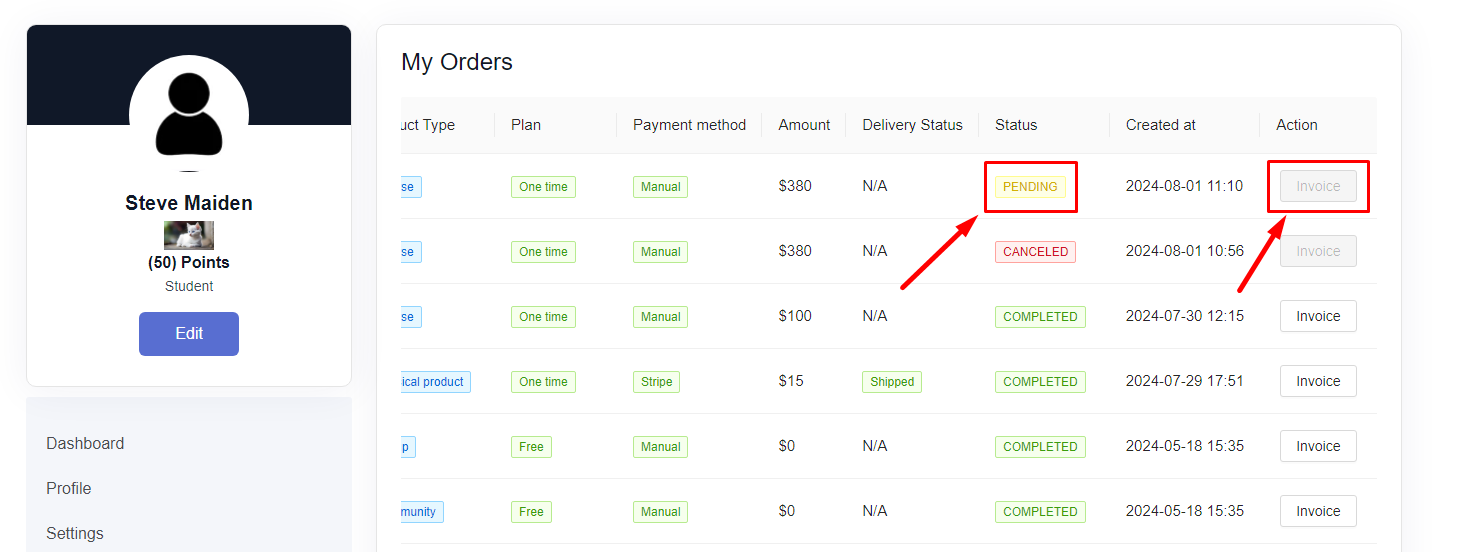
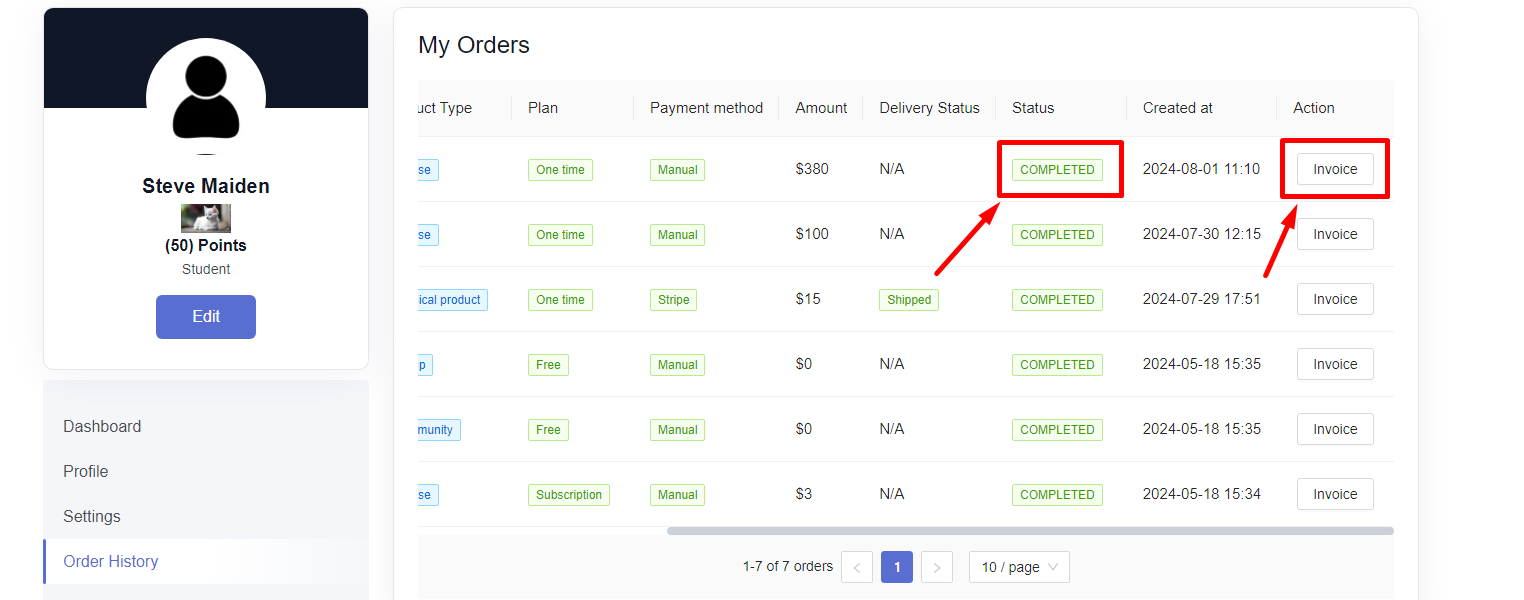
On the student-end, they can always see the Status column to know if their request has been approved. Once approved, they can also download the invoice from the Order History menu.
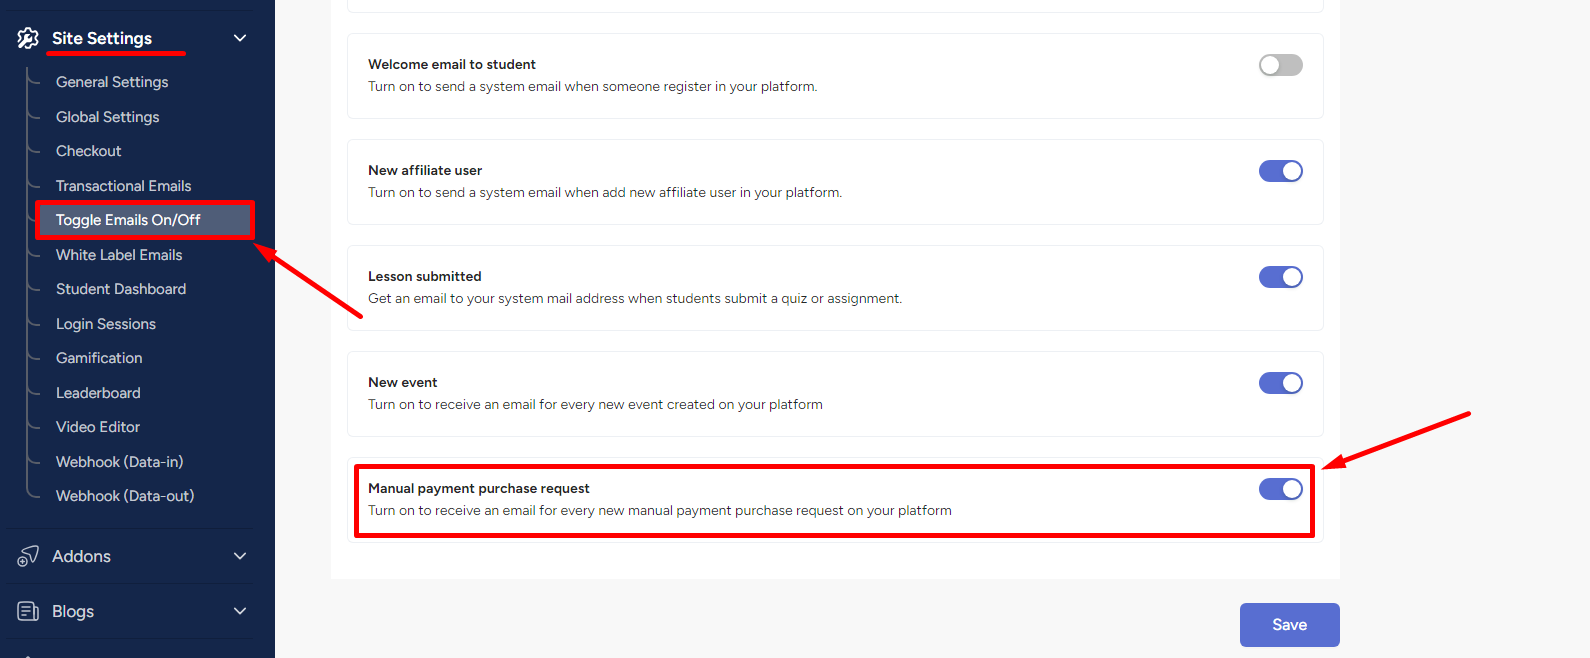
The admin will receive email when a purchase request is made. Ensure you turn on the toggle email for that from Site Settings -> Toggle Emails On/Off.
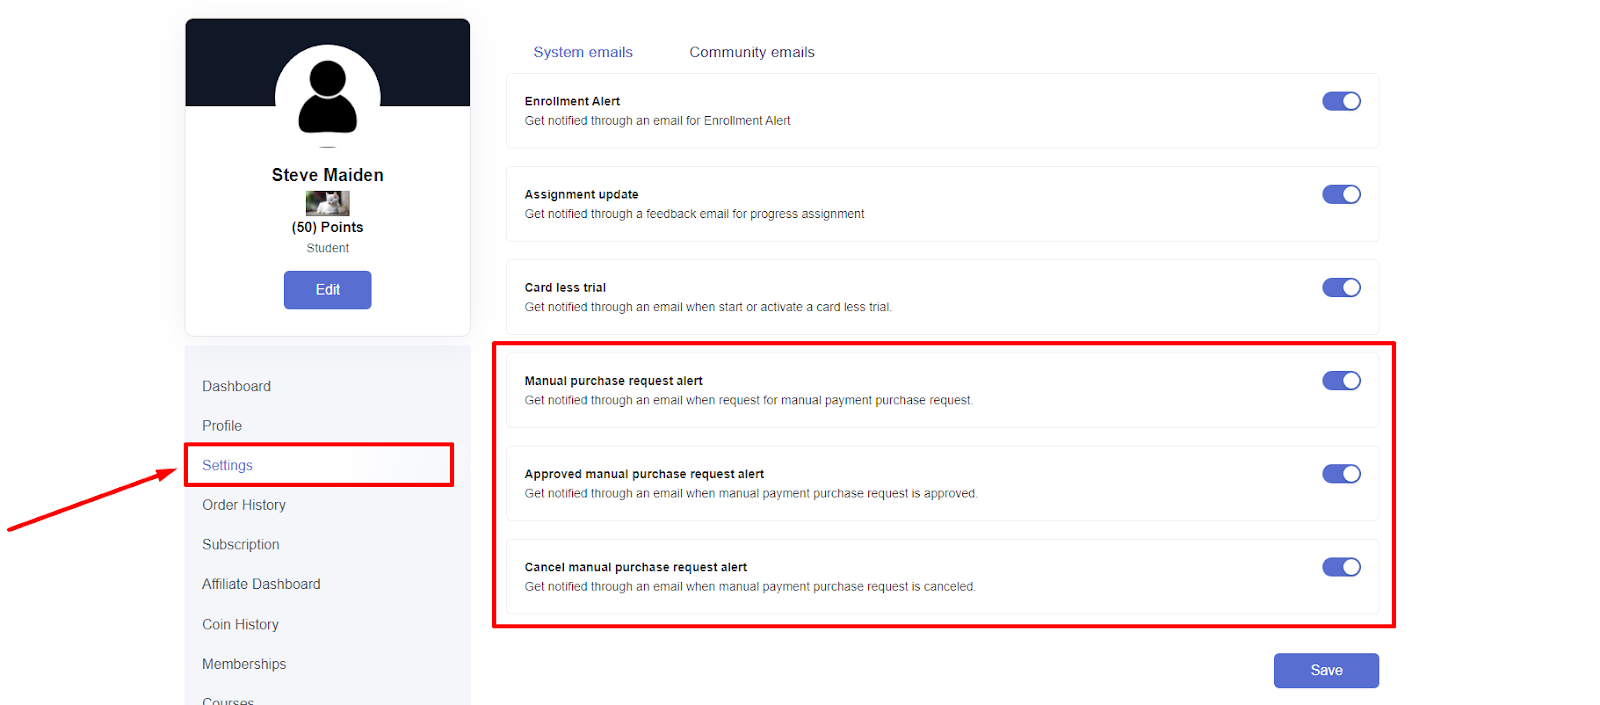
Remember that students receive emails when a request is made for the purchase, and when approved or canceled by the admin. They can control whether they want to receive the emails from the Settings menu on the student dashboard.