Back
Import Form Responses with Pabbly
You can easily automate and import form responses into your EzyCourse platform from any other third party app using Pabbly Connect.
[Note: Read Webhook Integration w/ Pabbly to learn how you can utilize Pabbly Connect to transfer data between your EzyCourse platform and other platforms.]
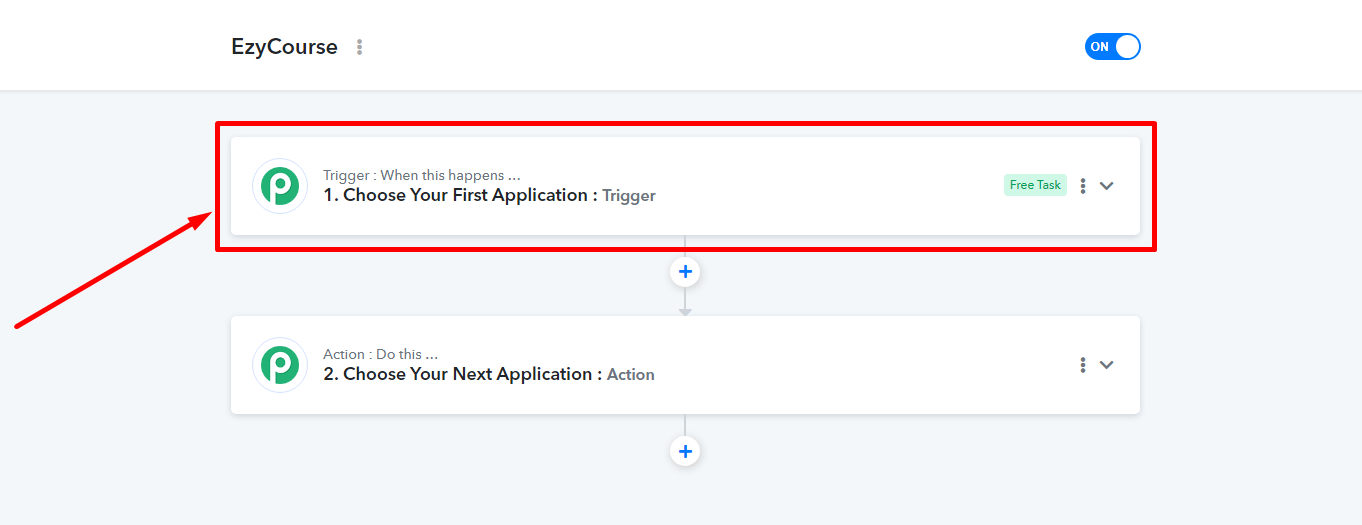
To begin, you have to connect the other platform with Pabbly Connect. You can do that on the Trigger section of a Pabbly workflow.
On the Trigger section, select the app/platform from where you want to import form contacts into your platform. It could be Google Sheets, Google Forms, or any other app. After selecting the app and then choosing a Trigger Event, you should see a webhook link. Simply copy it and then use it on the app for connecting with Pabbly.
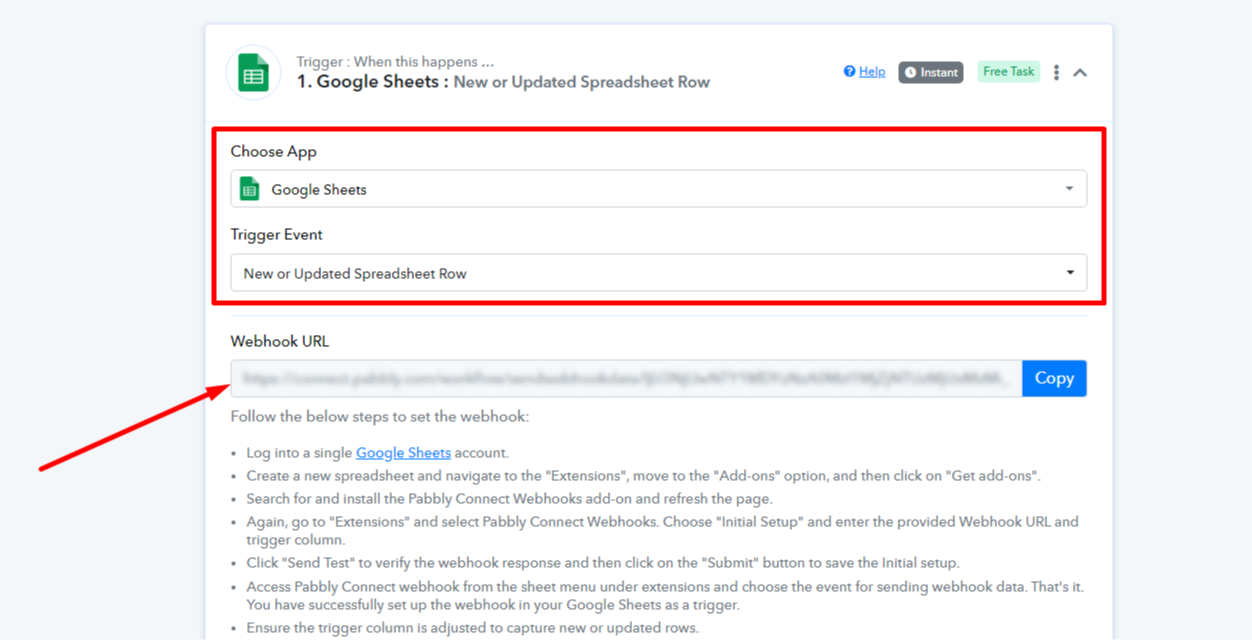
Upon successful connection, you should be able to send test data from that app which will be captured on the Pabbly Connect workflow.
[Note: Depending on the platform you are importing from, there should be some sort of documentation or guide on their platform regarding how you can connect with Pabbly Connect.]
Now that the response from the third-party app is captured on Pabbly, you can send it or import it into any form on your EzyCourse platform using the Action section.

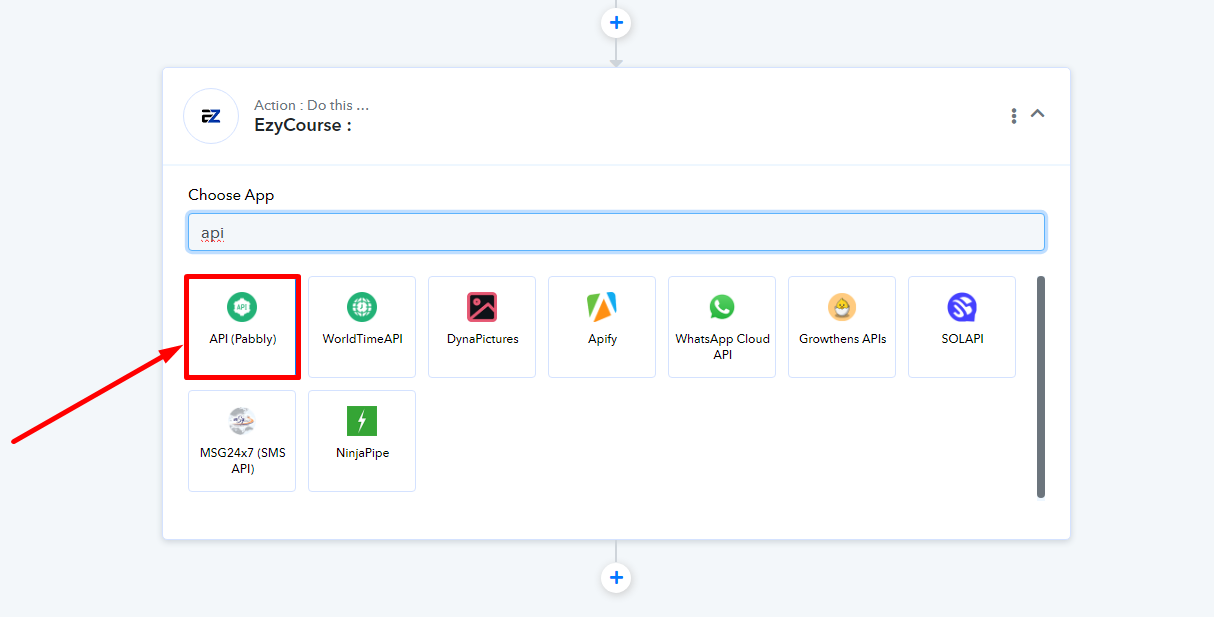
On the Action section, search and select API (Pabbly).
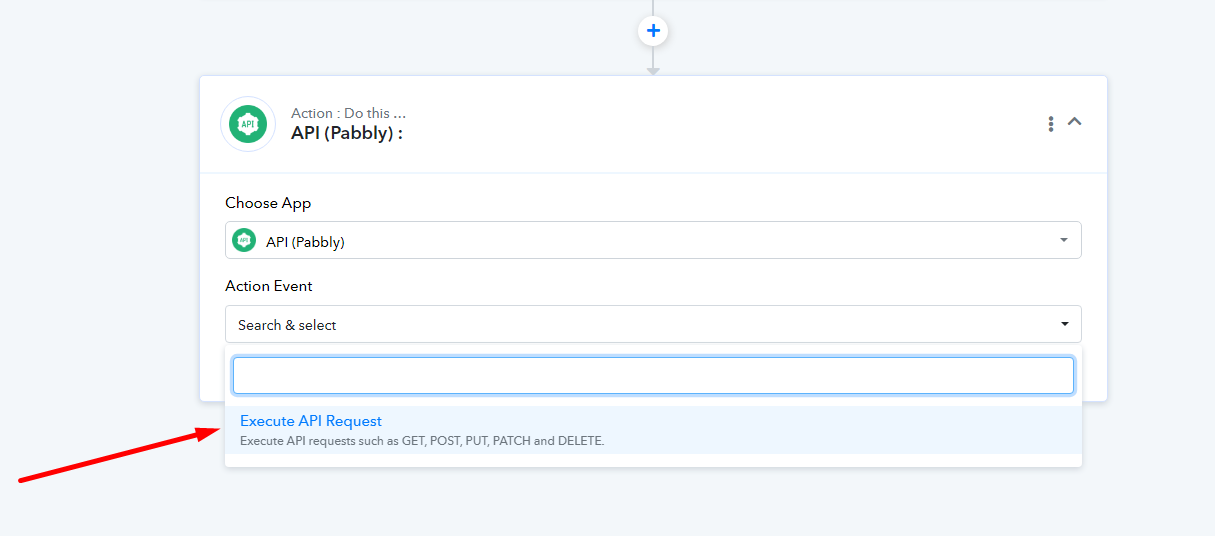
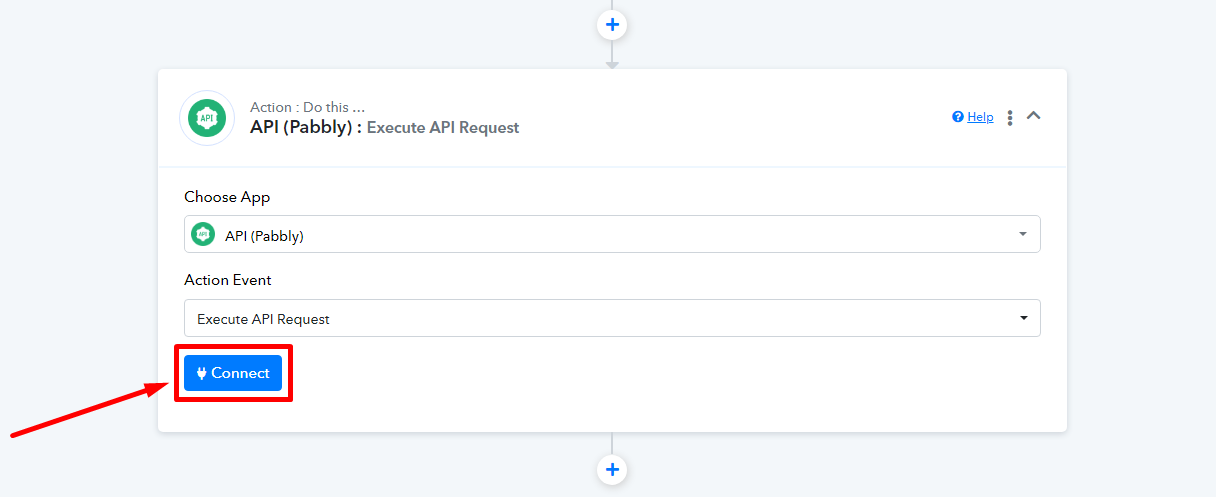
Select the Action Event to be Execute API Request. And then click Connect.
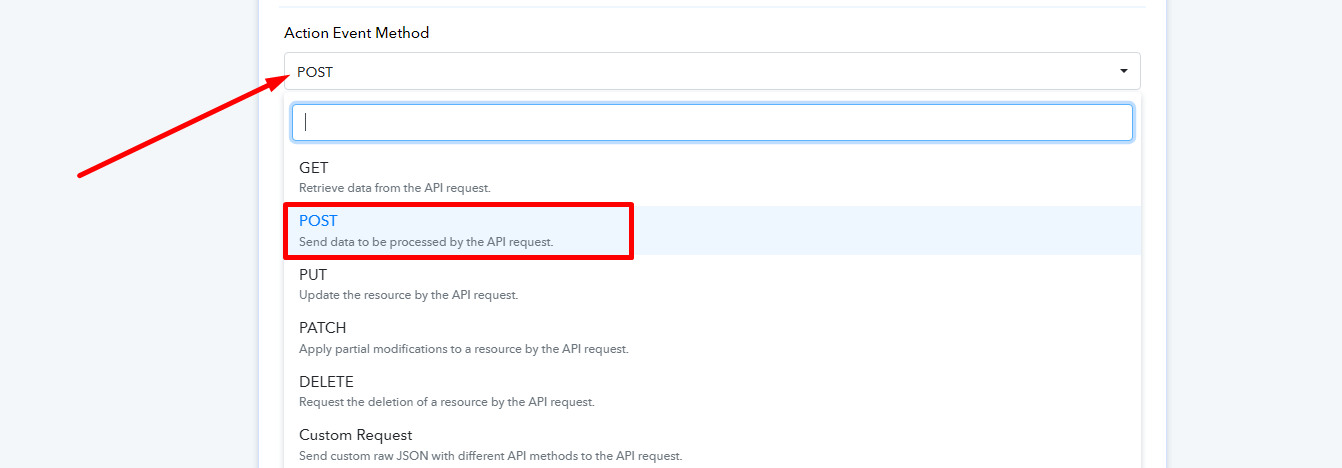
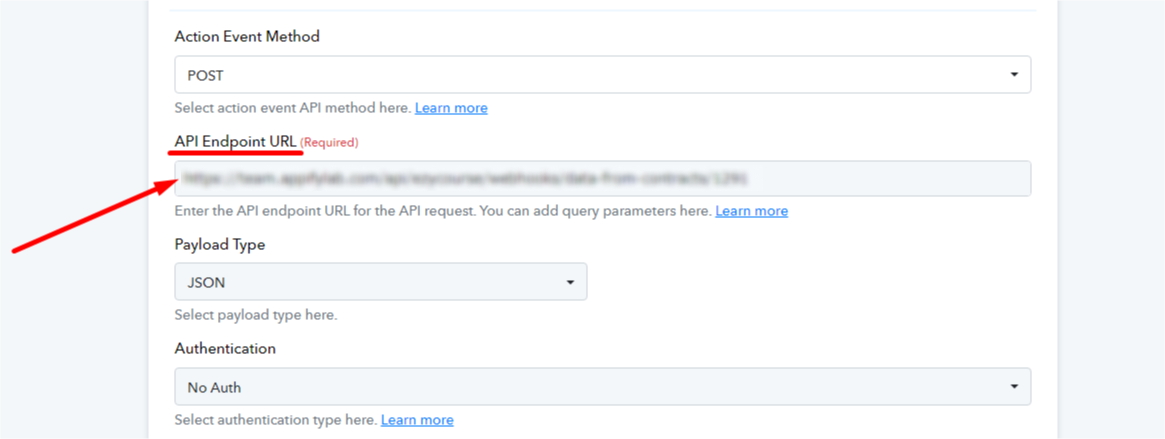
Choose the Action Event Method to be POST.
Now, you have to give the webhook URL specific to the form on your EzyCourse dashboard. To find it, log in to your EzyCourse dashboard and go to Marketing & Contacts -> Forms & Contacts -> click the three dots on an existing form and select the Edit option.

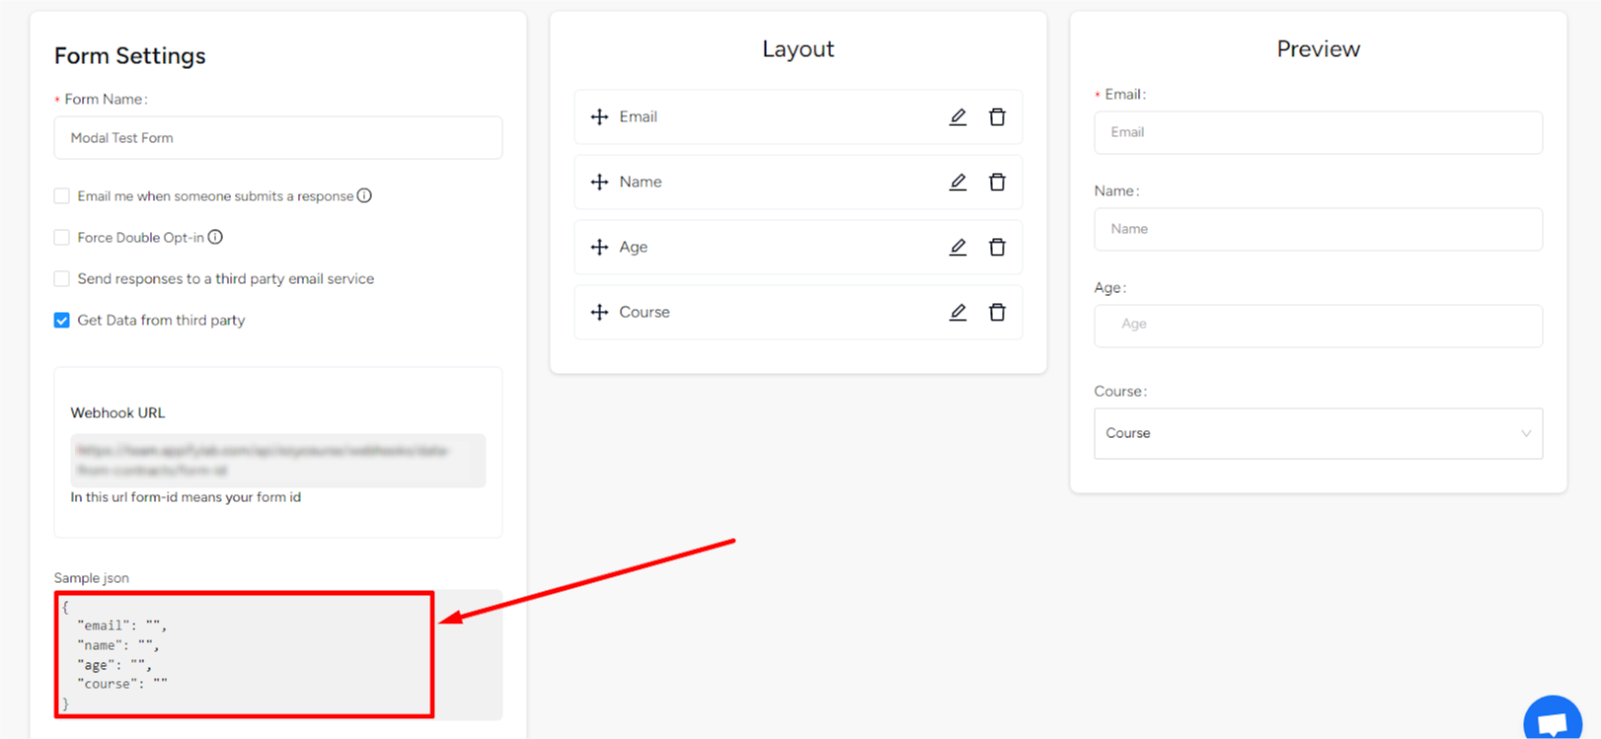
On the form editor, tick the “Get Data from third party” option. And then copy the Webhook URL.
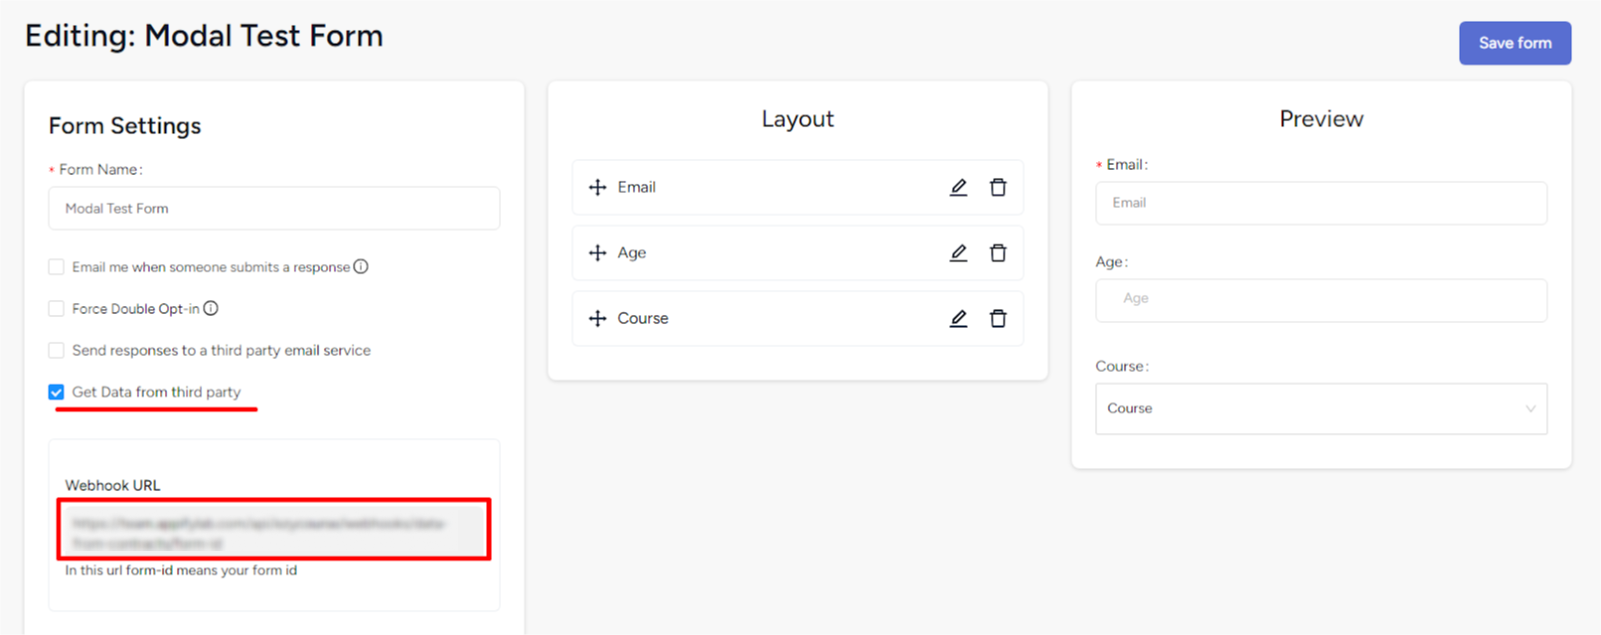
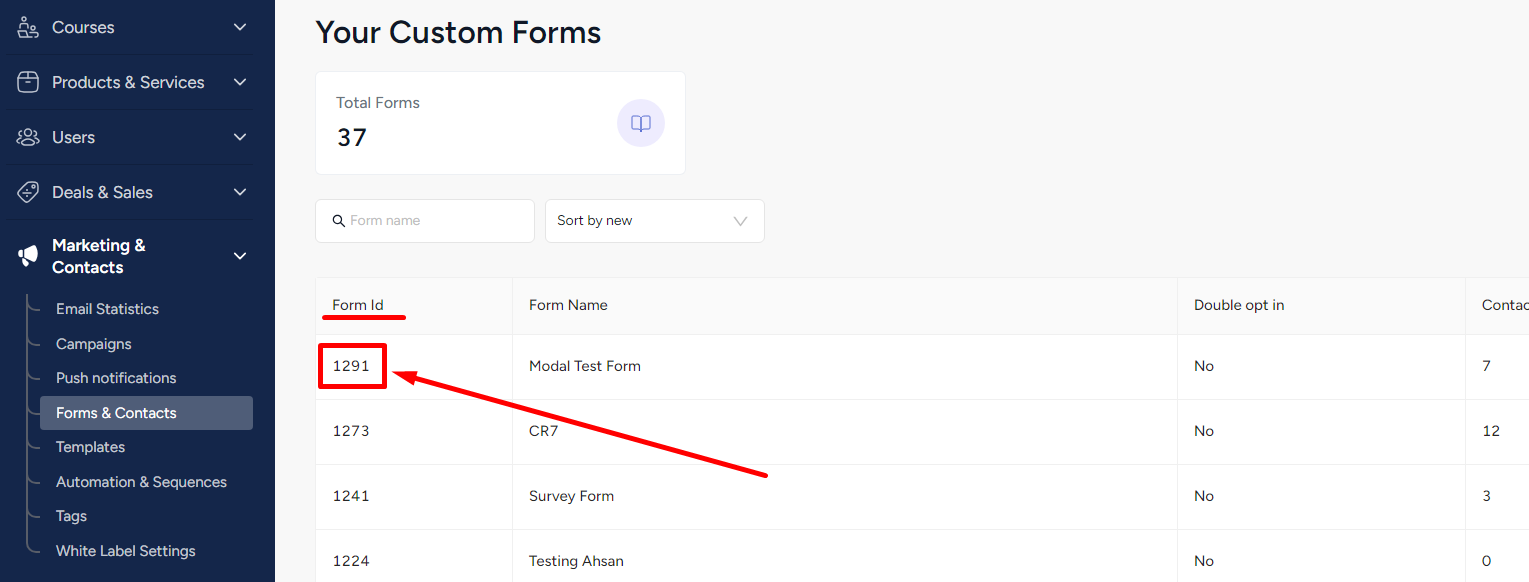
You cannot yet paste the URL on Pabbly Connect. First, you have to replace the form-id on the Webhook URL with the actual ID of the form. To find the form ID, go to Marketing & Contacts -> Forms & Contacts -> and you’ll see the form ID.
After replacing the form-id part of the Webhook URL, you can paste it on the API Endpoint URL field.
Now, scroll down and tick mark the “Set Parameters” checkbox. You’ll then see a row created with label and value fields. To add a new row, click the add (+) button.
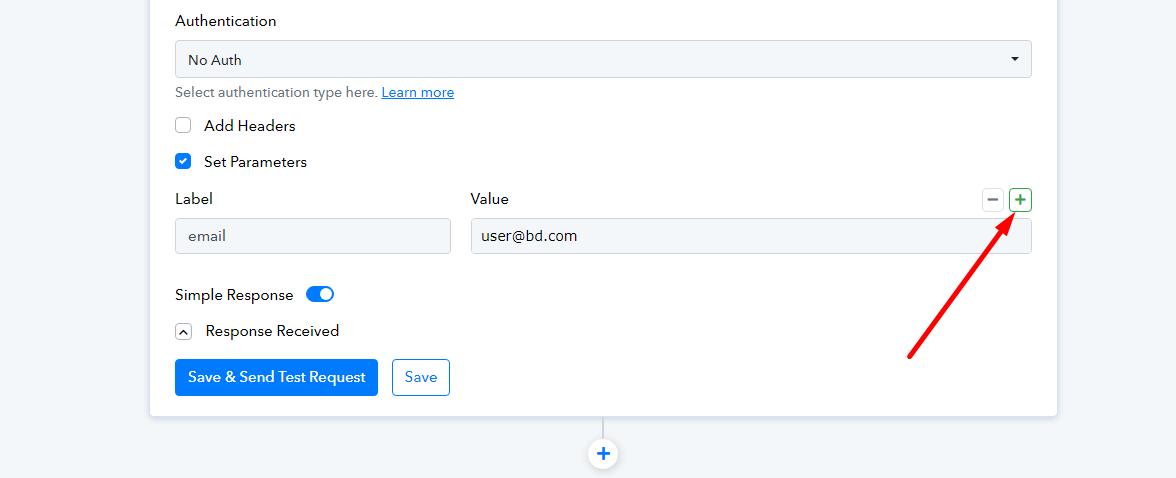
It is important to note that you need to write the labels exactly as given on the form editor, when you enable the “Get Data from third party” checkbox.

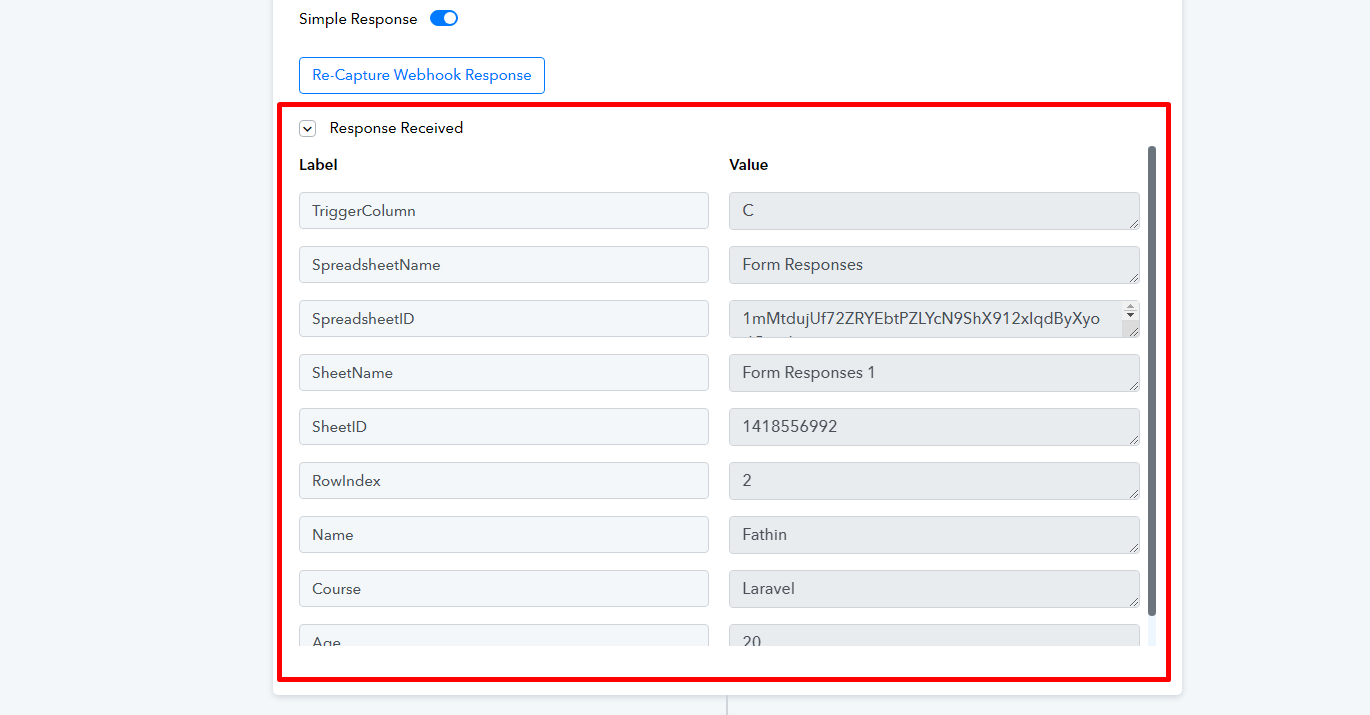
After writing the labels, you can map the correct data on the Value fields. If you’ve captured data on the Trigger section then you can easily map those data on the Value fields here.
To map captured data on the Value fields, click the field, search for the data, and then you can easily select an entry from the captured data.

Once you’ve added all the fields and mapped the values, you can click the Save & Send Test Request button. This will add the data as form responses into your form.

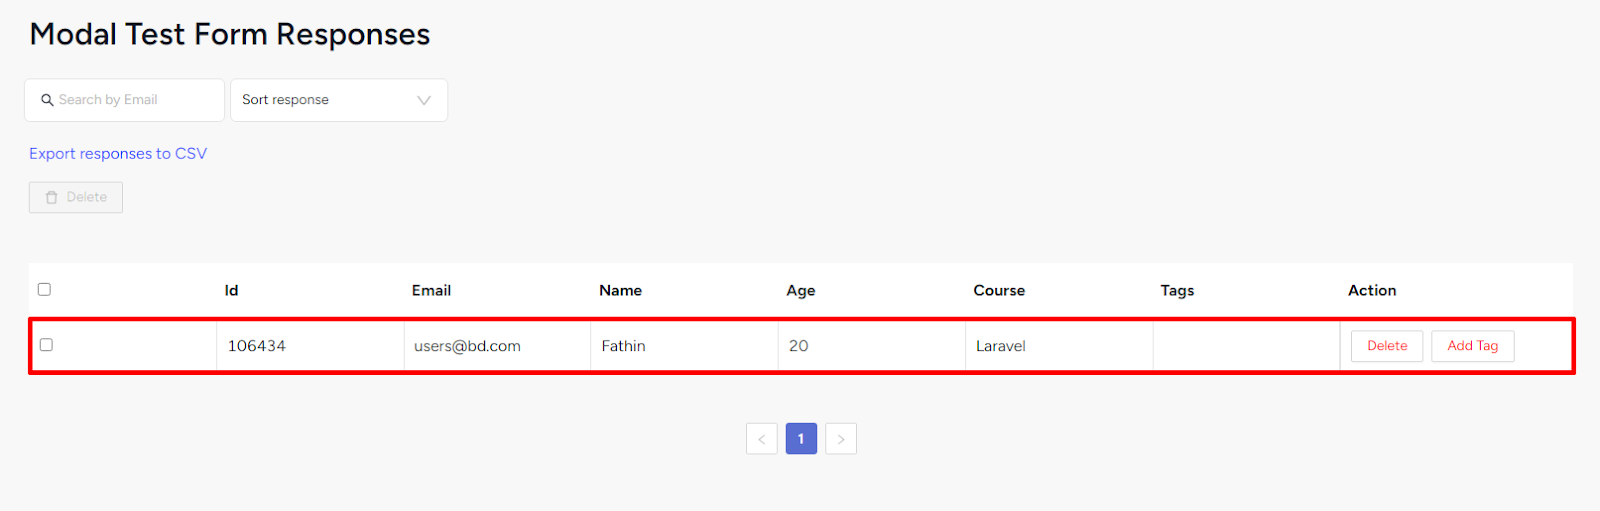
You can check and view the data sent from your EzyCourse dashboard. Go to Marketing & Contacts -> Forms & Contacts -> click the three dots on the form and select View contacts response.