Back
How to Add Multiple Tags Using Webhook for Users
What is it & why do you need it
Data-in webhook refers to a webhook that allows external systems to send data into your platform.
Previously, only one tag could be added for a user at a time and manullay. With the latest update, now you can add multiple tags at once for a student and automate it using webhooks.
So, this feature is going to help you to add multiple relevant tags and organize and manage your offerings more effectively. It’ll make it easier for your students/users to find products under various categories.
How it works
With the new settings, you can now auotomate tagging in the system usin webhooks to assign specified multiple tags to your registered students.
Related: Webhook Integration in EzyCourse
How to get started using it
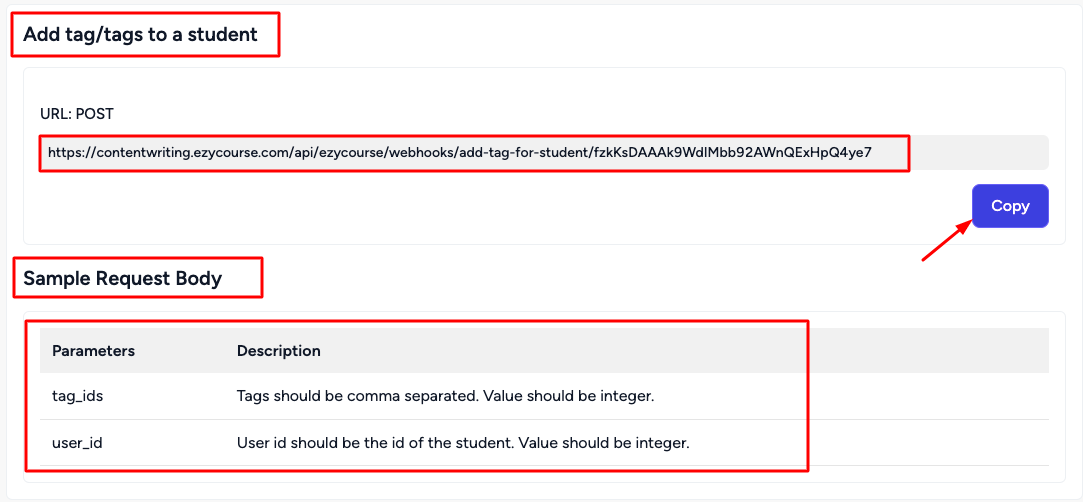
Step 1: Go to Site Settings > Webhook (Data-in). Scroll down and you’ll find ‘Add Tag/Tags to a Student’.
Step 2: Copy the POST URL provided for this webhook. You can use this URL from Pabbly.

Step 3: Set up your webhook request in the external system. Make sure to include the following parameters in the request body:
tag_ids: List of tag IDs you want to add, separated by commas. For example, "1,2,3".
user_id: The ID of the student to whom you want to add these tags. This should be an integer.
Step 4: Test the Webhook Send a POST request to the webhook URL with the appropriate JSON data. If set up correctly, the system will automatically add all specified tags to the user’s profile.
Follow this guide for detailed information on Webhook Integration in EzyCourse. Also, you can see the detailed video here —