Back
Certificate Expiry Settings
What is it & why you need it
You can customize the text, color, and other aspects of your course certificates from the admin dashboard. With the new update, you can now add expiry time on the certificates.
Courses with time-bound certificates appear more professional and go well with skill-based training. By setting expirations, you can even prompt students to retake the course or an updated version, increasing re-enrollments.
This is specially useful for industries or subjects where knowledge or compliance needs to be updated regularly (e.g. healthcare).
How to get started using it
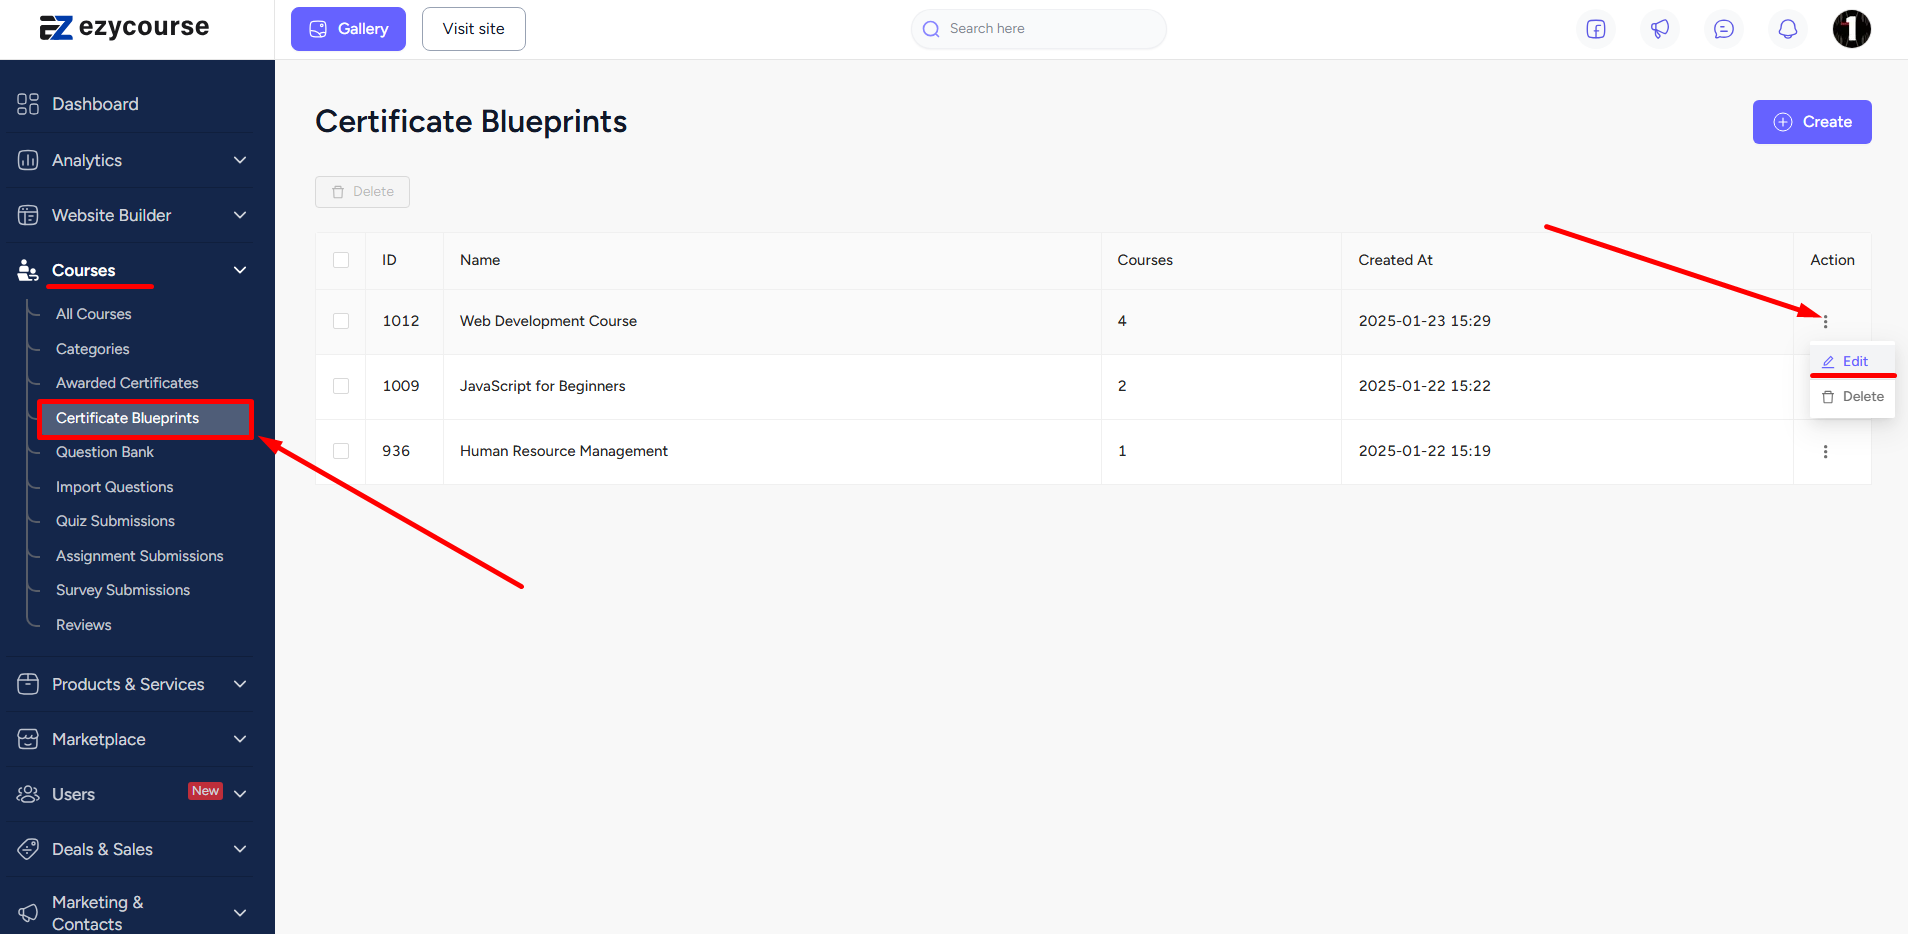
First, log in to your EzyCourse dashboard and navigate to Courses -> Certificate Blueprints. Click the three dots on an existing certificate and select the Edit option.
Scroll down to find the Expire Type option.

When setting up your course certificate, you can choose how and if it should expire. Here are the three options available:
1. Never
• The certificate will never expire.
• The expiry info will not appear on the certificate.
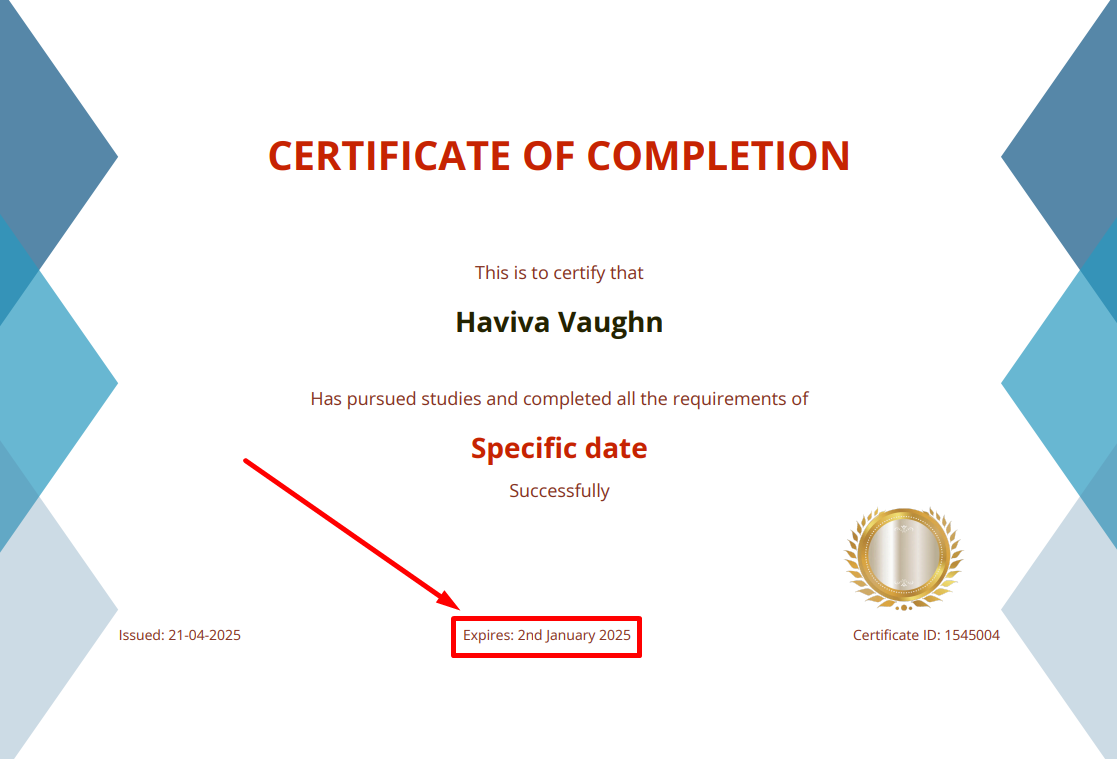
2. Specific Date
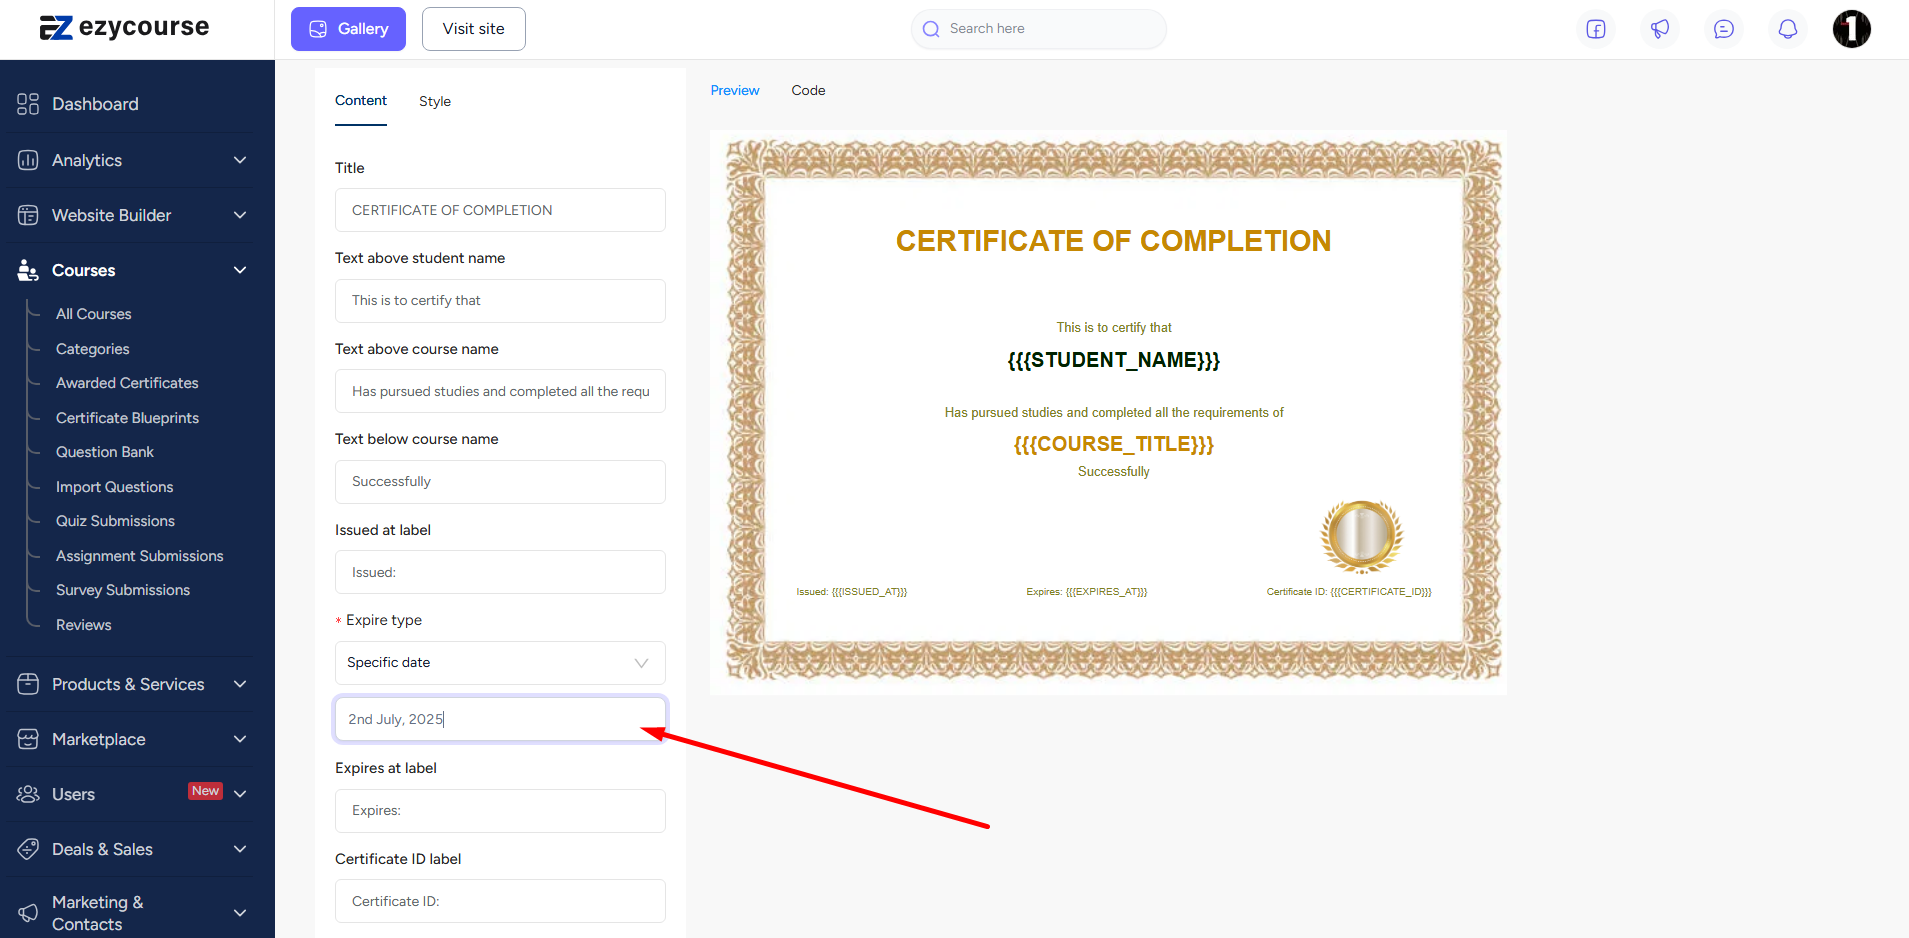
• You set a fixed expiry date, like July 2, 2025.
• The certificate will show this exact date as the expiry.
• You can format the date however you like, e.g., 02-07-2025, 2nd July 2025, etc.
3. X Days After Issued
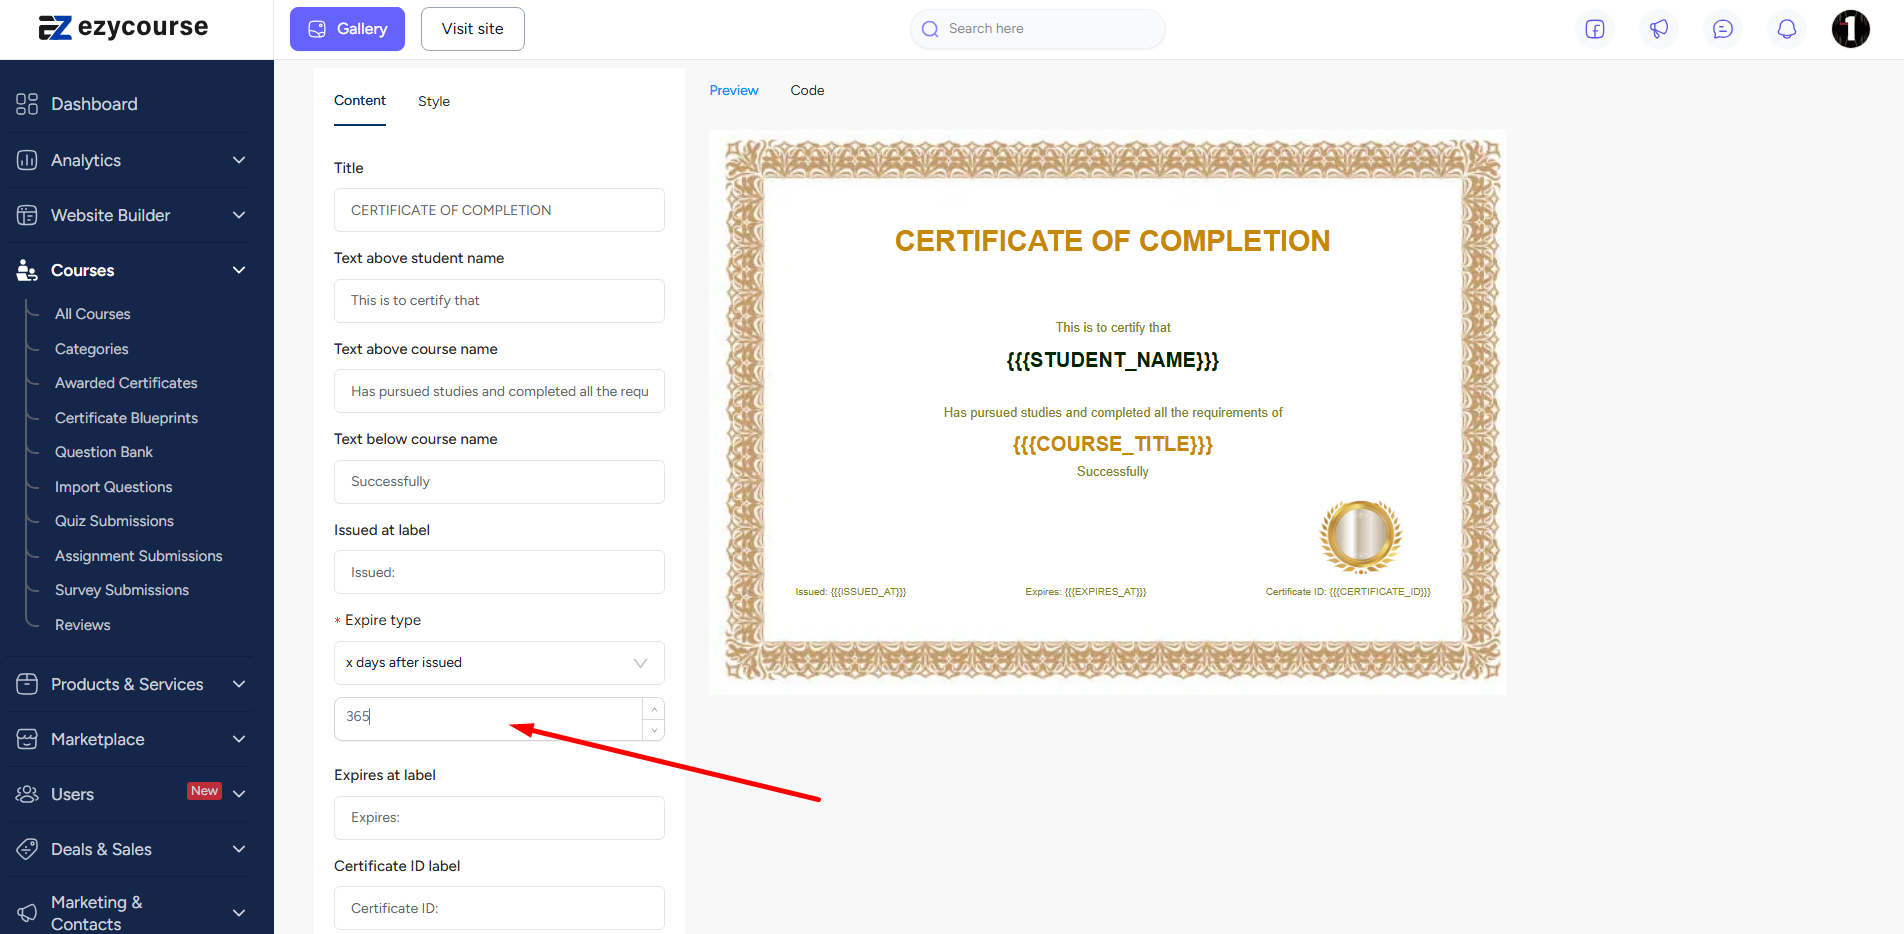
• You set the number of days (e.g., 180).
• The certificate will expire X days after it’s issued to the student.
Whether you choose “specific date” or “x days after issued”, the expiry will show on the certificates once they are issued to the students.