
Back
Creator’s Marketplace
What is it & why you need it
The Creator’s Marketplace is where you can manage a community of sellers, offer a wide variety of courses and products, and grow your platform like nothing else.
With Marketplace, you get to earn through commissions without actually doing any of the hard work. Simply allow users to sign up on your platform as sellers, let them purchase a seller membership plan, and then sell their products on your website, under your brand. Not only that, you can also display all your site products on the marketplace page. This doesn’t only add some extra revenue, but also grows your platform as a whole in terms of value.
And the best part? You manage everything! You decide who can sign up and purchase membership plans according to your choice. You set the product creation limit and control which products are qualified for your marketplace. You oversee all the transactions including the seller's commissions. And much more.
In short, the marketplace is your very own Udemy-like platform. You do not sign up for it, you are the owner of it.
How it works
Marketplace comes as an add-on which you’d have to purchase first in order to use from your dashboard. Once purchased, you’ll get access to the marketplace dashboard, settings, and can manage the sellers too.
The dashboard is where you get an overview of how your marketplace is doing. From settings, you can control and choose to enable or disable -
• The marketplace
• Display your products on marketplace
• Seller sign up
• Email verification for seller sign up
• Auto approval for new sign ups
• Best seller setting
• Which products to sell on the marketplace
As for managing sellers, you have complete control of setting product limit and what to give them access to on their seller dashboard. You can even choose to accept/reject the request of a user to sign up as a seller.
For each seller, you can set product creation limit based on membership plans, give access to different products, coupons, and payment gateways. In addition, the commission you get from each seller is also upon you to define.
You can also manage the workflow, from product launch to giving commissions, for each seller. Any product they create will have to go through your approval first in order to be showcased on the marketplace in your website. Plan limit, product orders, commissions, coupons, and transactions are all under your supervision.
You will also notice another marketplace menu called Billings. This is where all the commissions you owe the EzyCourse platform will be displayed. Here’s how that works:
• For every sale on your marketplace, EzyCourse charges you 3.5% of the sold product price.
• If you reject any commission for a sale, then EzyCourse will not charge you for that sale.
• EzyCourse claims the commission only at the end of the month or when the total due is $50 or more.
As for the seller, they will have their own separate dashboard after successfully signing up as a seller from your website. They will only have access to the products that you enable for them and can create products according to their membership plan limit.
As for showing the marketplace on your website, you will find two default pages built for you. One is the seller signup page and another one is the Marketplace page. You can even use the “Marketplace Product List” widget on the website builder. Moreover, you can create seller membership plans and also add it on your site. In the marketplace, customers can see all the (approved) products created by the sellers and all your site’s published products as well (based on permission). They can also view the profile of each seller to know more about them.
Throughout the marketplace workflow, you and the seller will receive continuous updates through notifications and emails. It depends on the different settings, but here are some general scenarios when you or the seller will receive notifications/emails:
• Admin will be notified to approve/reject when the seller creates any product.
• Sellers will be notified when the requested product is approved/rejected by the admin.
• Admin and sellers will be notified when any purchase is made from the marketplace.
• Sellers will receive notifications when the admin approves the sale commission for an order.
• Sellers will also be notified when the admin pays out a sale commission.
How to get started using it
After you get the add-on, the first thing you could do is set up a seller-based membership plan. To do that, follow the article on seller membership plans.
After creating the seller membership plans, set up three website pages related to the marketplace. First one is the seller sign up page, second one is for seller membership plan, and third one is for the marketplace itself. There will be default pages added for you. But, you can also use widgets to create the seller signup and marketplace pages yourself.
Here is how the default signup page looks:

For using the widget, it is called Seller Signup on the builder 2.0.

For the marketplace, you need to create a new separate page from Website Builder -> Pages.

On the builder, you can drag and drop the ready made Marketplace widget.

Here’s how the marketplace looks on the website.

Follow this guide to show the membership plans on your website so sellers can purchase a plan from your site.
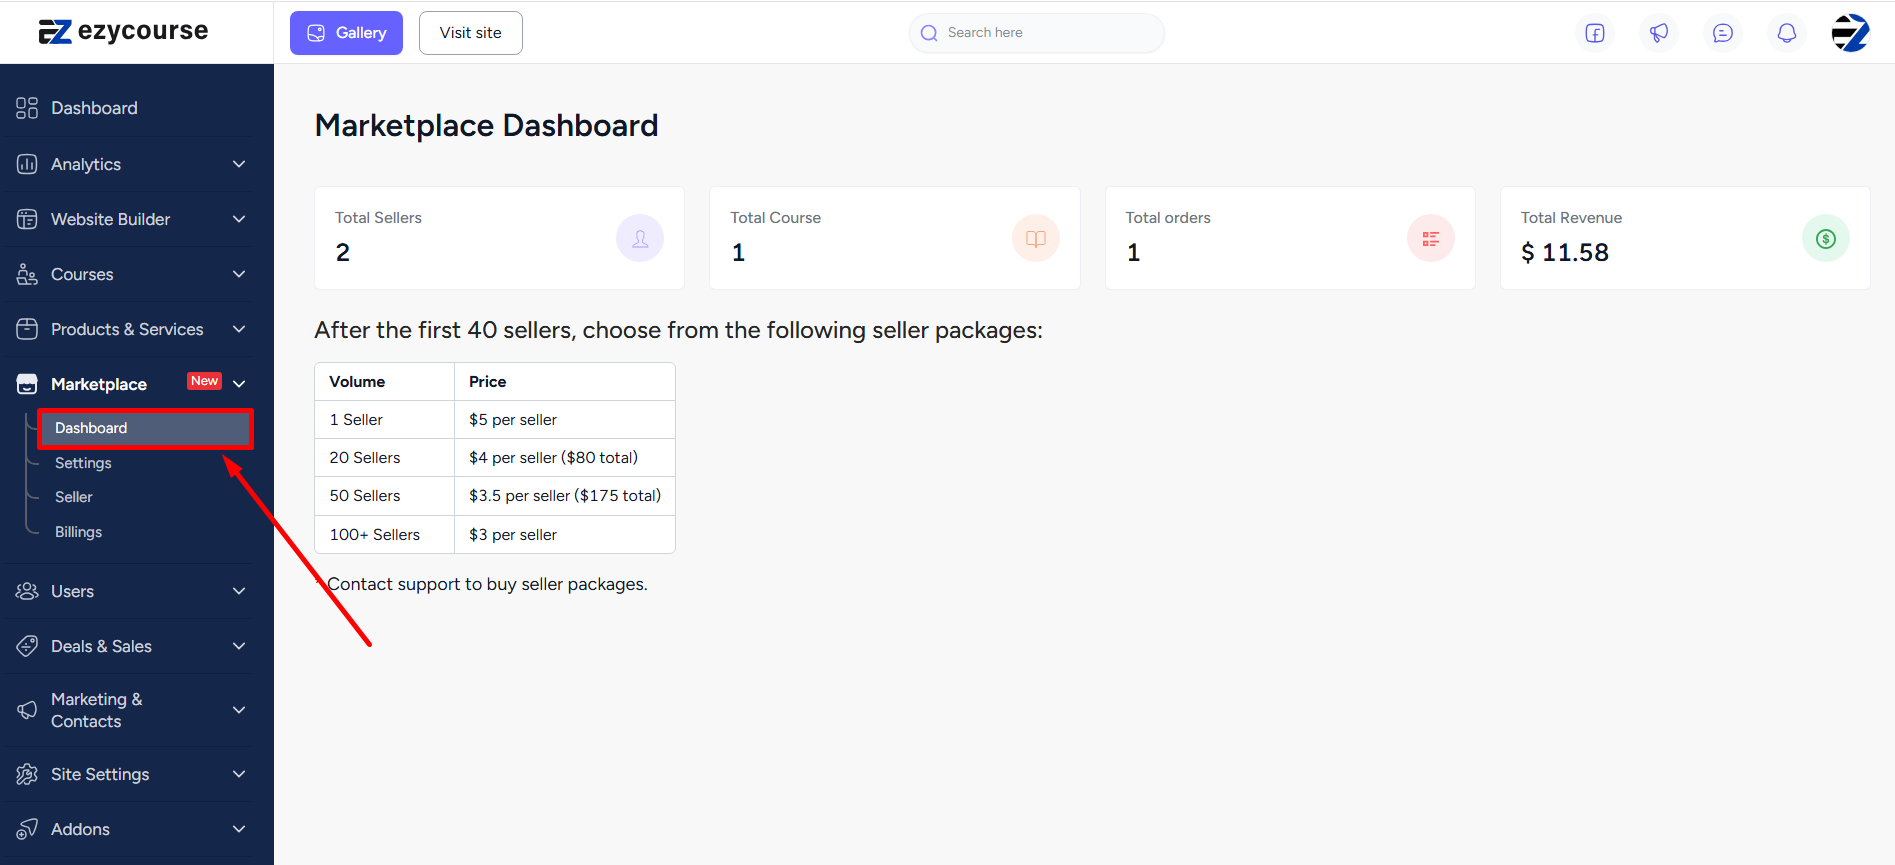
Marketplace Dashboard
The marketplace dashboard gives you an overview of your marketplace. Notice that you’ll also see a table that contains how much you’d have to pay to get the privilege for signing up more sellers.
[Note: First 40 sellers are free.]
Marketplace Settings
Once you have the pages set up, you can go on to enable the marketplace from Marketplace -> Settings.

If you keep the marketplace disabled -
• New sellers cannot sign up.
• Existing sellers can still log in to their dashboard and even create accessible products.
• The marketplace page will not show any products or other aspects like the seller profile.
• Marketplace workflow in terms of you approving/rejecting the sellers’ products will still remain in effect.
The marketplace addon gives the option to display your site’s published products on the marketplace page, except the hidden ones as they are not on your site as well.

You can then choose whether to enable seller sign up also. This will allow any user to sign up on your platform as a marketplace seller. If disabled, then you are basically stopping sellers from signing up.

With seller signup enabled, you’ll see more options related to the seller. You can turn on email verification for signing up as a seller and also select whether to auto-approve sellers. If auto-approve is turned on, users signing up will not need your approval manually.

You can also set a default commission for the sellers, if auto-approval is enabled. It could be in percentage or fixed amount.

If auto-approve is disabled, you will need to manually approve each seller. Here’s how that works:
• A user fills up the seller sign up form. You get the request on the Marketplace -> Seller page whether to approve or reject.

• You will also receive real-time notification. Click the notification to go to the Seller page directly to approve or reject the request.

You can choose whether to receive notifications when a plan limit or commission rate is updated. And also when any product is sold on the marketplace so that you can approve the commission.

Seller-created courses are counted when calculating the total number of courses in each category, if you enable the “Count seller courses in categories“ setting.

Usually, you’d have to approve new products created by sellers. But, if you enable the “Auto-Approve Seller Products” then products will automatically become available on your marketplace without you manually approving first.

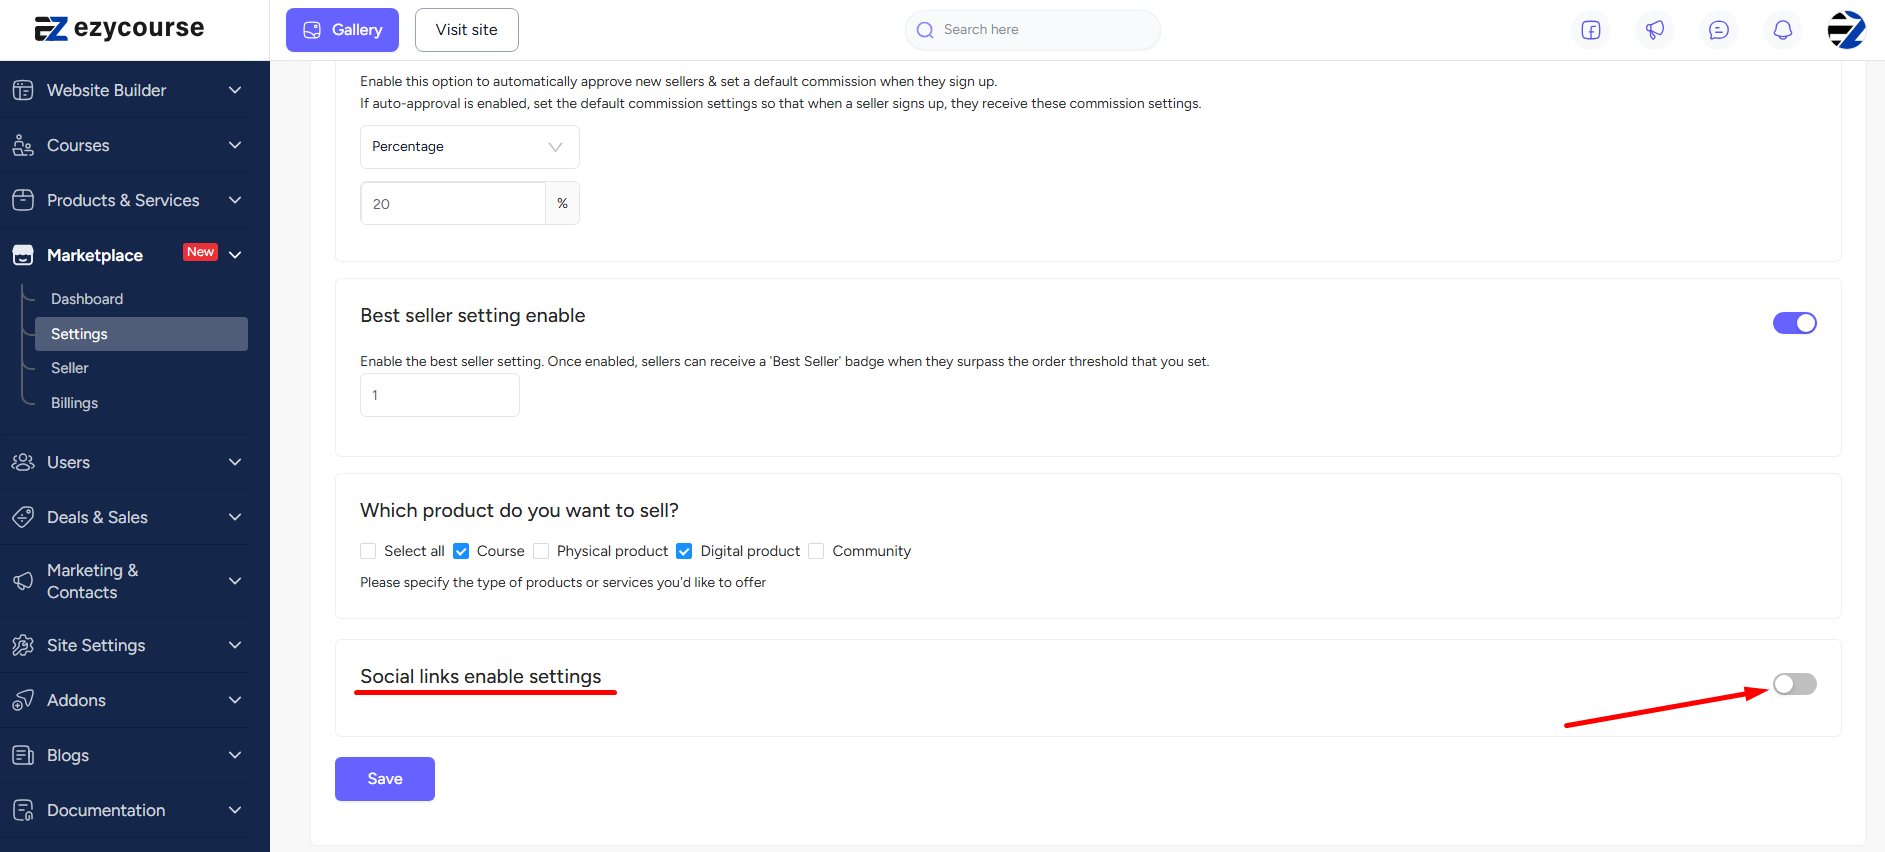
Another setting you can turn on is the Best Seller option. Once enabled, sellers can receive a 'Best Seller' badge when the total sales of all their products surpass the order threshold that you set.
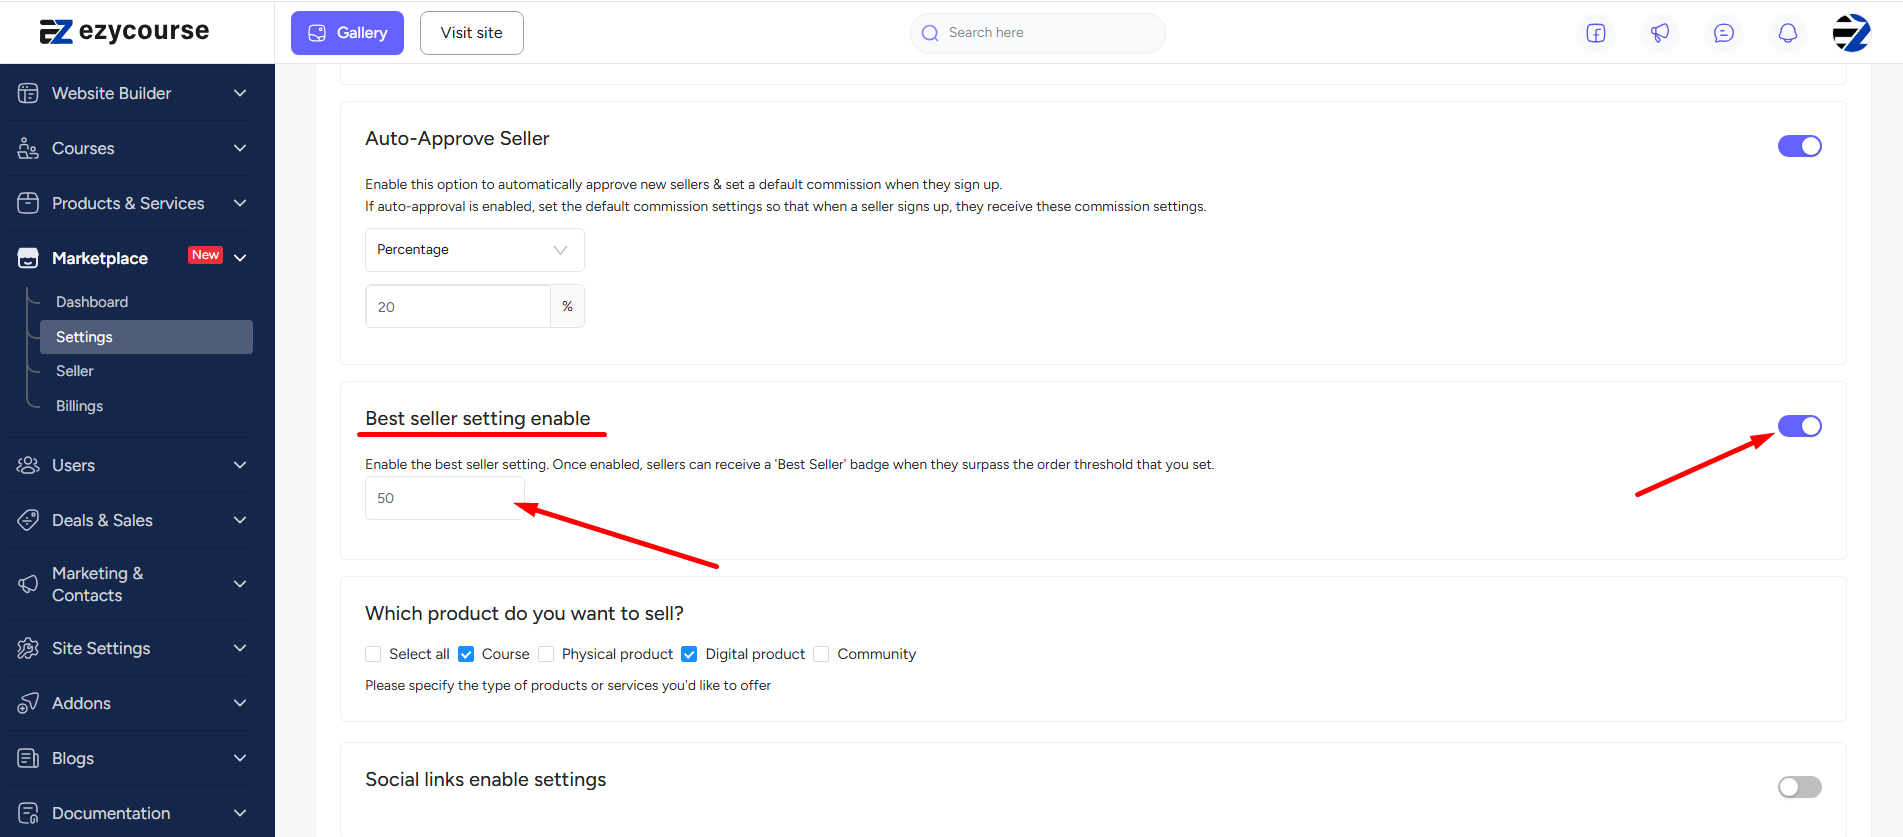
‘Best Seller’ badge once achieved shows on all the products of the seller on the marketplace.

It also appears on their seller dashboard.

You can also choose exactly which products you want to show on the marketplace and give access to your sellers.
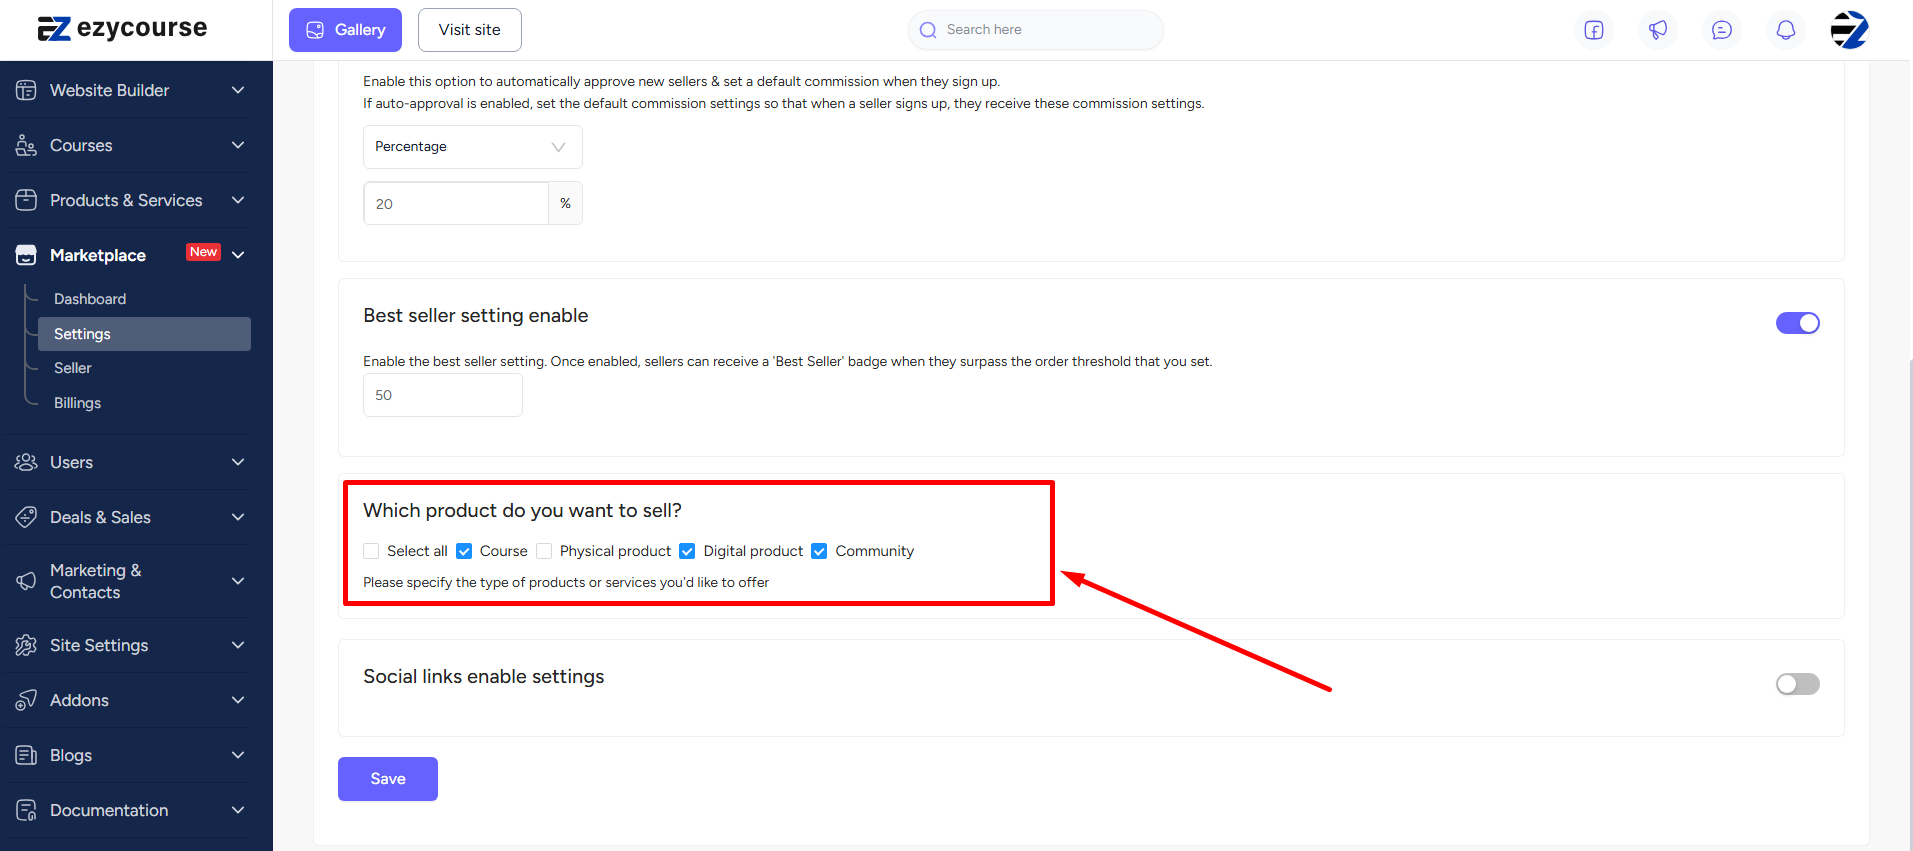
Enabling any product here will mean -
• You can give any seller the access to create and manage this product.
• If you provide access to a seller, that seller will be able to create and manage the product from the seller dashboard.
• It will appear as a separate category on the marketplace.
The disabled products will not show on the marketplace even if sellers created them and sold them beforehand. That means you can enable or disable these settings at any point of time.
Notice that in the screenshot below there’s no physical product category since it is disabled.
Enabling refund option will let sellers refund any order placed by customers.

The final setting you can enable is Social Links. Enabling this will let sellers add their social profile links such as Facebook, Linkedin, etc. from their seller dashboard. Social links appear on the seller profile.
Managing Sellers & Seller Dashboard
You can manage each seller from the Seller menu. In addition, you can also create a new seller directly from the seller menu. Simply click the Add New Seller button and then on the popup enter the signup details. Once you’re done click the Add button.


Initially, sellers only have access to certain options on their dashboard such as their account profile, and deals & orders menu. On the seller dashboard, from Account Info, they can see whether their seller profile is approved and also the different settings they have access to.
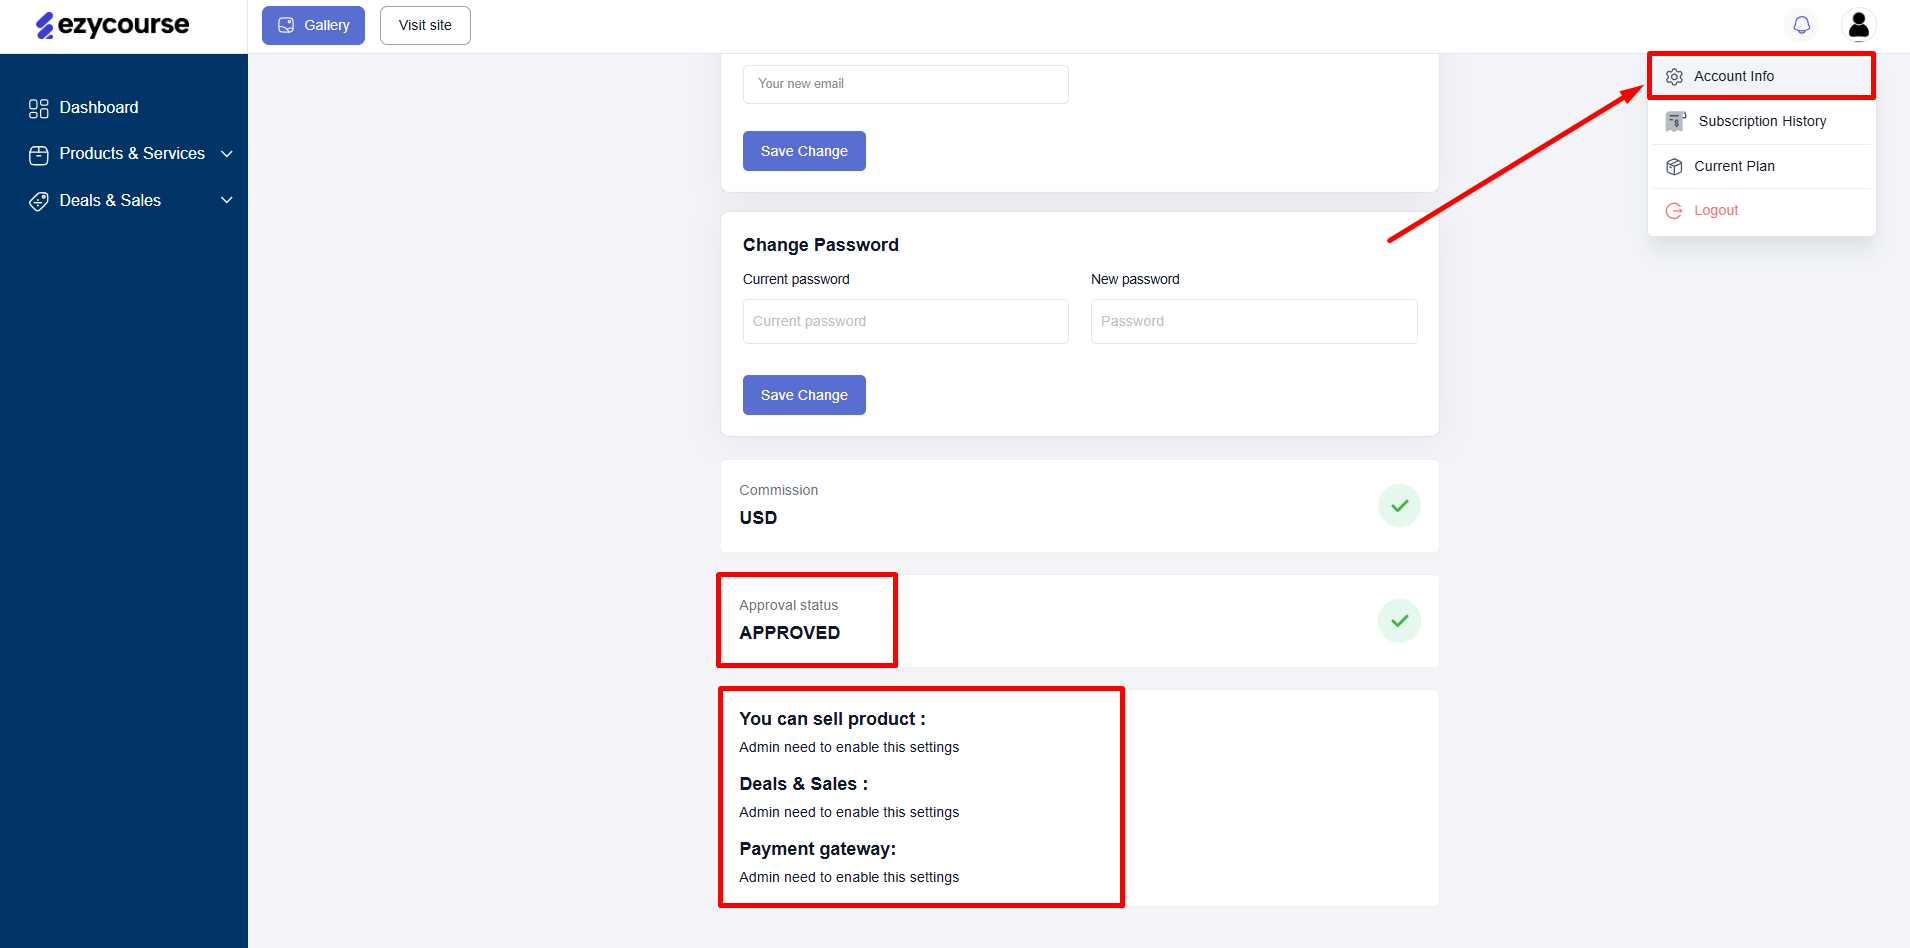
They can also add/edit their profile information including social media ID links and an “About me” section.
[Note: This information will show on the seller profile page in your website.]

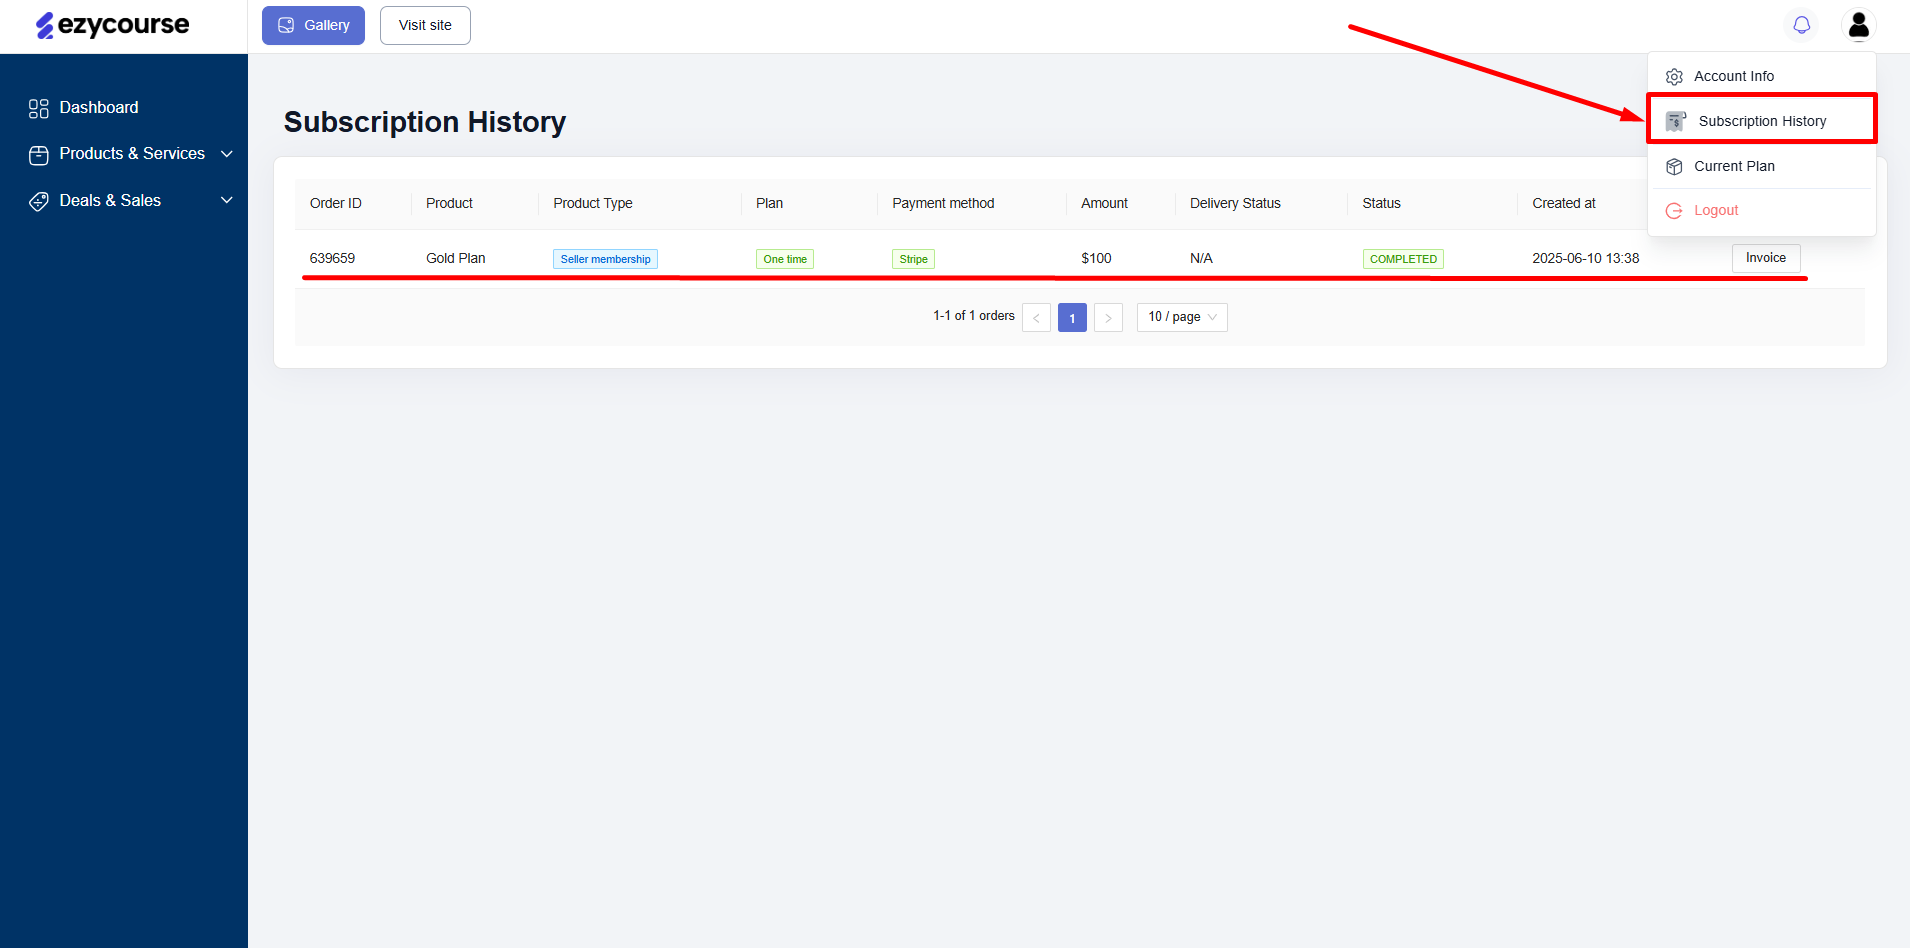
Moreover, they can view their Subscription History as well.
Furthermore, they can view their “Current Membership Plan” and see what they are getting with the plan.

The seller dashboard initially does not contain any products (courses, communities, etc.). Click the Settings option to give a seller access to the different products, coupons, and payment gateways.

Any product you enable from here will mean that this seller can access and create products on their seller dashboard.
[Note: The products appearing here depend on the settings you’ve set under “Which product do you want to sell” option on the Marketplace -> Settings page.]

Here is a breakdown of how enabling each product works with regards to the seller dashboard:
[Note: Sellers must first purchase a seller membership plan before being able to create or sell products.]
• Enabling “course” gives the seller access to everything under the Courses menu on your dashboard. That includes course creation, certificates, quizzes, assignments, etc.

• Enabling “community” gives access to all the community related options. This comes under the Products & Services menu.
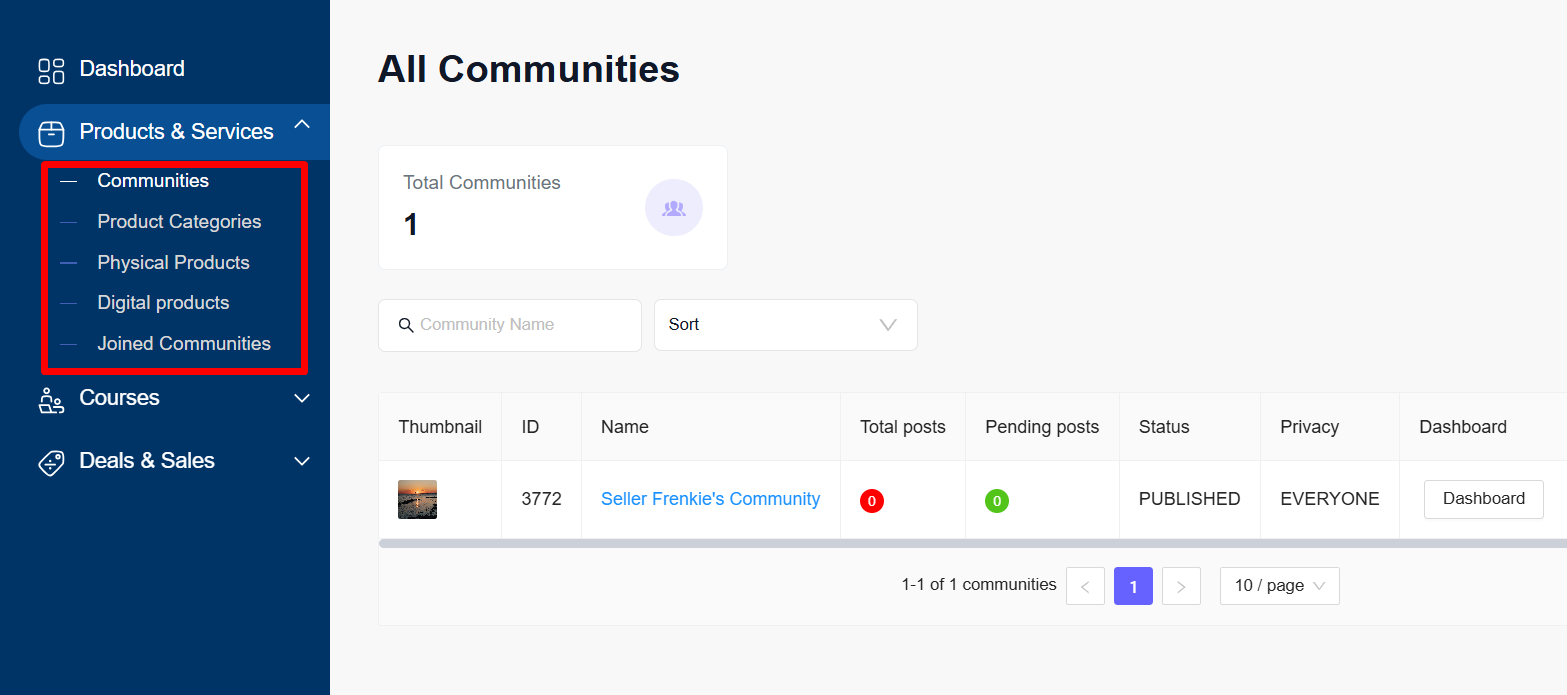
• Enabling “digital product” gives the seller access to Digital products and also the Product Categories menu under Products & Services. Same goes for physical products.
• “Joined Communities” also comes under the Products & Services menu as default. Here, the seller can only view and access the communities in which they’re enrolled by the admin manually.

• Coupon comes under the Deals & Sales menu, when enabled.

• Customers can purchase the products of that particular seller from the marketplace using only the enabled payment gateways. Ensure the gateway is enabled on your platform from Site Settings -> General Settings -> Payment tab.
And of course, you can set the commission for each sale coming from a seller. It could be either in percentage or fixed.

[Note: This commission here refers to the amount you will earn when the seller makes a sale on the marketplace.]
You can delete sellers from your marketplace. There are two types of deletion option:
• Permanent Delete completely removes a seller from your marketplace without any chance of recovering the seller’s data.

• Soft Deleting a seller will remove the seller temporarily. They will not be able to access their seller dashboard and their products will not show on the marketplace either.

• To re-activate a soft deleted seller, simply filter the list by selecting the Deleted seller option.


To see more seller details, click the three dots on the seller and select the View option.

From here, you will find all the different tabs related to managing the seller’s product request, order approval, commission approval, transaction history, etc.

Billings
The Billings menu is where you can see all the commissions you owe to EzyCourse. For every sale, a new record will be added here so that you can track how much the commission is for each sold product. After a certain amount or at the end of the month, EzyCourse will automatically charge the due.

Seller Dashboard
You can add any custom link as a menu on the seller dashboard. Simply input the menu label and add any link you want.

The added link appears as a menu on the seller dashboard under the Resources menu.

All Seller Products
To view all the seller-created products in one place, go to the All Seller Products menu.

From here, you can also approve/reject products, view product details, delete, etc.

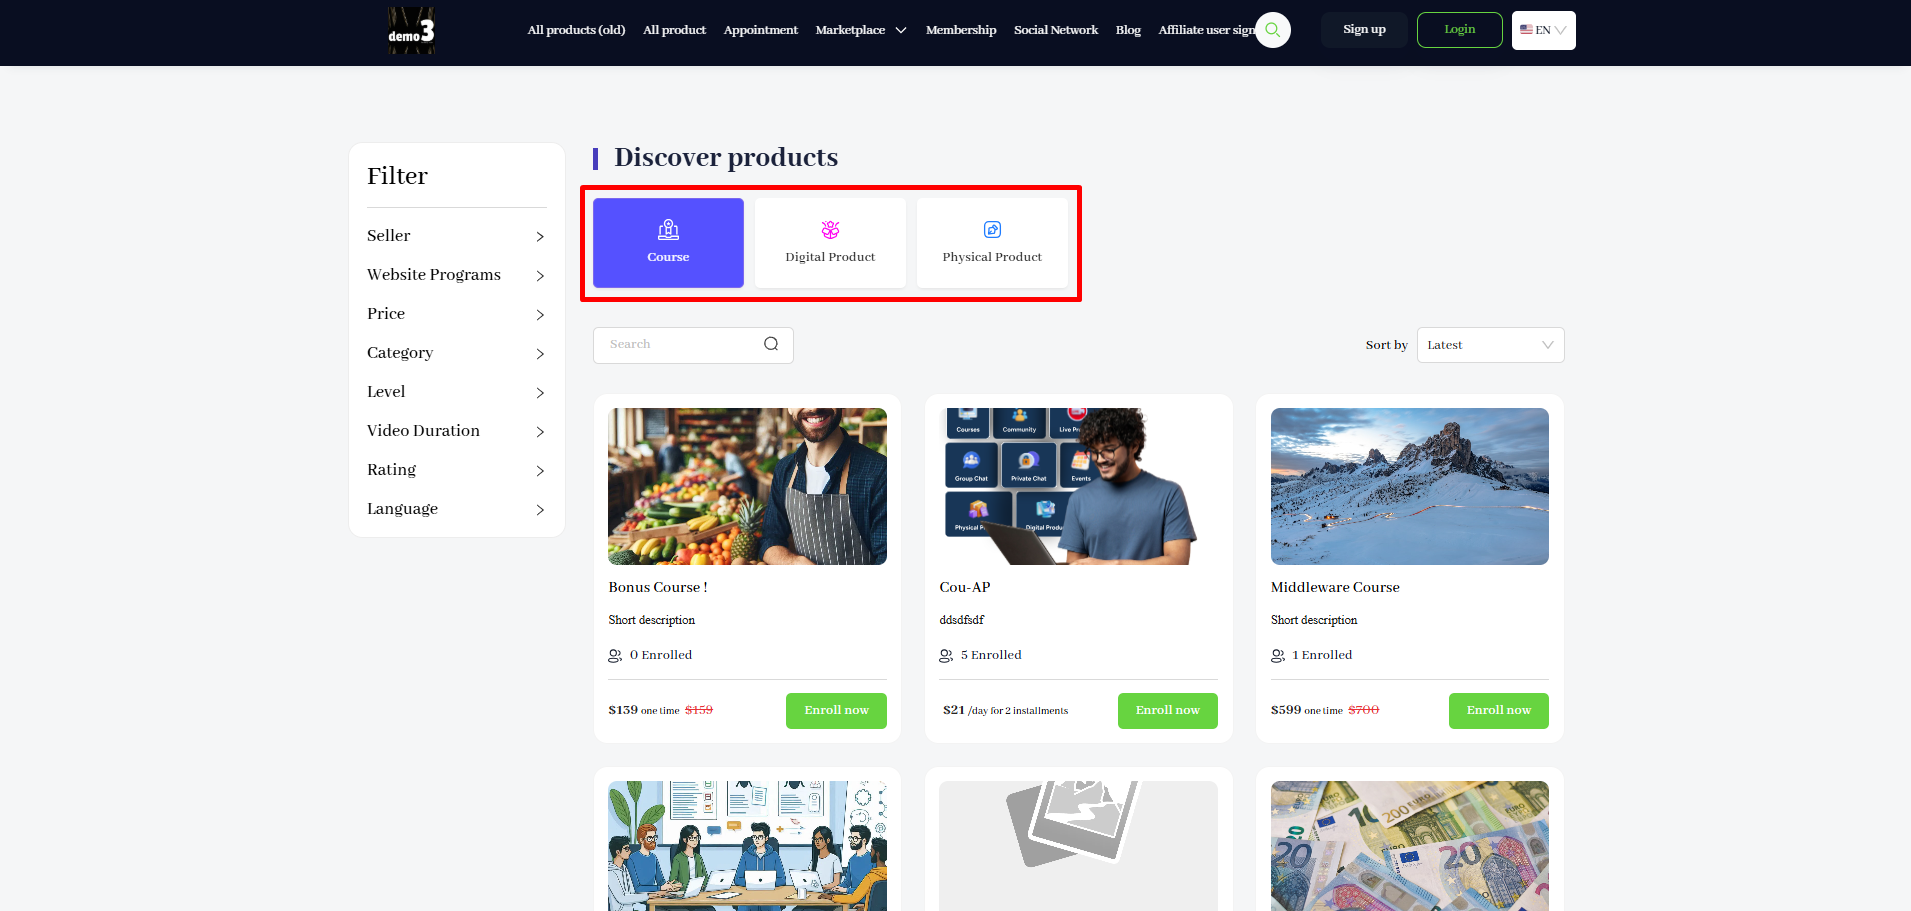
Student/Customer View
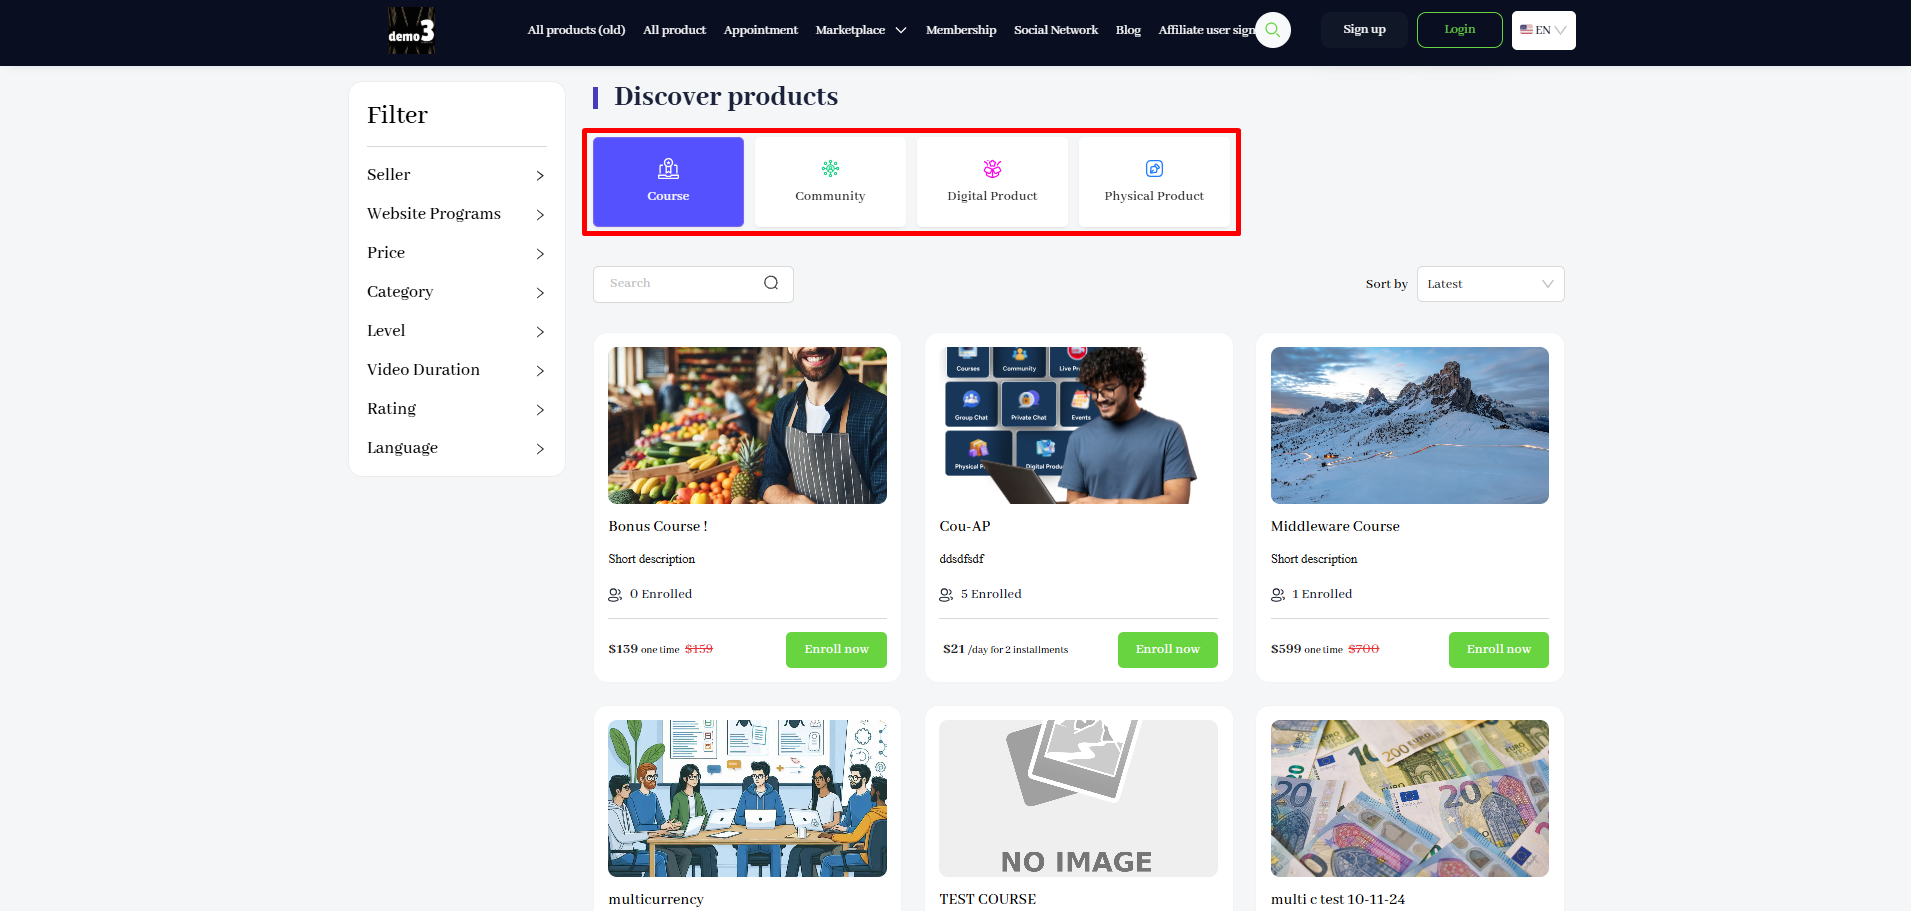
Once you enable the marketplace, it will show on your website. Any student or visitor can view the marketplace on your website and see all the different products on offer, from all the different sellers and including yours.
Each product will come as a separate category, making it easy to navigate and find what customers are looking for.
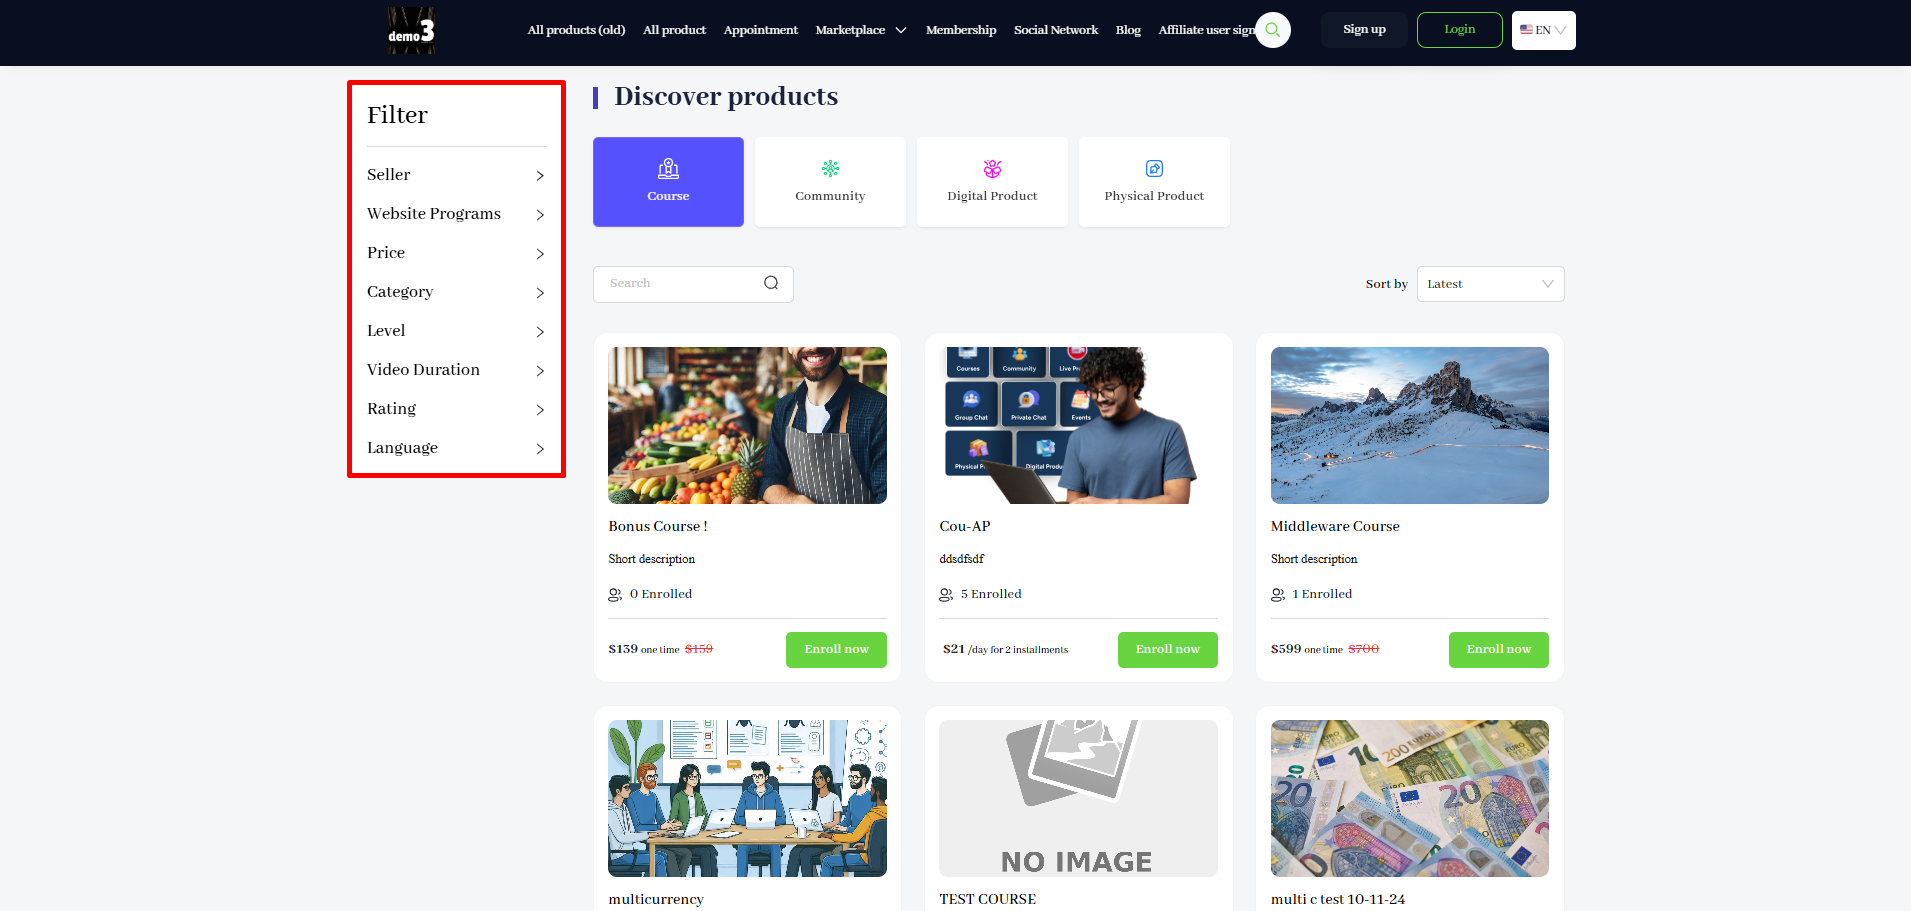
On the left side, students can filter the products based on different options such as website programs, category, difficulty level, video duration, price, etc.
Clicking the seller name on the product card will show the seller profile that contains seller info, all the products, social media links, etc.


For purchasing, customers can only use the payment methods that you enabled for the particular seller.

Marketplace Workflow
Now that you understand how to access everything related to the marketplace, let’s see how everything flows after a seller signs up on your platform and you’ve given them access to the products.
A seller creates a product from their seller dashboard. It could be a course (single or bundle), community, digital or physical product; depending on what access they have. Regardless of the product, it will not be published. Rather you will be notified to approve the product so that it shows on the marketplace.
[Note: Sellers can choose whether to immediately send an approval request to you when they are creating a course.]

Click on the notification and you will be taken to the product approval page of that particular seller. You can view and review the product from here. To approve, click the three dots and select the Approve option. Note that you access this page from viewing an individual seller on the marketplace (Marketplace -> Seller on your dashboard).

The seller will be notified that the product was approved/rejected by you. Whether approved or rejected, you will still have the option to approve/reject any time later.

Once approved, the product will appear on the marketplace page of your website. Anyone can see the product, the product details, and make the purchase.

Once a purchase is made, you can view the order on the All orders tab under the specific seller.

Upon purchase, both the seller and the admin will receive notifications. On the seller dashboard, the seller can click the notification and view the order from Deals & orders -> Orders menu.

On the order page, clicking the three dots will allow them to see the order details and they can also download the invoice.

The admin will also be notified for approving the commission of the seller. Without your approval, the seller doesn’t get the commission. Click the notification to go to the commission tab of the seller.

Whether you approve or reject, the seller will be notified on their dashboard. Rejecting a sales commission of a seller will mean you get the whole amount. Also, EzyCourse will not charge for any rejected commission.

Depending on whether the seller has connected the Stripe connect bank account from their dashboard, you can pay out the commission directly from the All Commissions tab.

The seller will get the commission to their bank account and receive the notification.

Finally, you can review all the transactions made with the seller from the Transaction history tab. Transactions appear here only after you’ve paid out the seller.
[Note: Converted amount entails the conversion to USD if your site currency and stripe currency are not the same.]
