
Back
Linking in Blogs
How to Add & Clear Links in EzyCourse Blogs
EzyCourse provides several built-in features to make your blog editing a breeze. In this article, we will show how you can add a link to any text in your blog post.
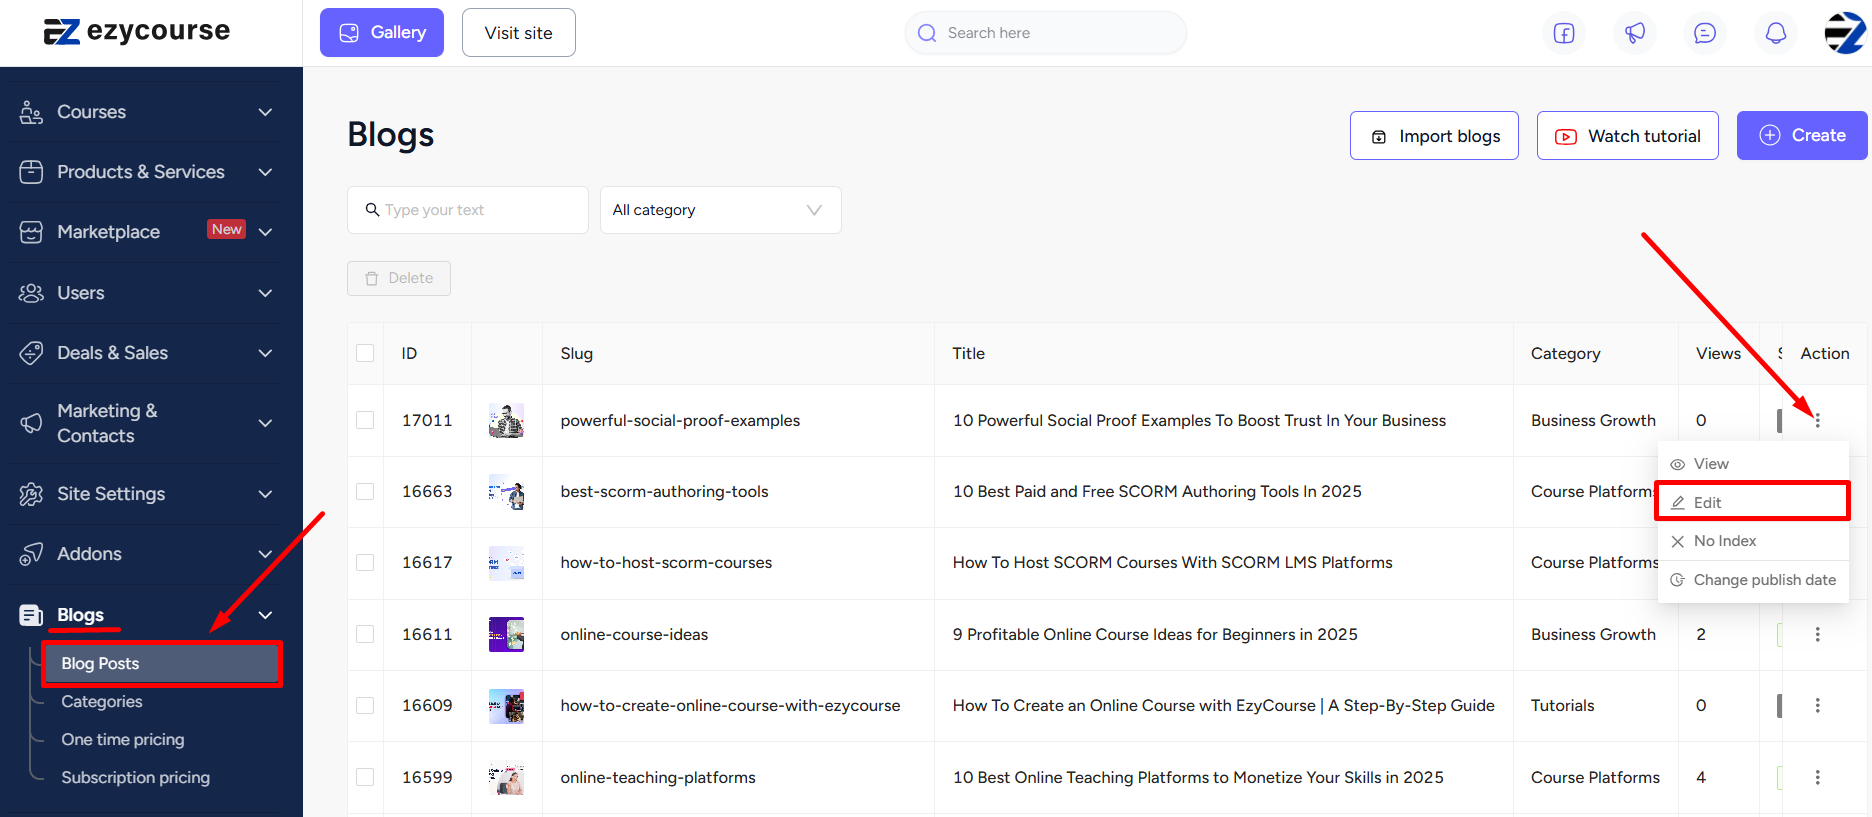
→ To begin, go to Blogs -> Blog Posts -> click the three dots on the blog and select the Edit option.
[Note: You can of course do the linking when creating a new blog post also.]
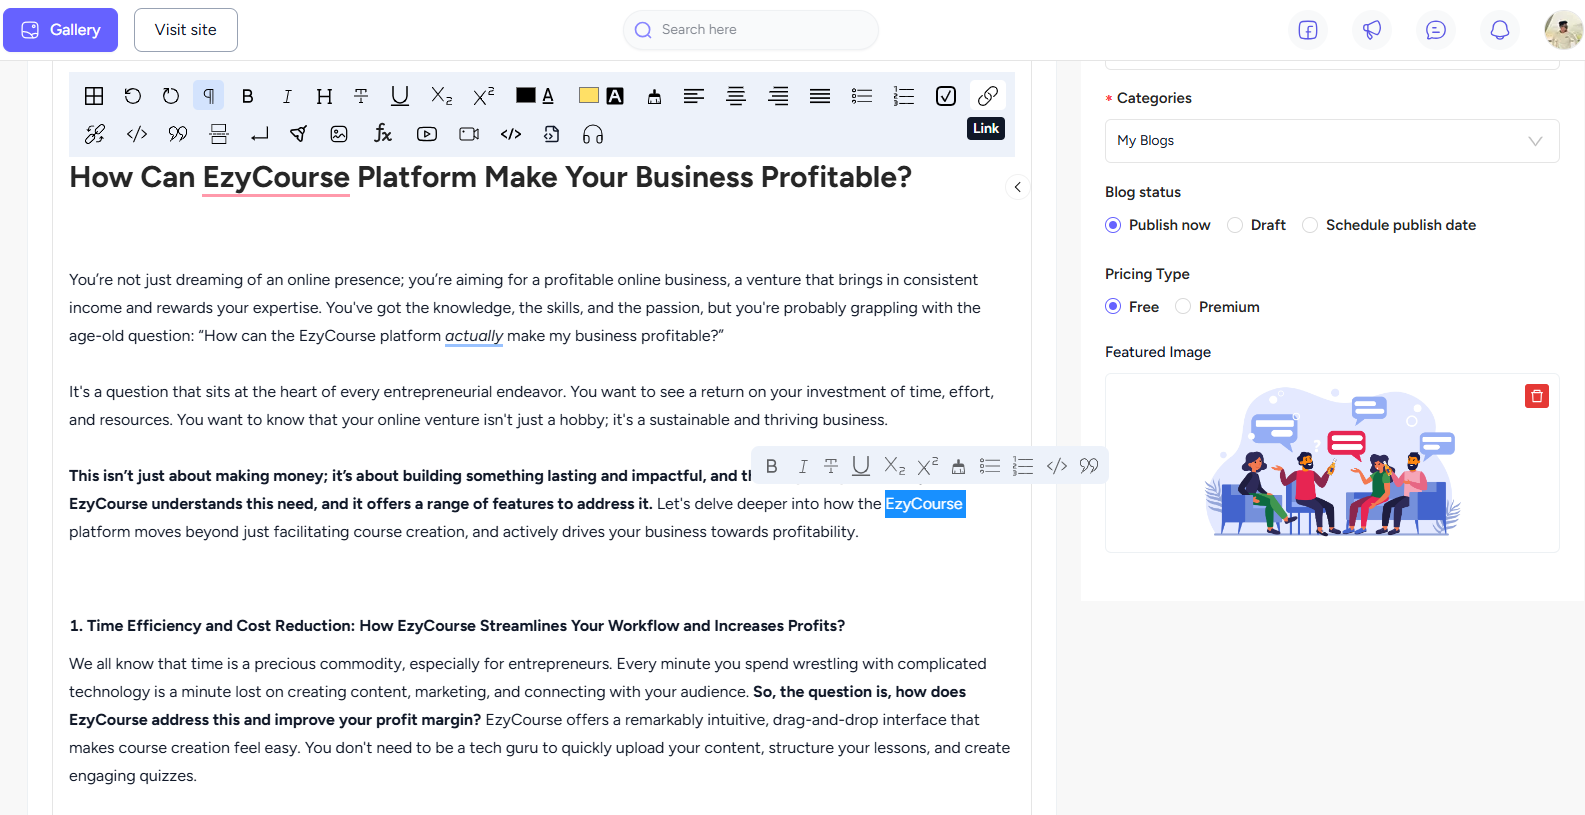
→ On the blog editor, select the text which you want to use for linking. And click the Attachment/Link icon on the tools bar.
→ Now, give the URL link on the popup and tick the checkbox whether you want the link to open in the same tab or a new tab. Hit the Add Link button to complete the linking to the text.
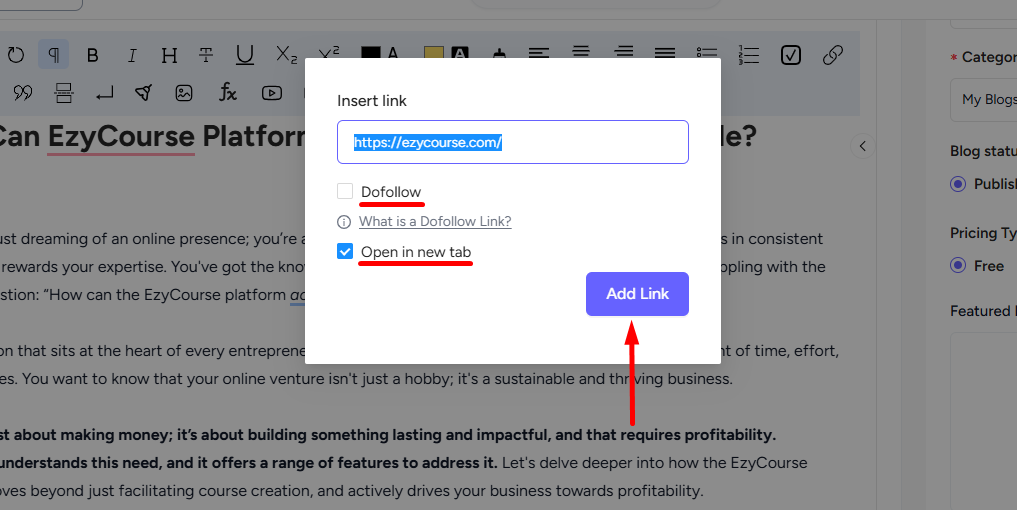
[Note: For error-free linking, we recommend that you copy the link rather than typing it in manually.]
→ To clear a link, simply select the linked text and click the Link clear icon.
