
Back
Category: Products on EzyCourse
Add an Image
How to Add an Image on a Blog Post
EzyCourse provides several in-built features to make your blog editing a breeze. In this article, we will show how you can add an image in your blog post.
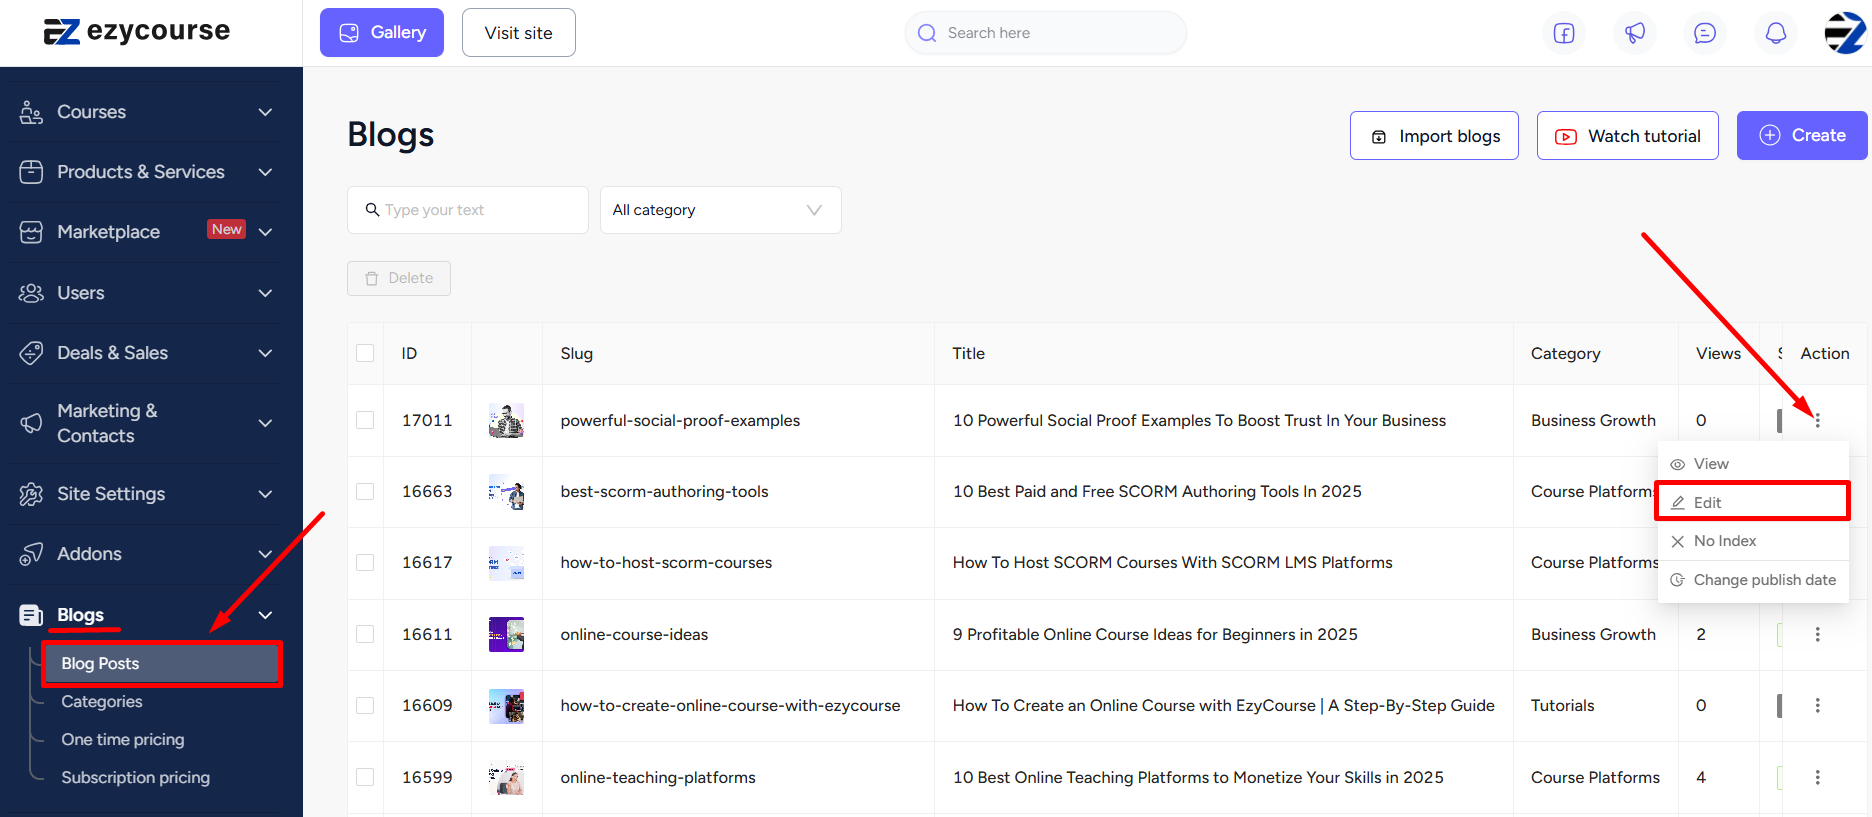
To begin, go to Blogs -> Blog Posts -> click the three dots on the blog and select the Edit option.
[Note: You can of course add an image when creating a new blog post also.]
On the blog editor, put the cursor where you want to insert the image. Then click the Gallery icon and select an image from the popup gallery. You can also upload an image from your device and select that.
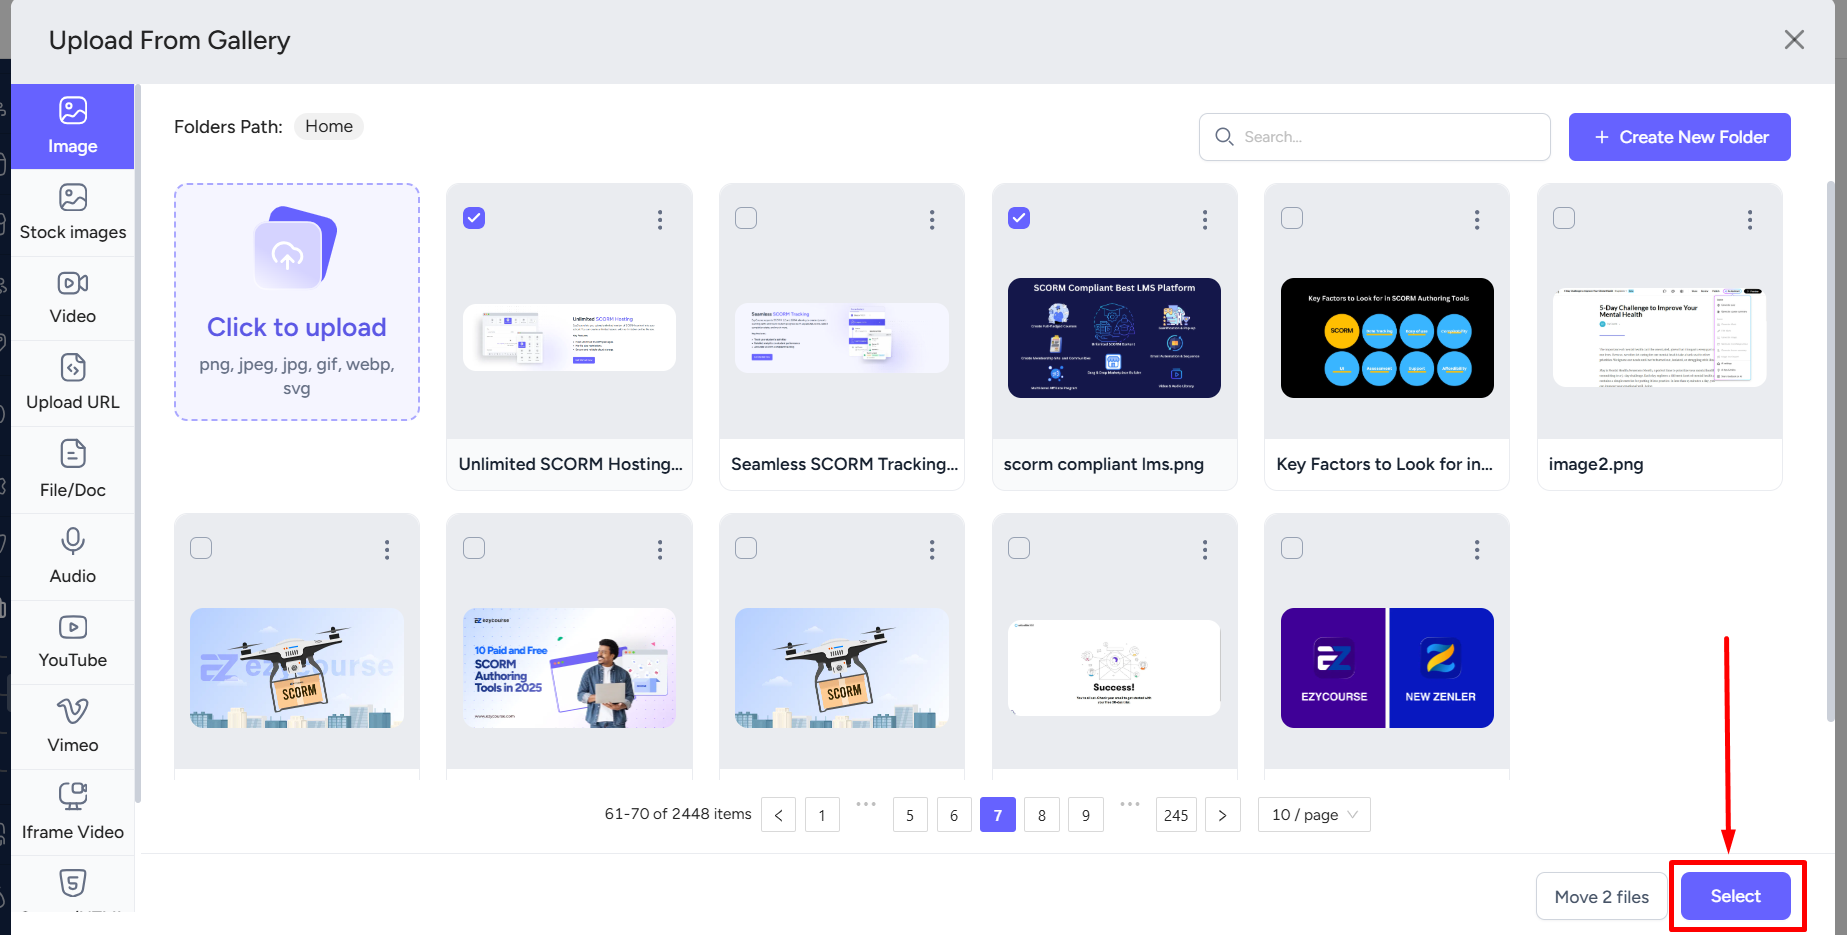
[Note: Please upload images with an aspect ratio of 16:9 or close to this to get the best image output.]