
Back
EzyCourse Coupons
How to Create a Coupon on EzyCourse
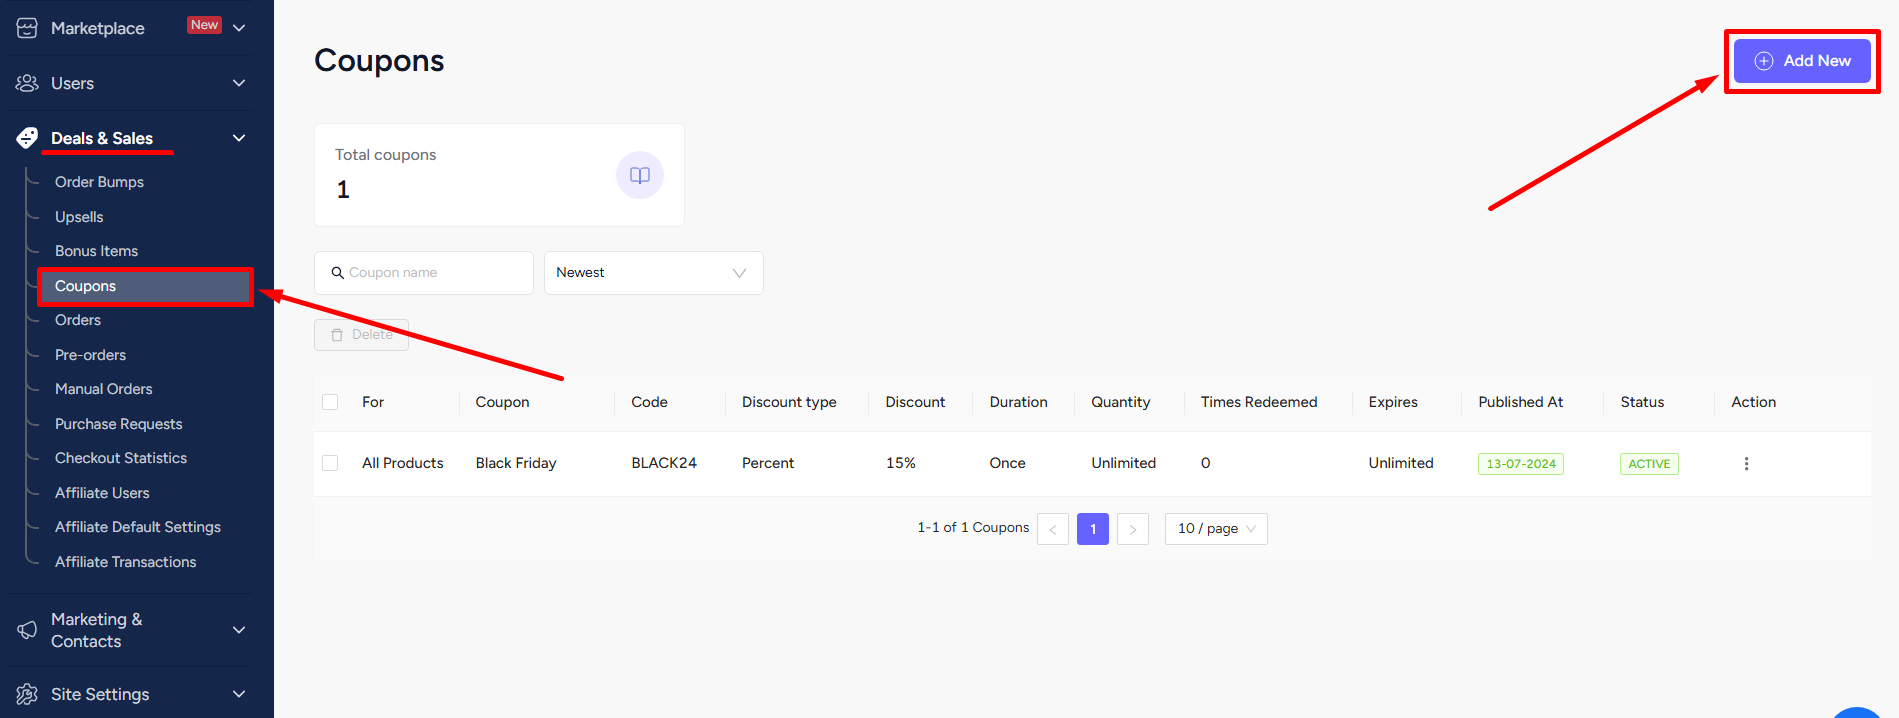
You can offer products at a discounted price using coupons on EzyCourse. To create a coupon, log in to your dashboard and navigate to Deals & Sales -> Coupons -> click the Add New button on the top right corner of the screen.

Let’s go over the fields that you need to fill out to create a coupon.
Select Product: You can apply the coupon for all the products on your platform. Or, you can either select a particular type (ex. All courses, all communities, all events, etc) or a specific product.
[Note: If you ever change the pricing of the selected product/products then you’d have to simply update the coupon also. Otherwise, the coupon will not work for that particular product.]
Name: You can give a name so that you recognize what the coupon is about. Ex: Black Friday Discount.
Code: This is the coupon code which your users will apply on the product checkout page, to get the discount.
Discount: The discount field holds the percentage value of the total amount or a fixed amount which you want to give as a discount. First, select discount type and then assign the percentage or fixed amount on the next field.

Duration: This defines how many times the coupon is applicable for a subscription based product. The value can be Once, Forever, or Repeating. Once means coupon is applicable only for the first payment, Forever is for all the payments, and Repeating means you get to define the number of months they can use the coupon.
[Note: The “Repeating” option is only applicable for monthly subscription products.]
So, you have the luxury to offer a free trial, for example, by giving 100% discount on 1st subscription payment. And then continuing with the usual price.
Duration in Months: If you select the Repeating duration then you have to define the number of months users can apply the coupon.
Quantity: In simple terms, this basically is the usage limit. It defines the number of times the coupon can be used. So, you can limit the coupon usage to the first x number of users.
Max redemptions per customer: This field lets you set the number of times a single user can apply the coupon. Leaving the field blank will mean unlimited usage.
Expires at: You can set the date when the coupon will expire.
[Note: “Quantity”, “Max redemptions per customer“, “Expires at” are optional fields. If left empty then your coupon will be applicable for unlimited times and available indefinitely.]
User: Make the coupon applicable for a specific student. If selected, only that specific student can use the coupon at checkout. Skip this option when you’re creating the coupon for all the users
Click the Create button to launch and activate the coupon on your platform.

If you’re using the multi-currency feature, you can create coupons for the different currencies. Click the Add New Coupon to get started.

On the popup, select the currency from the dropdown. All currencies set from your Site Settings will appear here. Note that coupon code must be different. This way, you can set relevant discount offers for relevant users based on their location.


Finally, make sure the coupon field checkout setting is enabled from Site Settings → Checkout menu. This will automatically show the coupon code field on all the product checkout page on your website. And from there, users can apply on the applicable products and get their discount.
